I am one of those people who will DIY basically anything to save money, but mostly to exercise my creative mind. I don’t sit still for very long, and nothing makes me more excited then taking on a new project, or learning how to do something new. I have a long list of things I hope to learn in my lifetime, and reupholstery was definitely one of those things!
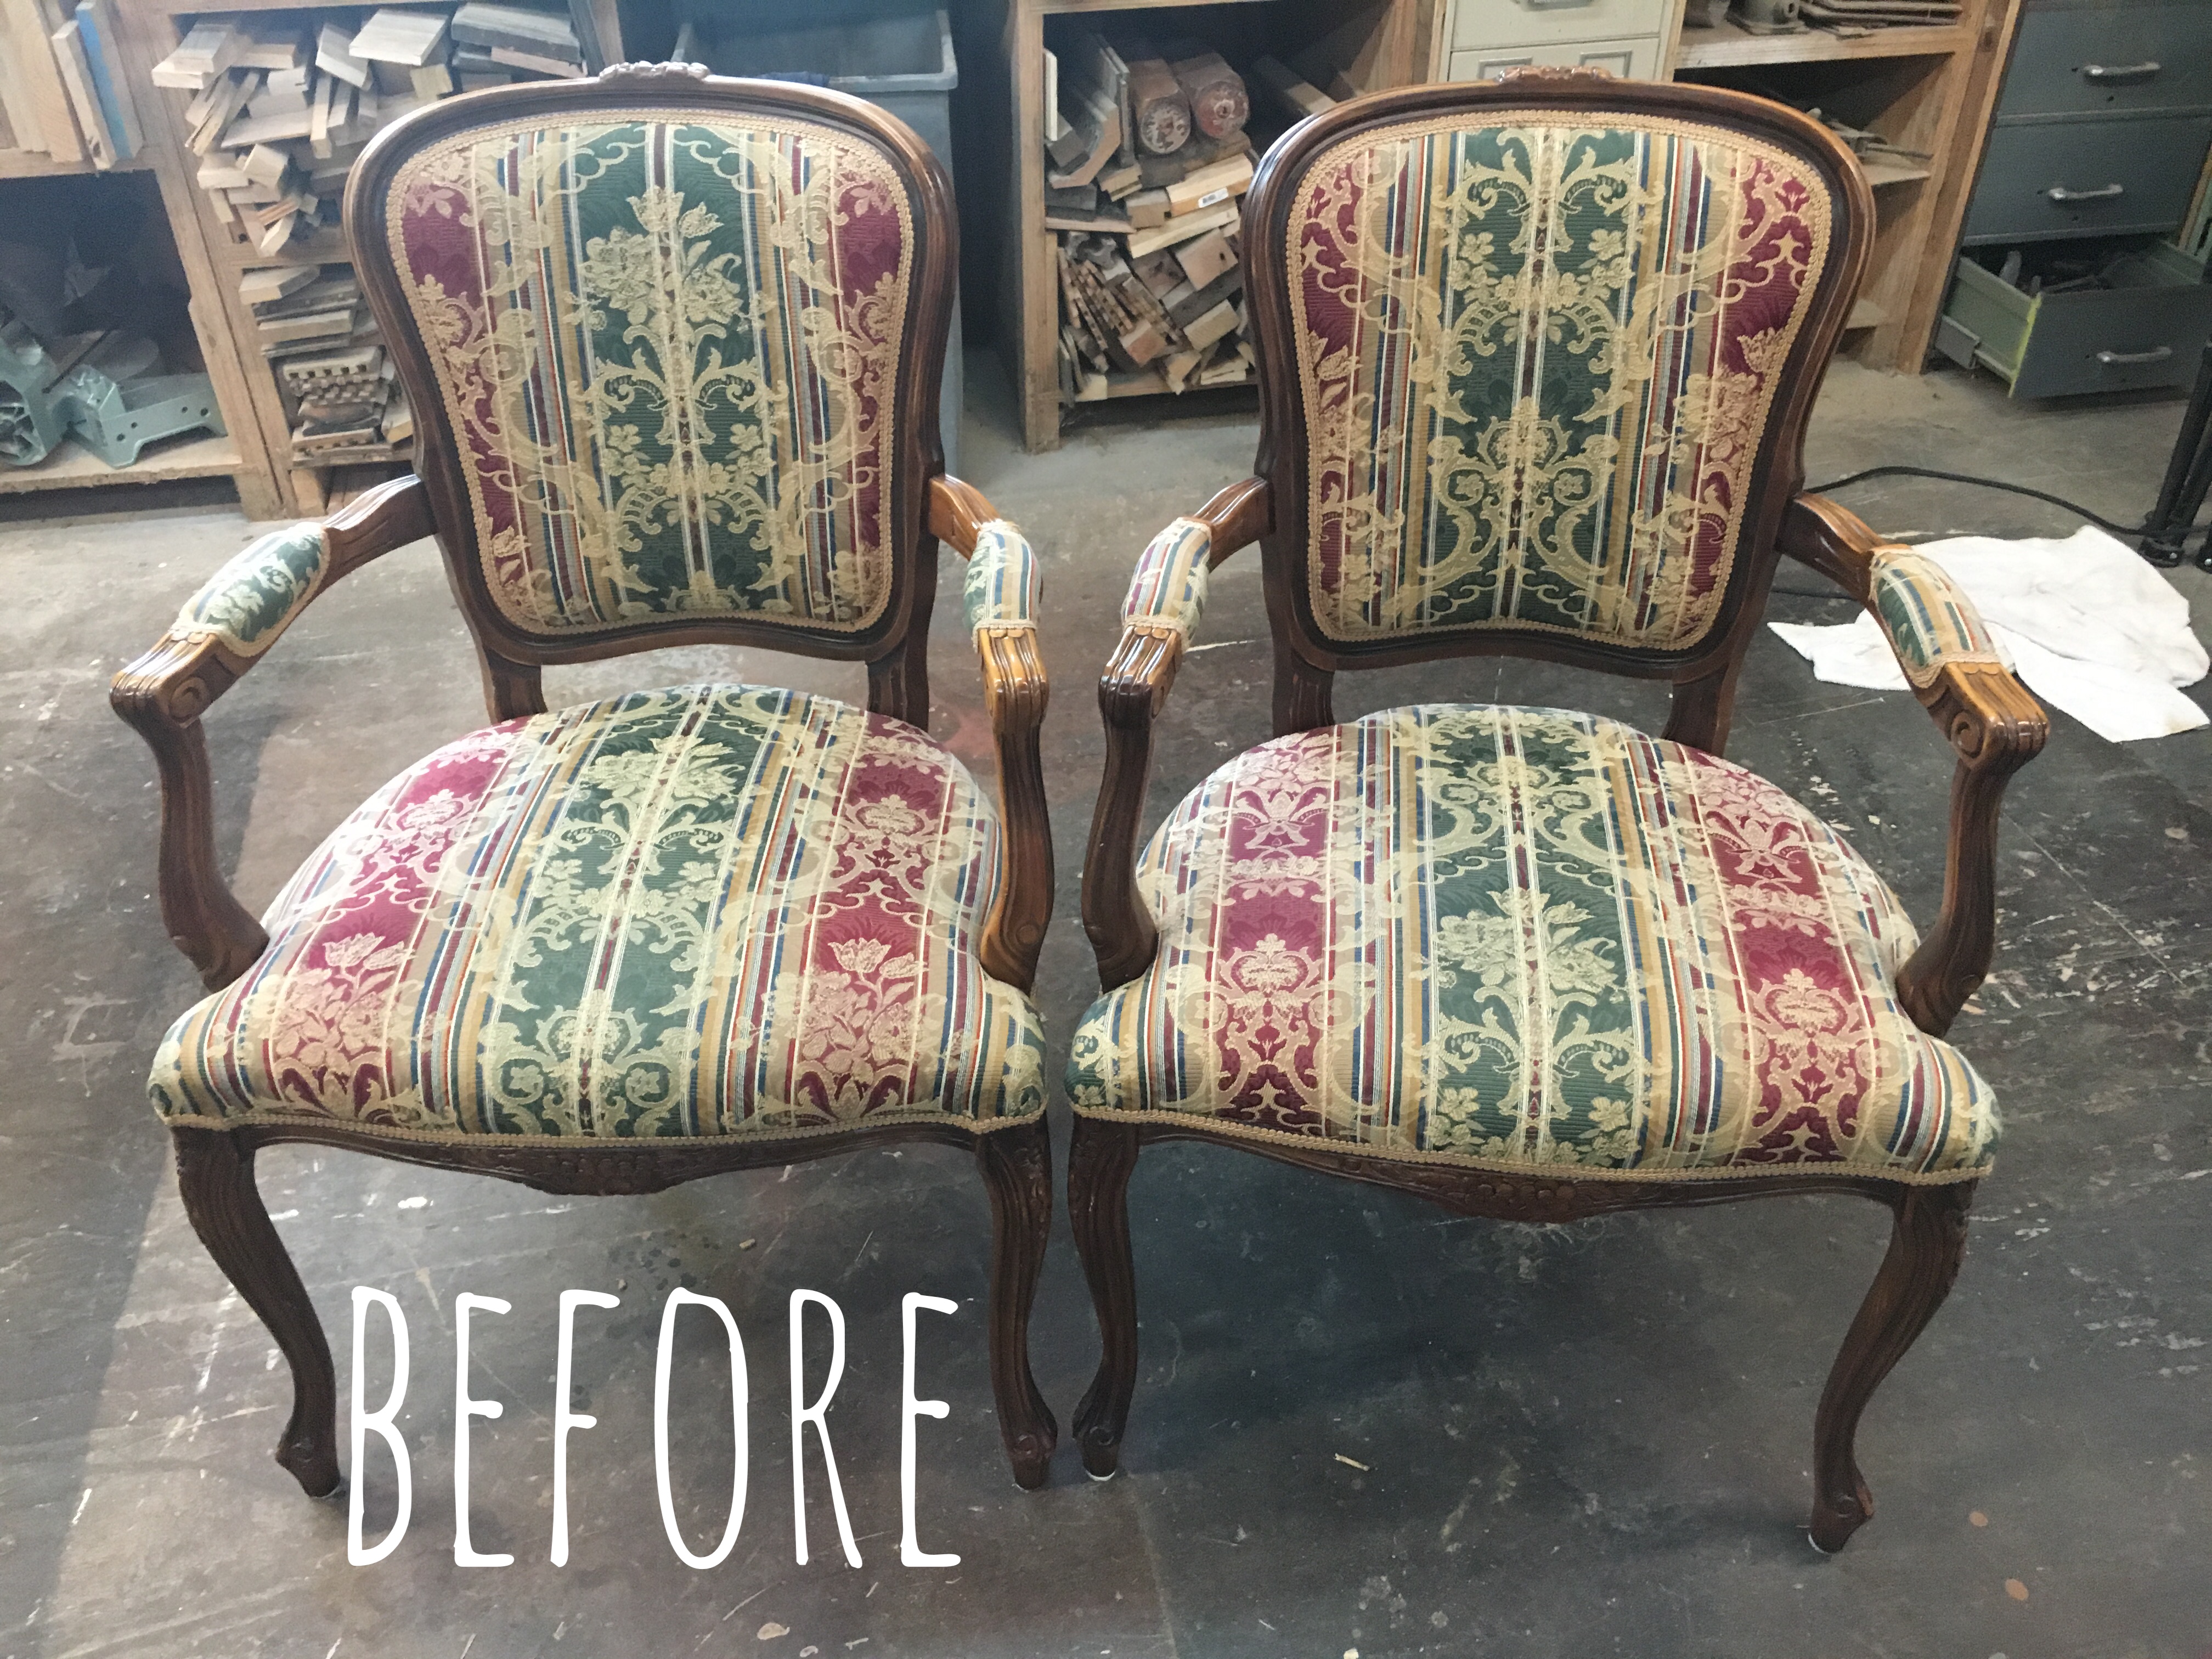
Our house has an area off of the dining room that’s a little…awkward I guess. Like, what do you do in this space?! When we first moved in, I wondered this, and went back and forth several times, before deciding to make a little sitting area. I already started accomplishing this with the farmhouse bench we refurbished, but I wanted to add something else. A couple months ago I started looking for a good deal on something to reupholster. Knowing my first attempt may end up being a “practice piece” that I scrap, I set my budget at $40, and spent several weeks looking for the right deal.
*Tip: If you don’t find what you are looking for right away, be patient! Don’t settle for something else, or pay more than you would like, especially when it comes to refurbishing. There are good deals out there on everything, sometimes you just have to wait it out and stick to your plan! If you do happen to find that good deal, don’t pass it up, even if you aren’t planning on doing something with it right away. If you see the potential, why not go ahead and buy it? You can always fix it up later and sell it if you change your mind.
My go-to is the Facebook marketplace and I check everyday for project pieces. When I came across two french provincial style accent chairs for $40, I knew they were going to be perfect for my first reupholstery project!
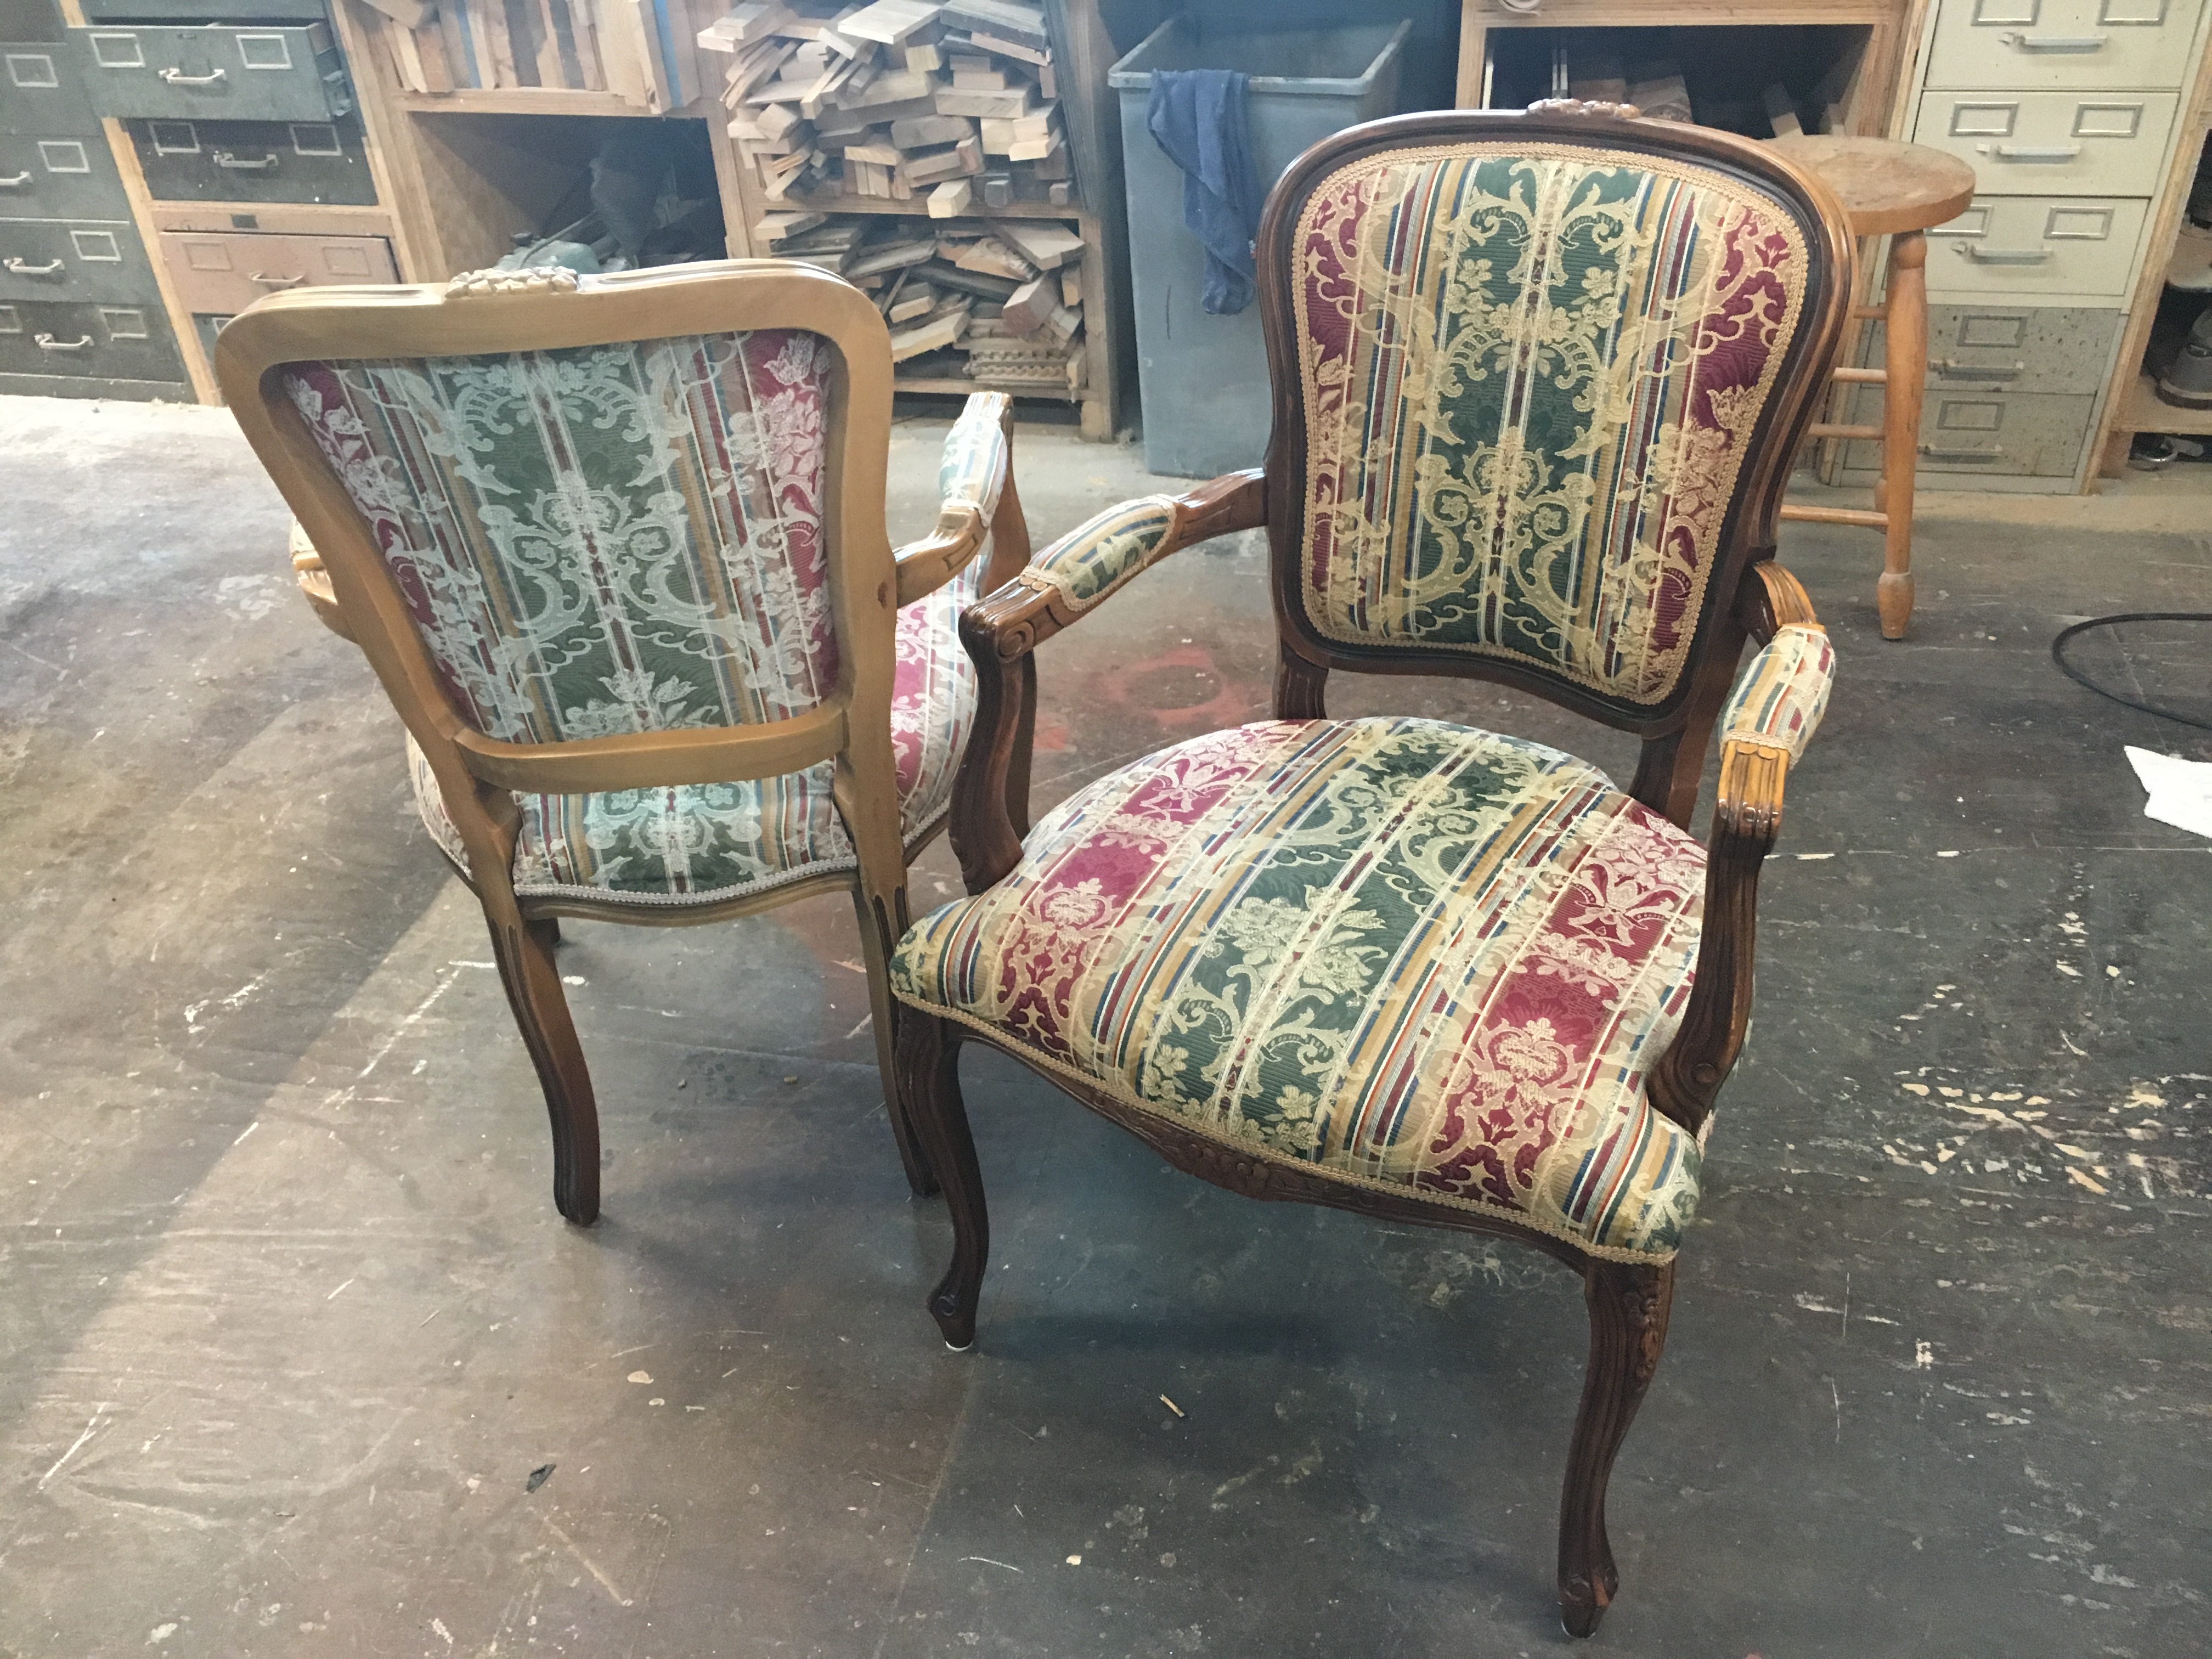
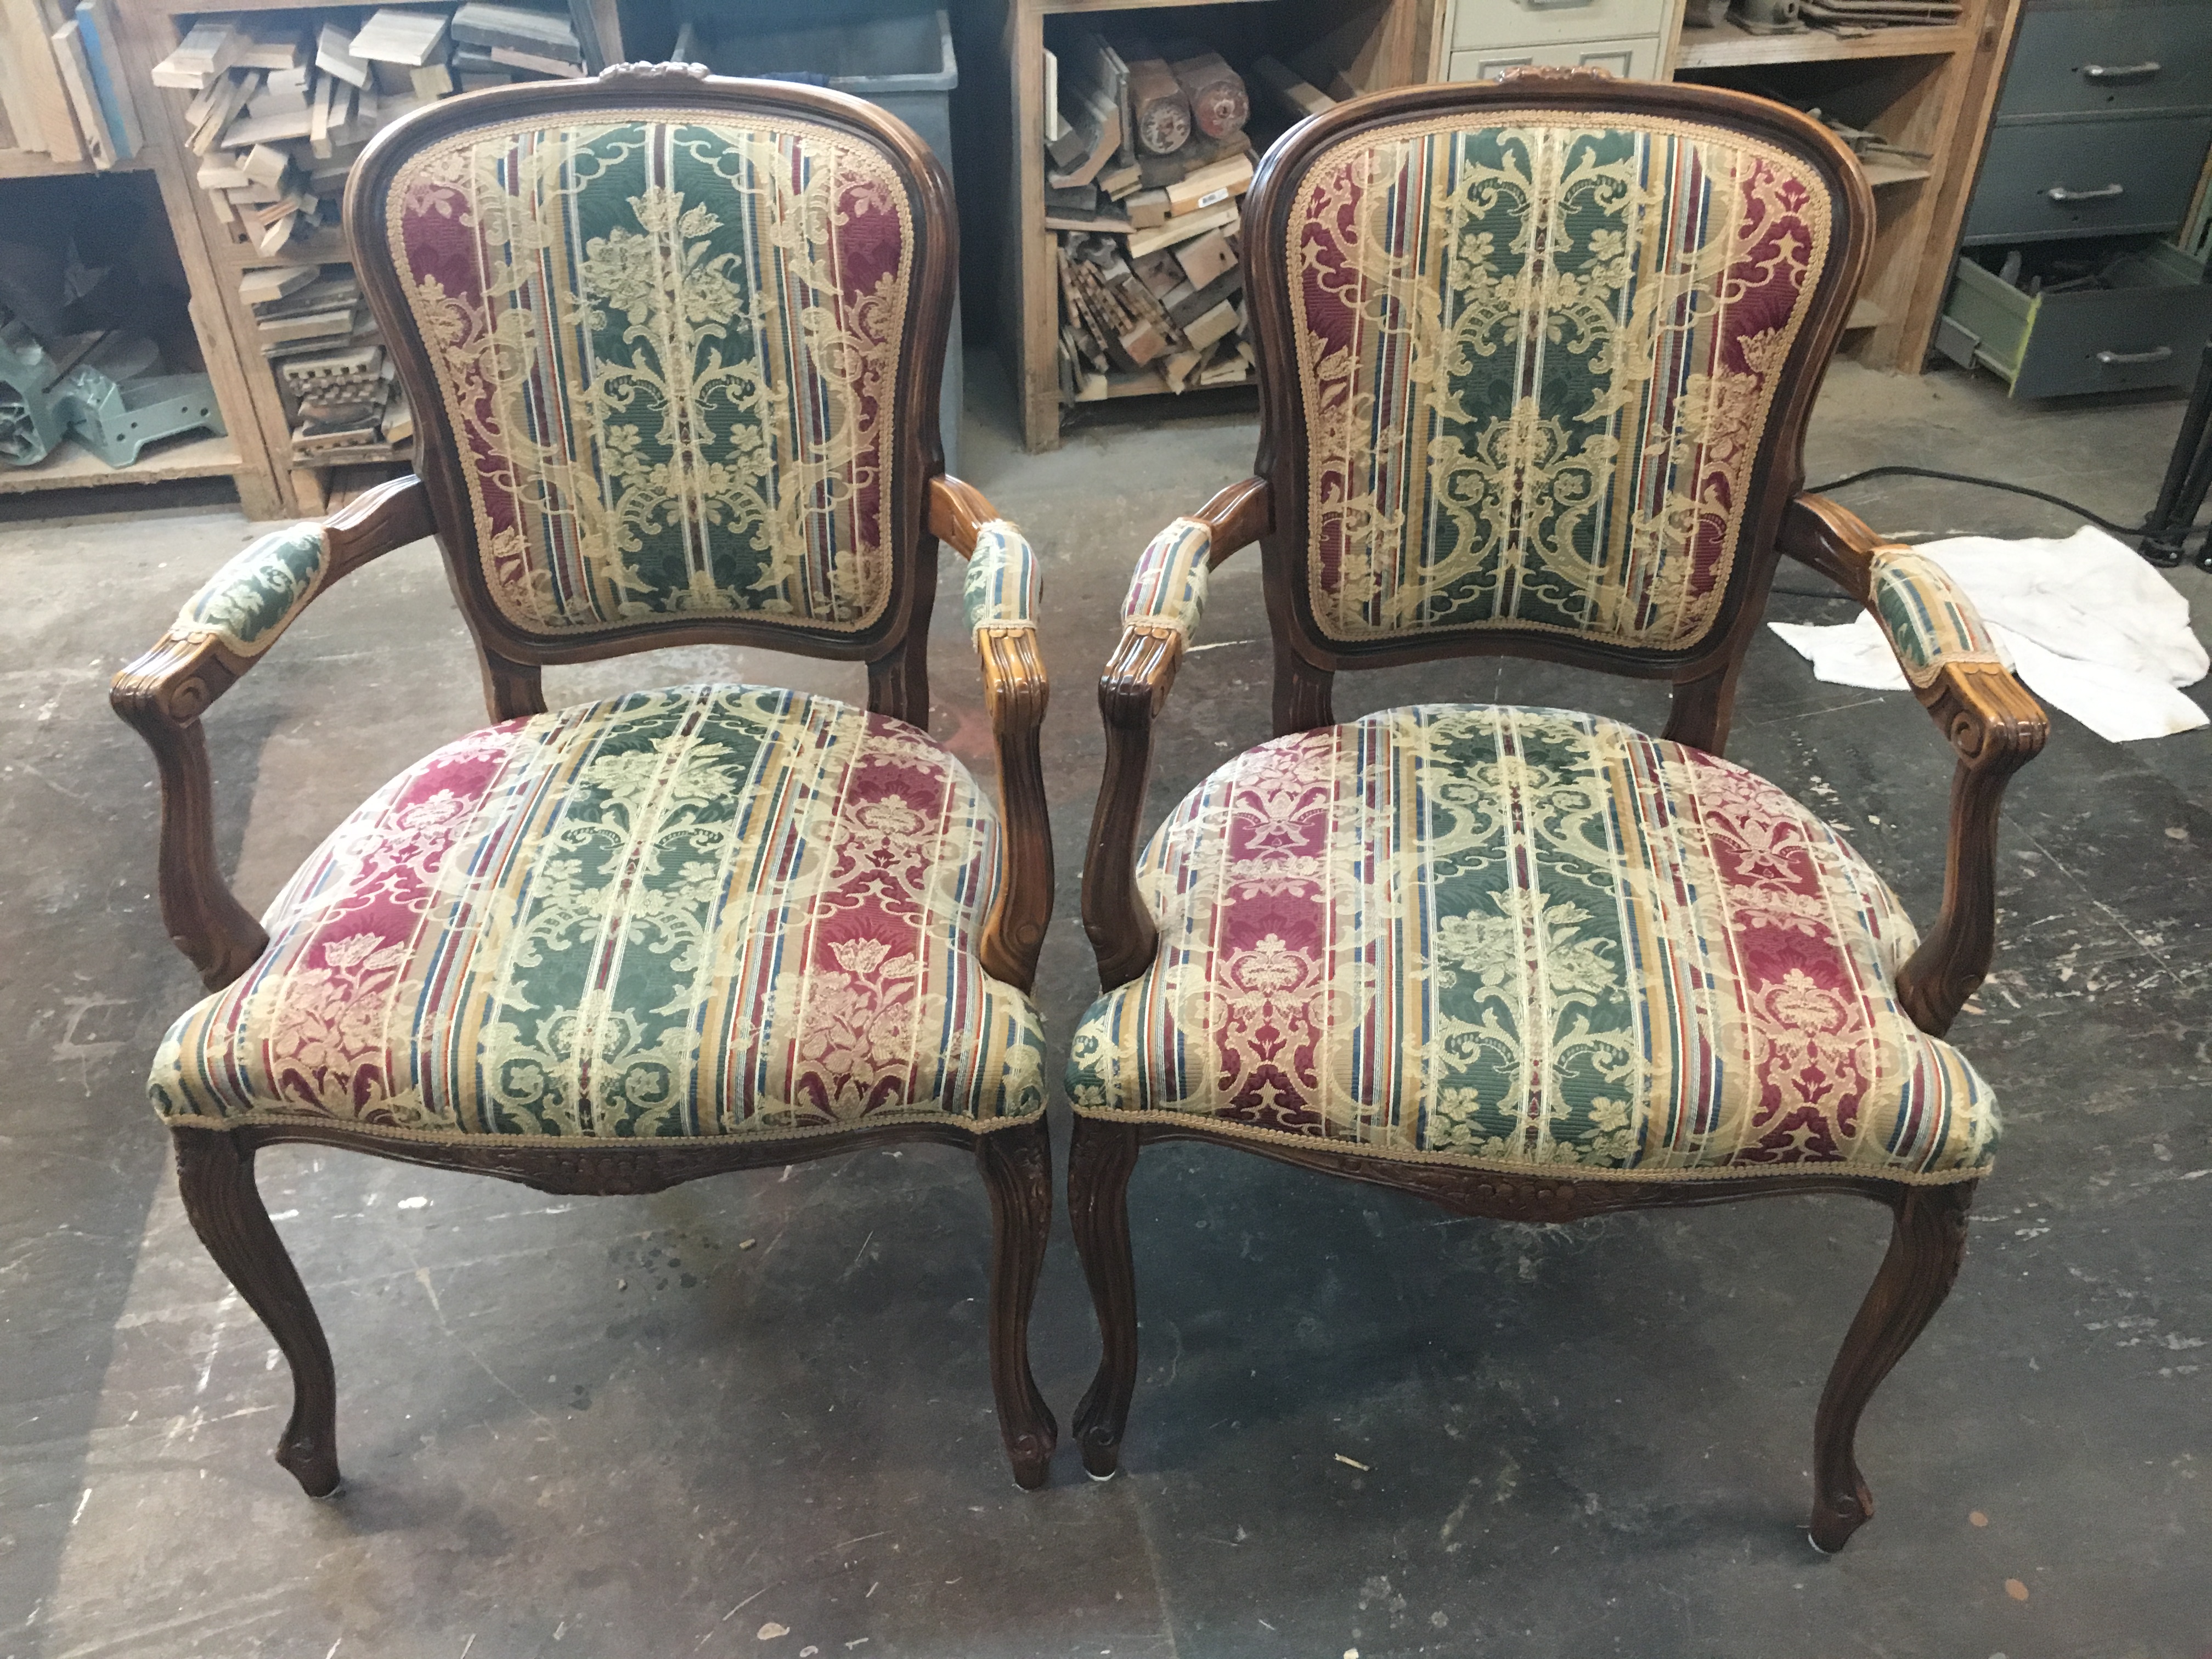
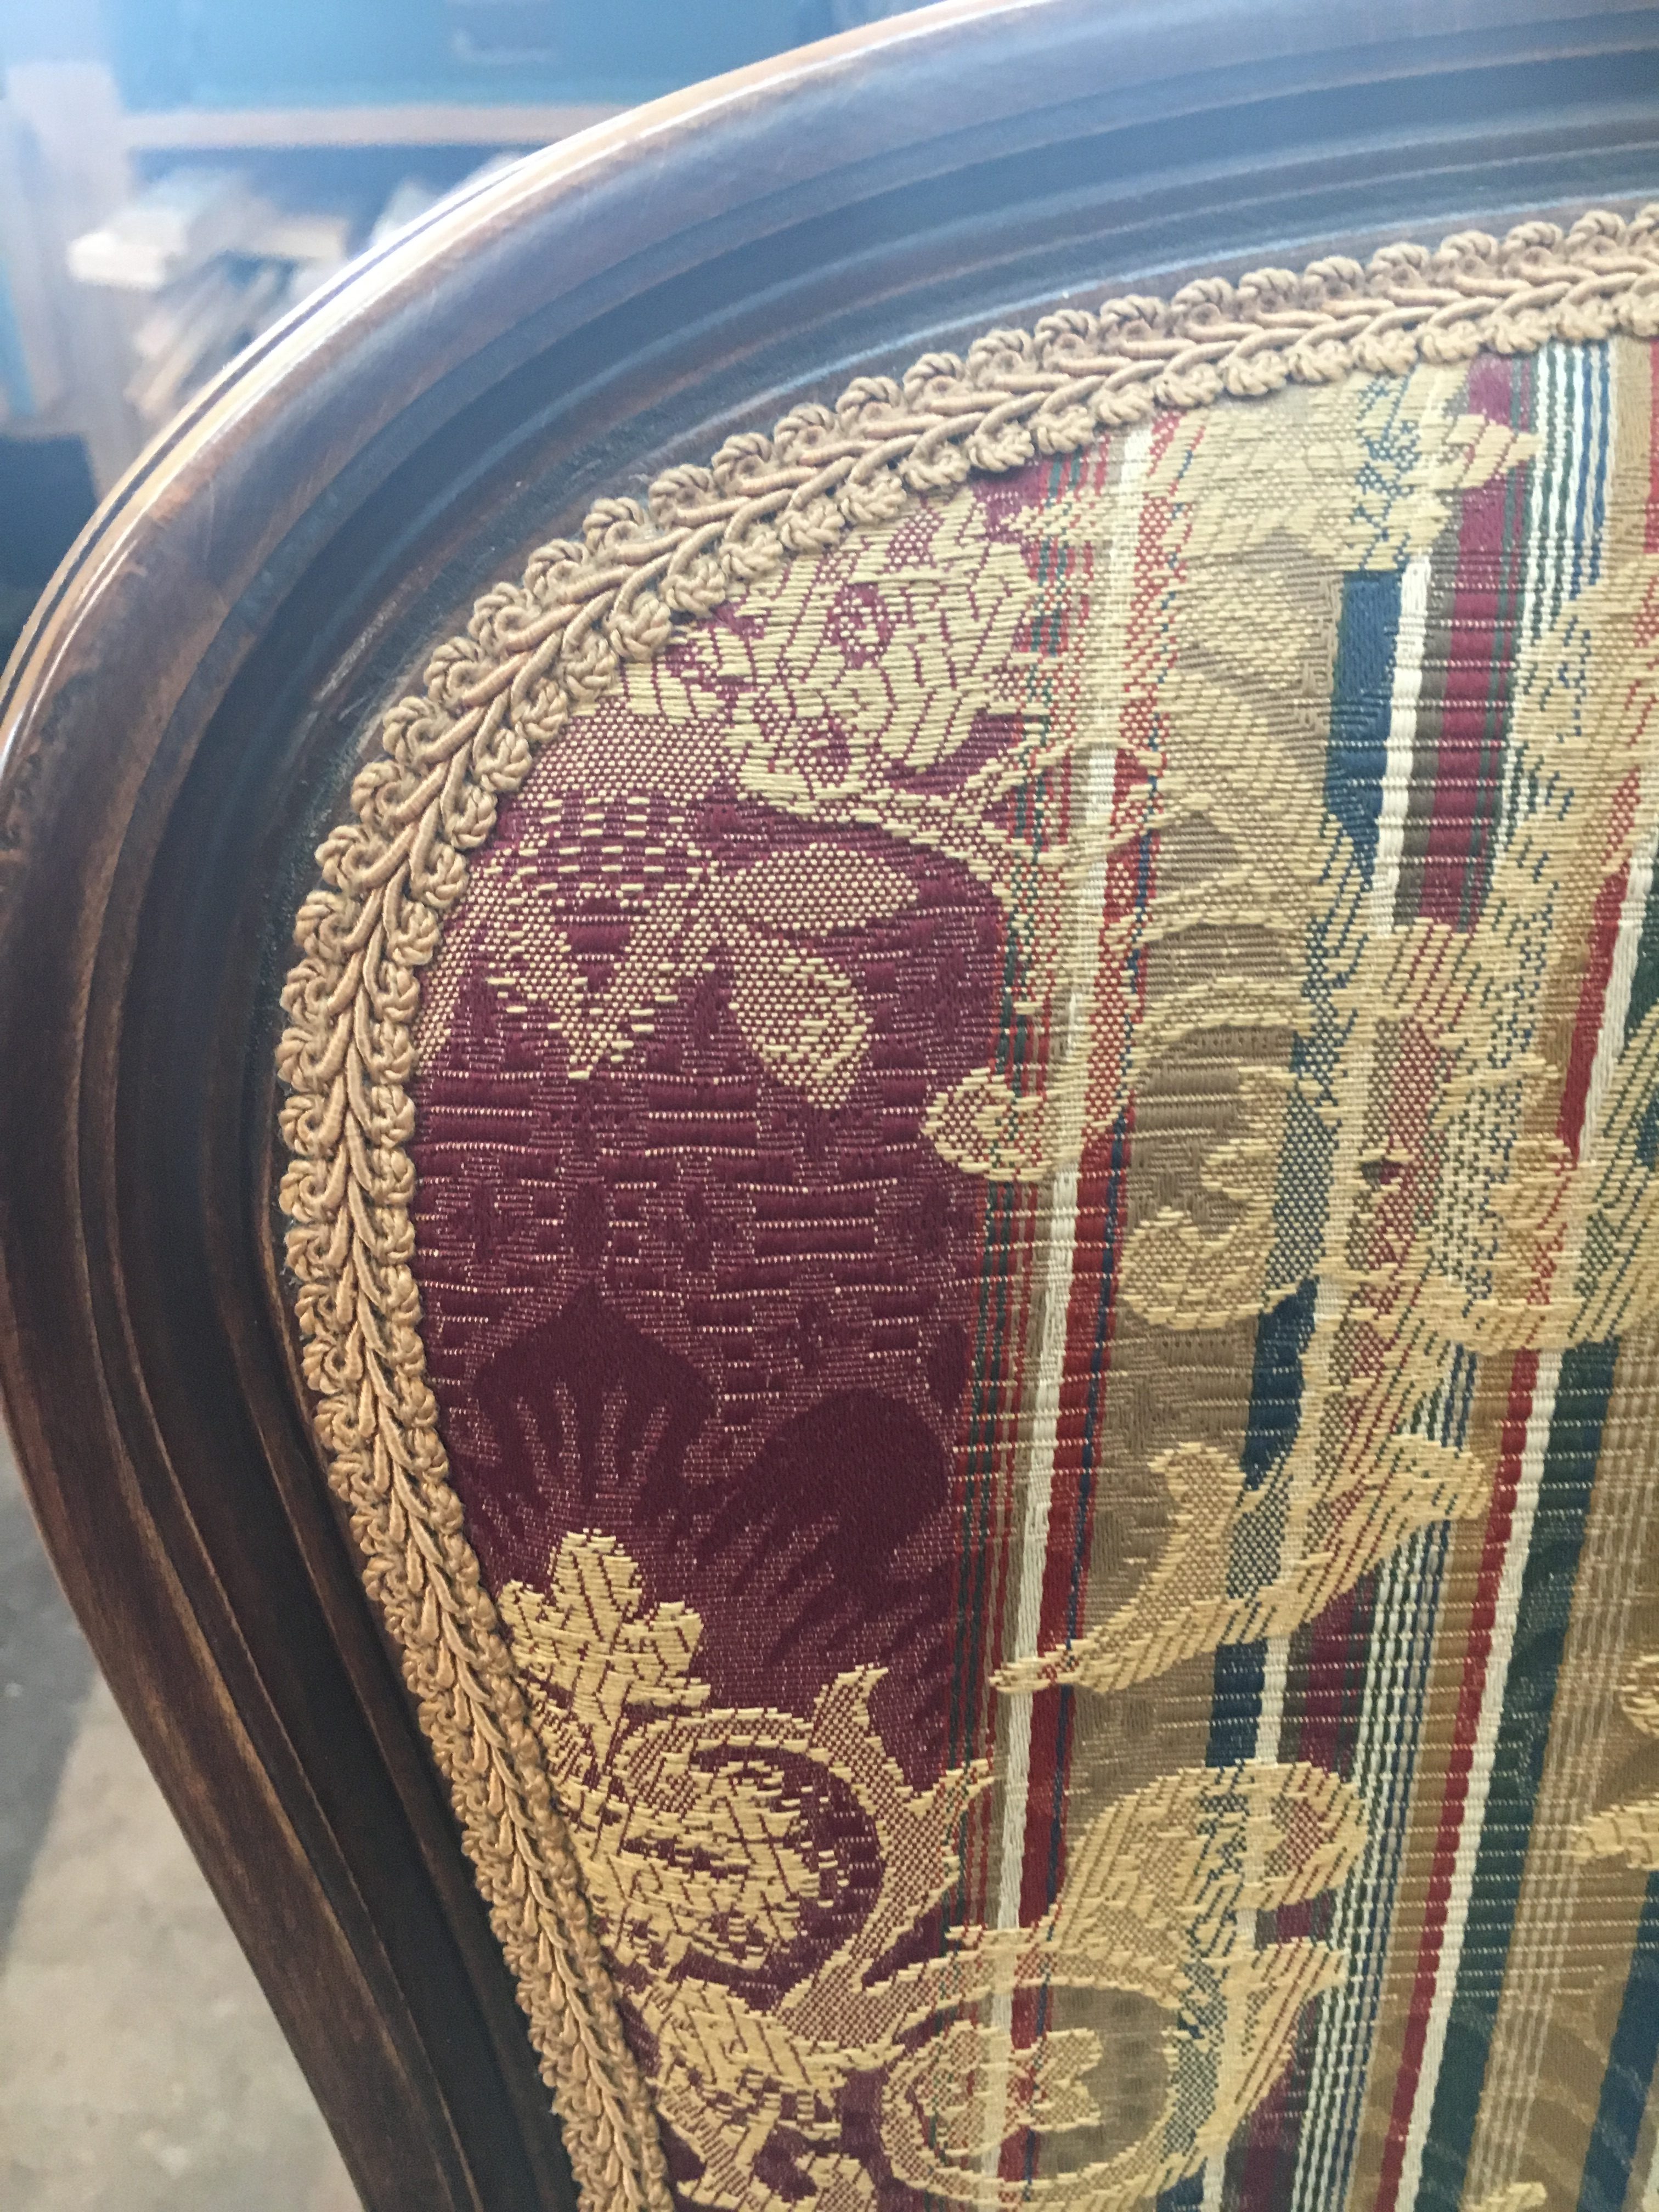
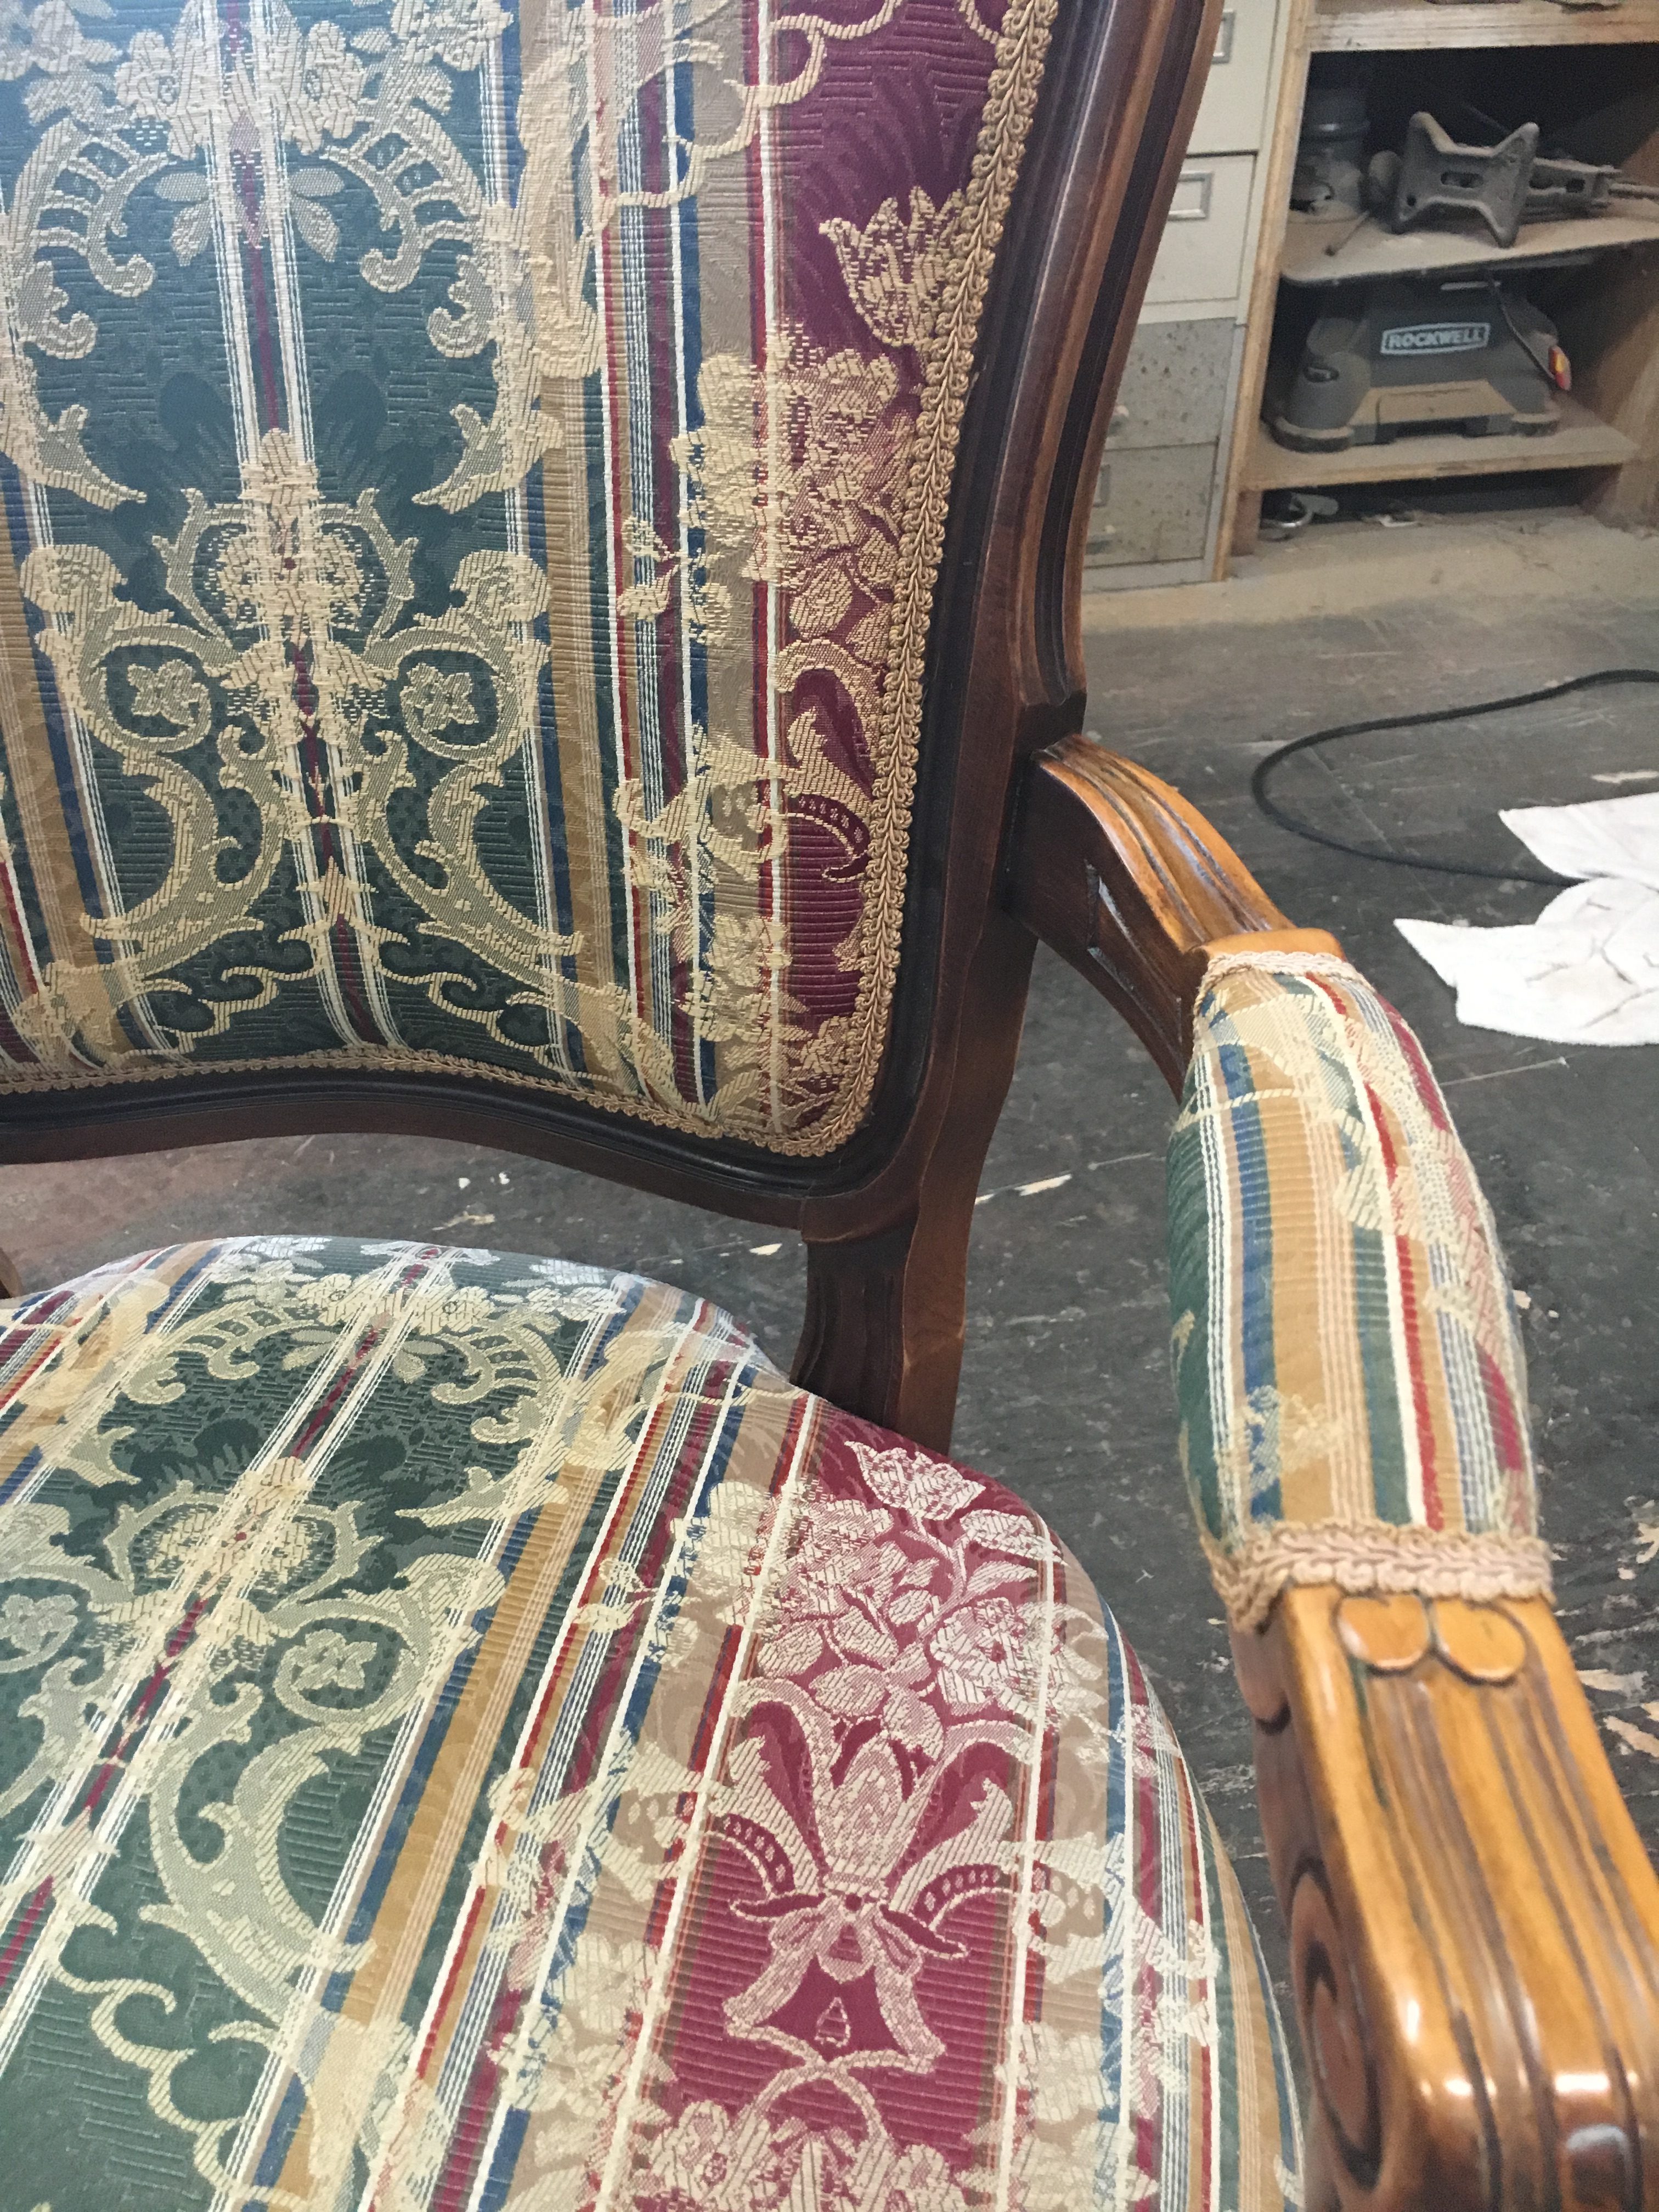
Now, full disclosure, this is not a tutorial on reupholstery. I’ve never even taken a class, and this was absolutely my first time doing anything like this. BUT, even though it wasn’t perfect, I still learned a lot that could be useful to a newbie like me!
So here’s the “how-to” on hiding newbie mistakes, like a pro!!!
Frames
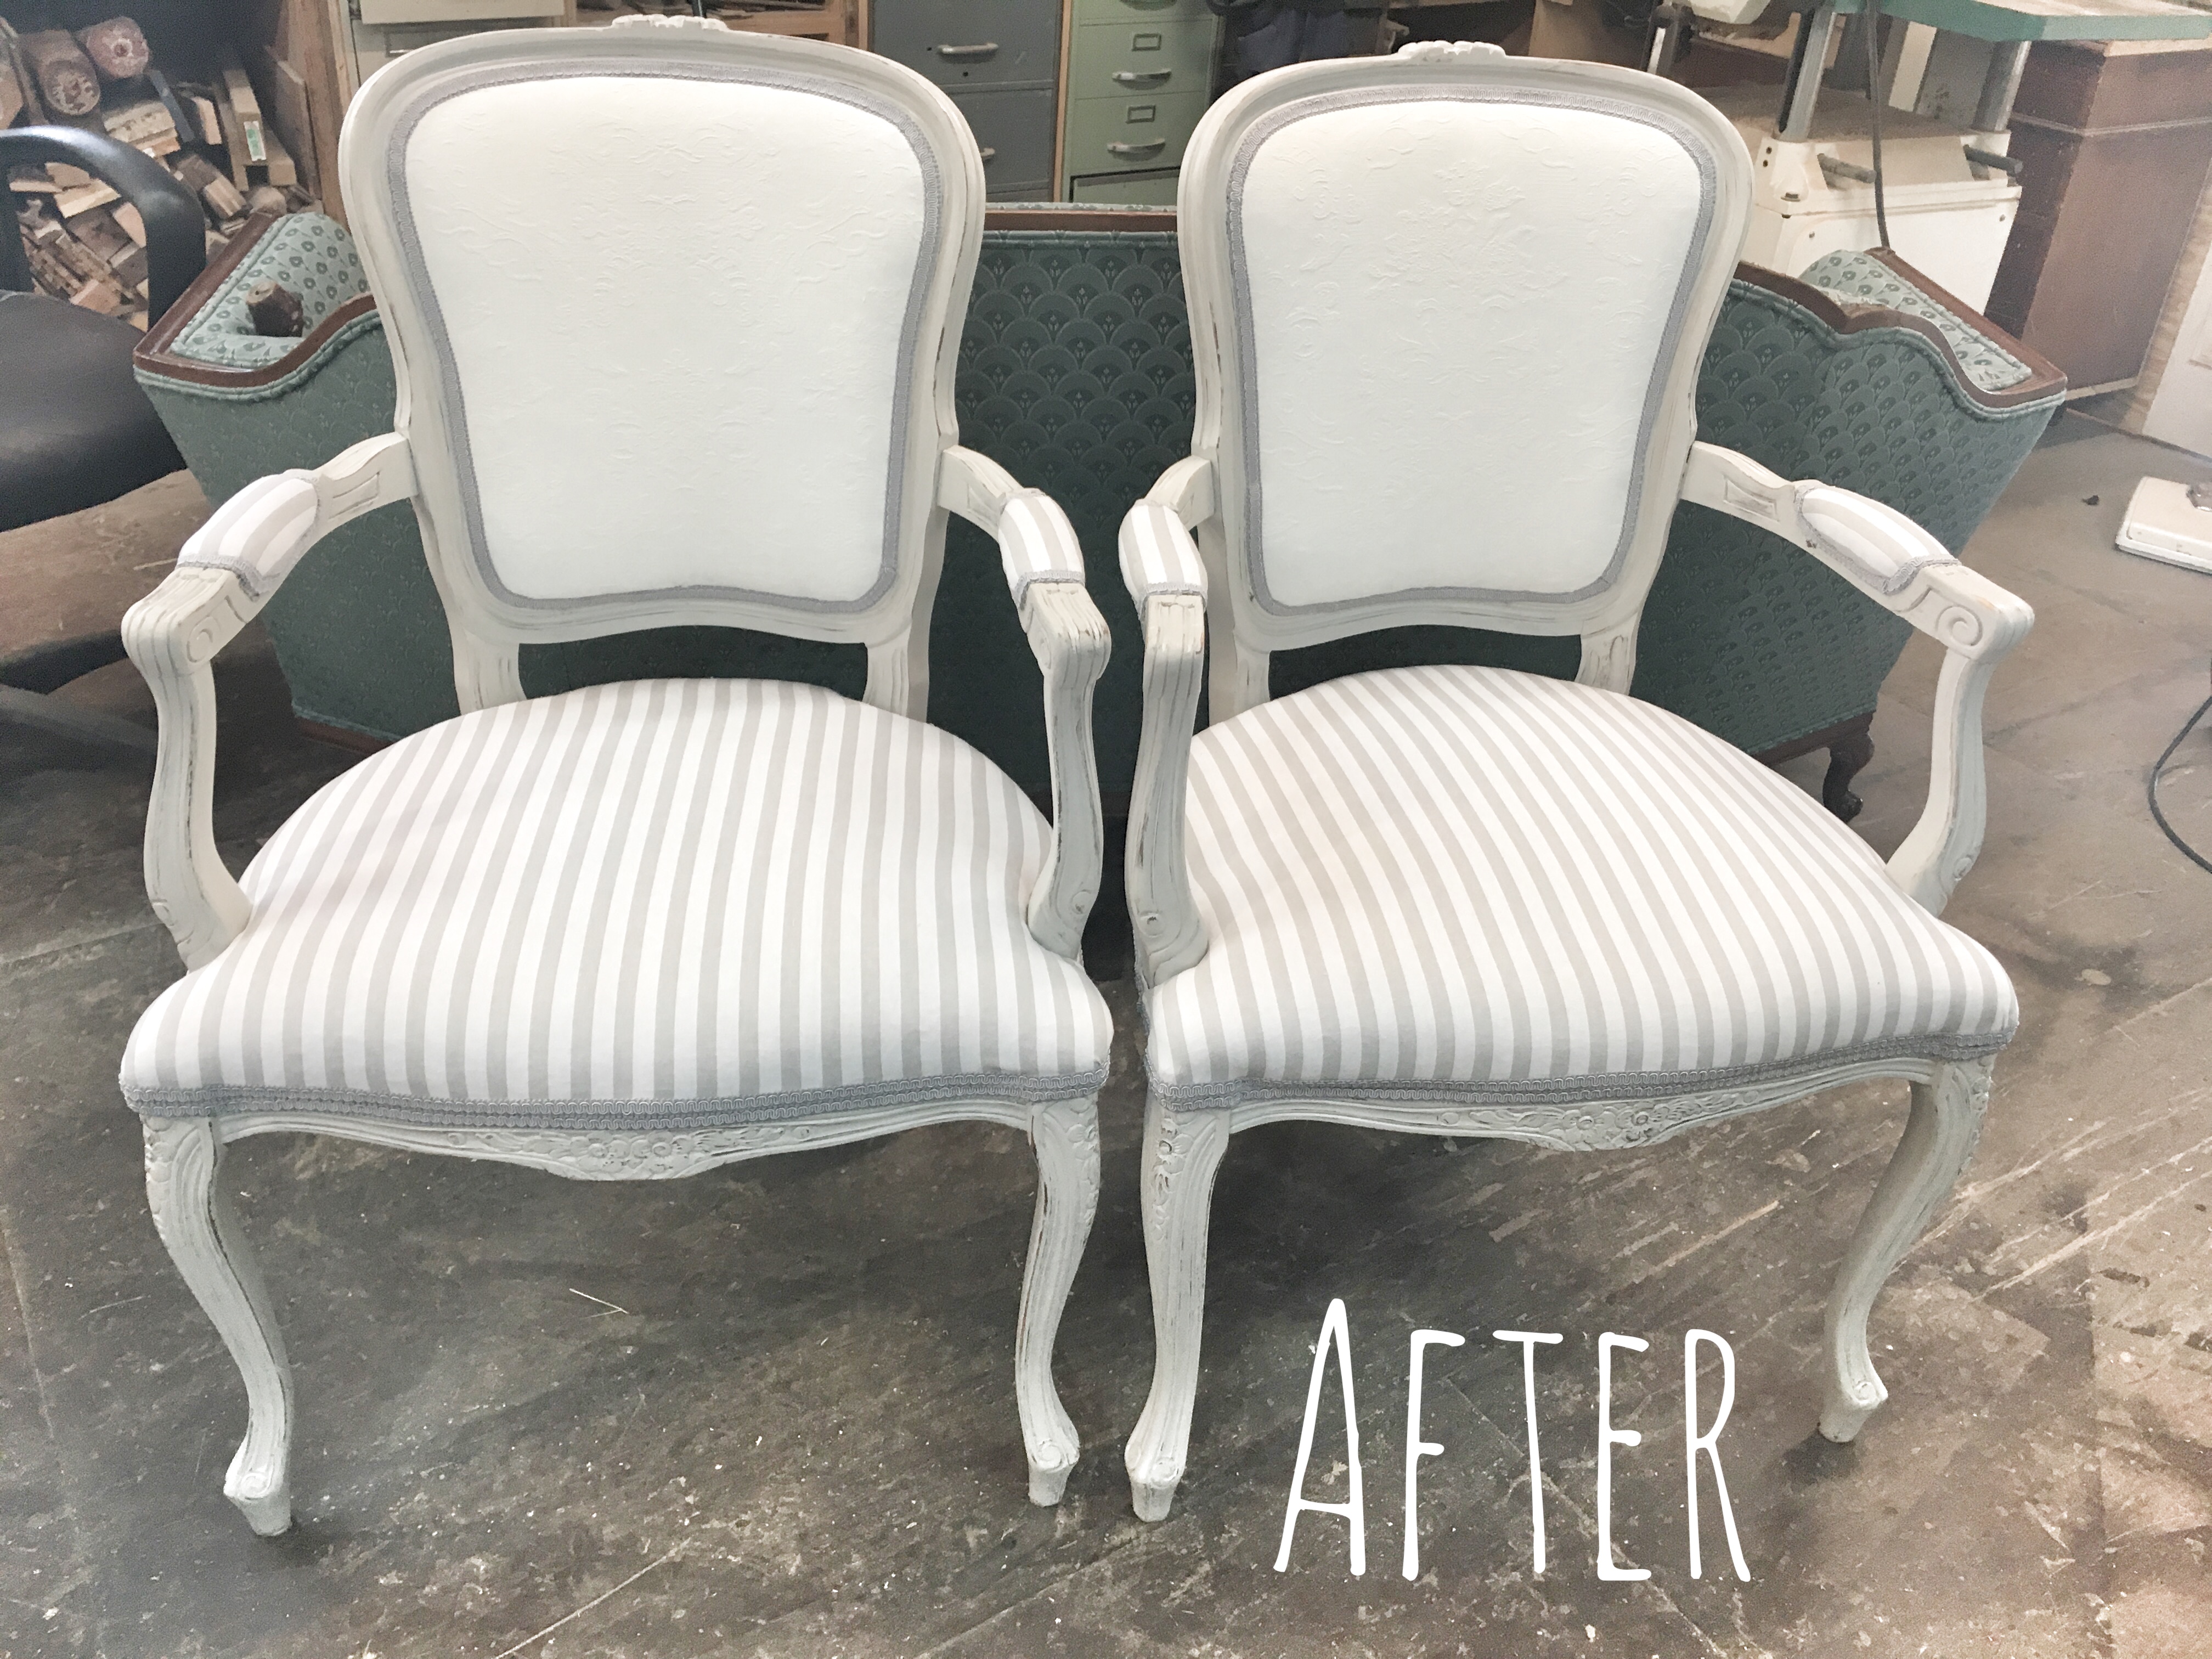
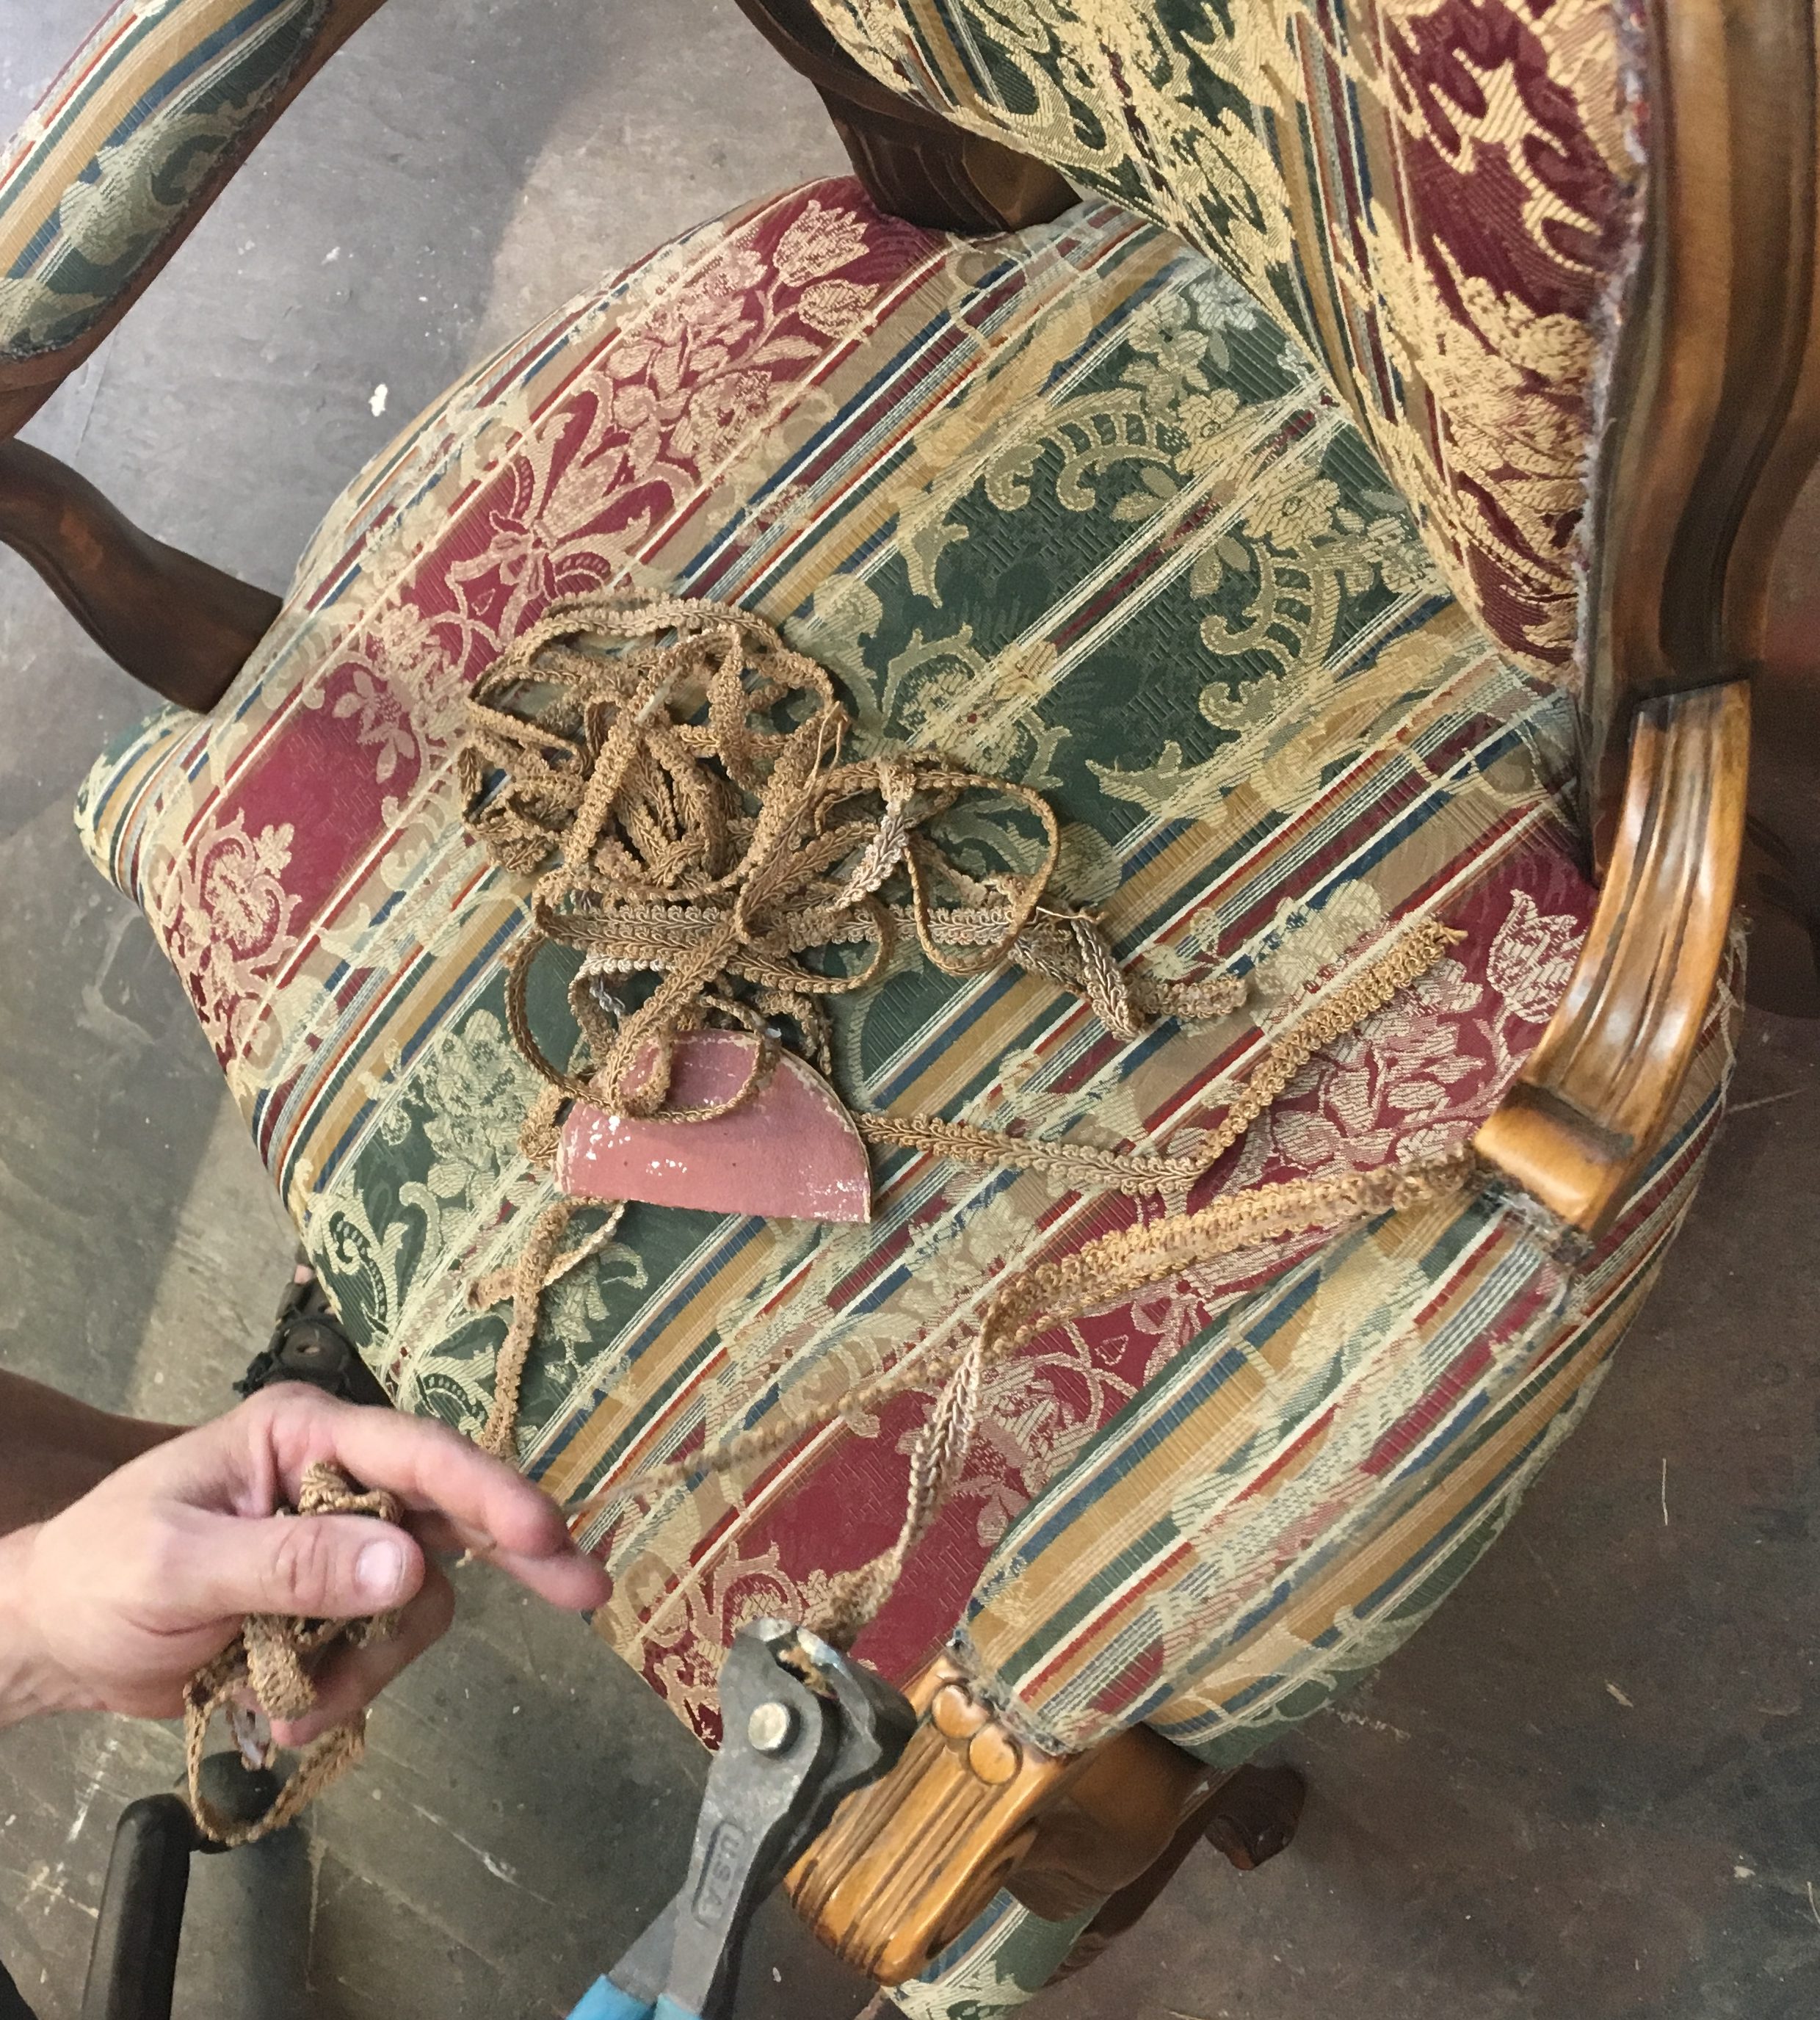
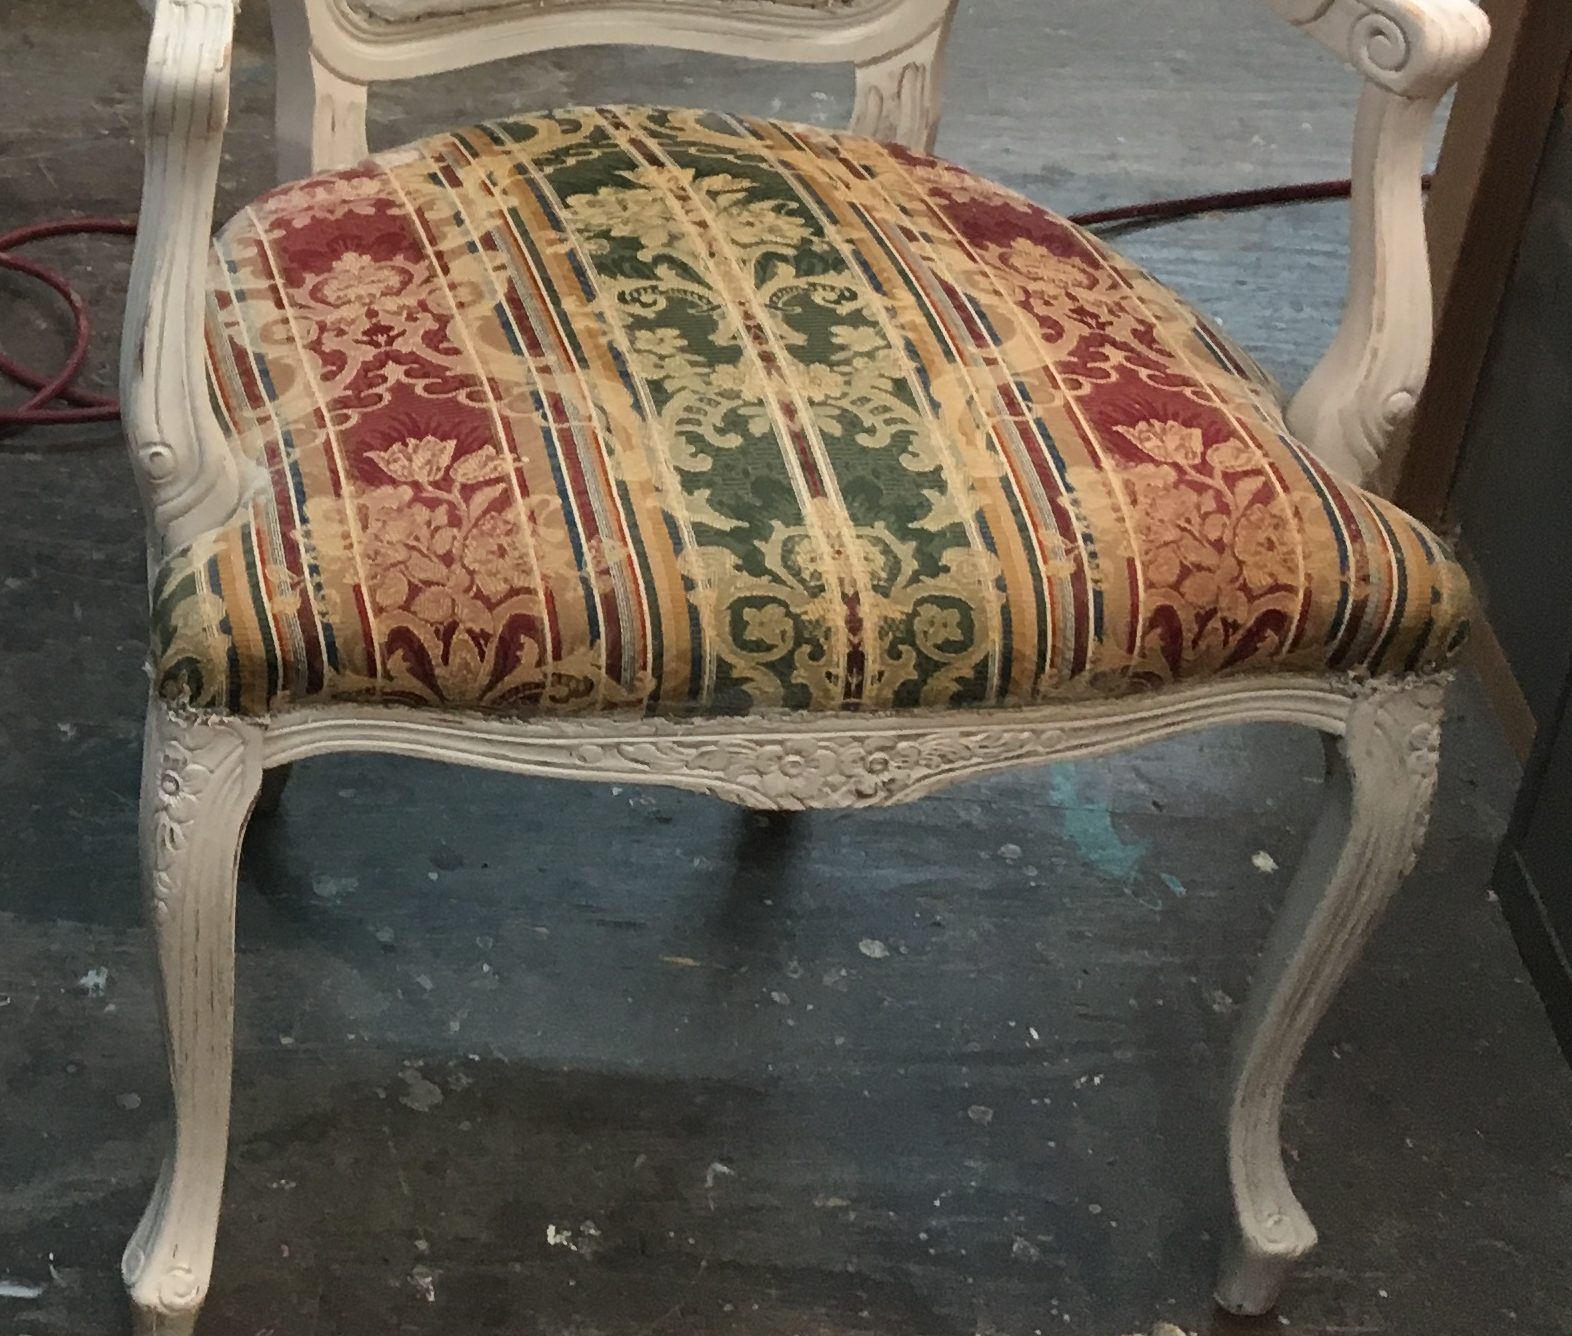
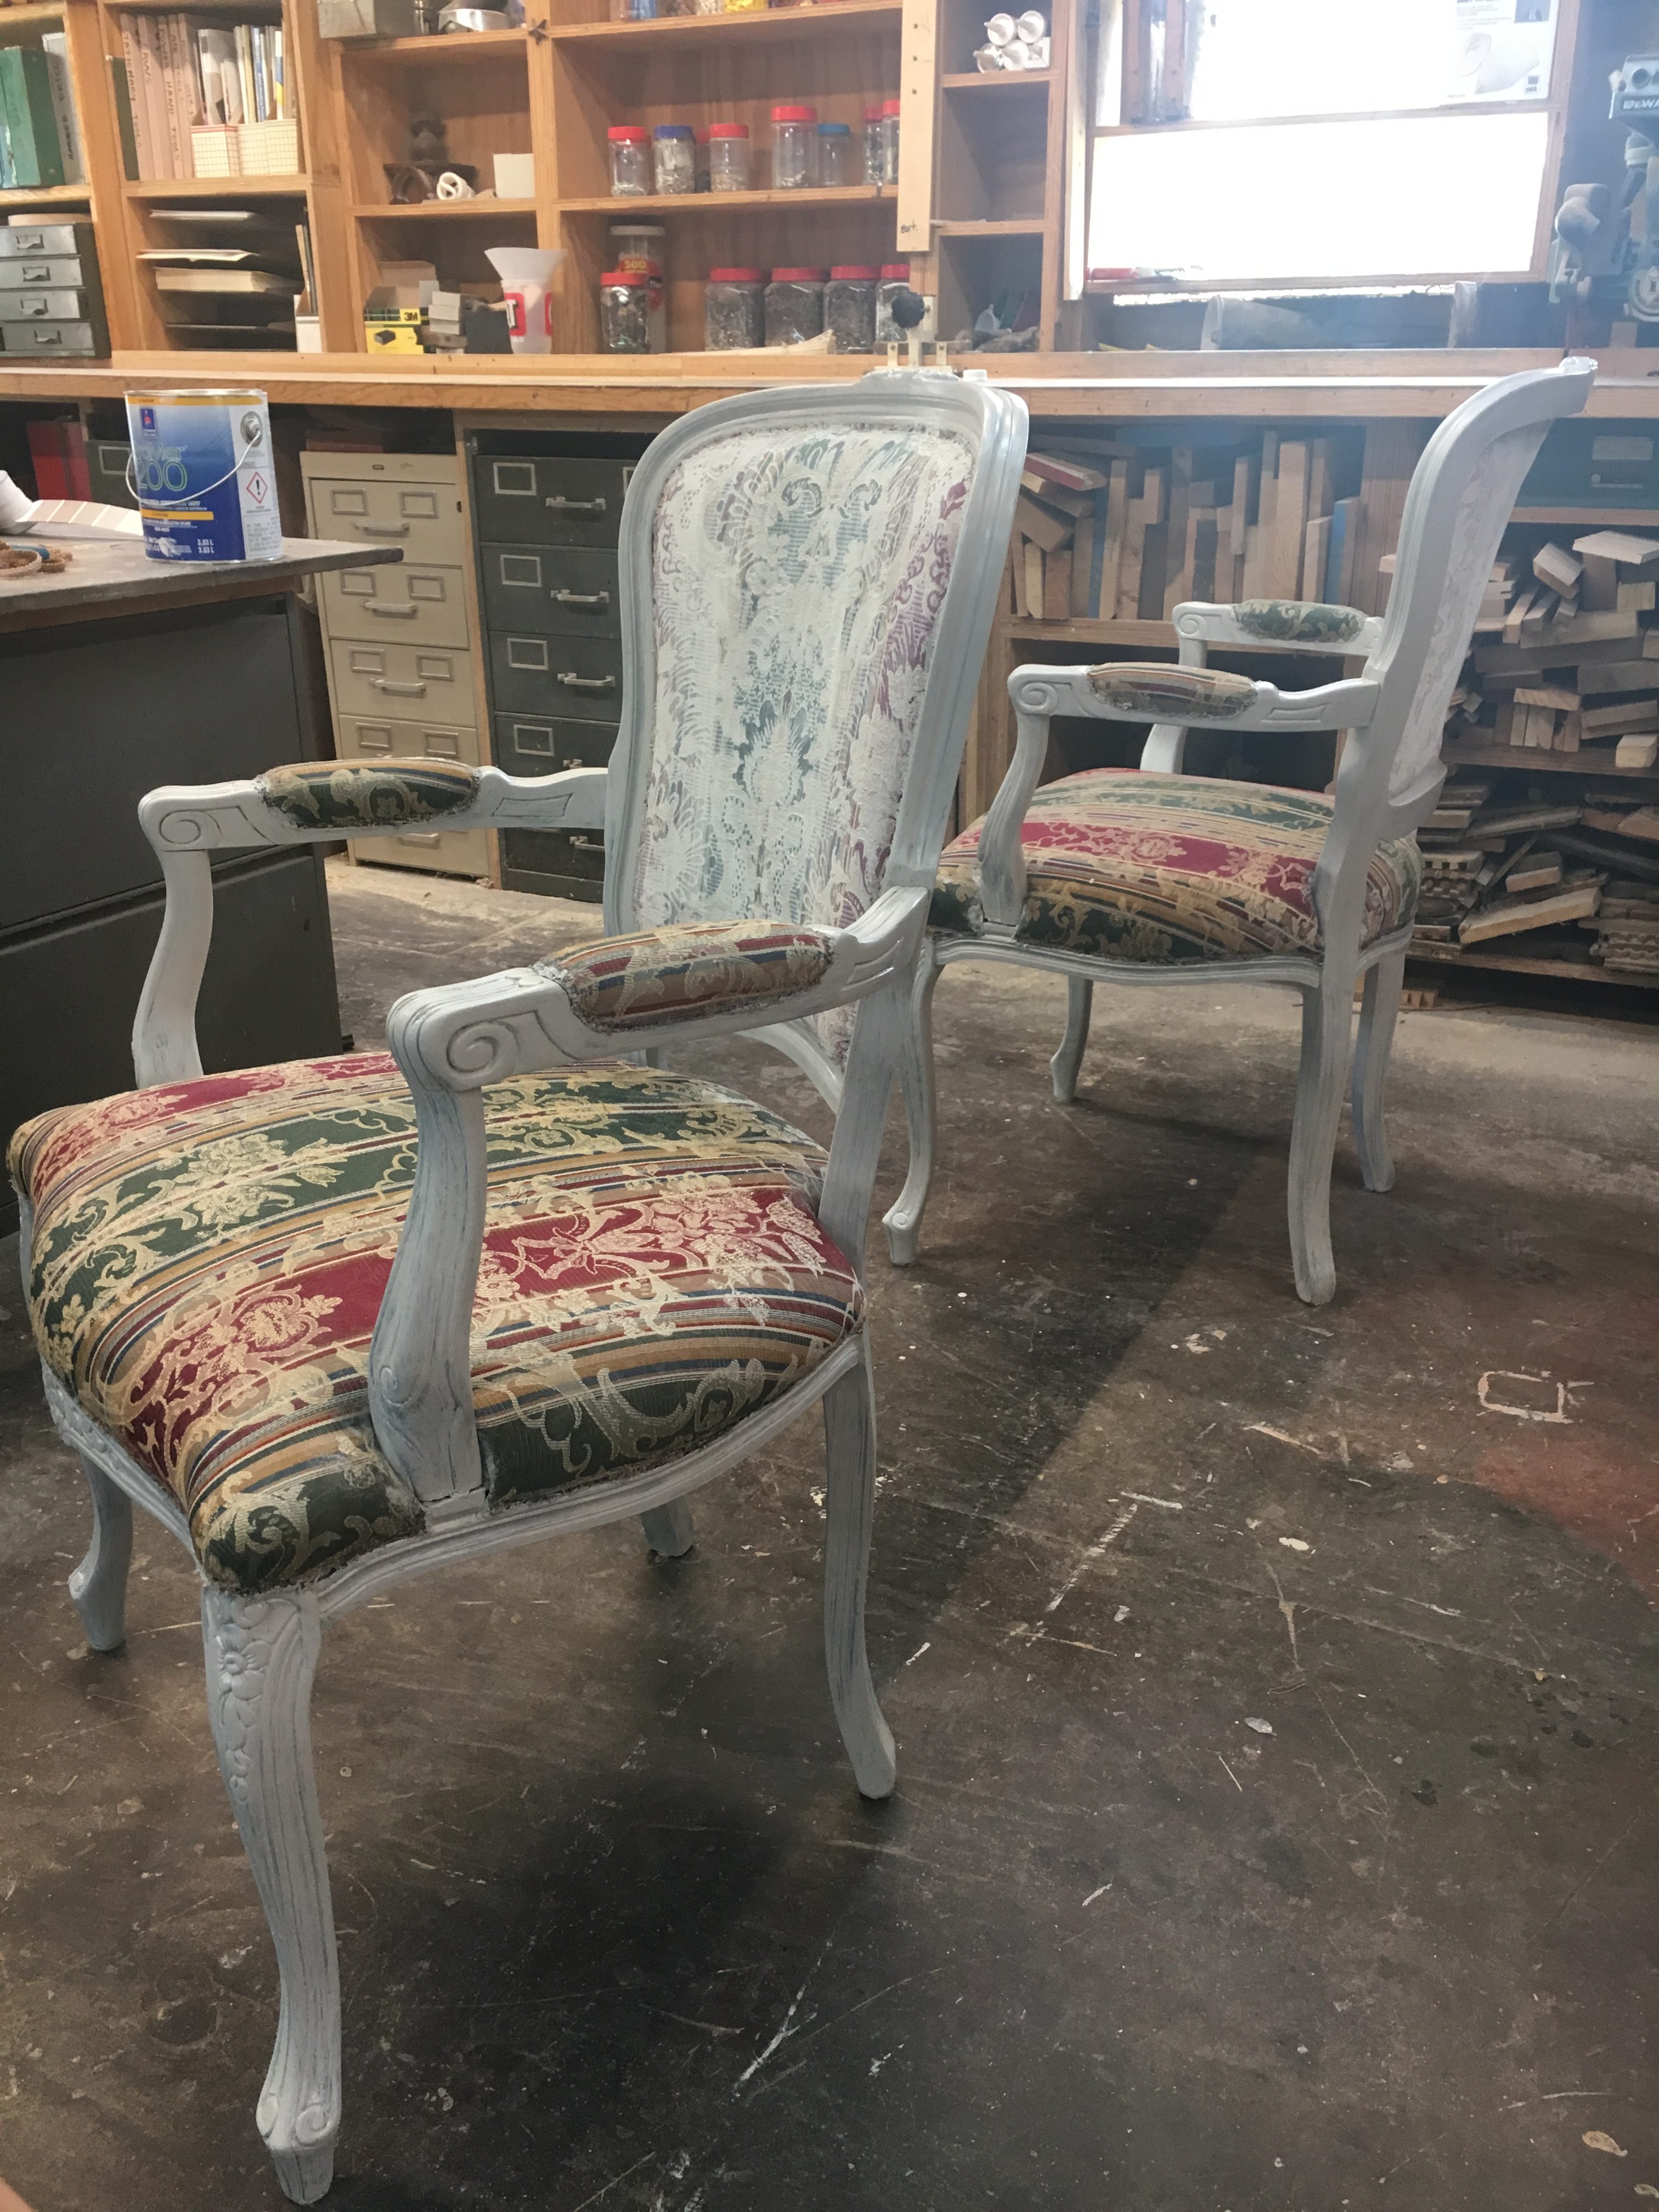
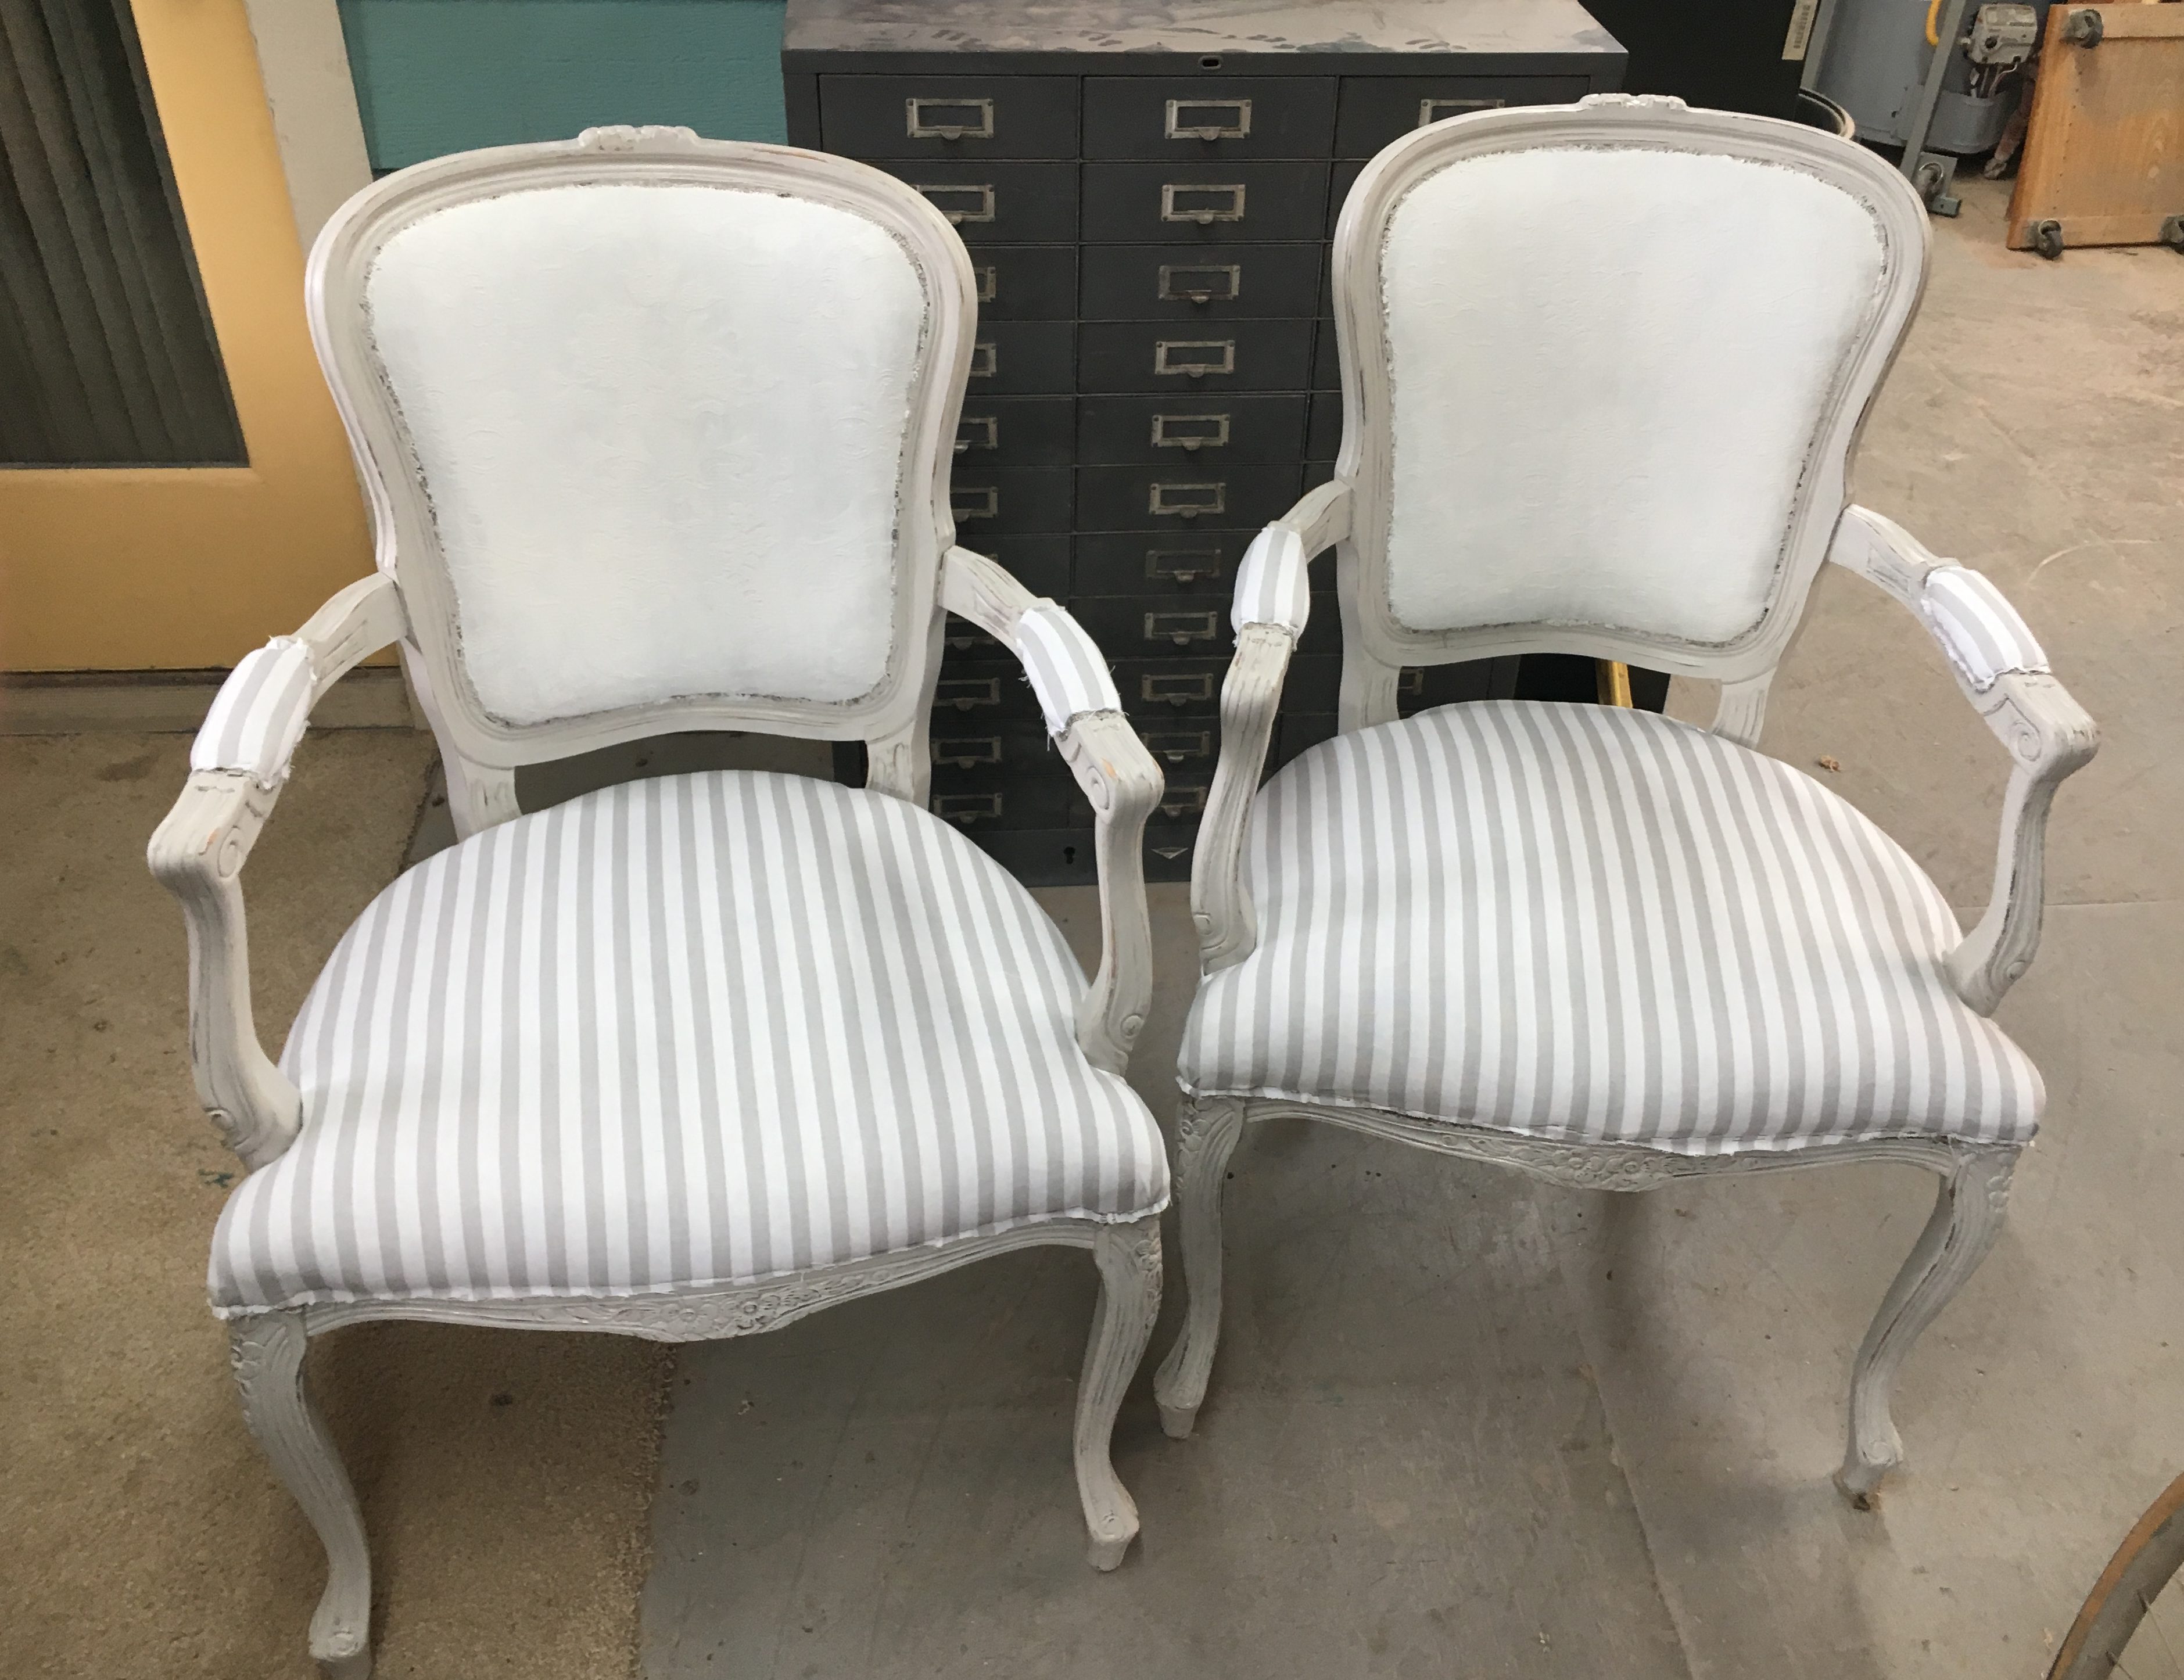
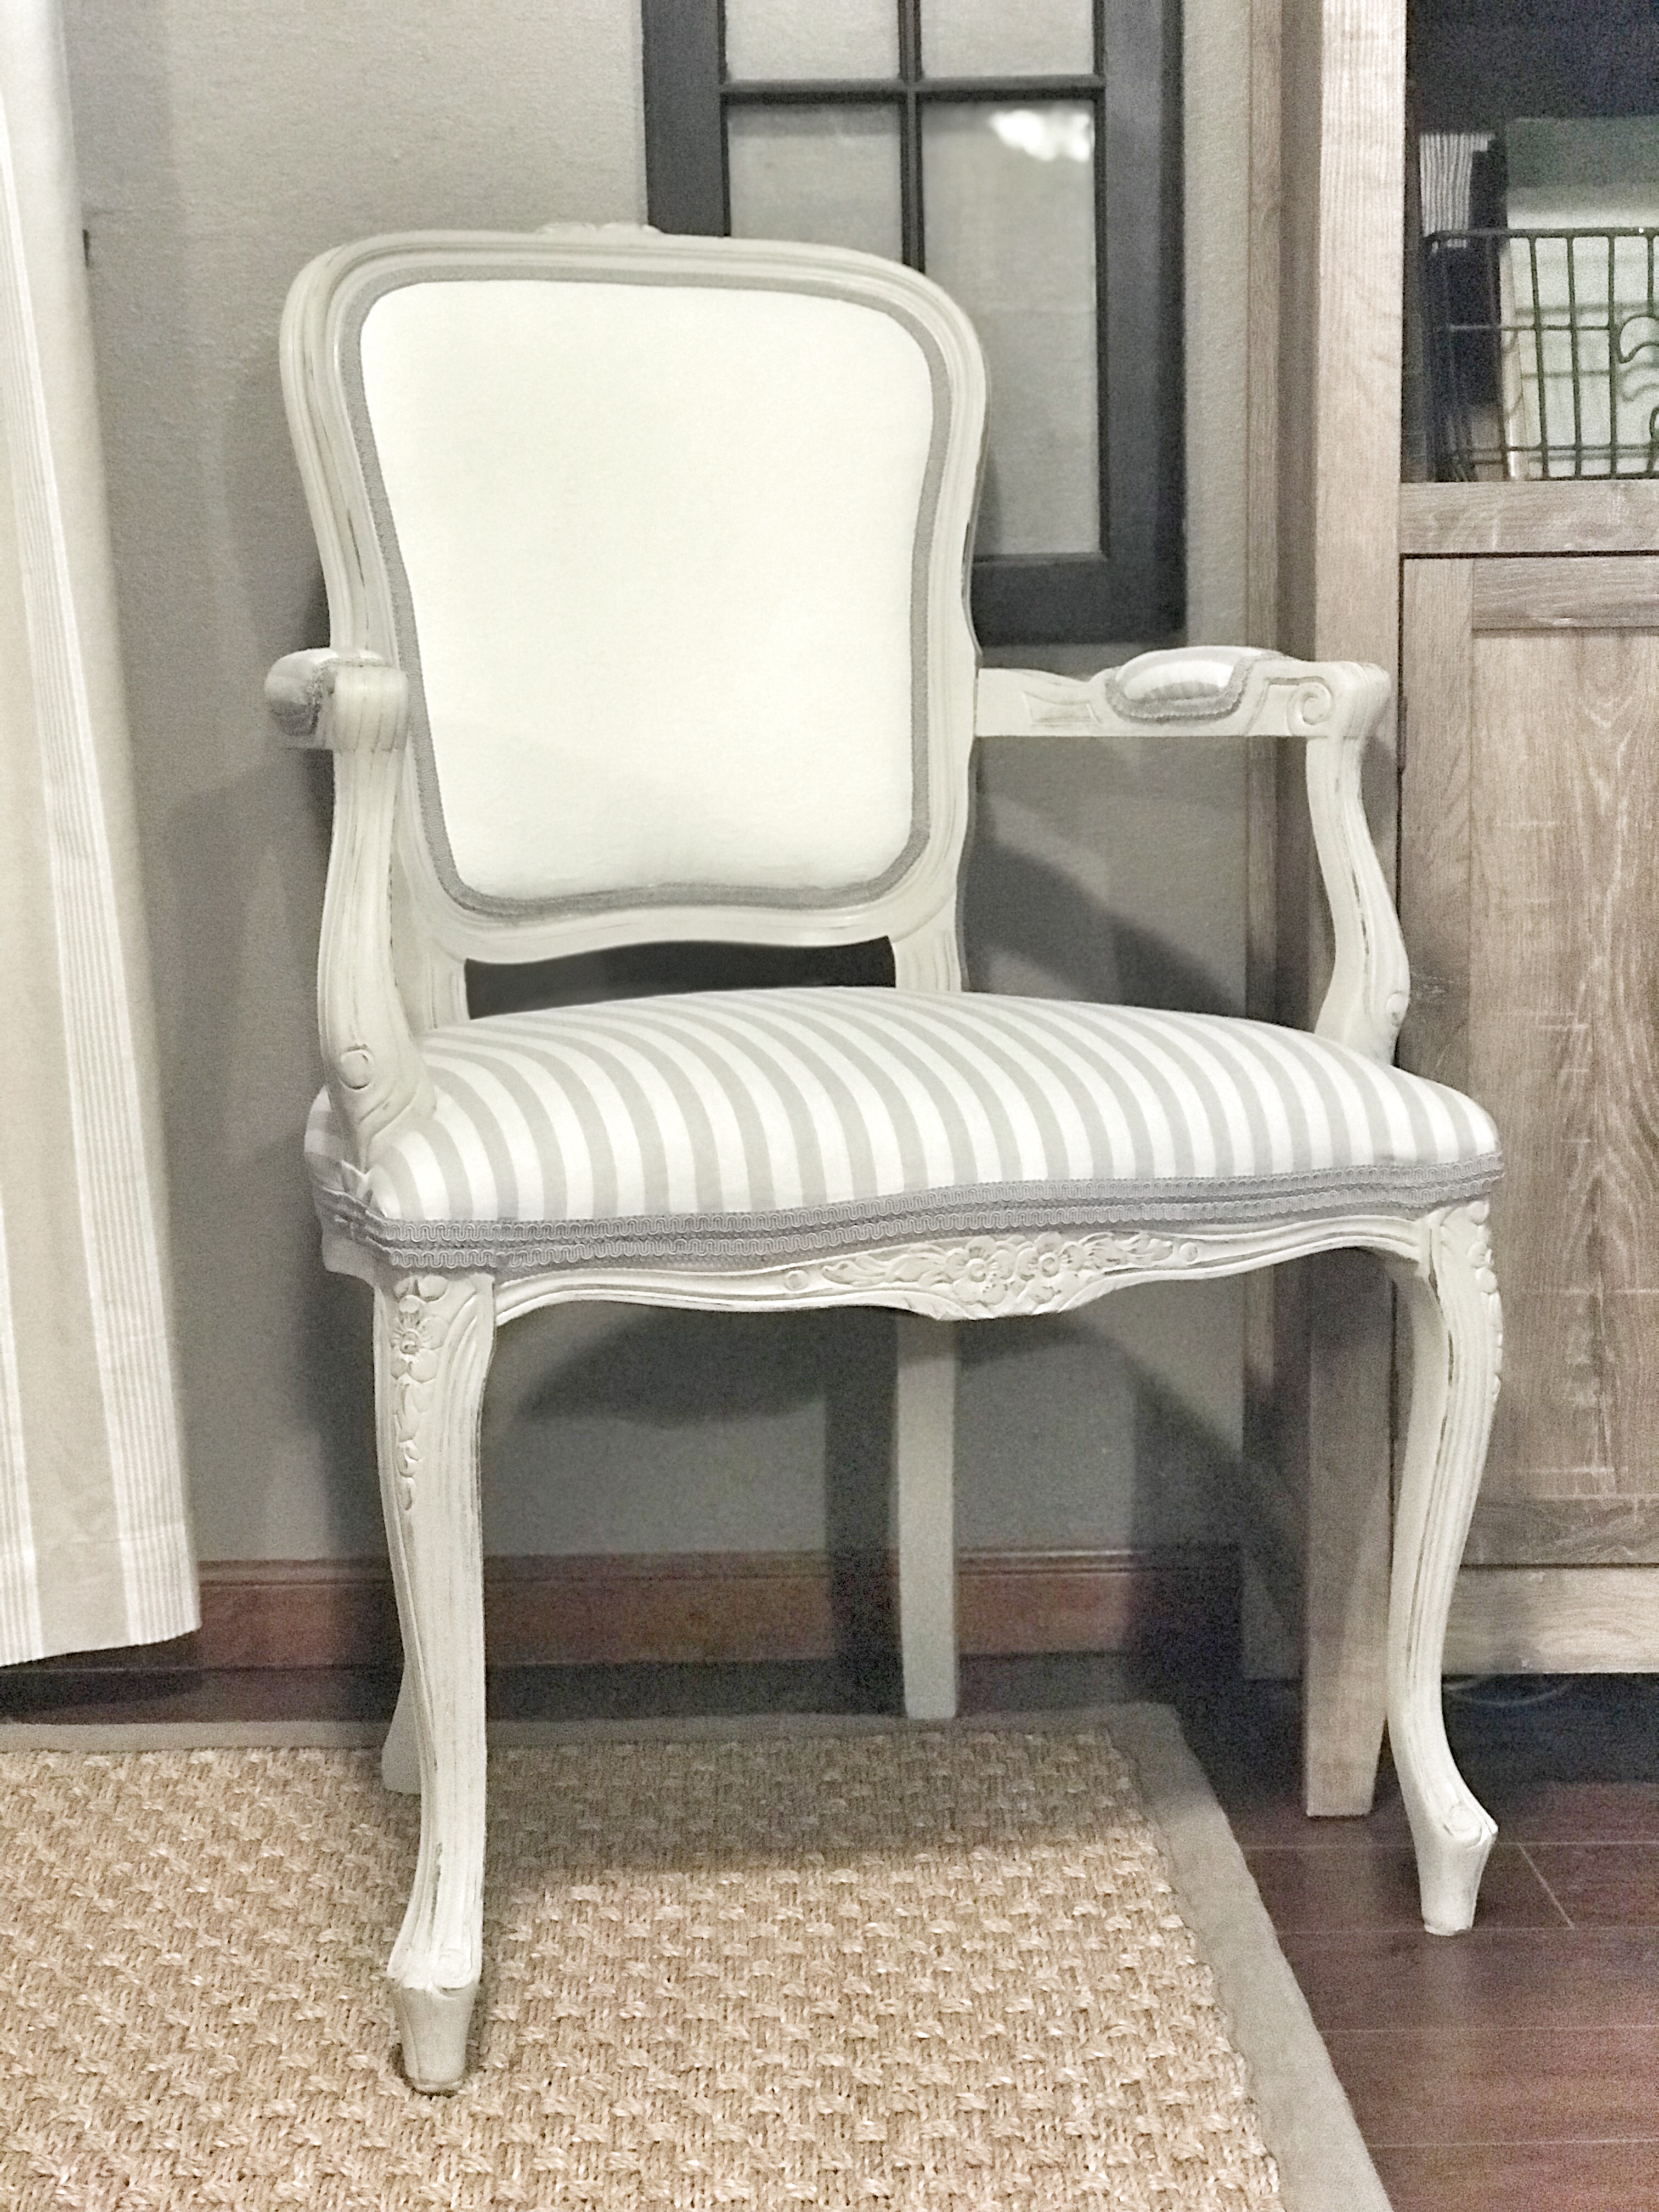
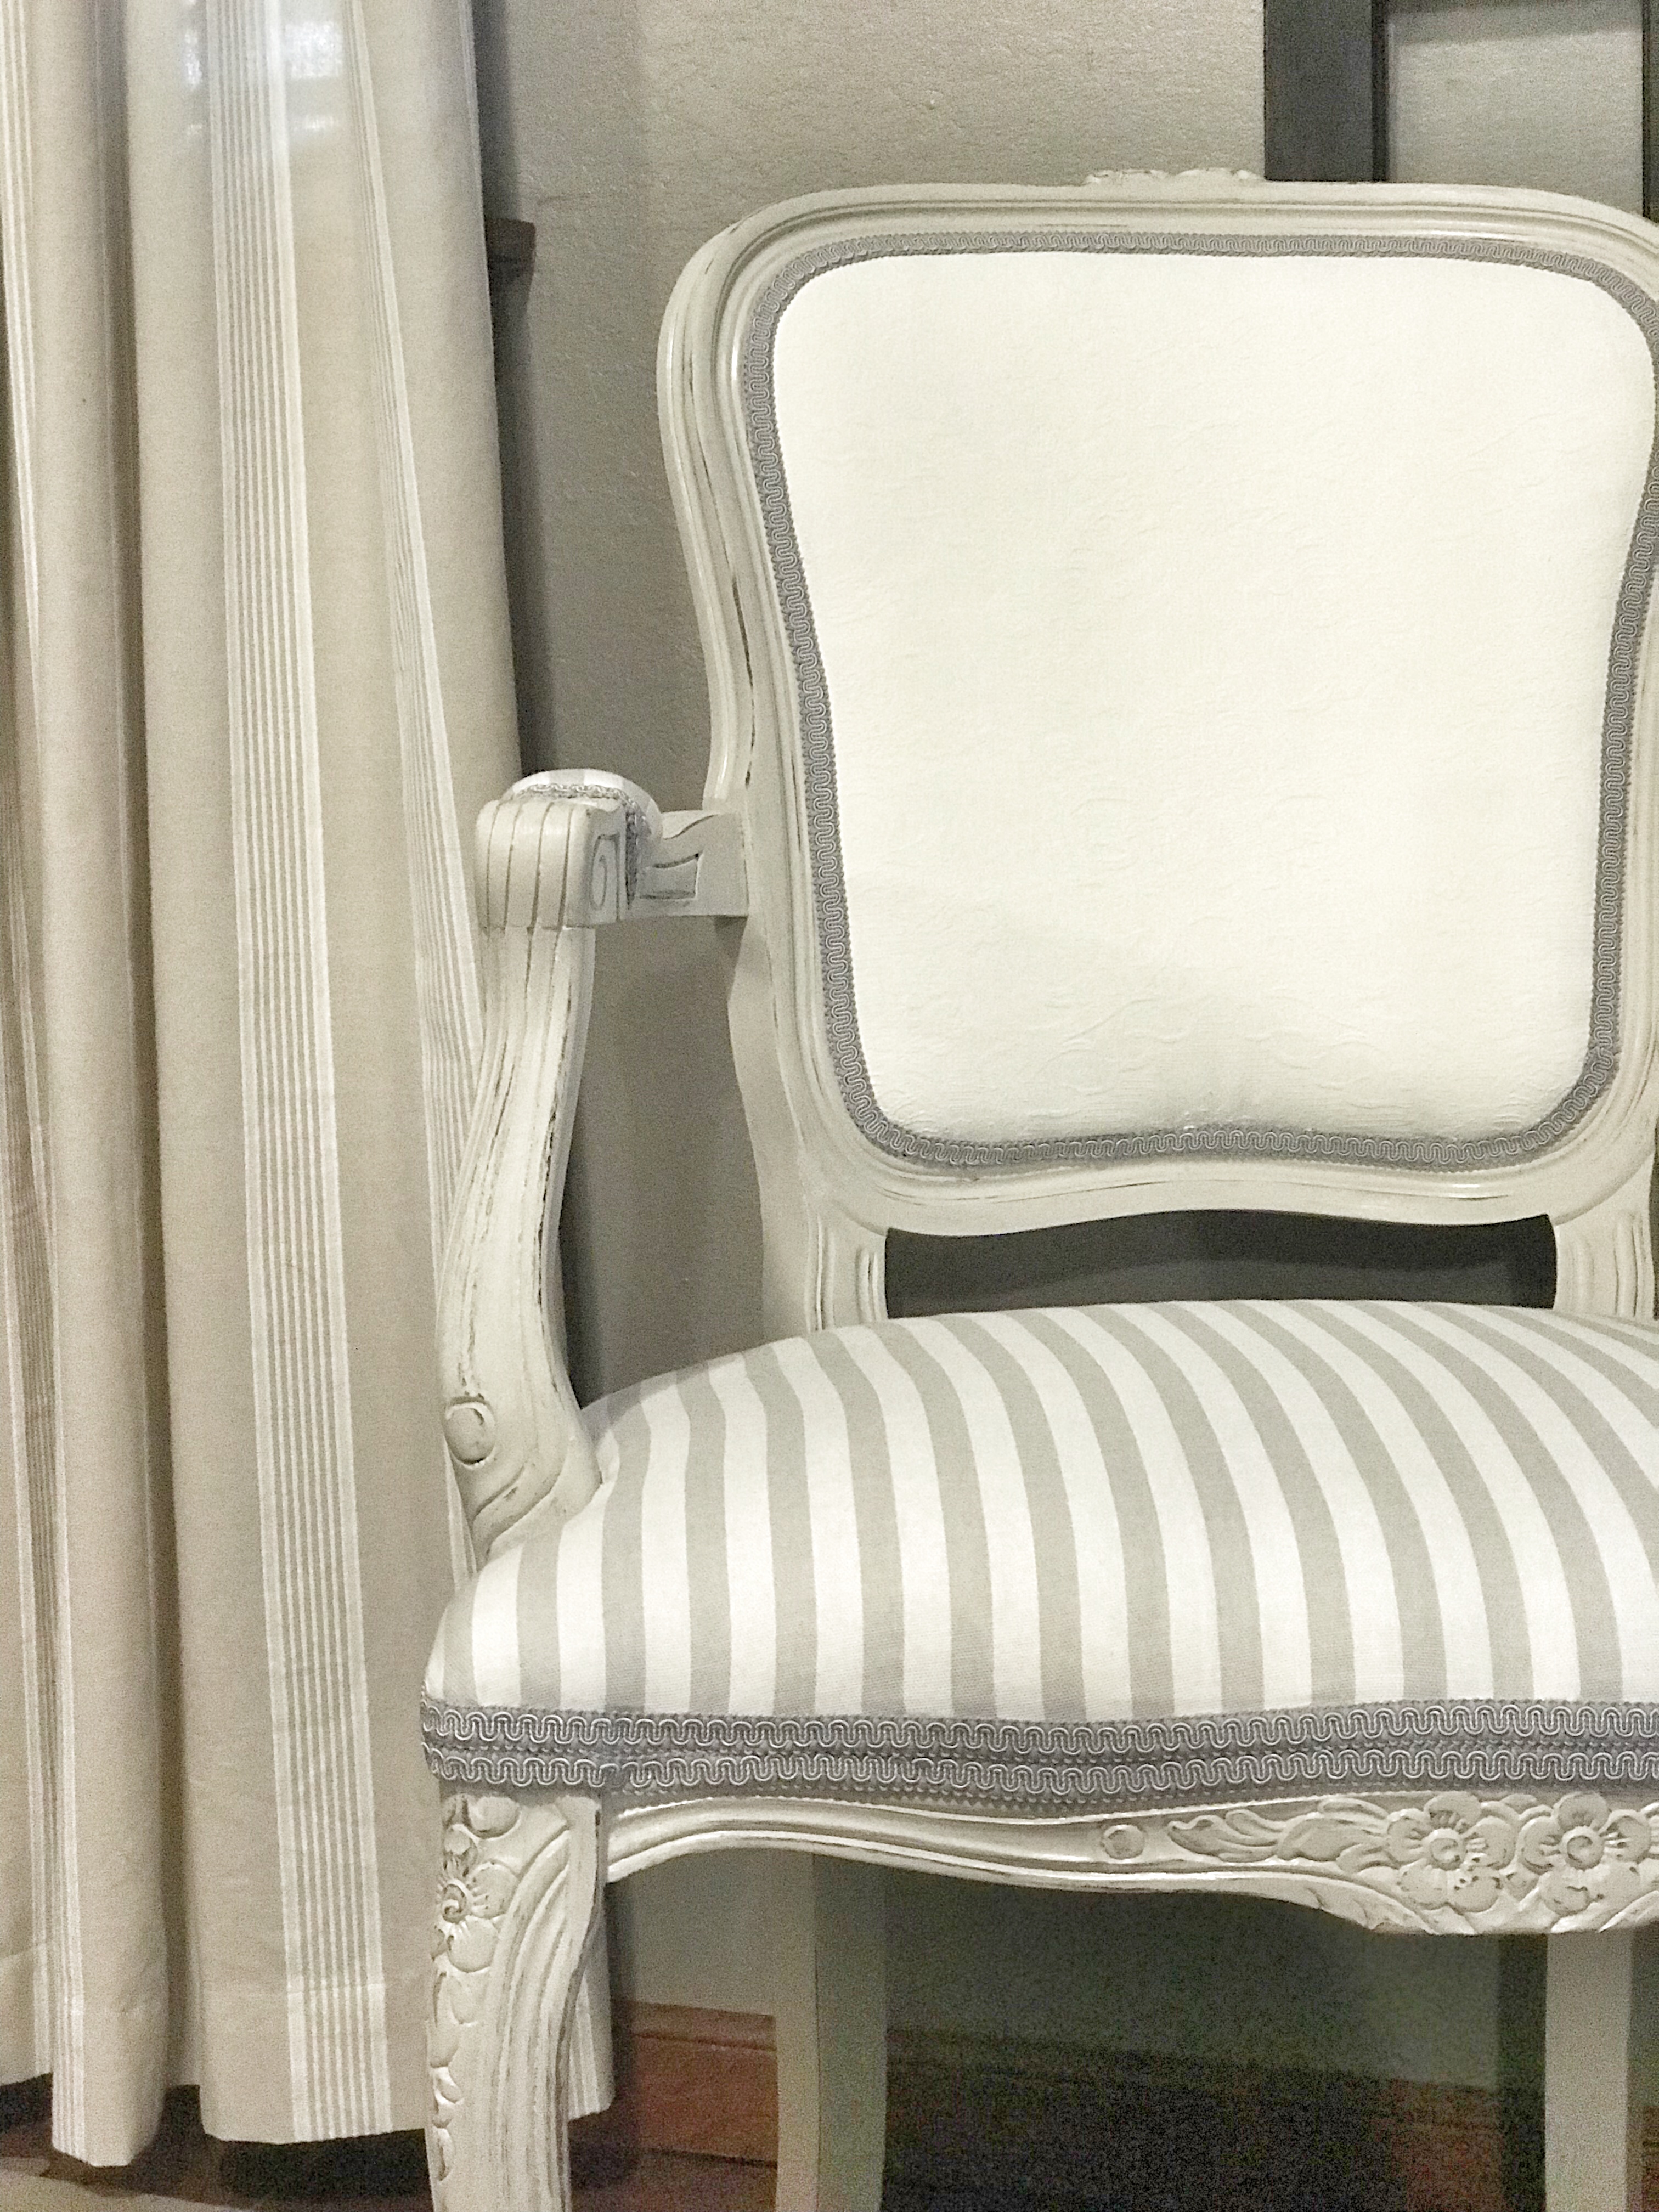
I wanted these chairs to match the shabby chic, farmhouse style in my home, so I decided to paint the frames! I first started by tearing the decorative trim off and sanding the frames to ensure the paint would stick. Cleaning the chairs really well with lacquer thinner took off any dust, or dirt, and also helped to strip the finish even more. I chose a light grey paint (Colonnade Gray from Sherwin Williams) that looked close to the color of fabric that I picked. After two coats of paint and distressing, these chairs were already looking better, but that hideous fabric needed to go.
Painted Fabric
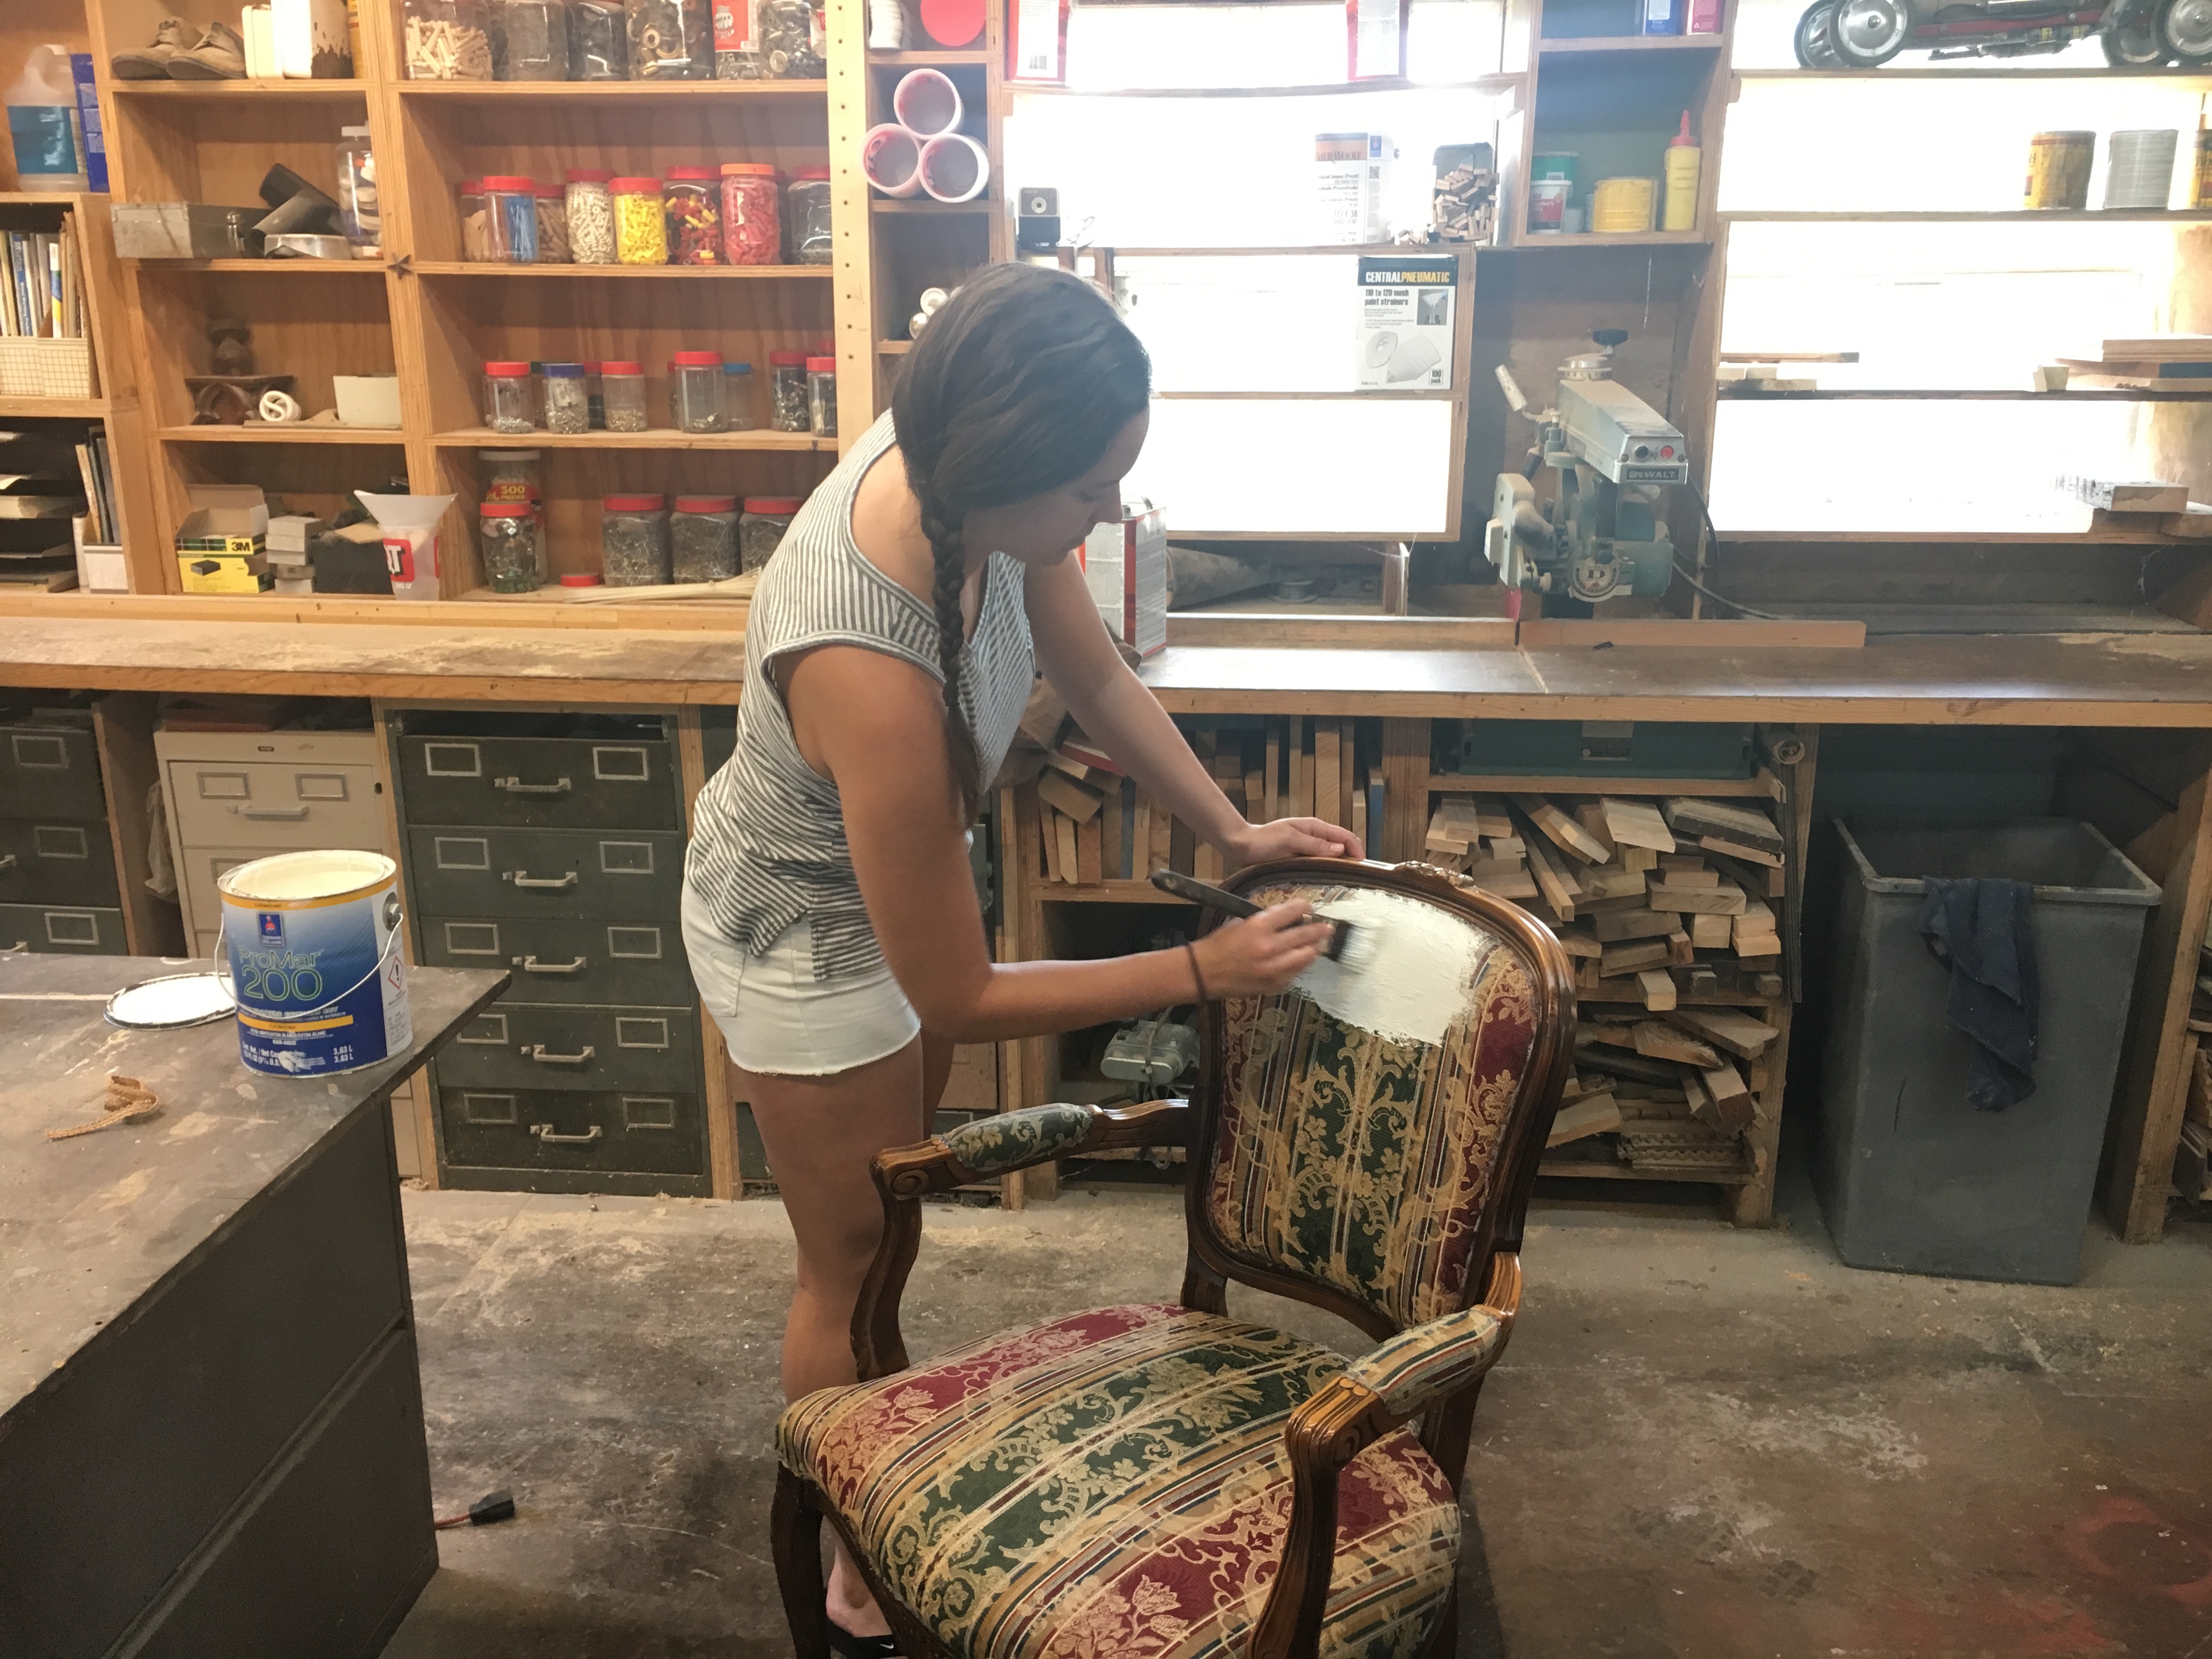
I know what you’re thinking…”Didn’t she want to reupholster them?” Yes! That was still the plan for the seat and the arms, but after considering an out-side-of-the-box idea, I decided to try painting the back panel on both sides. Yes, that’s right…painted fabric! I thought it sounded crazy too, but come to find out painting fabric as an alternative to reupholstery is actually a pretty popular thing, especially when the fabric is in good condition.
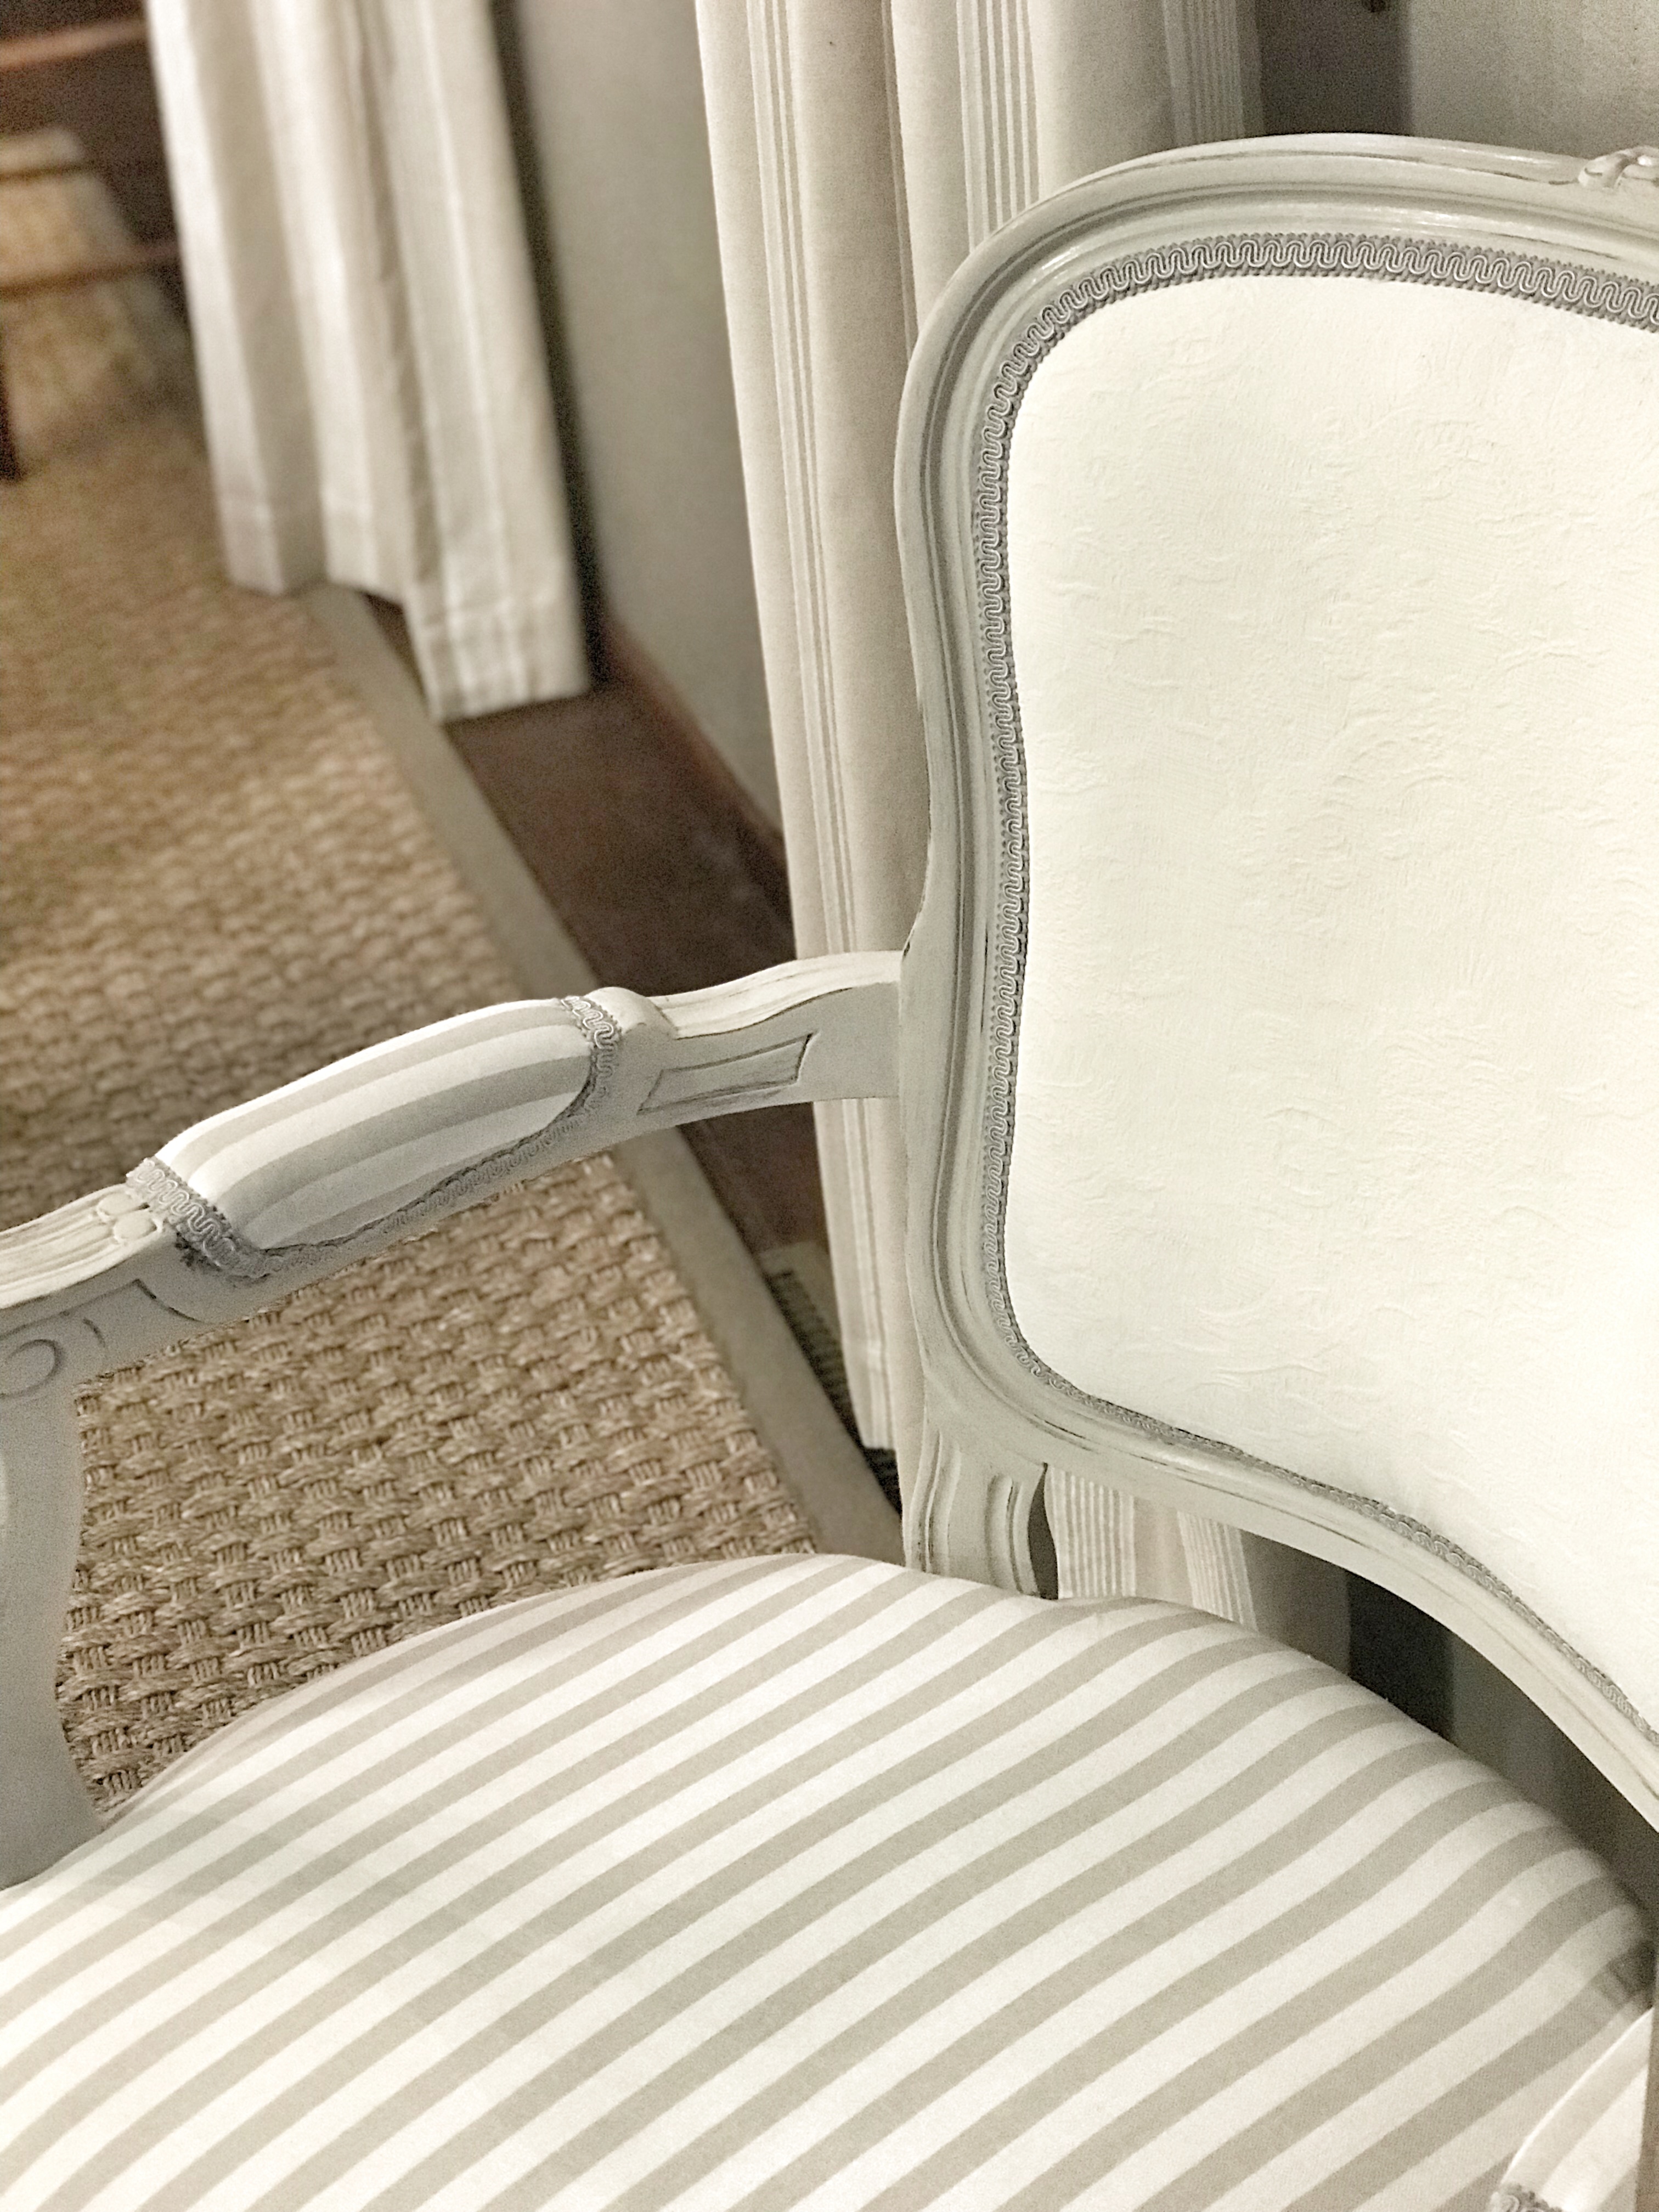
Although this fabric was straight out of the 80’s color-wise, it had a nice textured pattern, so I thought it would be a good experiment. To be honest, I really didn’t have high hopes for this, and I was fully prepared to tear it out if I hated it. Surprisingly, though, I was pretty pleased with how it turned out!
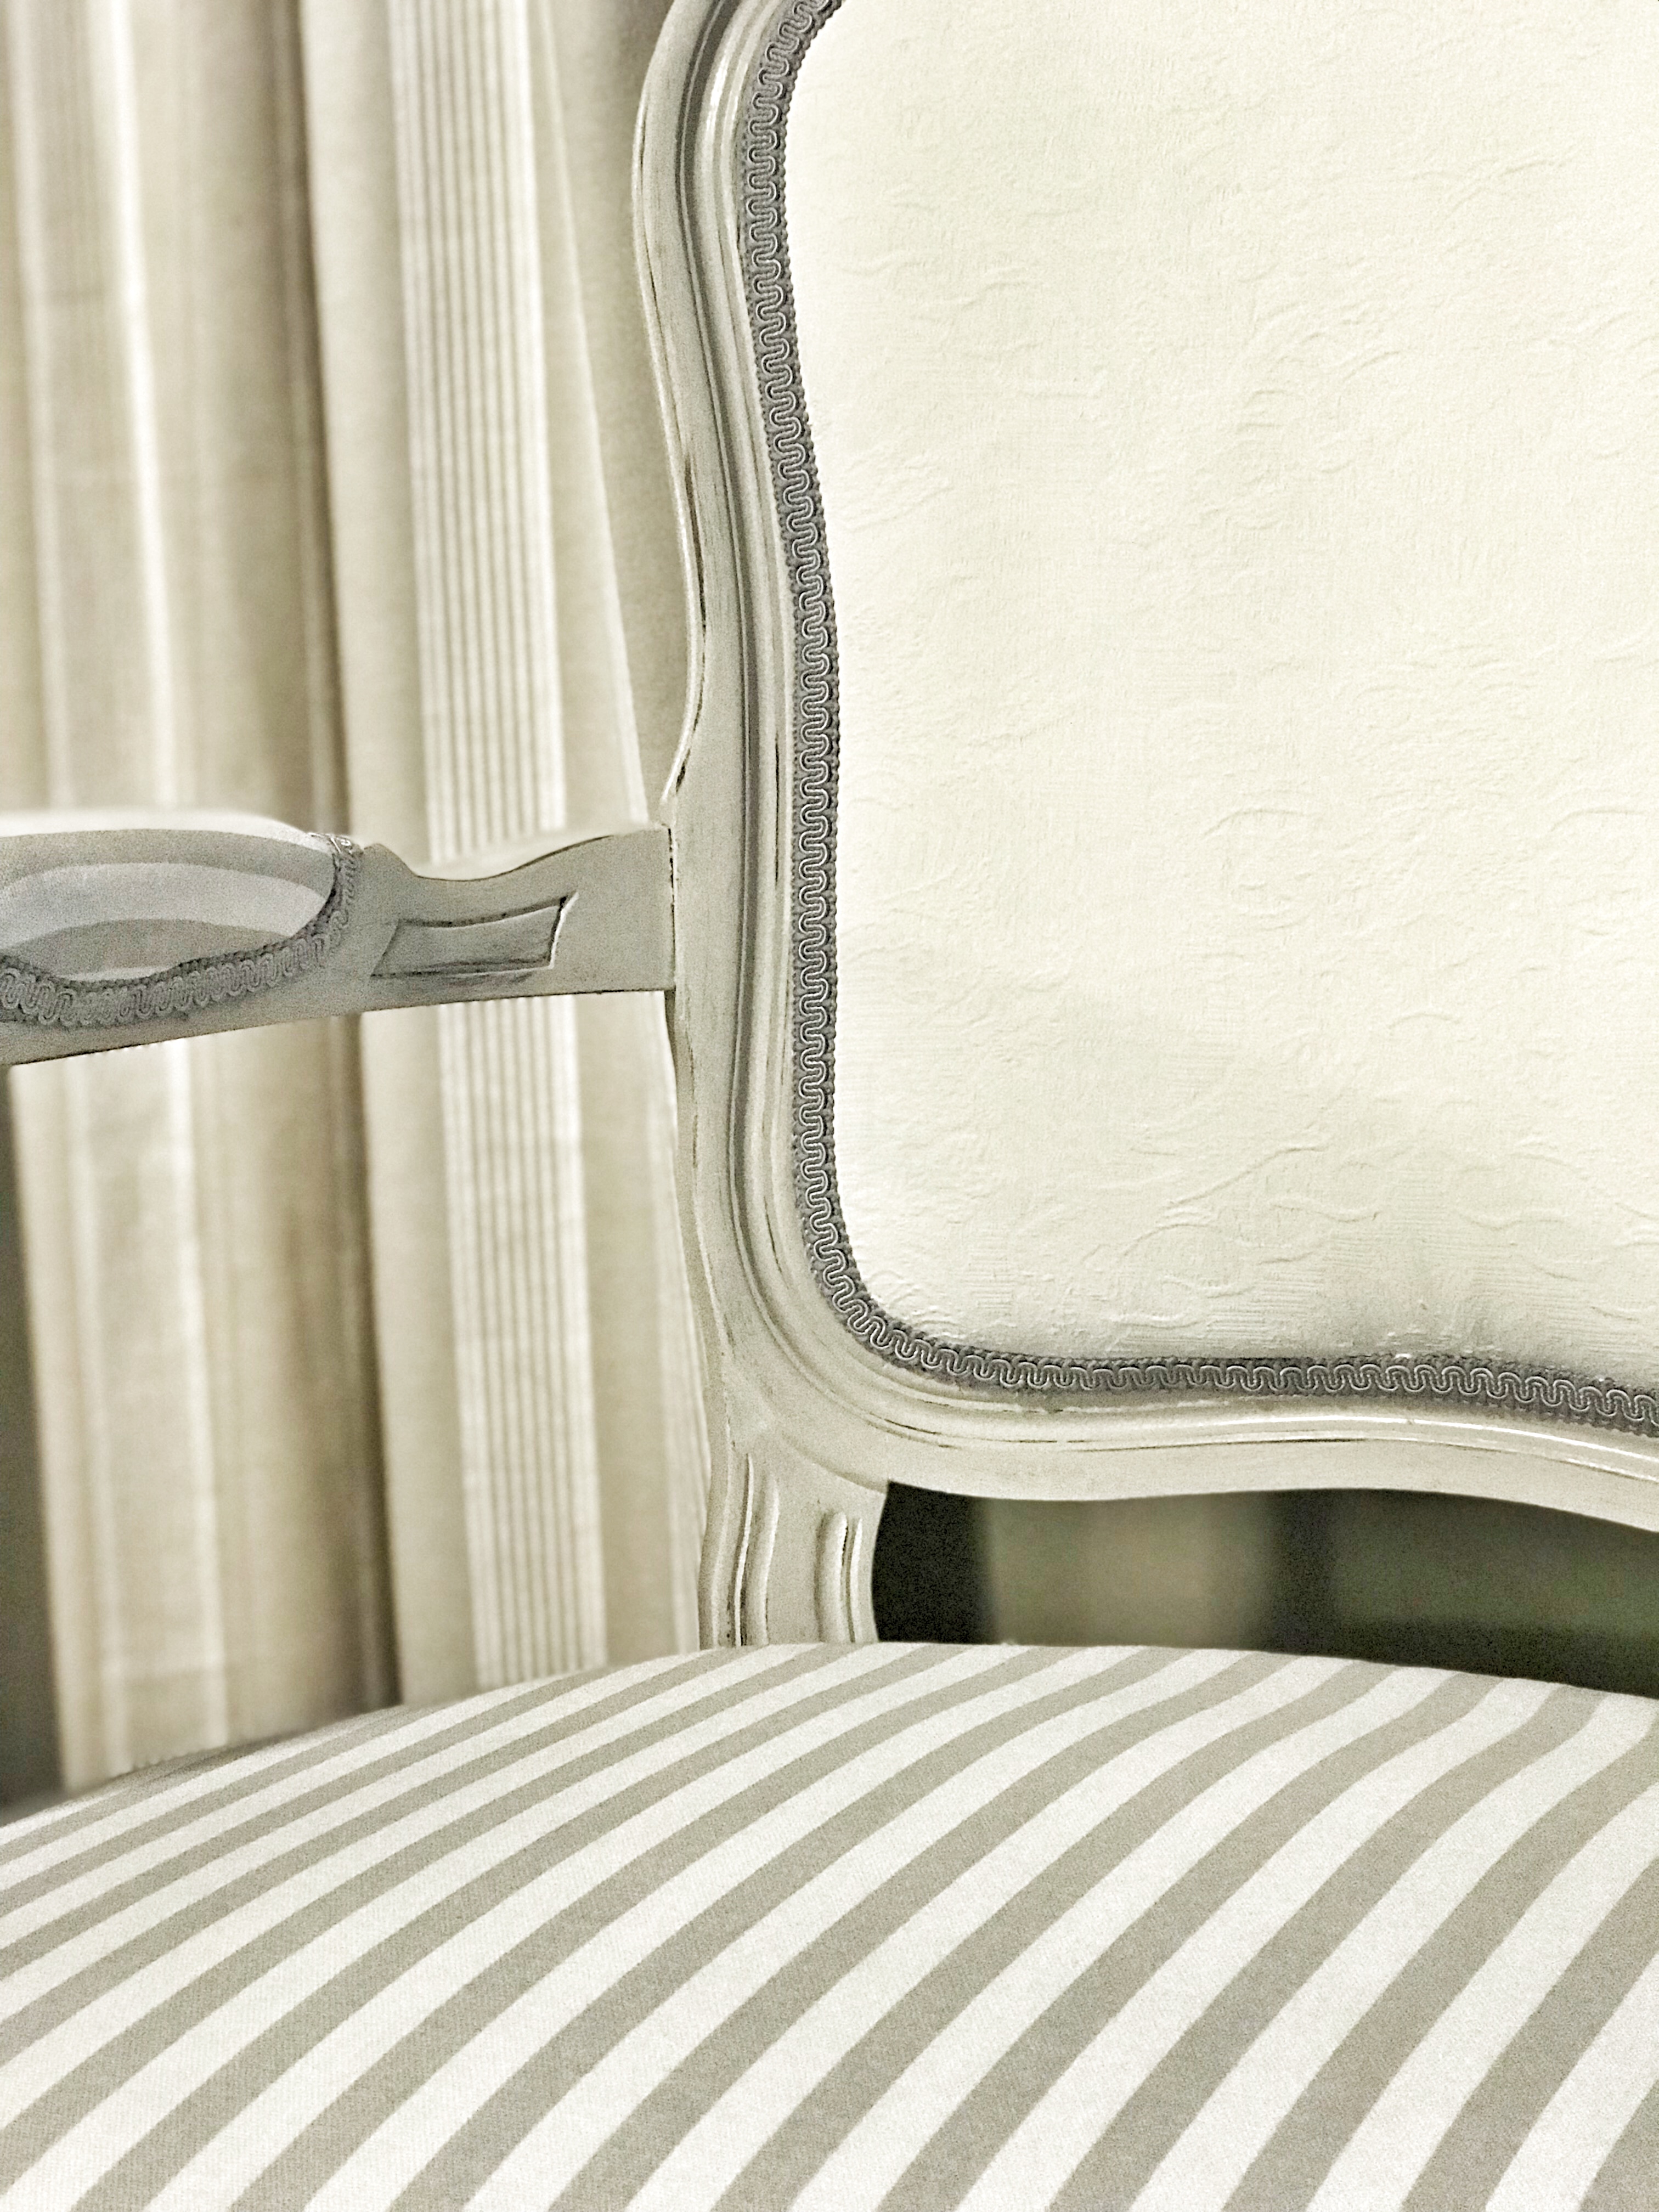
I used regular flat white paint and a paint brush, nothing fancy! I did the first coat of paint on the fabric before I painted the frames, just to see if I was even going to like it. It took about four coats to totally conceal that color, and I made sure to tape off the edges on the next few coats once the frames were painted.
This did give the fabric a slightly stiff feel, almost like vinyl, but I figured the back of the chair won’t get as much wear as the seat. The solid color and textured pattern actually gives this a nice contrast to the fabric I chose for the rest of it. I’m not worried about the paint “cracking,” but I am still considering sealing it with something just to keep it clean.
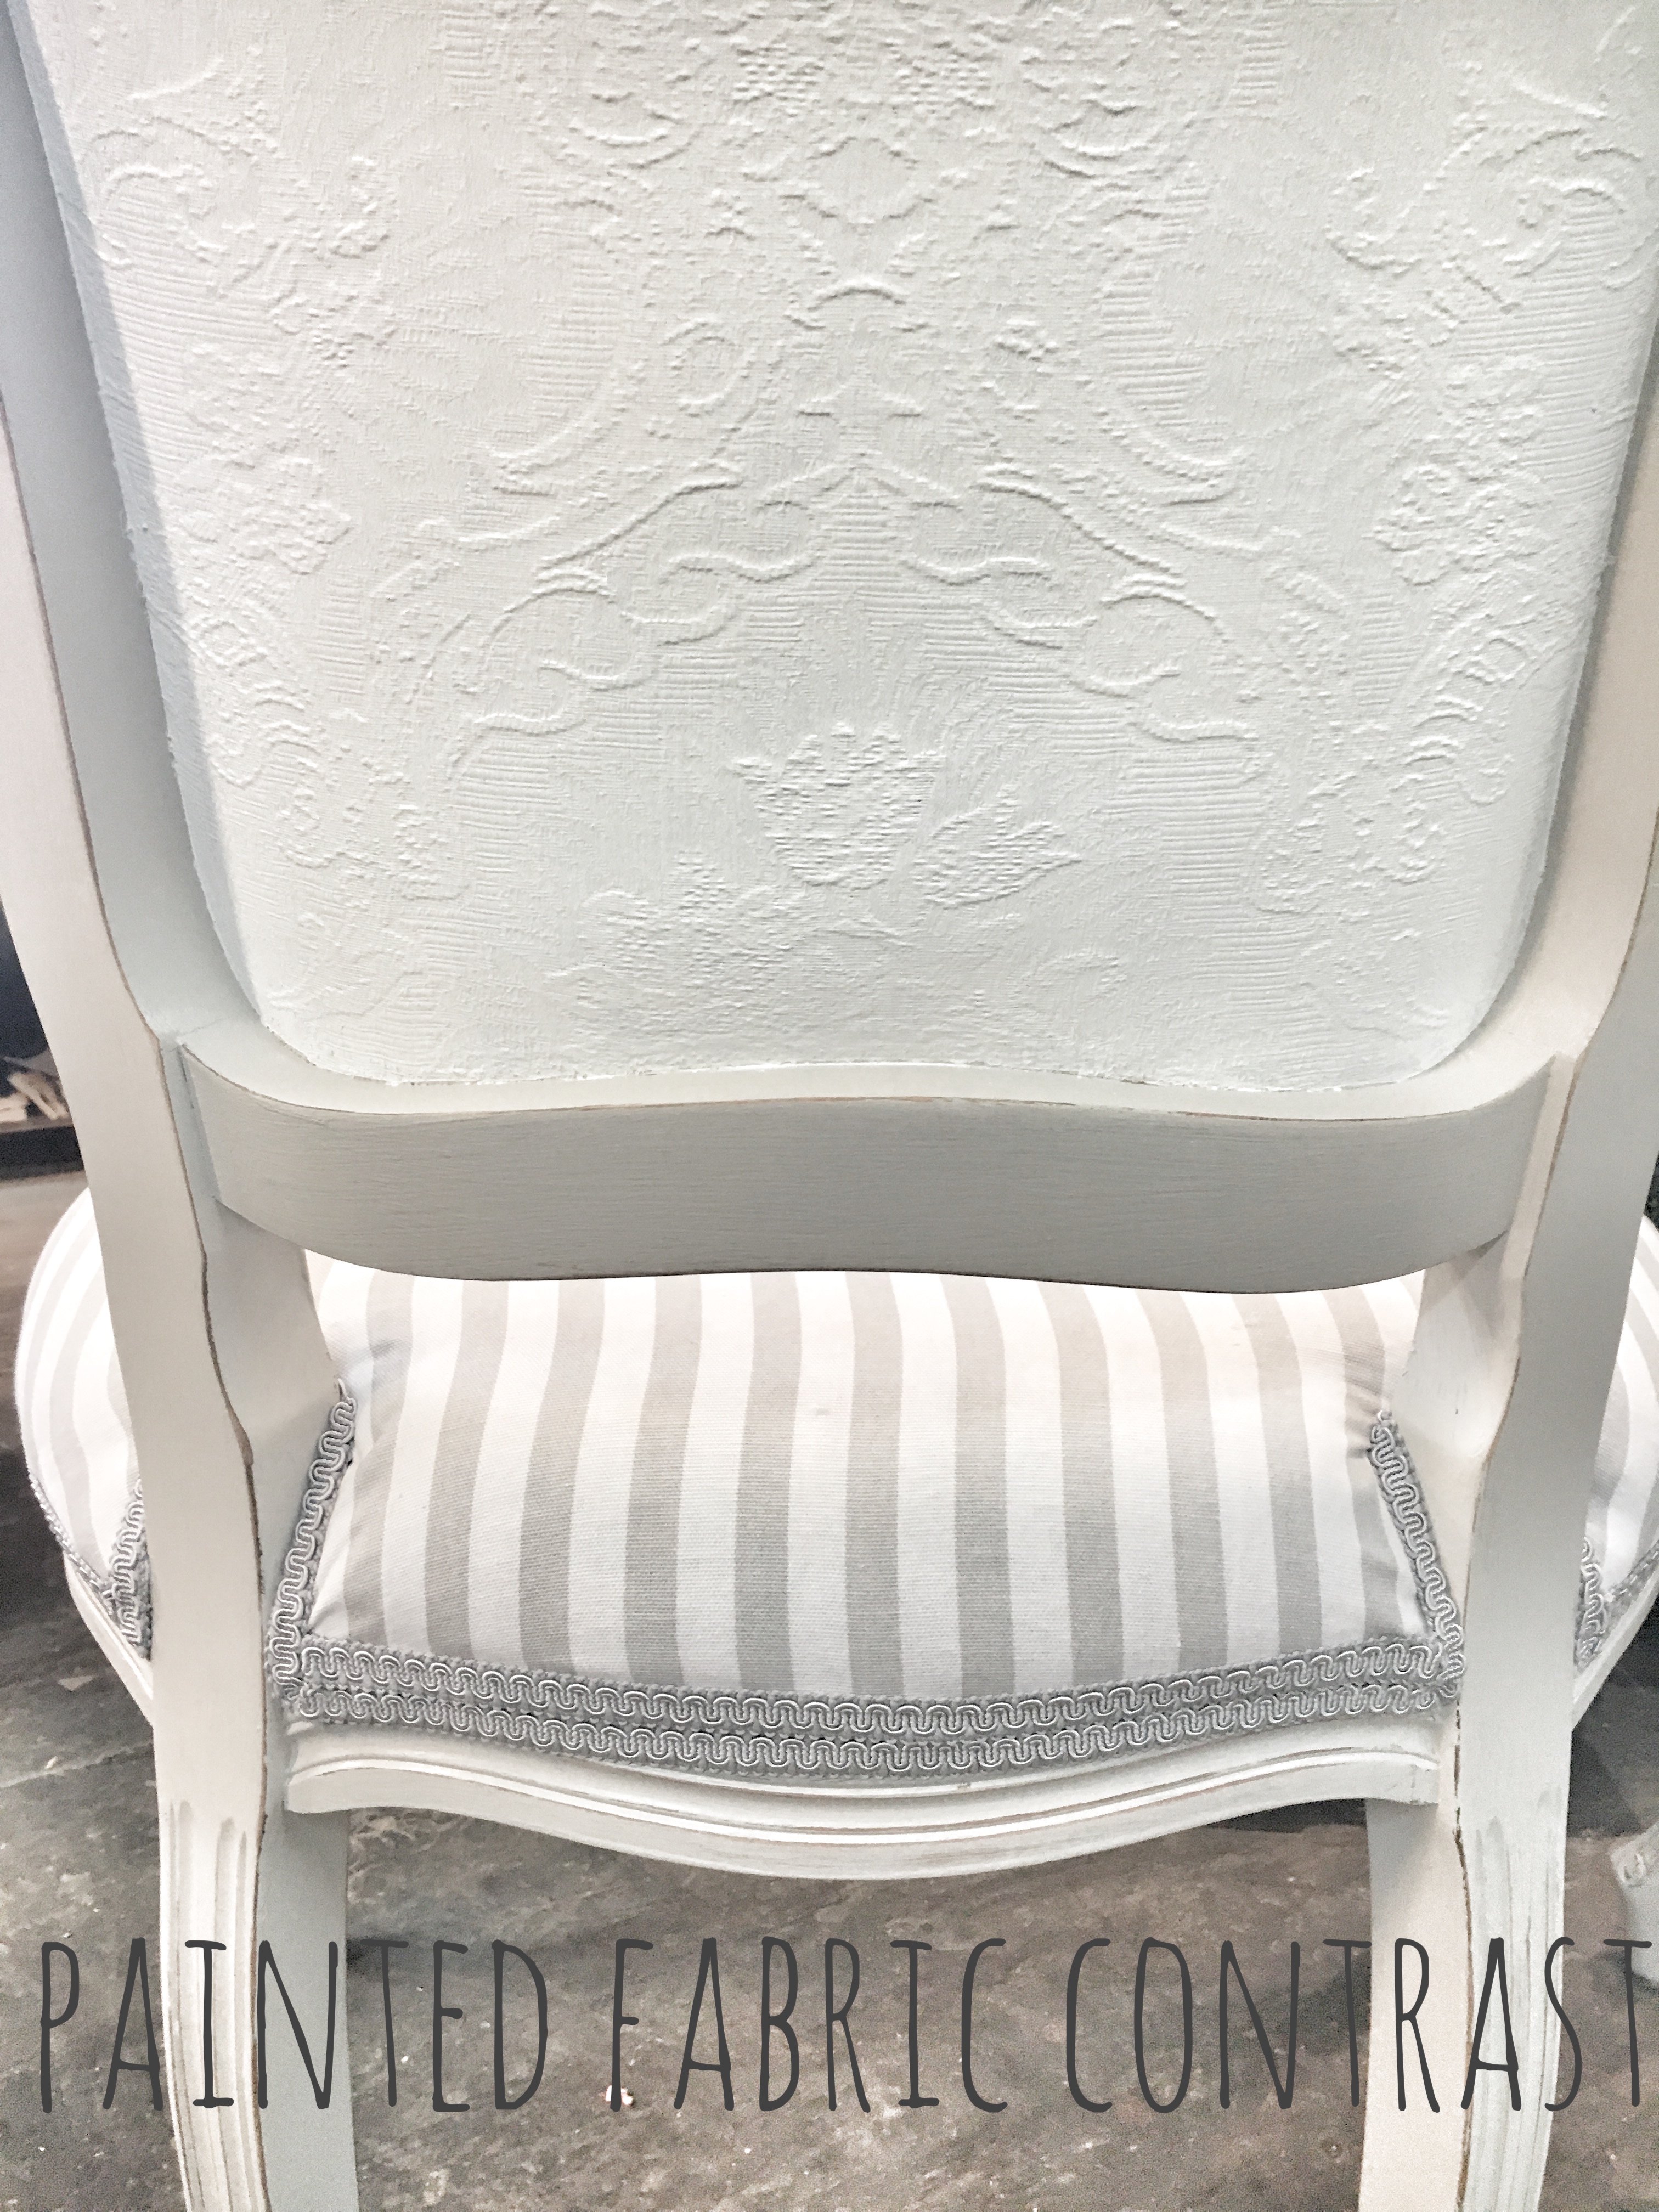
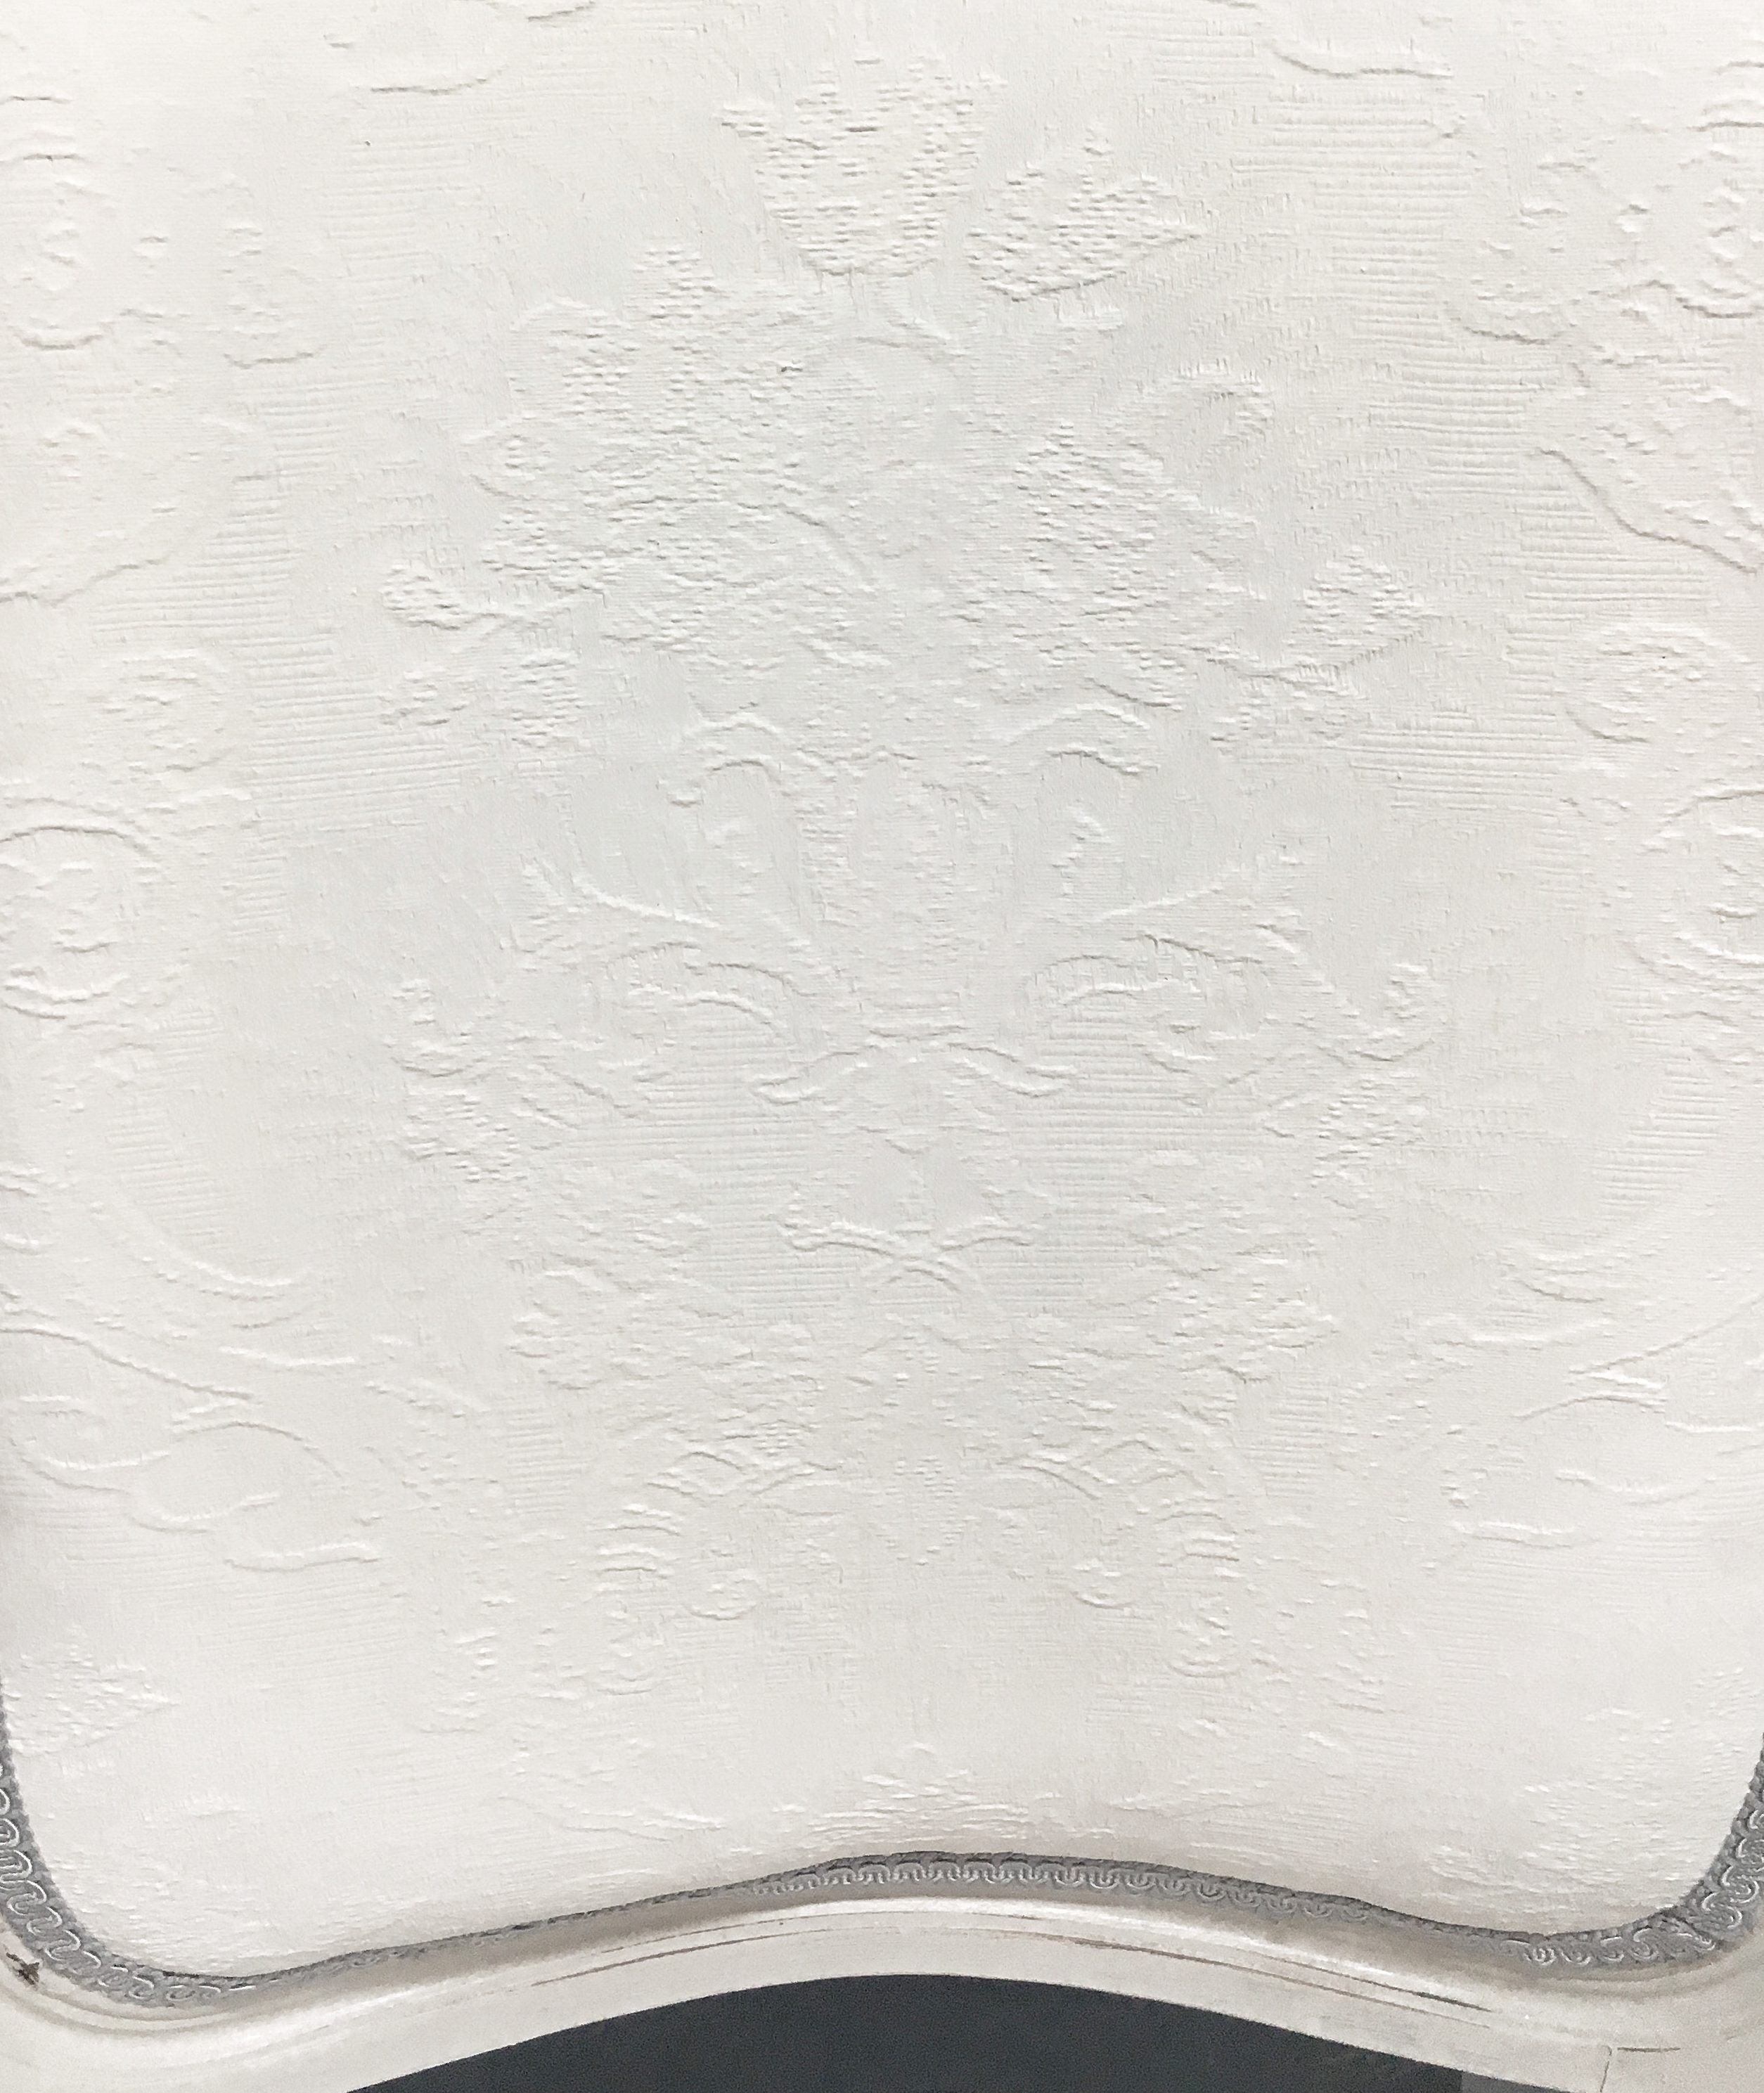
Let’s be honest, I could have taken the panel out and reupholstered it, but any time less money and work is required to make something look better, I’m all for it. It also gave me the opportunity to try out something else!
Reupholstering
I said this wasn’t a tutorial, and it’s not, but I will share a little bit of what I did, and the materials and resources I used! I picked out the striped fabric at Hobby Lobby for 40% off (yay for coupons)! This technically wasn’t even “upholstery fabric,” but I liked the pattern/color, and I have used canvas fabric like this for other projects and it’s pretty sturdy.
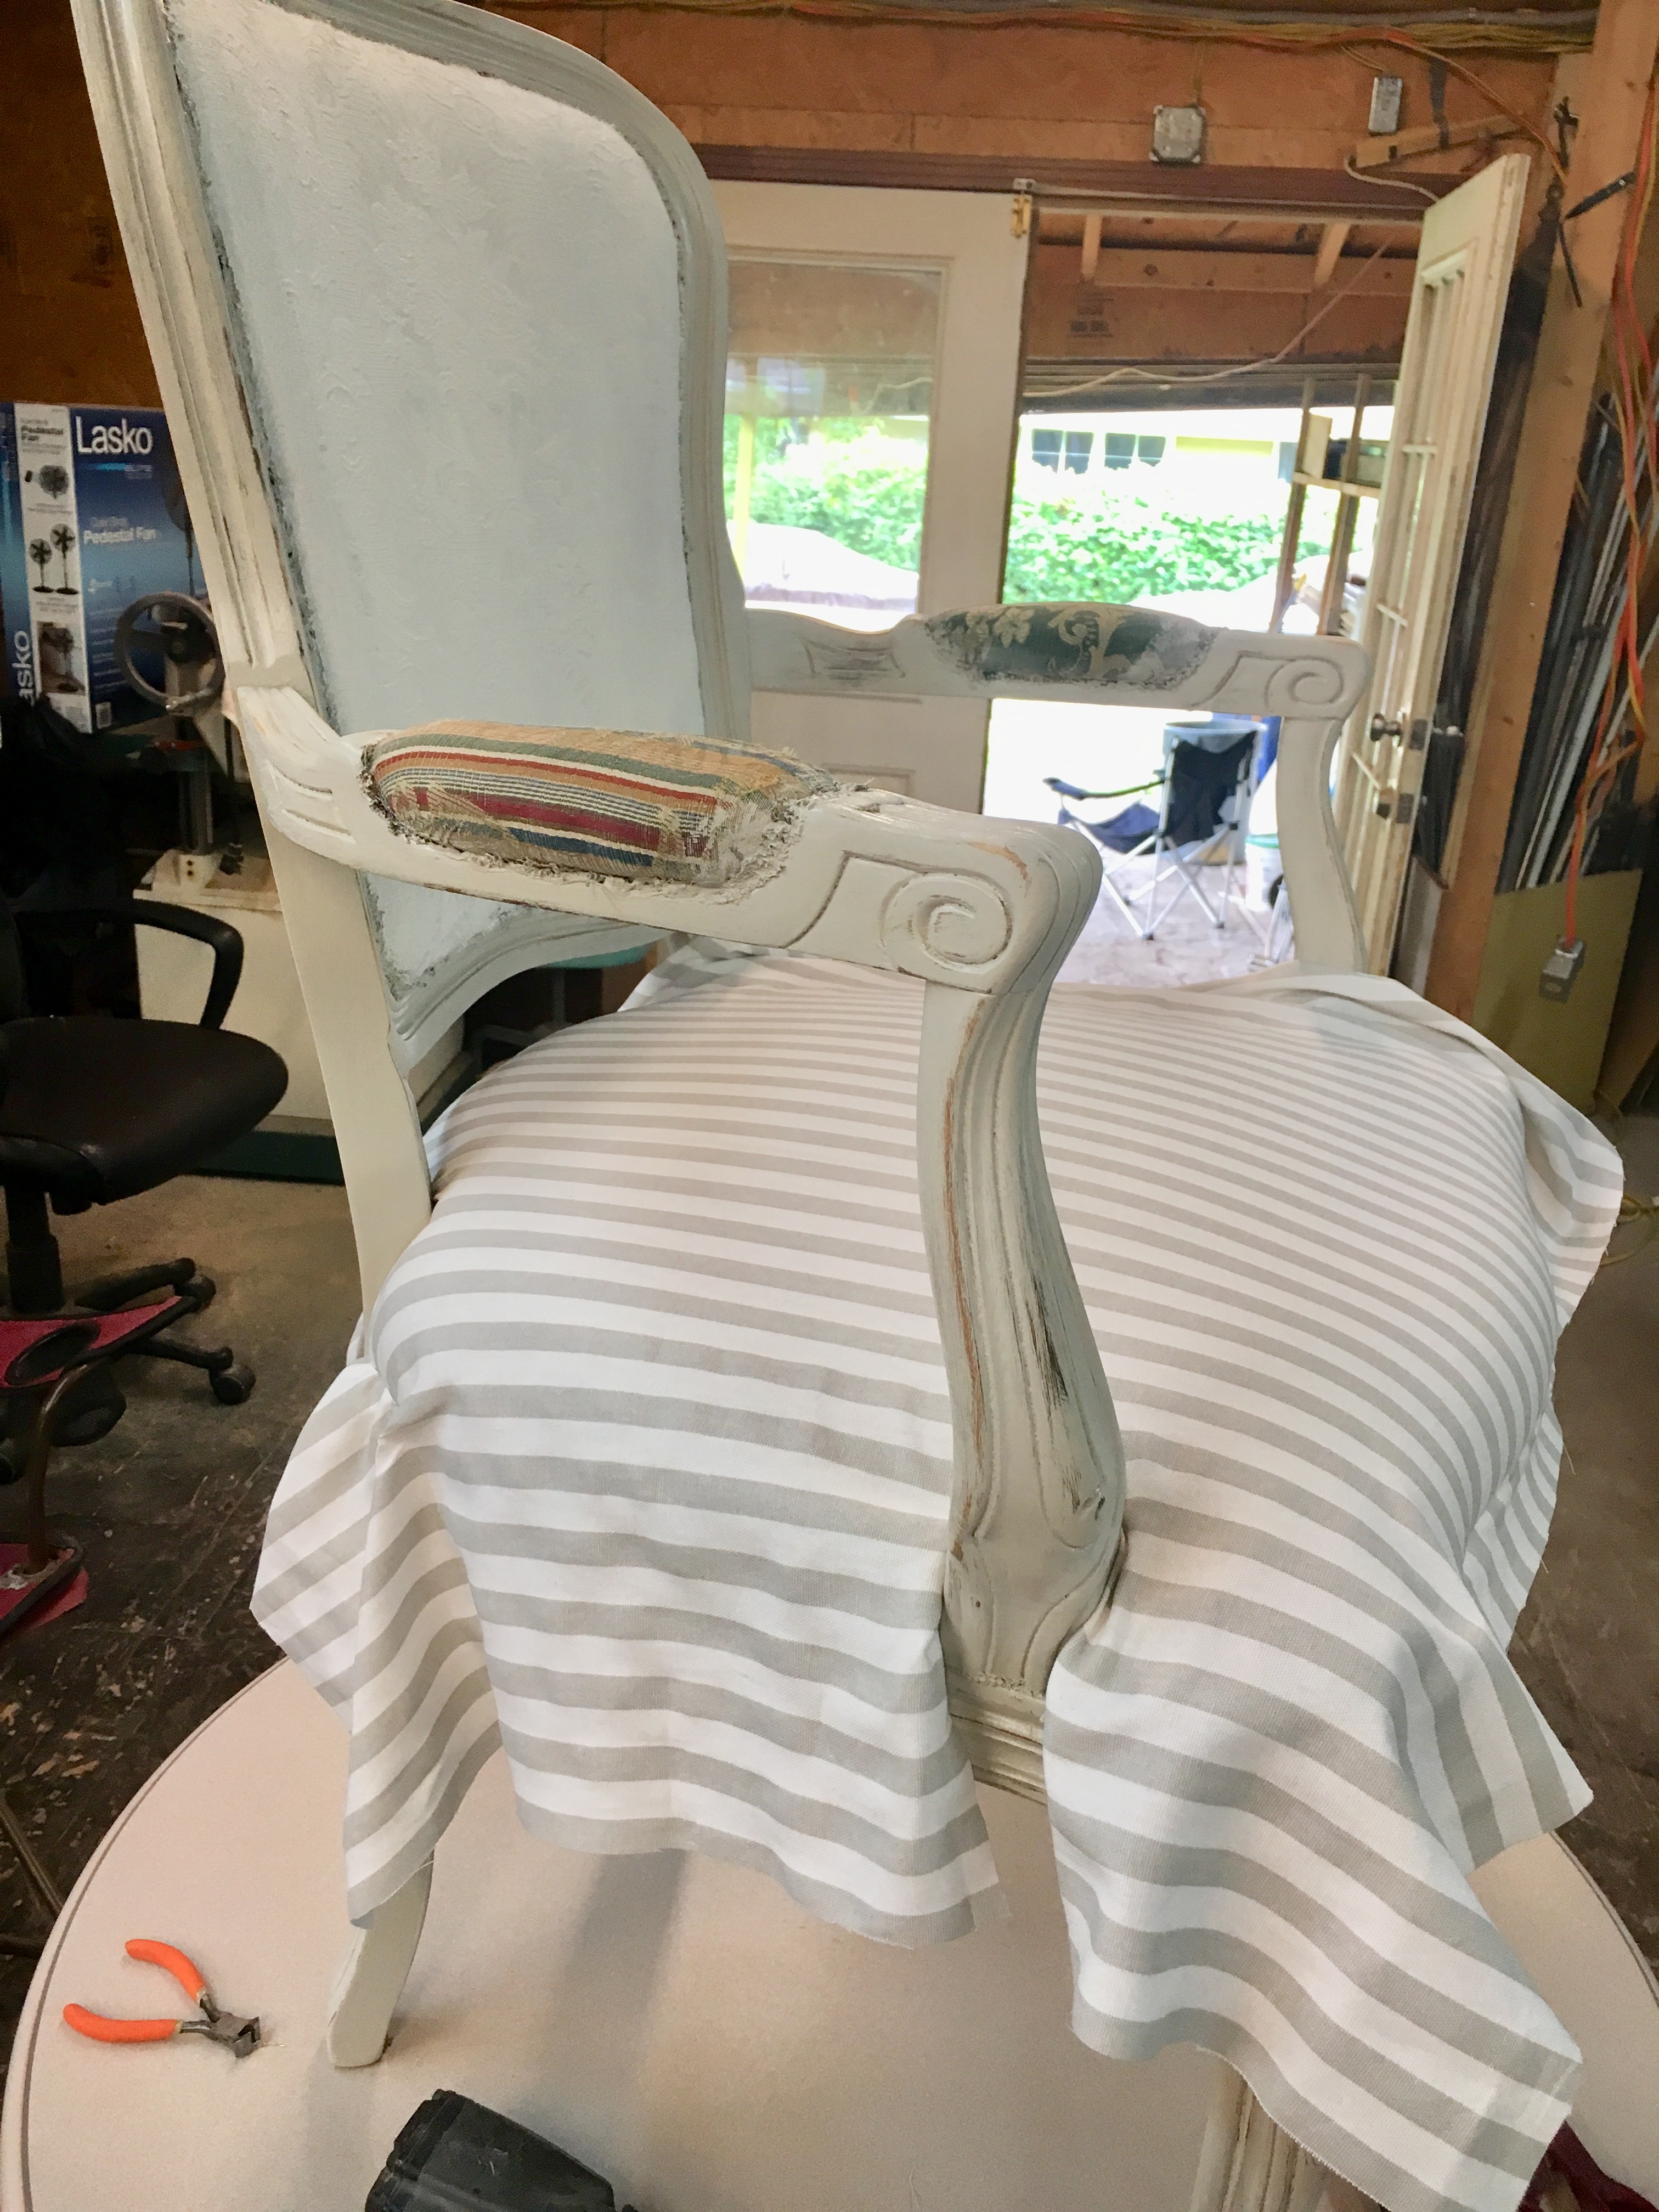
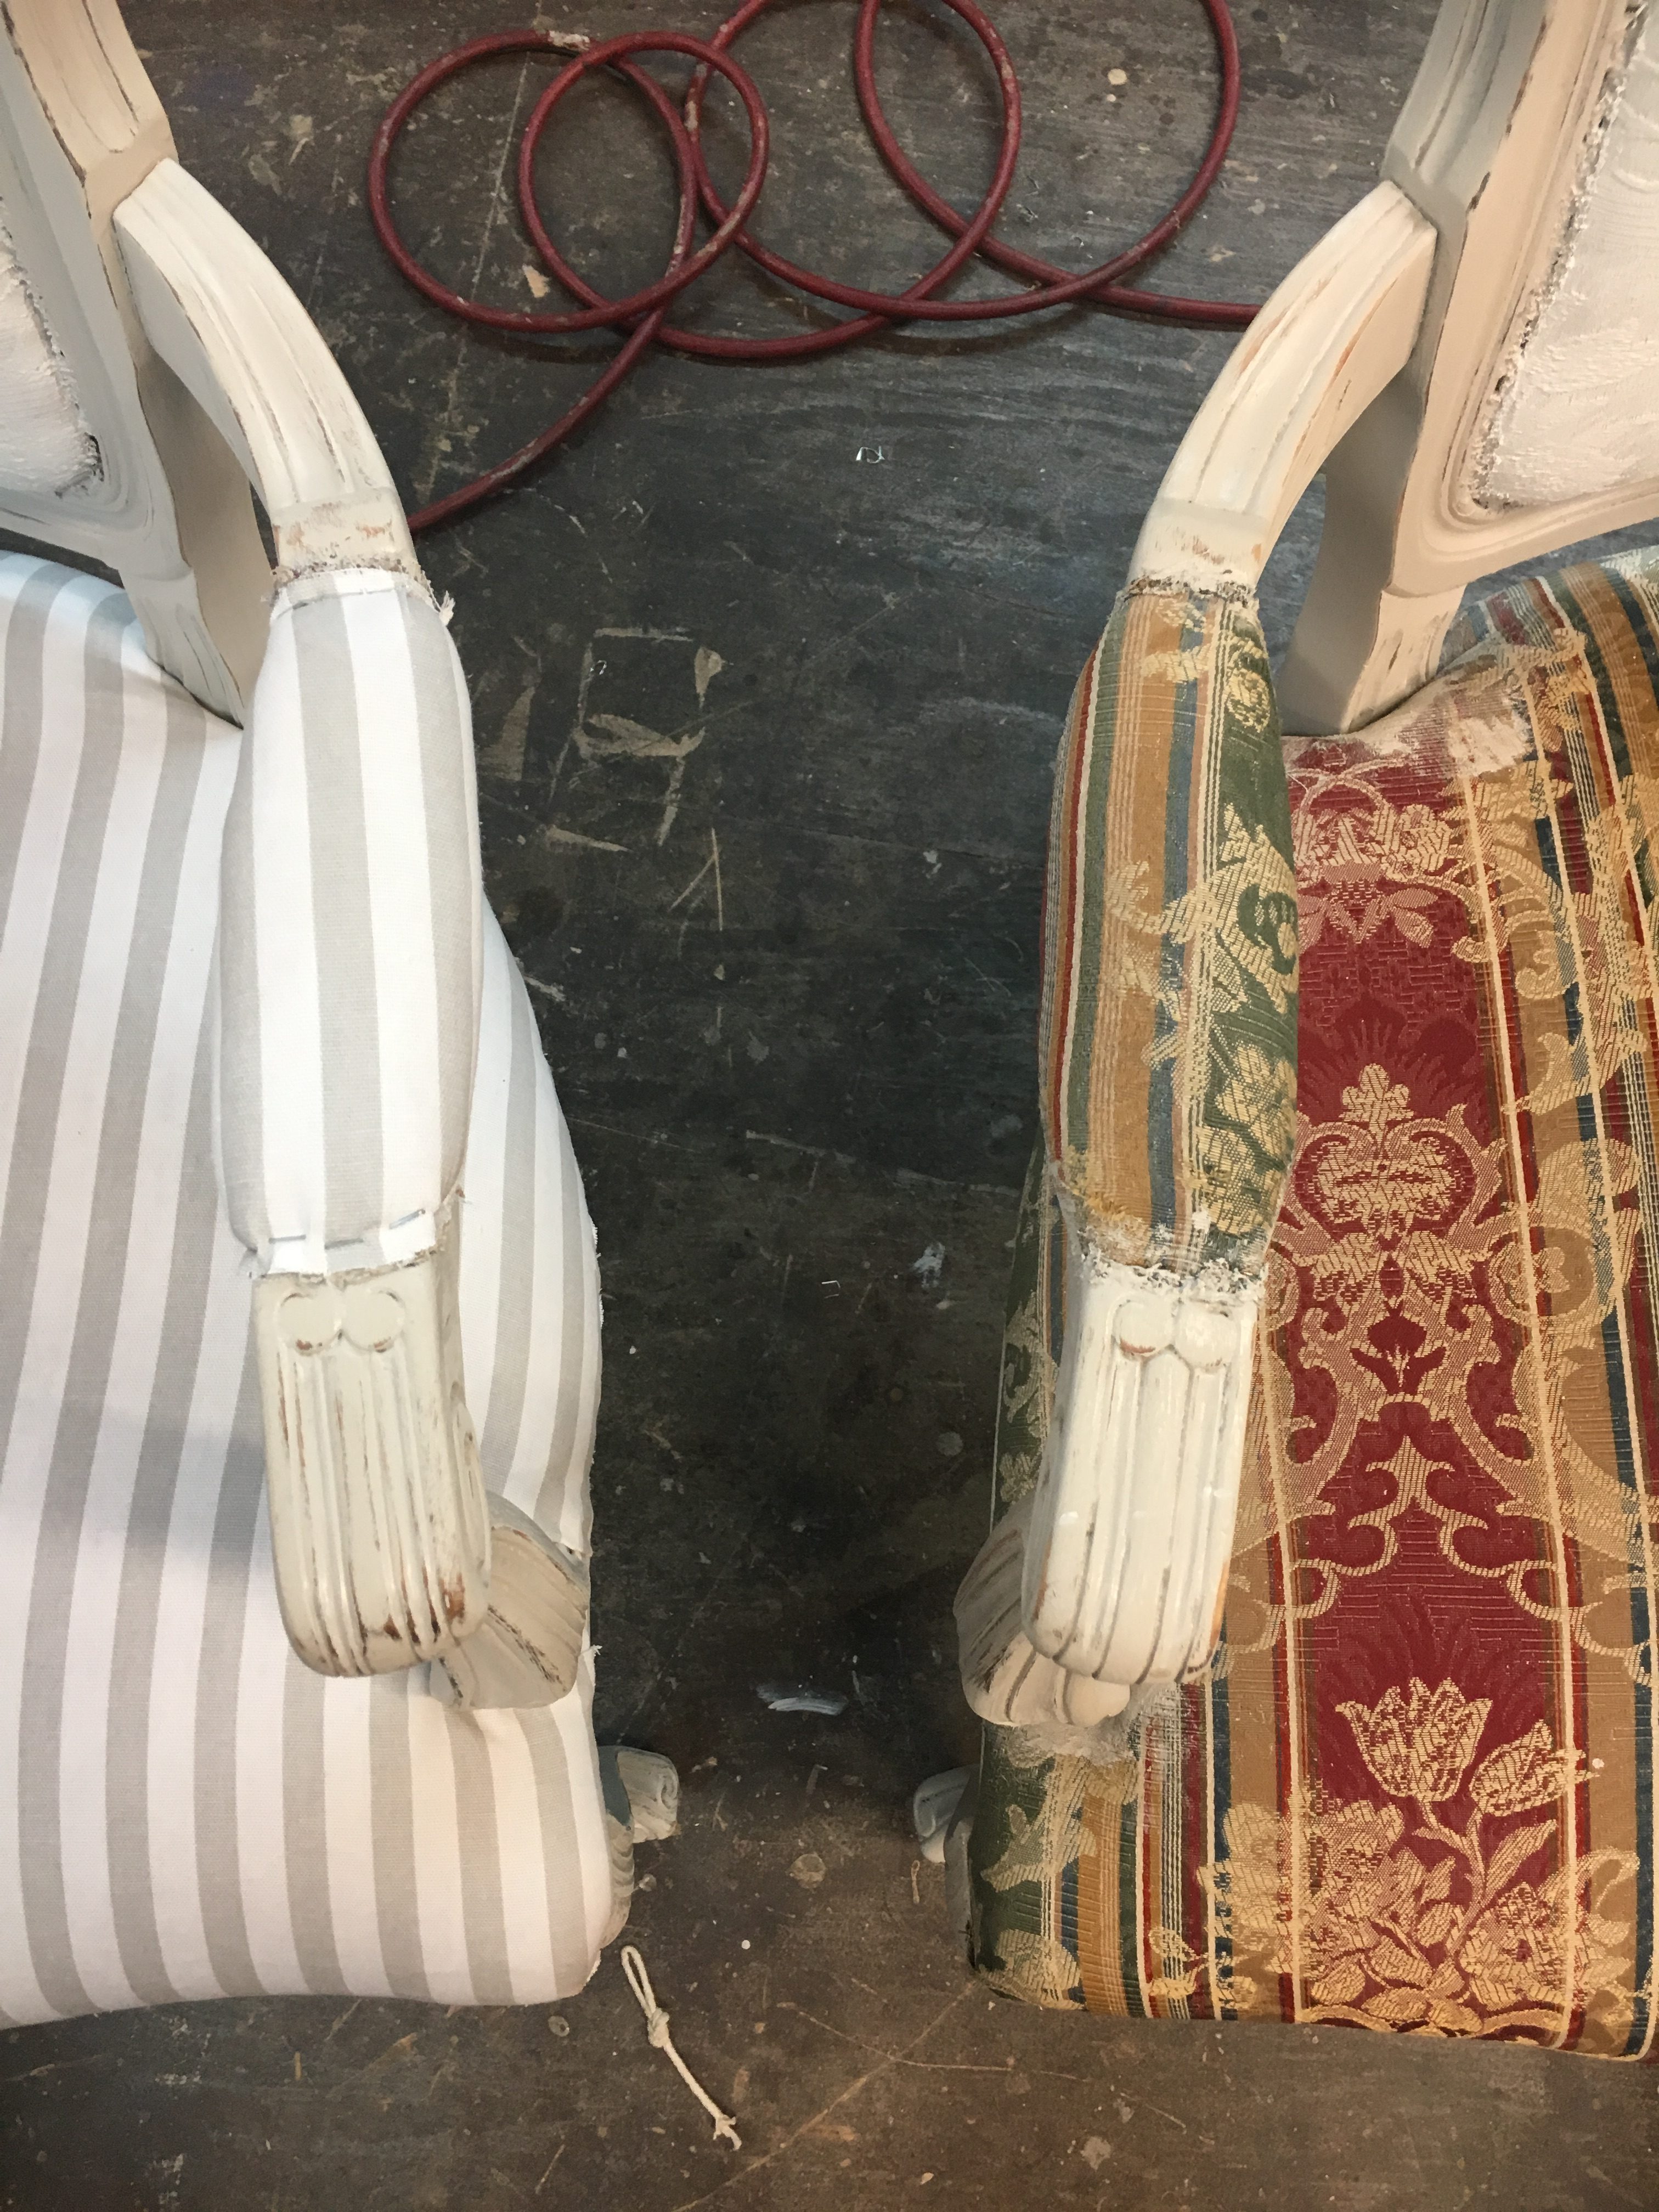
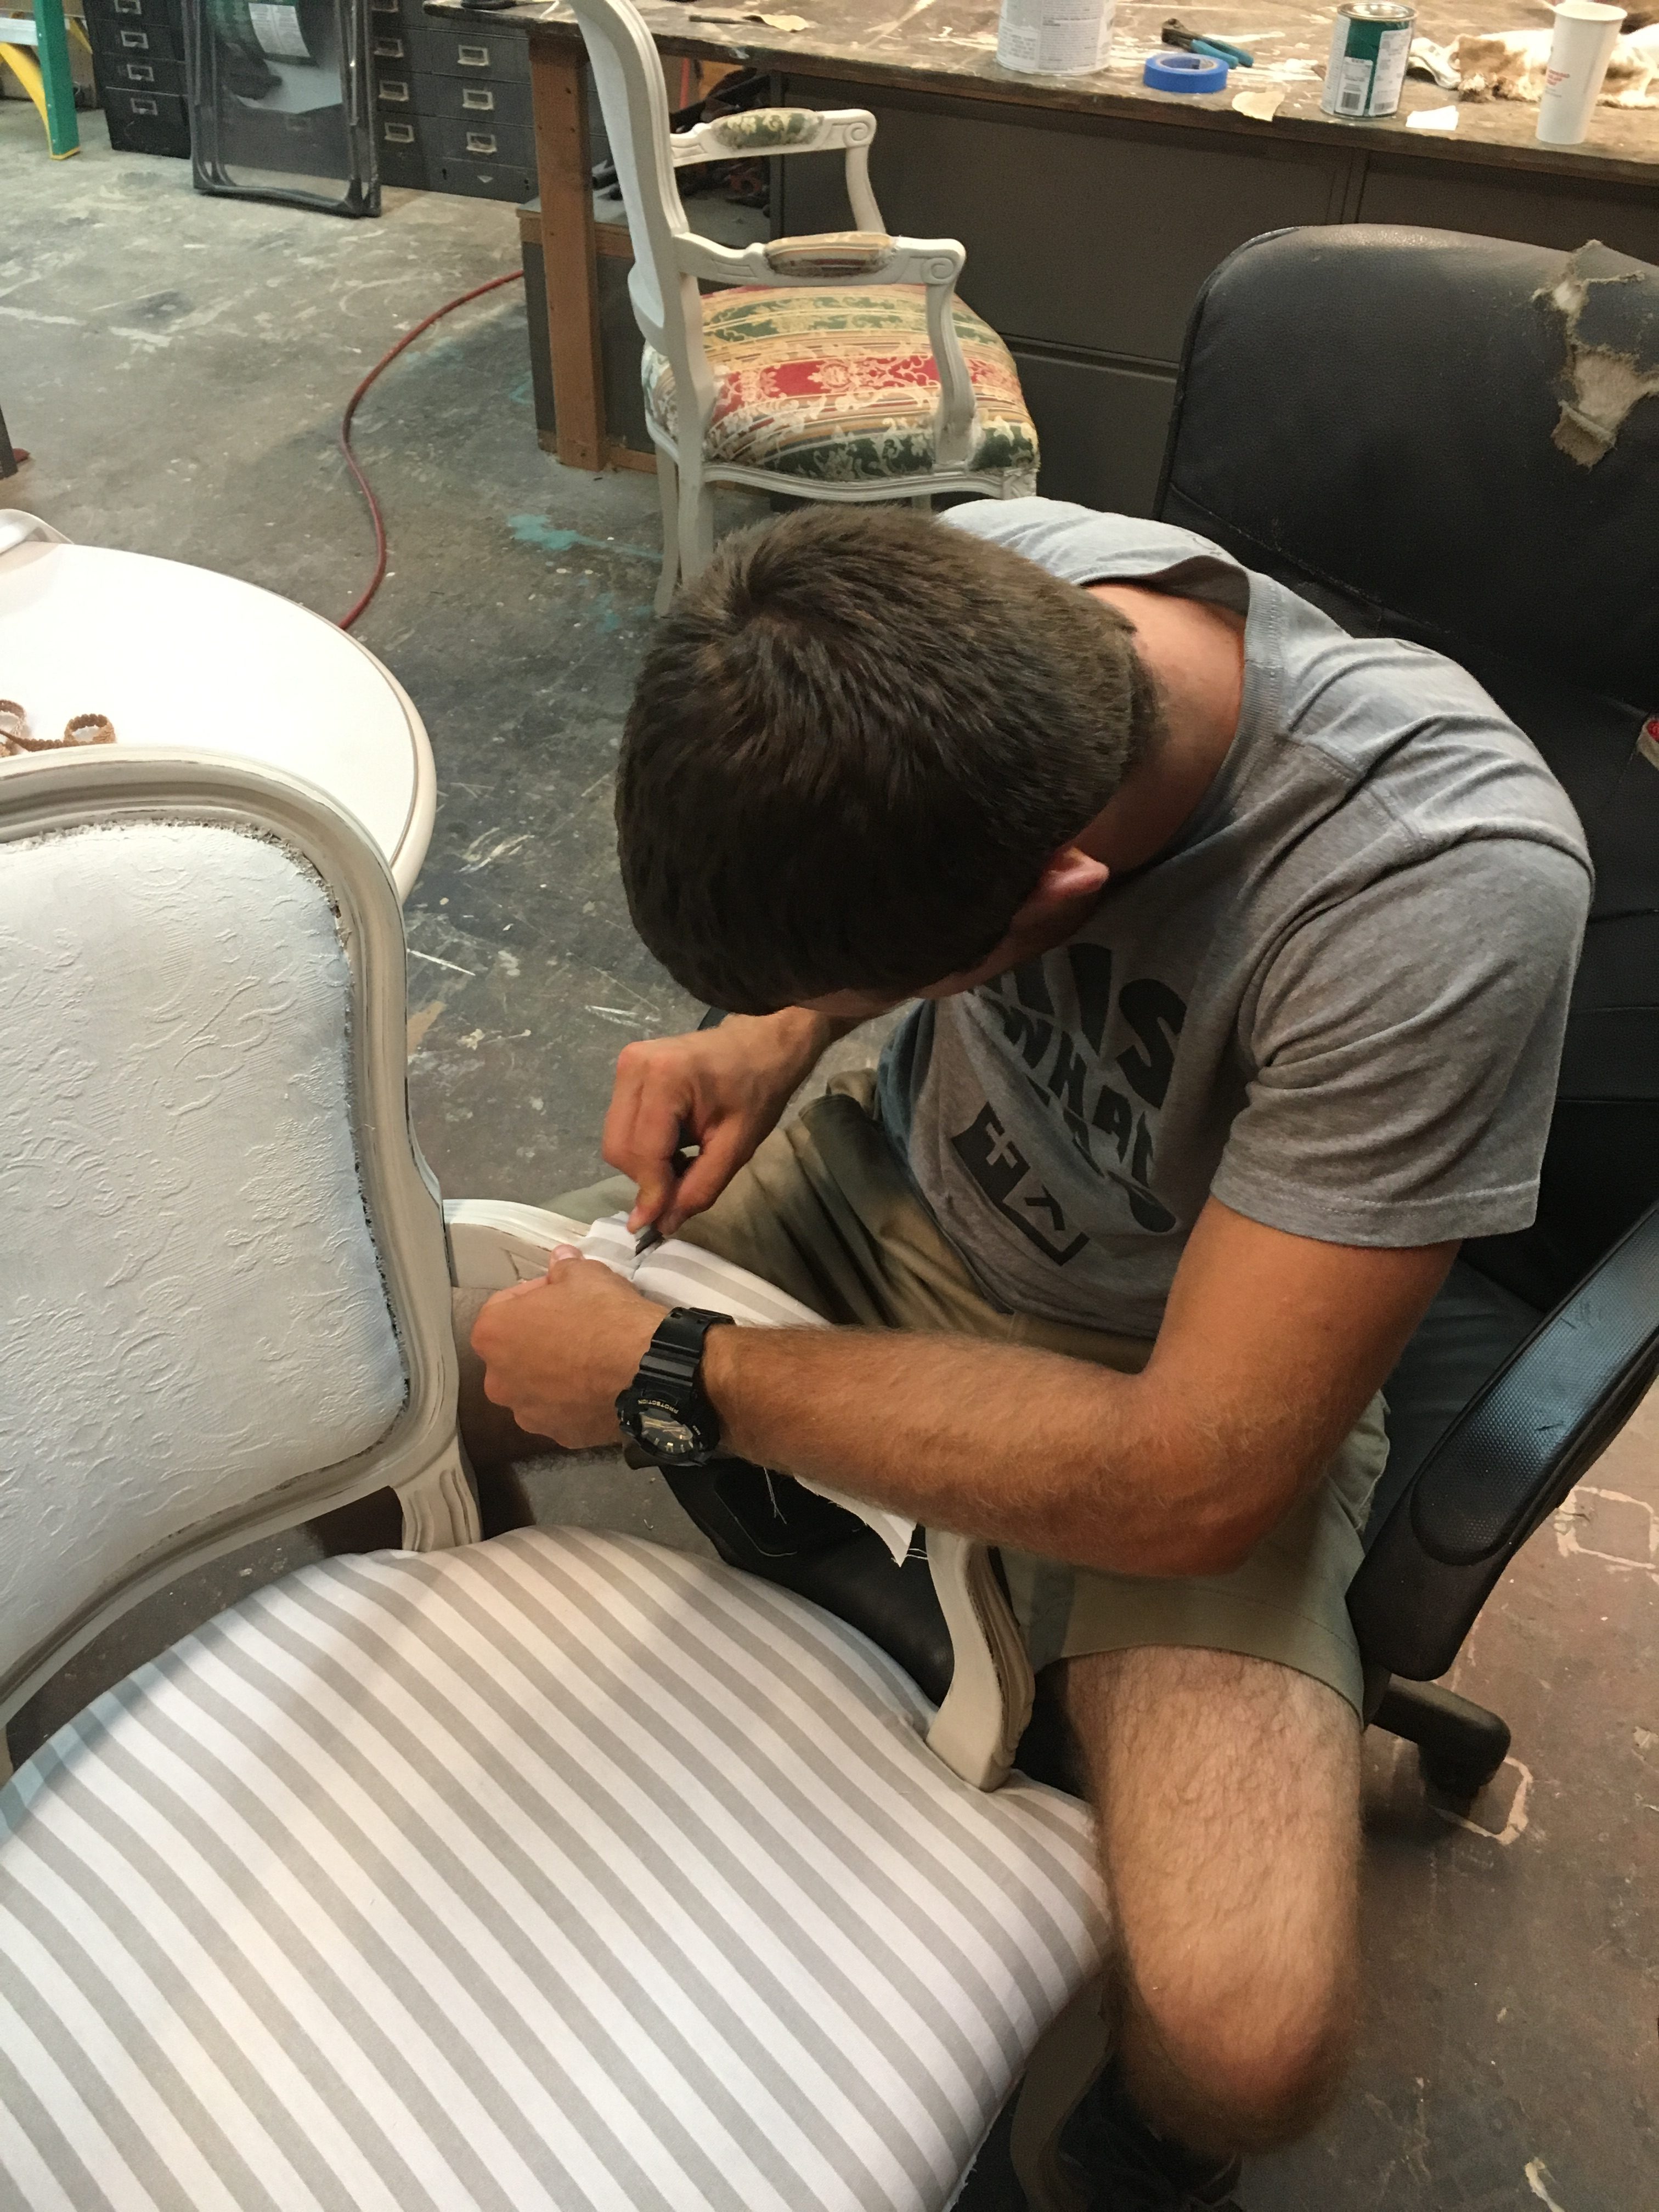
I watched several youtube tutorials, but I found this video tutorial to be the most helpful for this project. On these chairs, I didn’t even bother taking off the old fabric. I’m covering it anyways aren’t I? That’s what I told myself at least. I didn’t want to deal with pulling glue and staples out if I didn’t have to, besides, it was holding the padding all nice and tight together which made the actual reupholstering a breeze. Logan helped me by cutting away the excess fabric with a razor blade.
Trim
Here’s where I ran into some issues…
About halfway through the second chair, I noticed my staples weren’t close enough to the frame to easily be covered by trim. I couldn’t pull the staples out at this point because the holes would be visible. So I knew I either needed 1″ trim (more expensive)… or I would have to use the normal 1/2″ trim and go around twice (also more expensive).
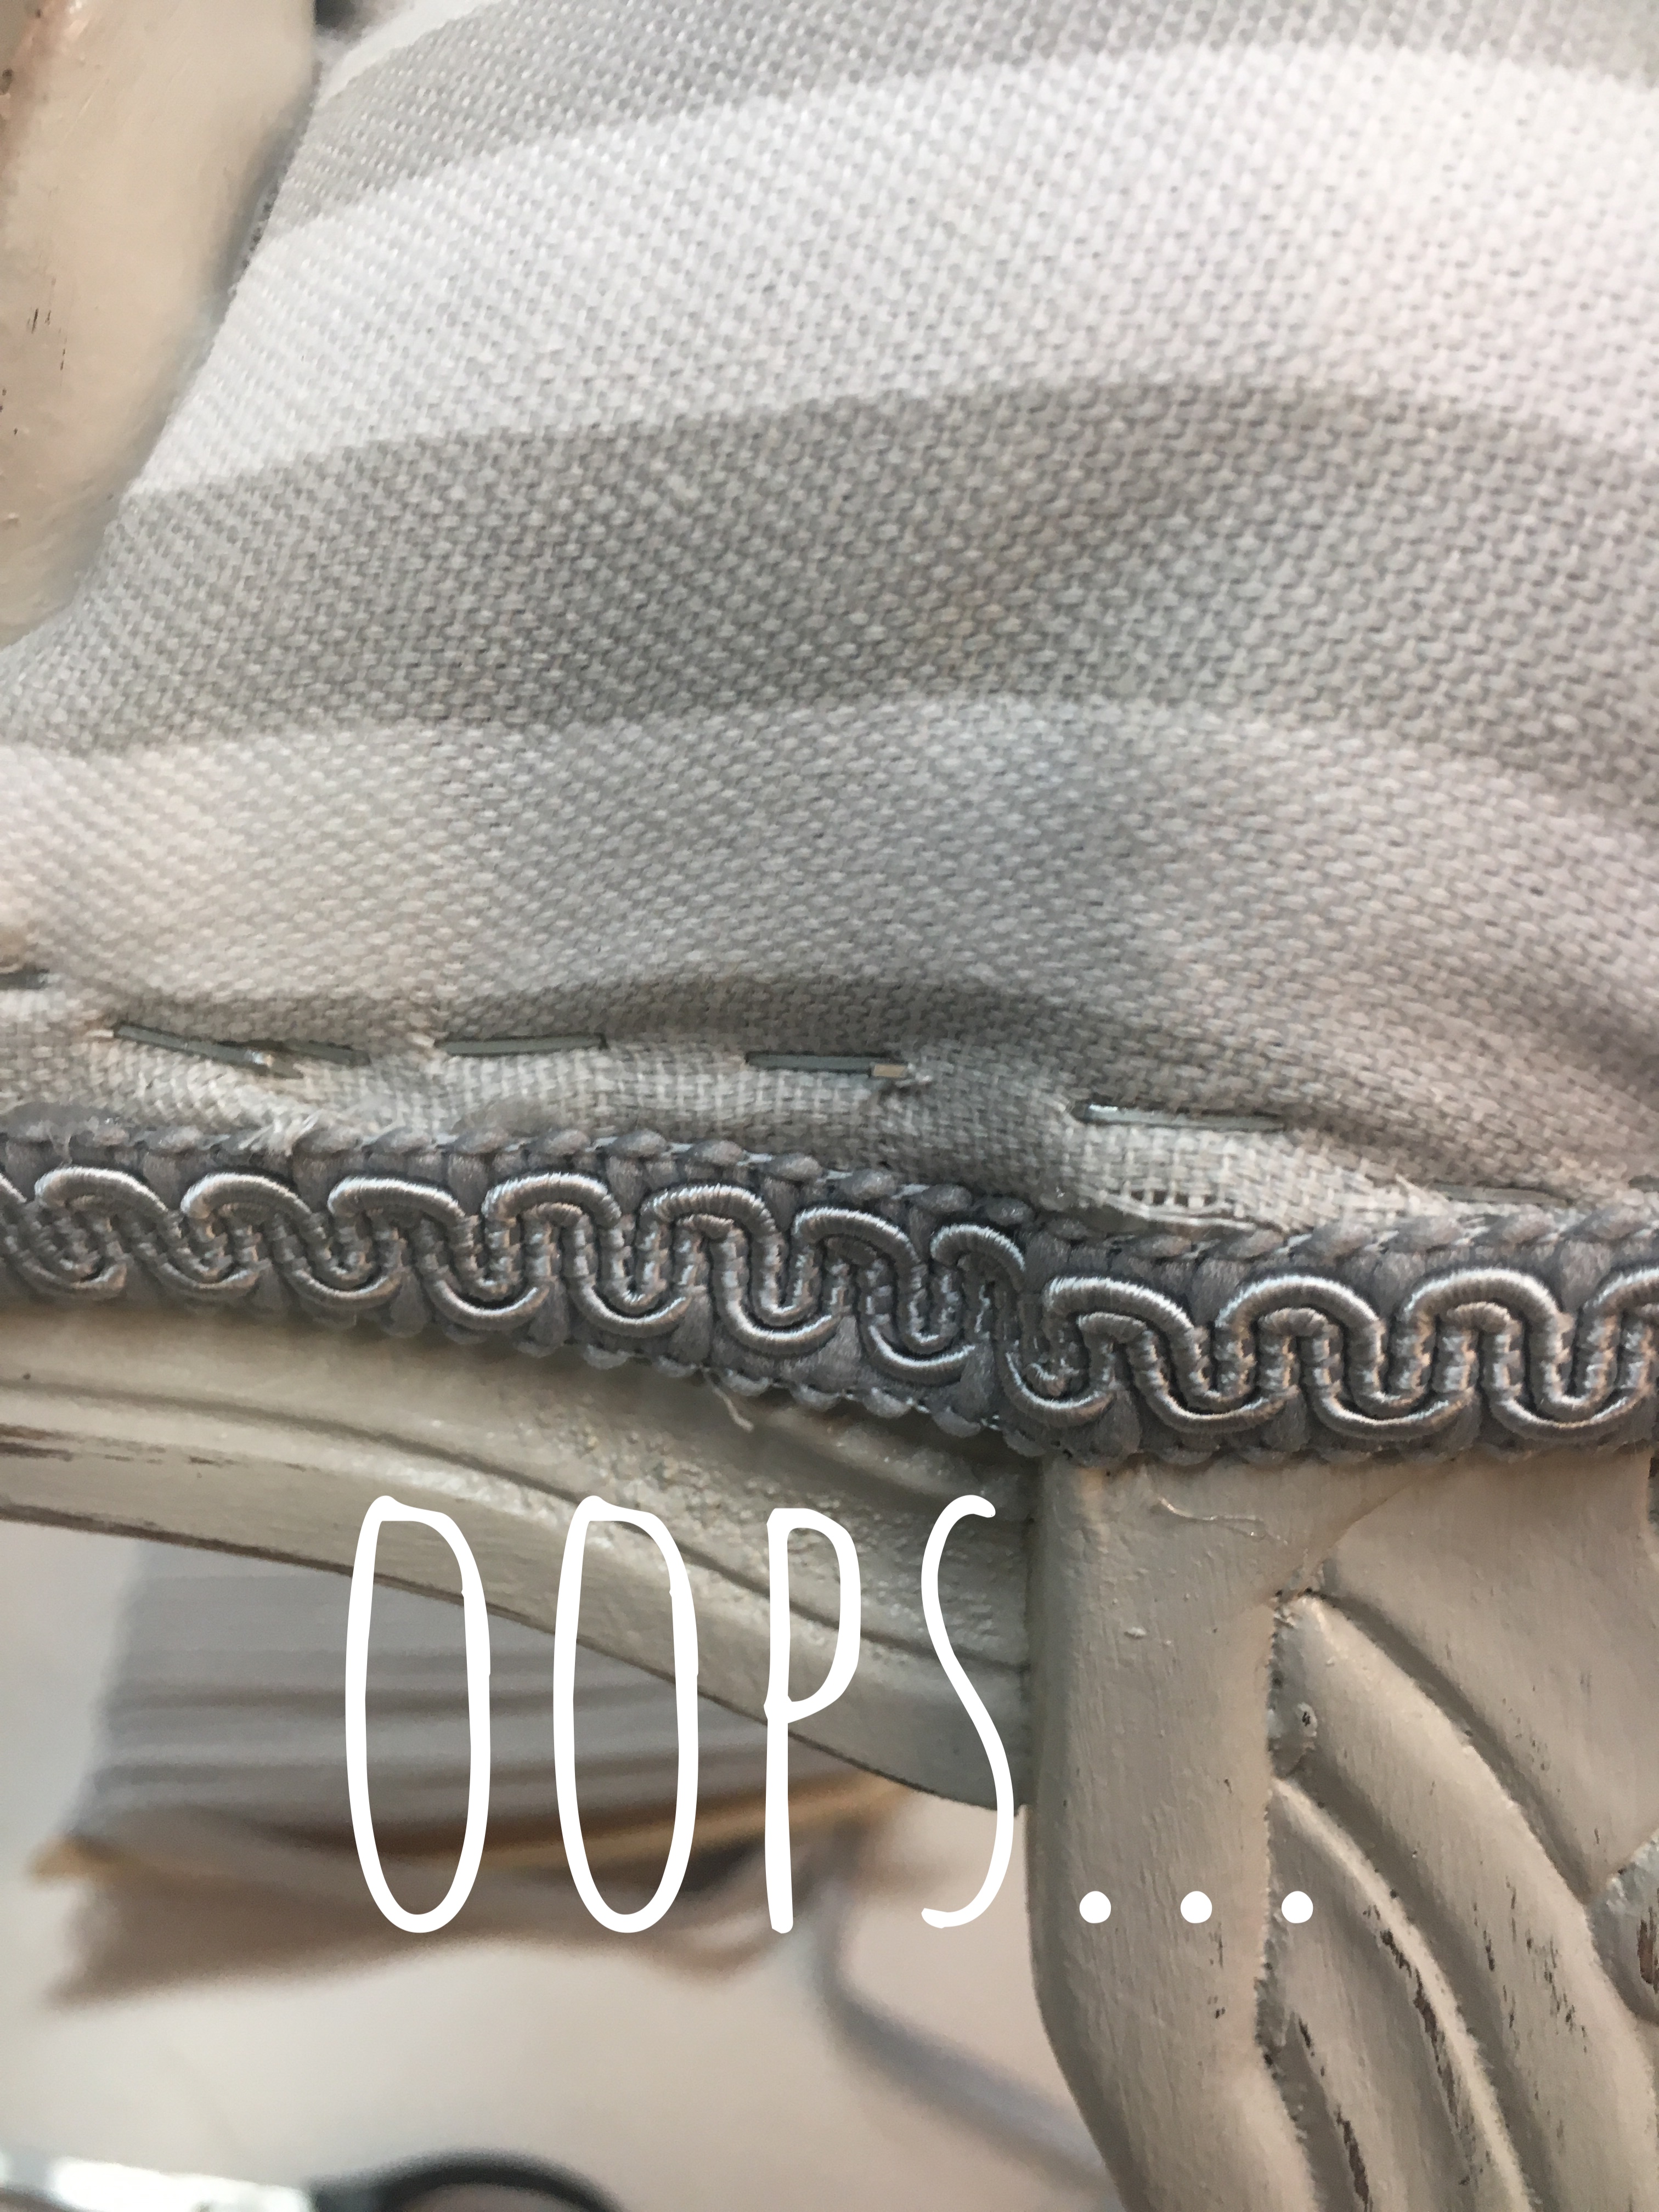
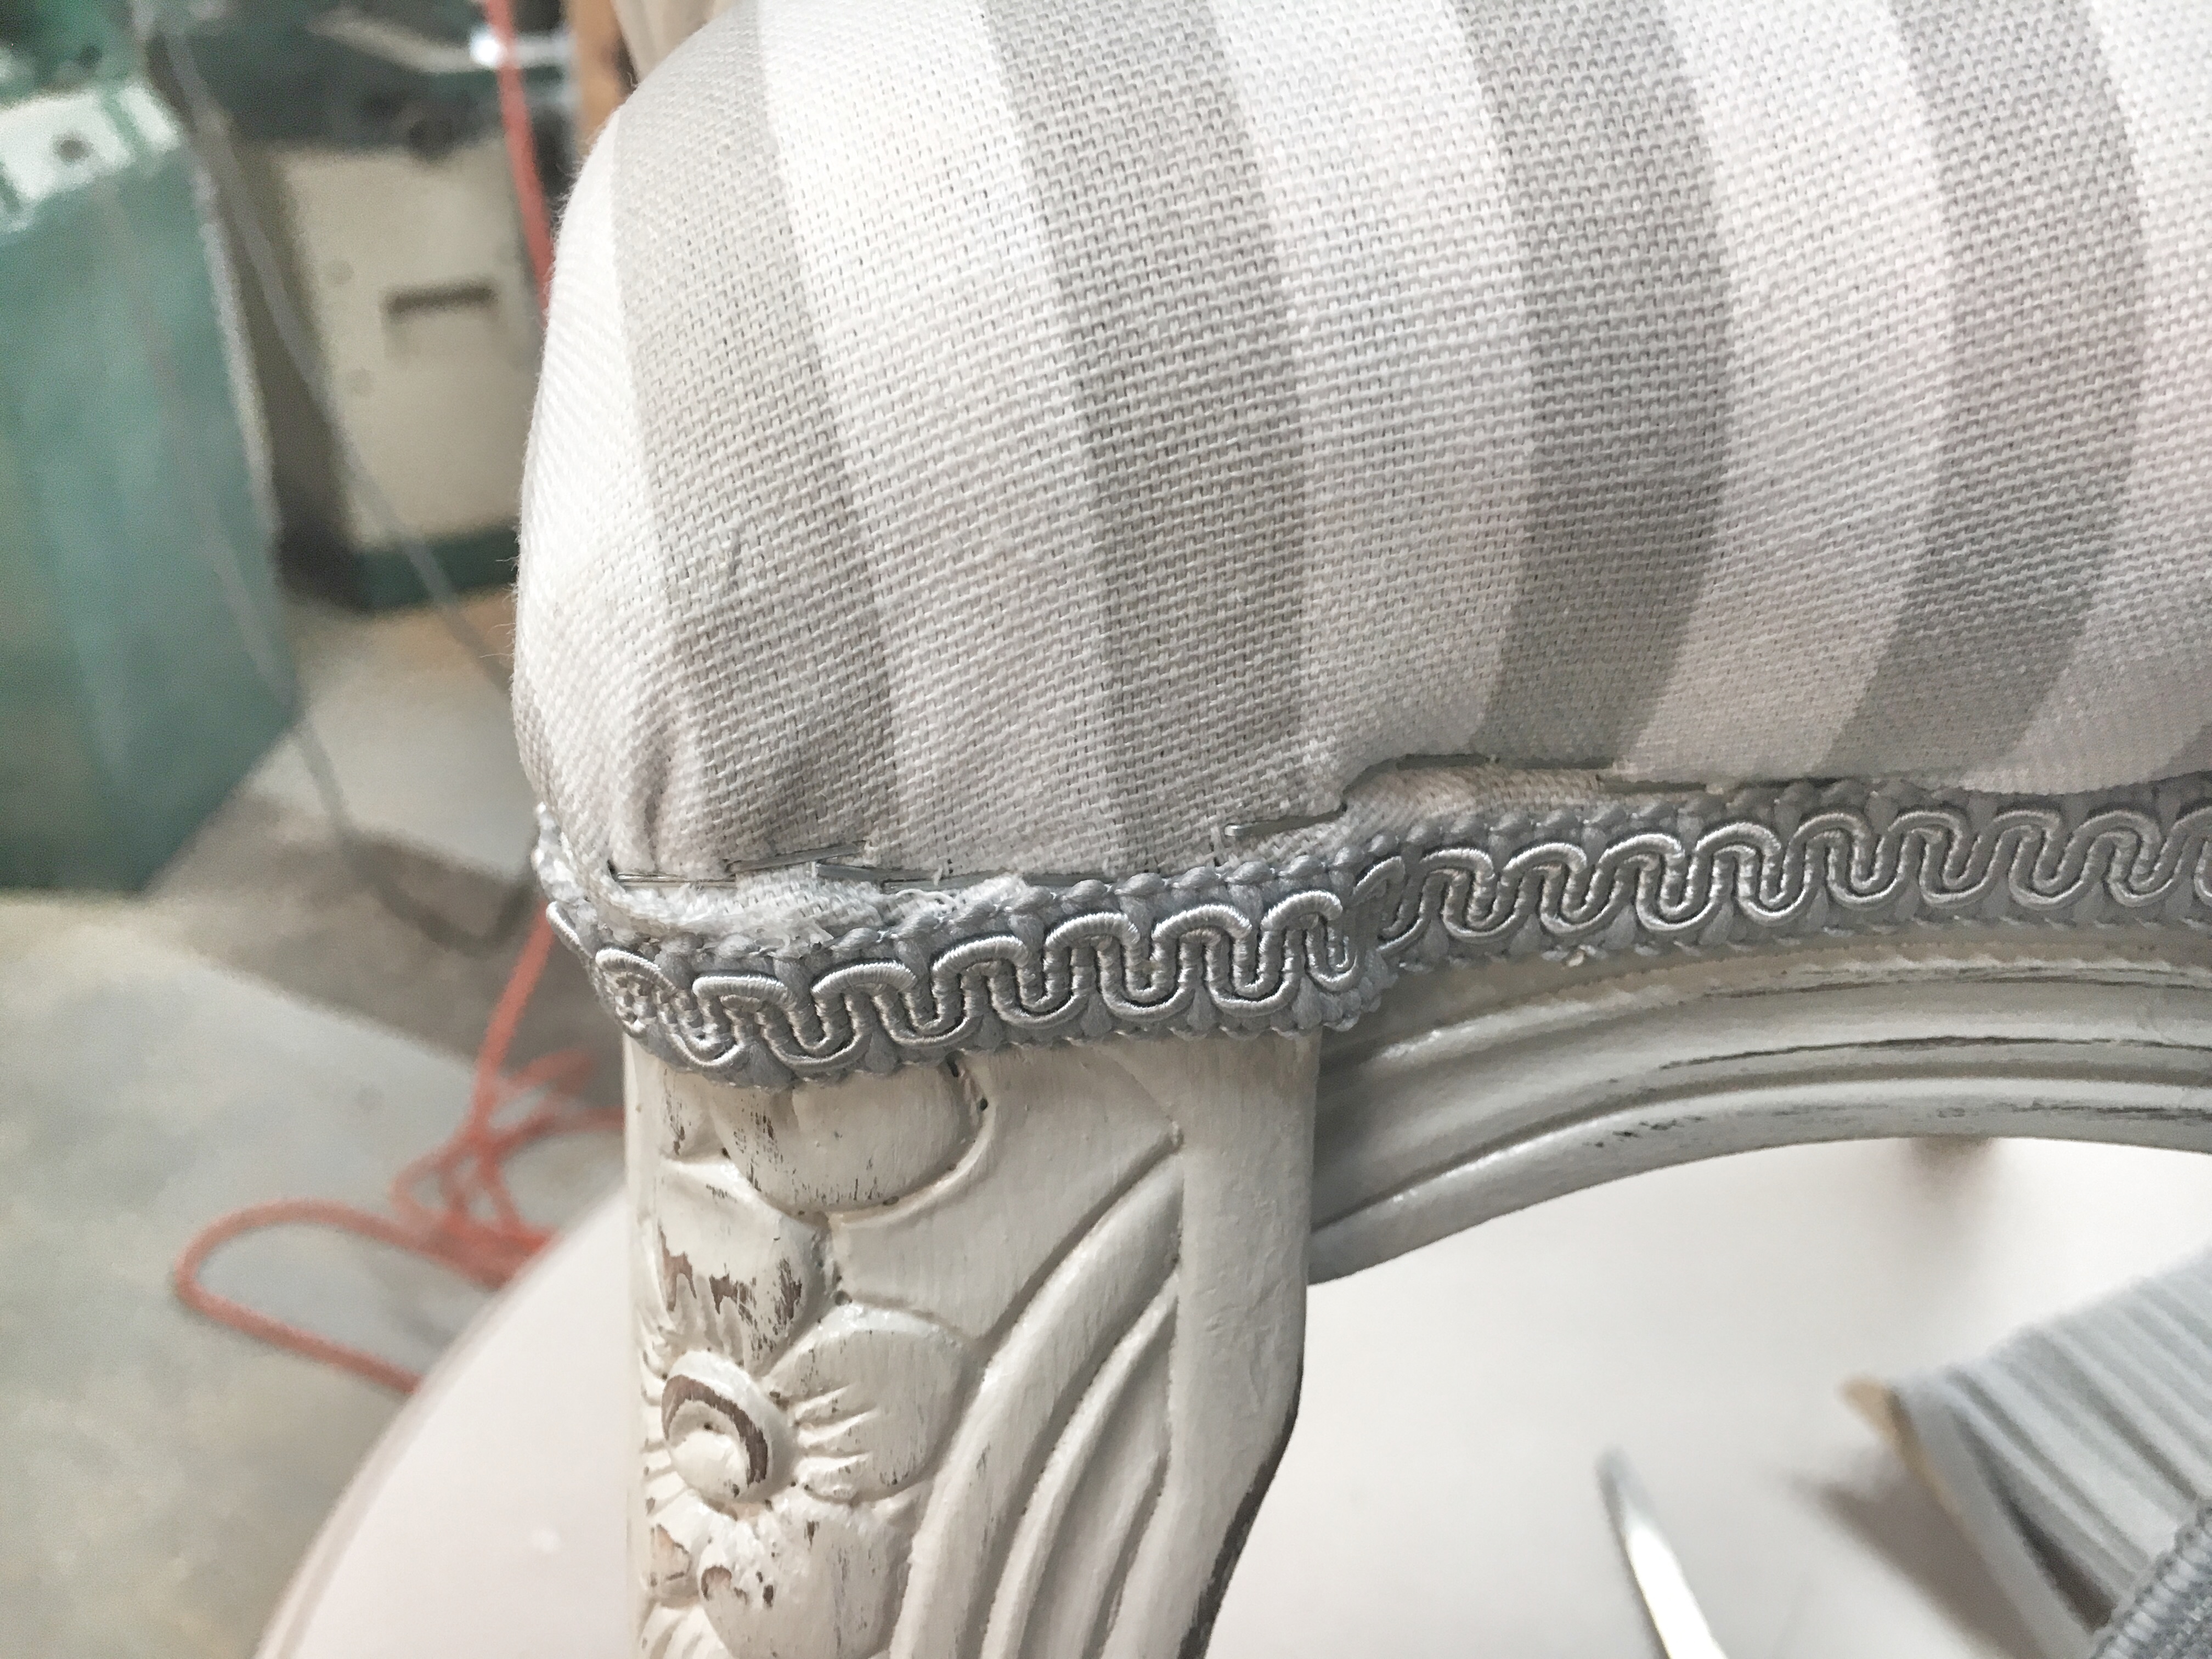
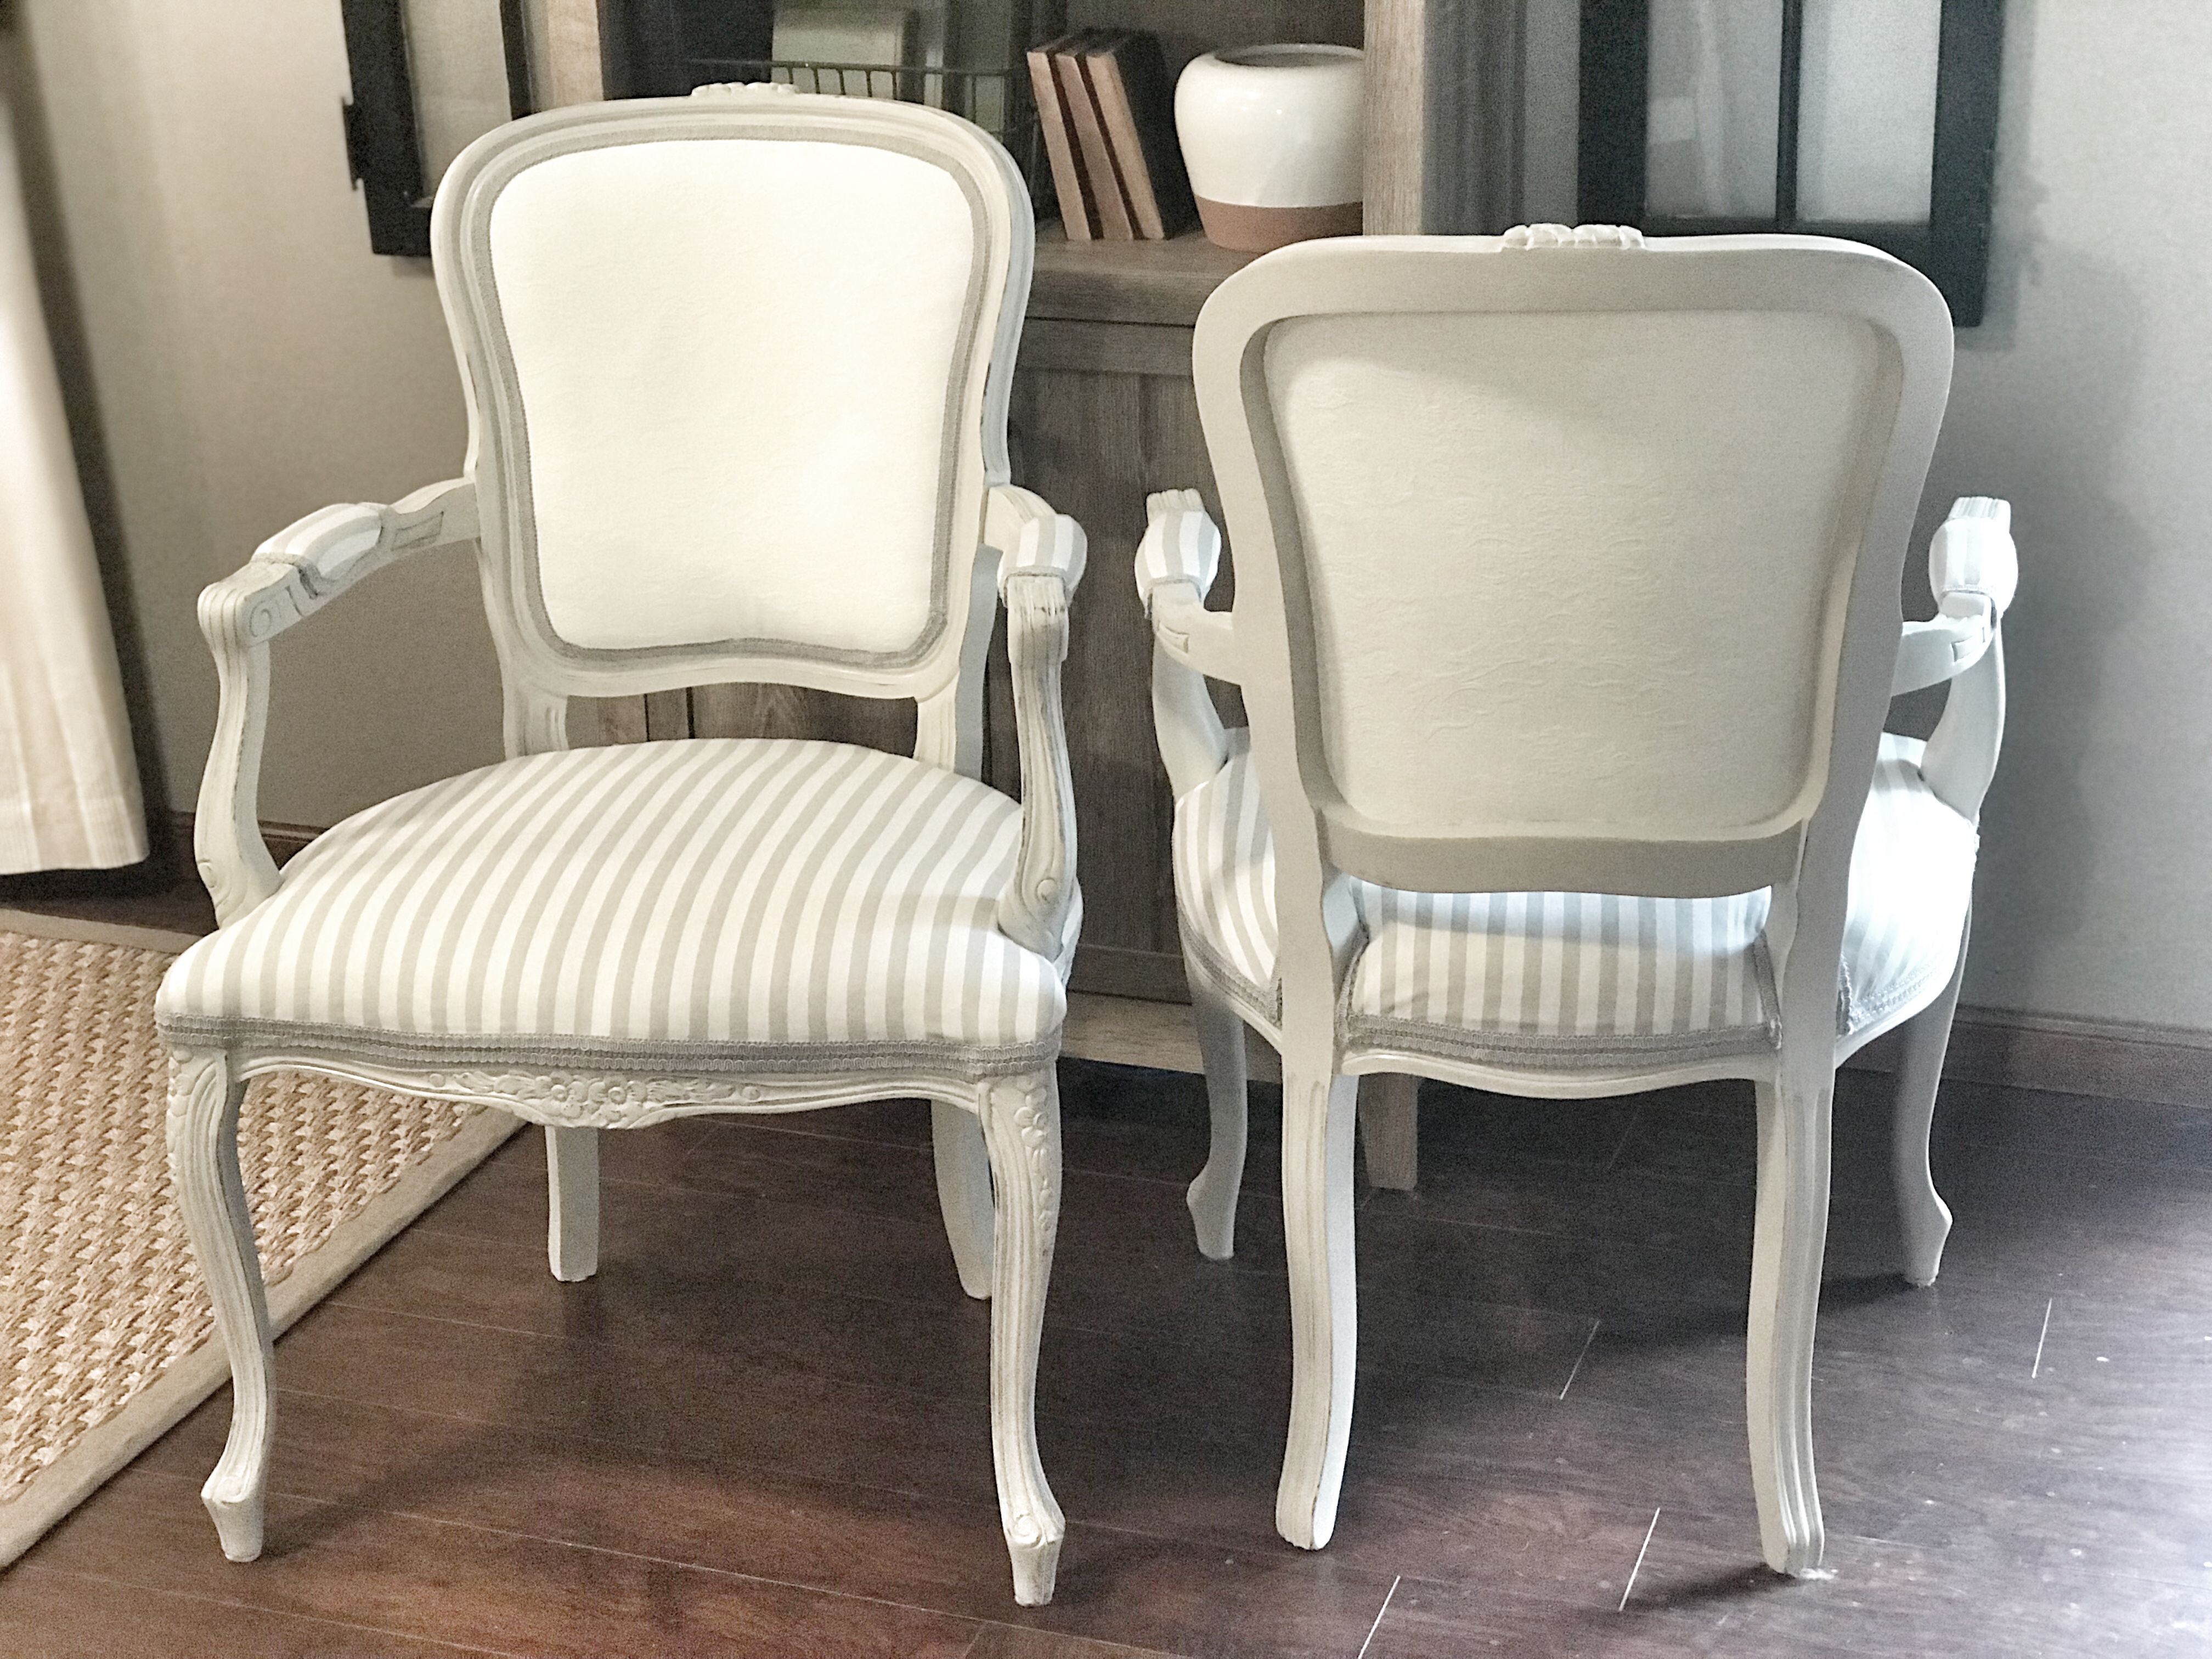
After some debate, and several trips to the store, I decided to go with the 1/2″ trim because the bottom is the only part that needed two rows; the arms and back just needed one row, and 1/2″ trim would look way better on the rest. Hobby Lobby had nothing, and Joann’s was WAY too expensive and still didn’t have the color I was looking for. I searched and searched online until I found the right amount of the right color and size for the right price! This seriously wasn’t easy y’all, I spent days looking! I ended up getting 36 yards of gray 1/2″ gimp braid trim for $25 from doveoriginalstrim.com. 36 yards was definitely overkill, but even for half of that amount I couldn’t find a better price anywhere, and I can use the extra for a future project. Win!
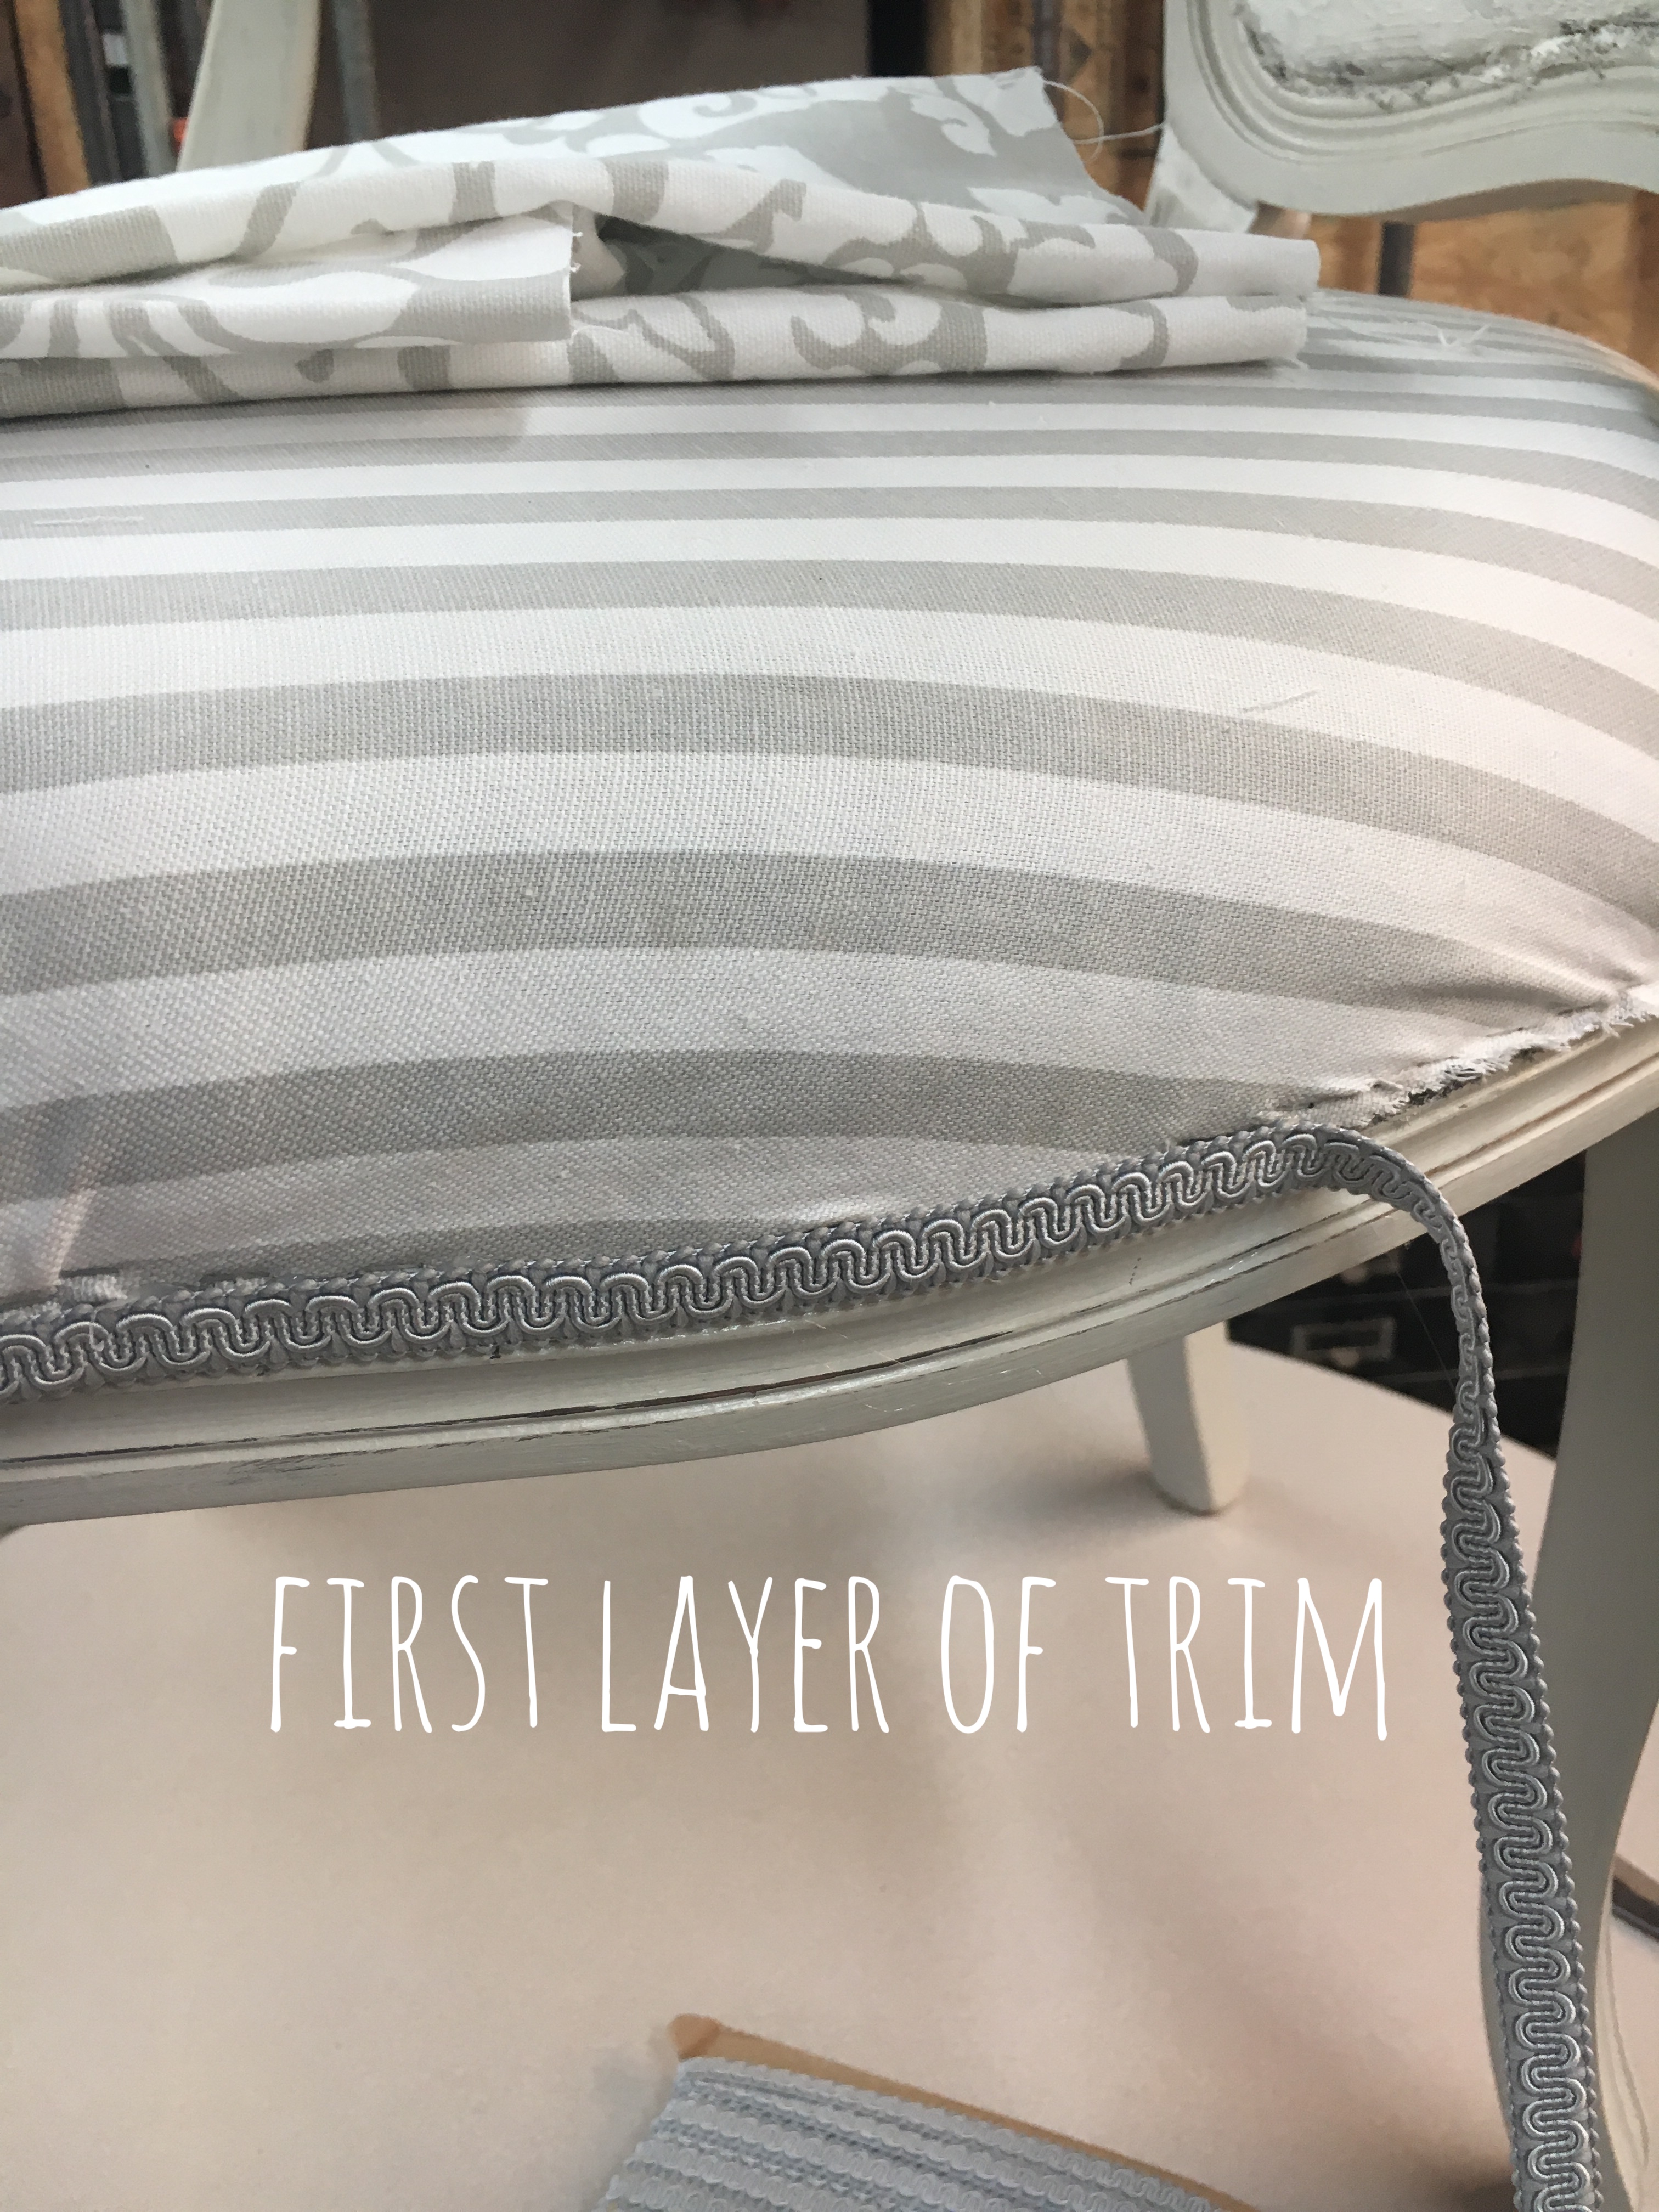
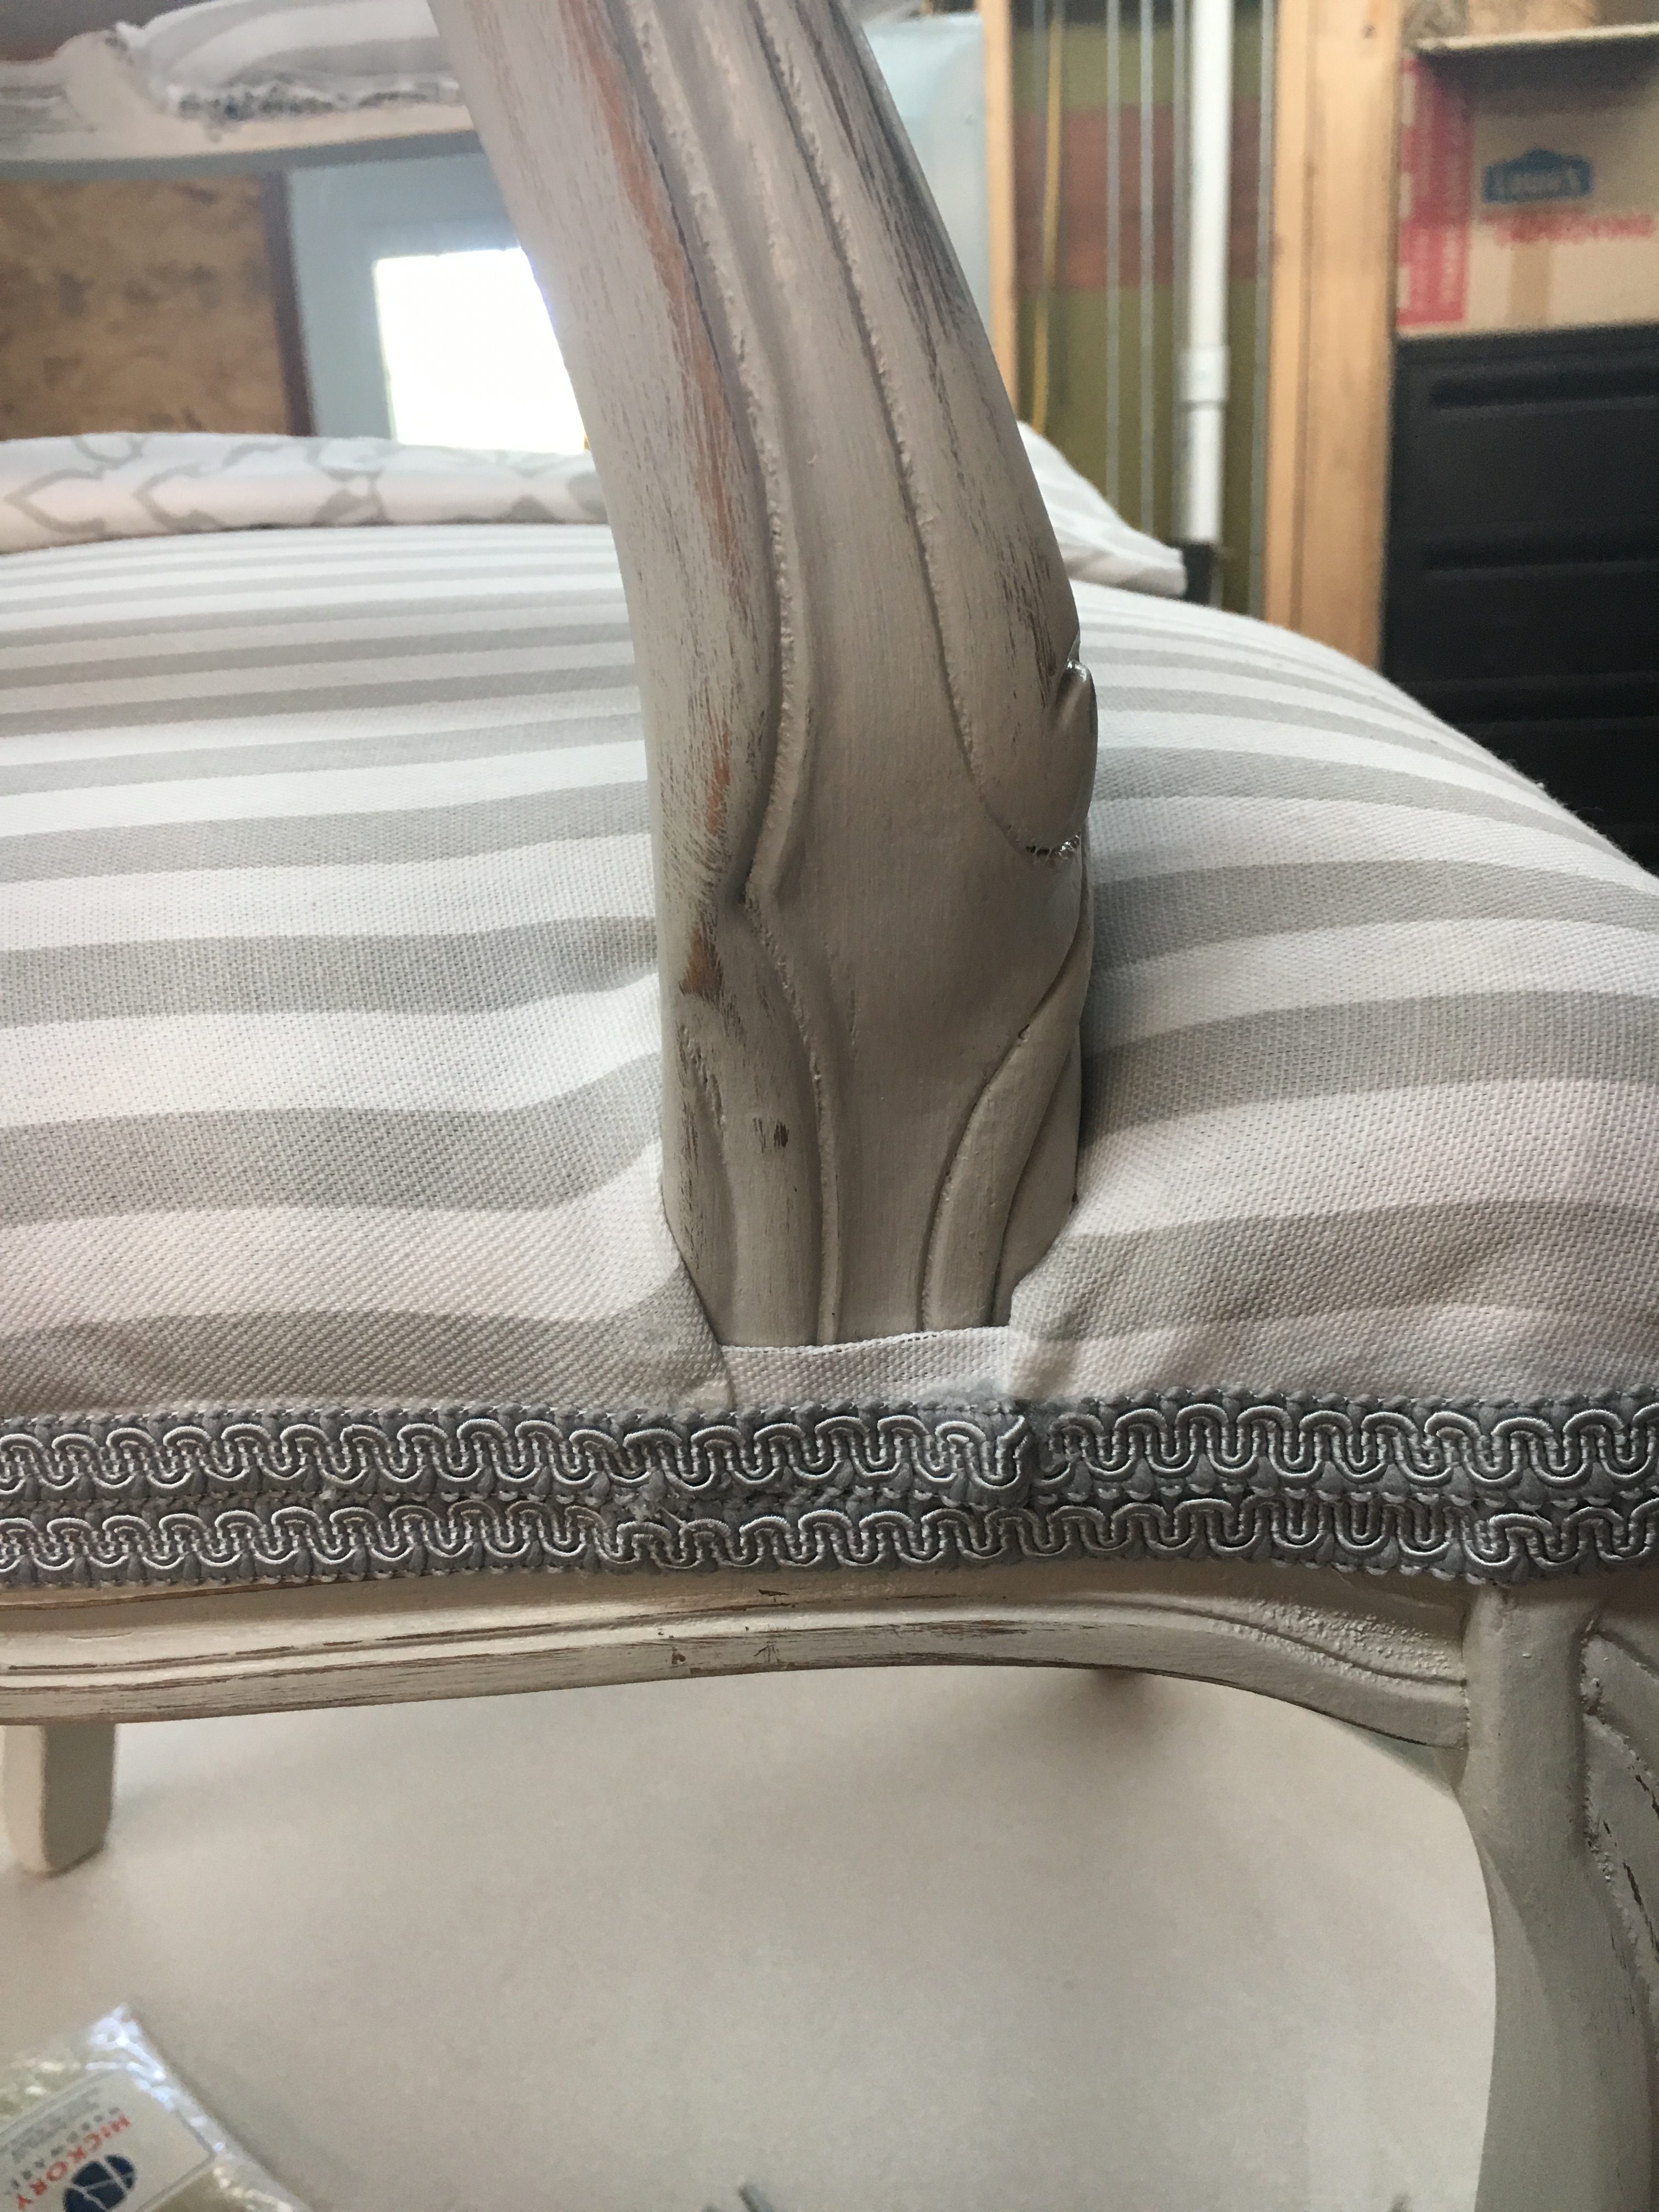
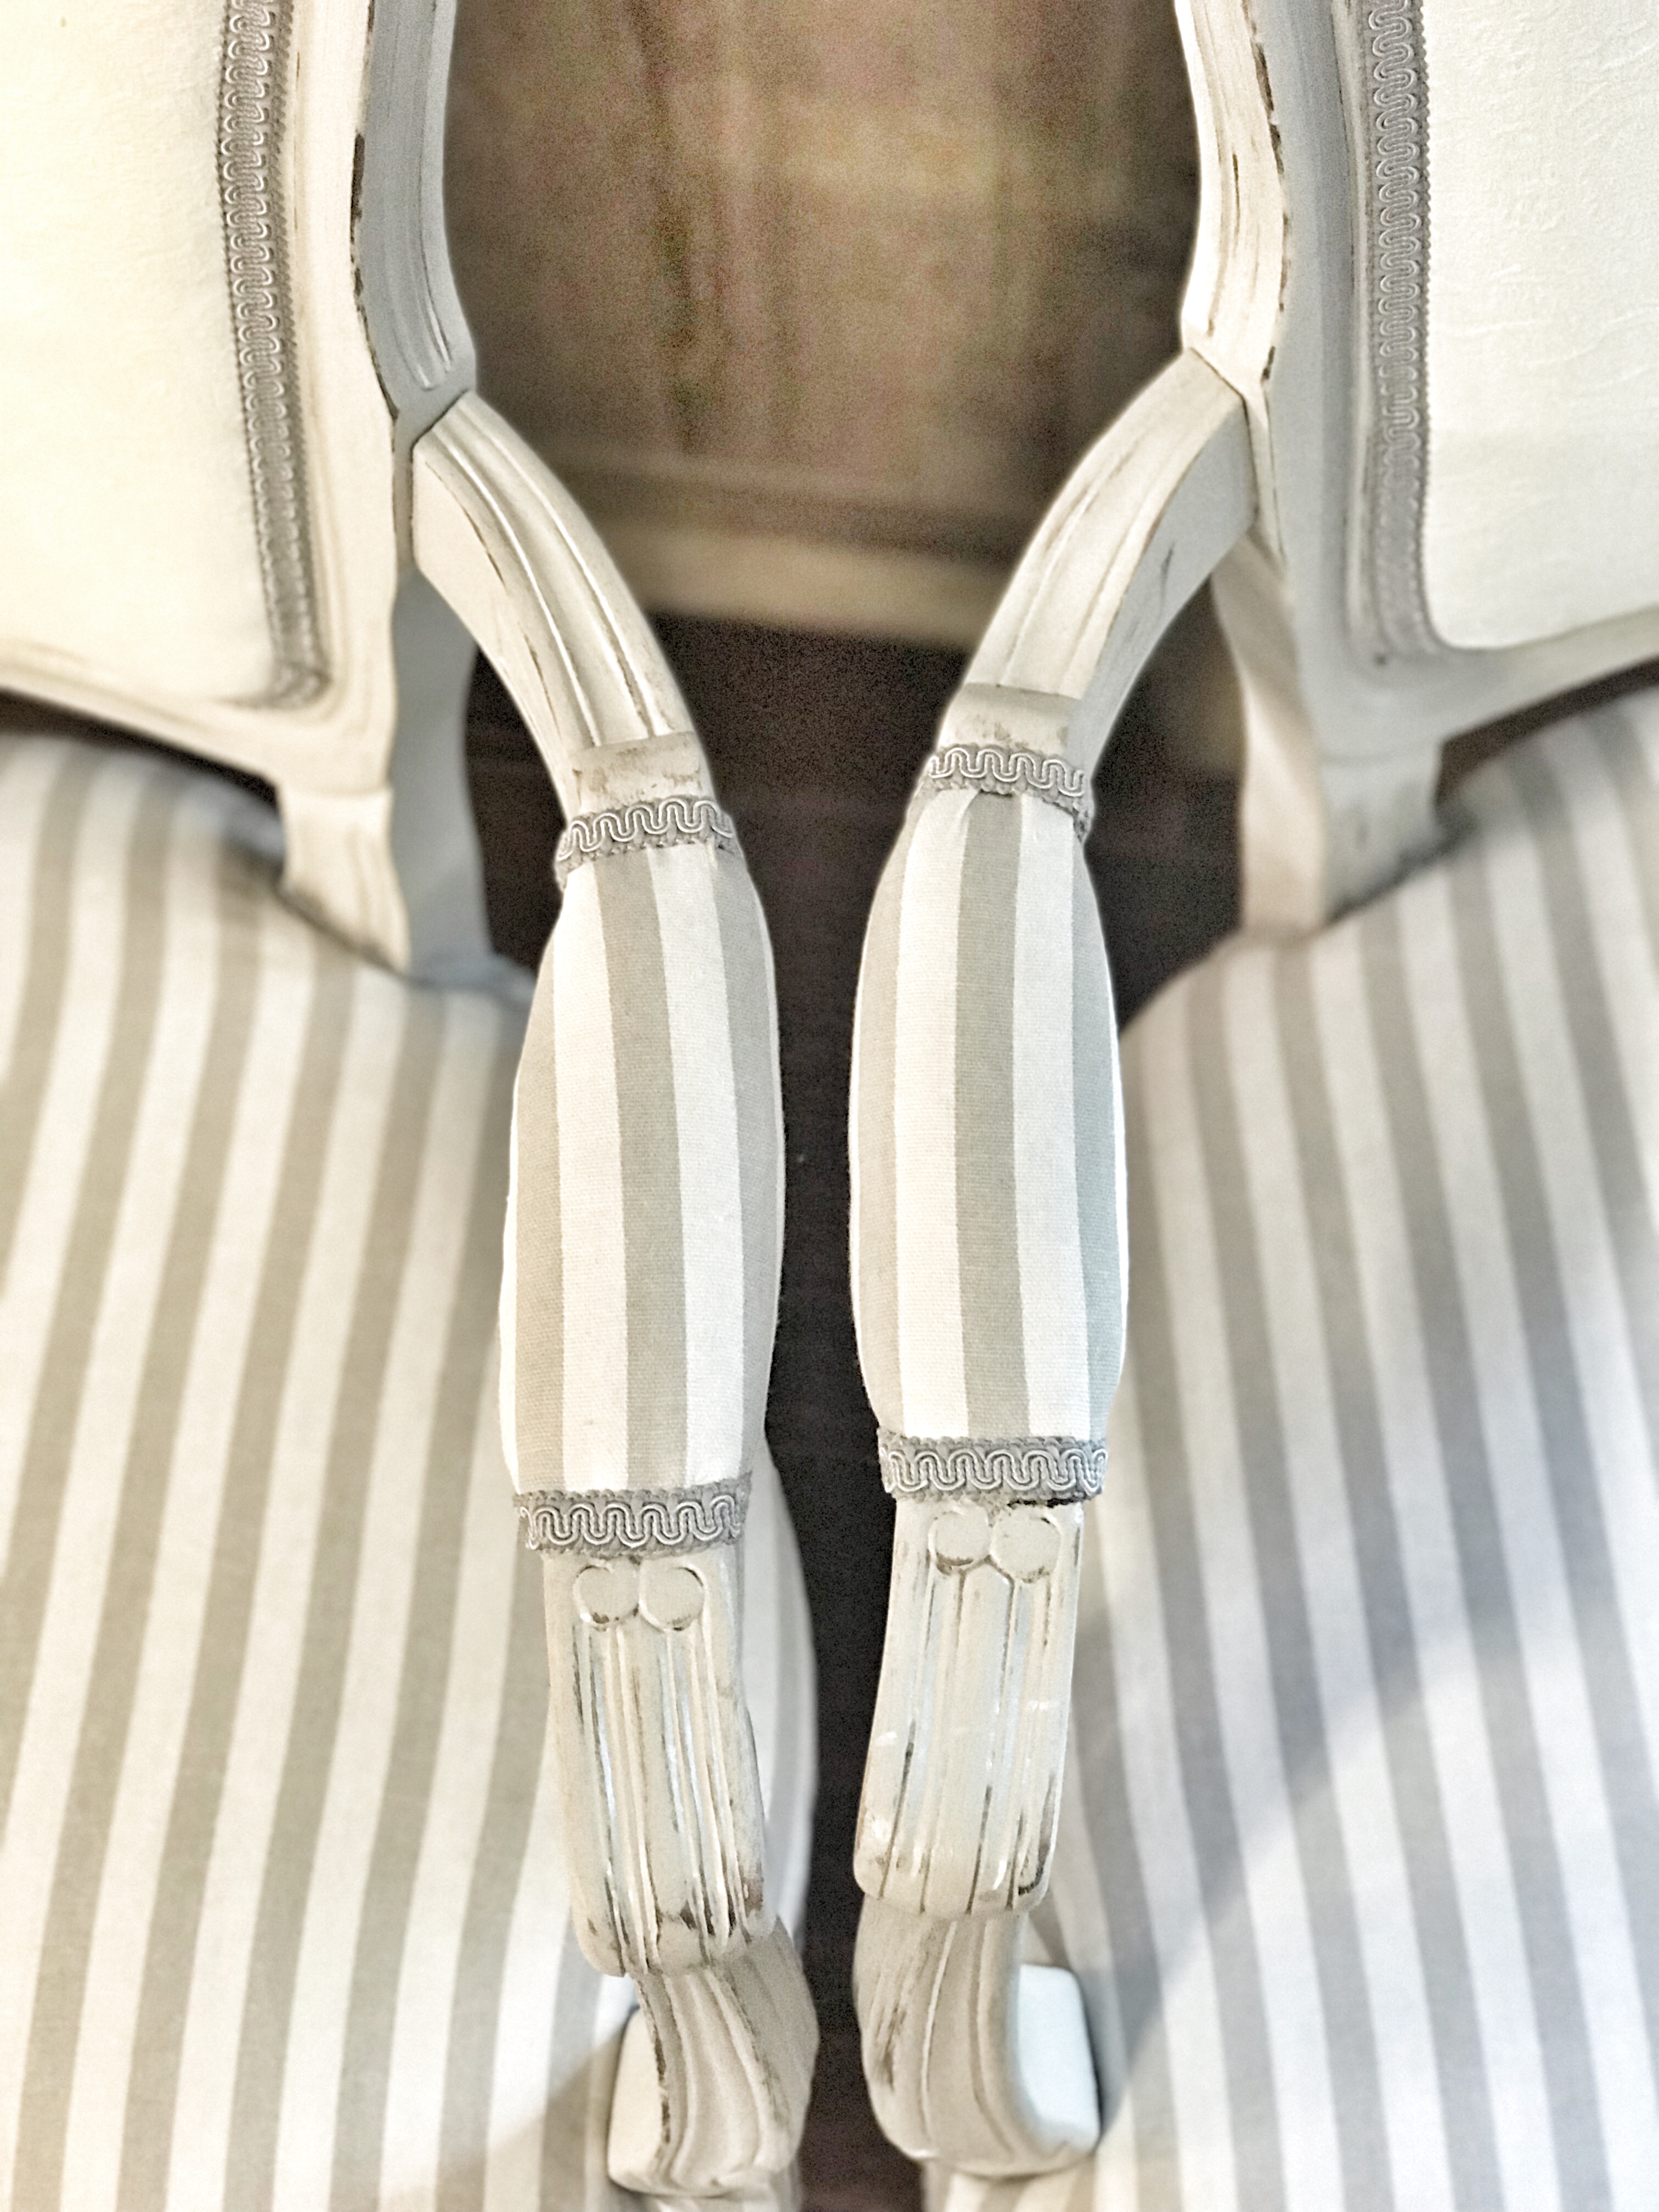
Using a hot glue gun to attach the trim, I went around twice on the bottom, making sure to tuck the frayed ends underneath. The double row of trim actually made the bottom look more substantial and like I planned it that way! I found this video tutorial to be helpful when it came to attaching the trim.
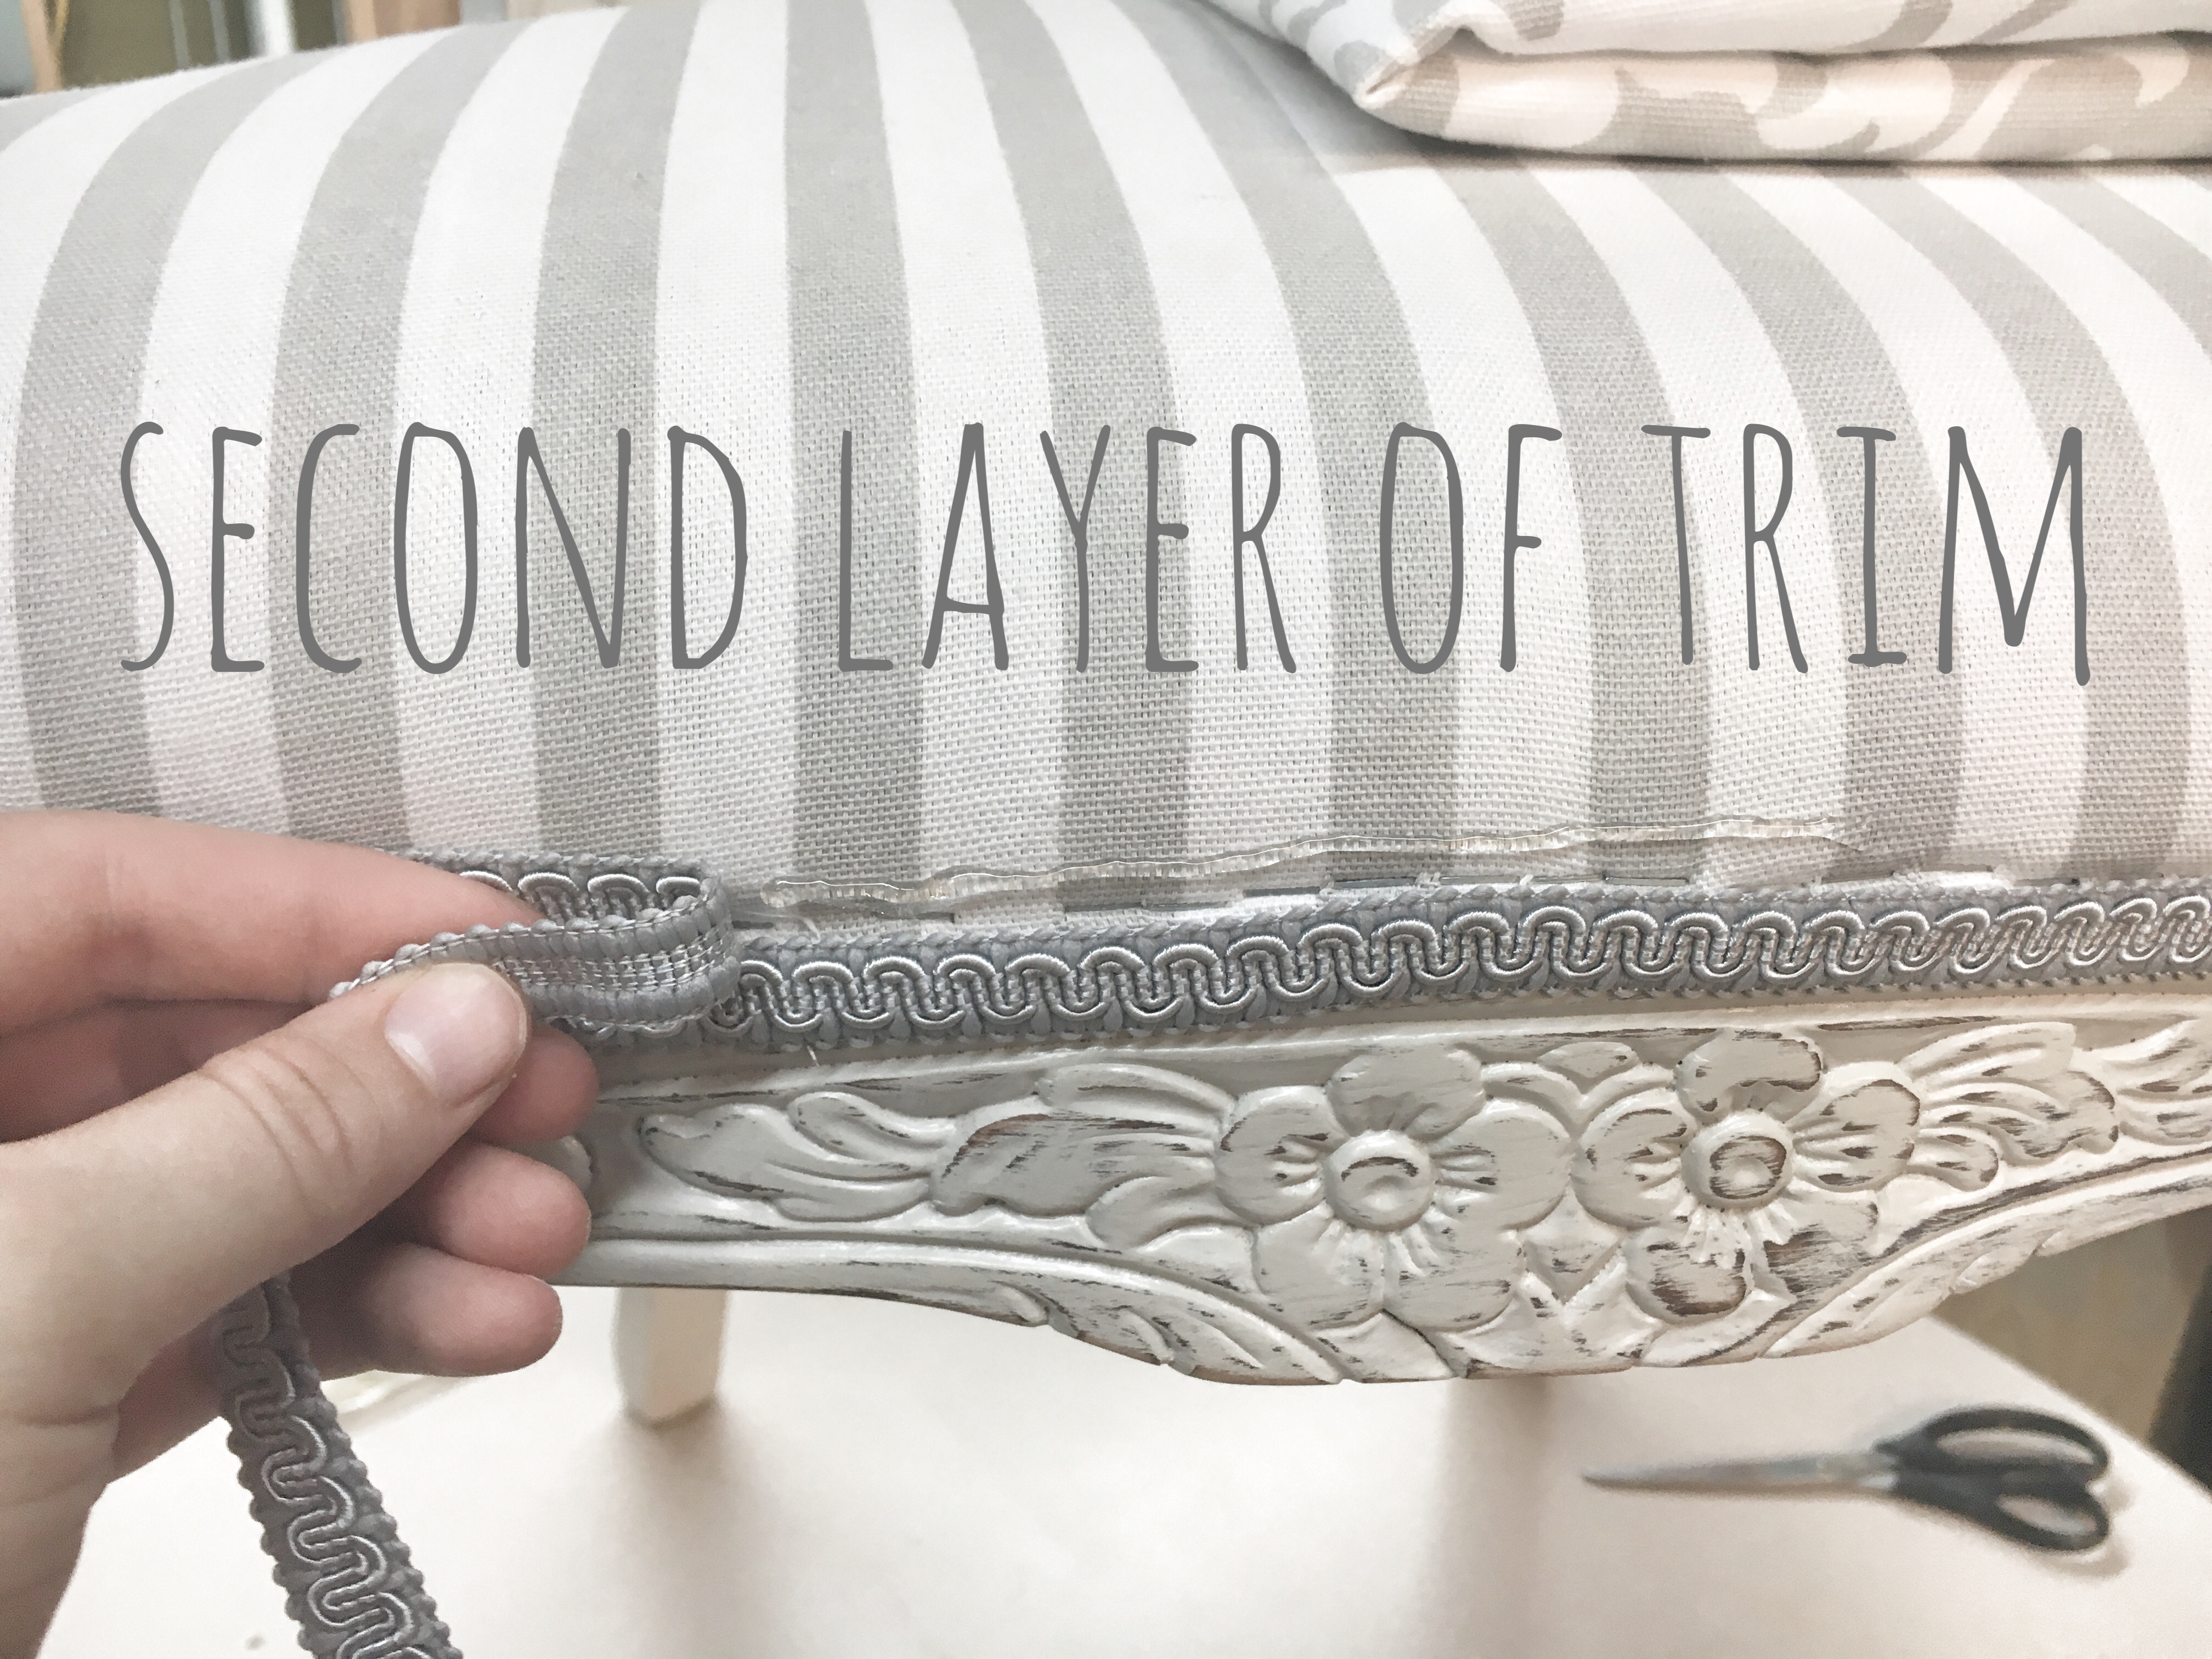
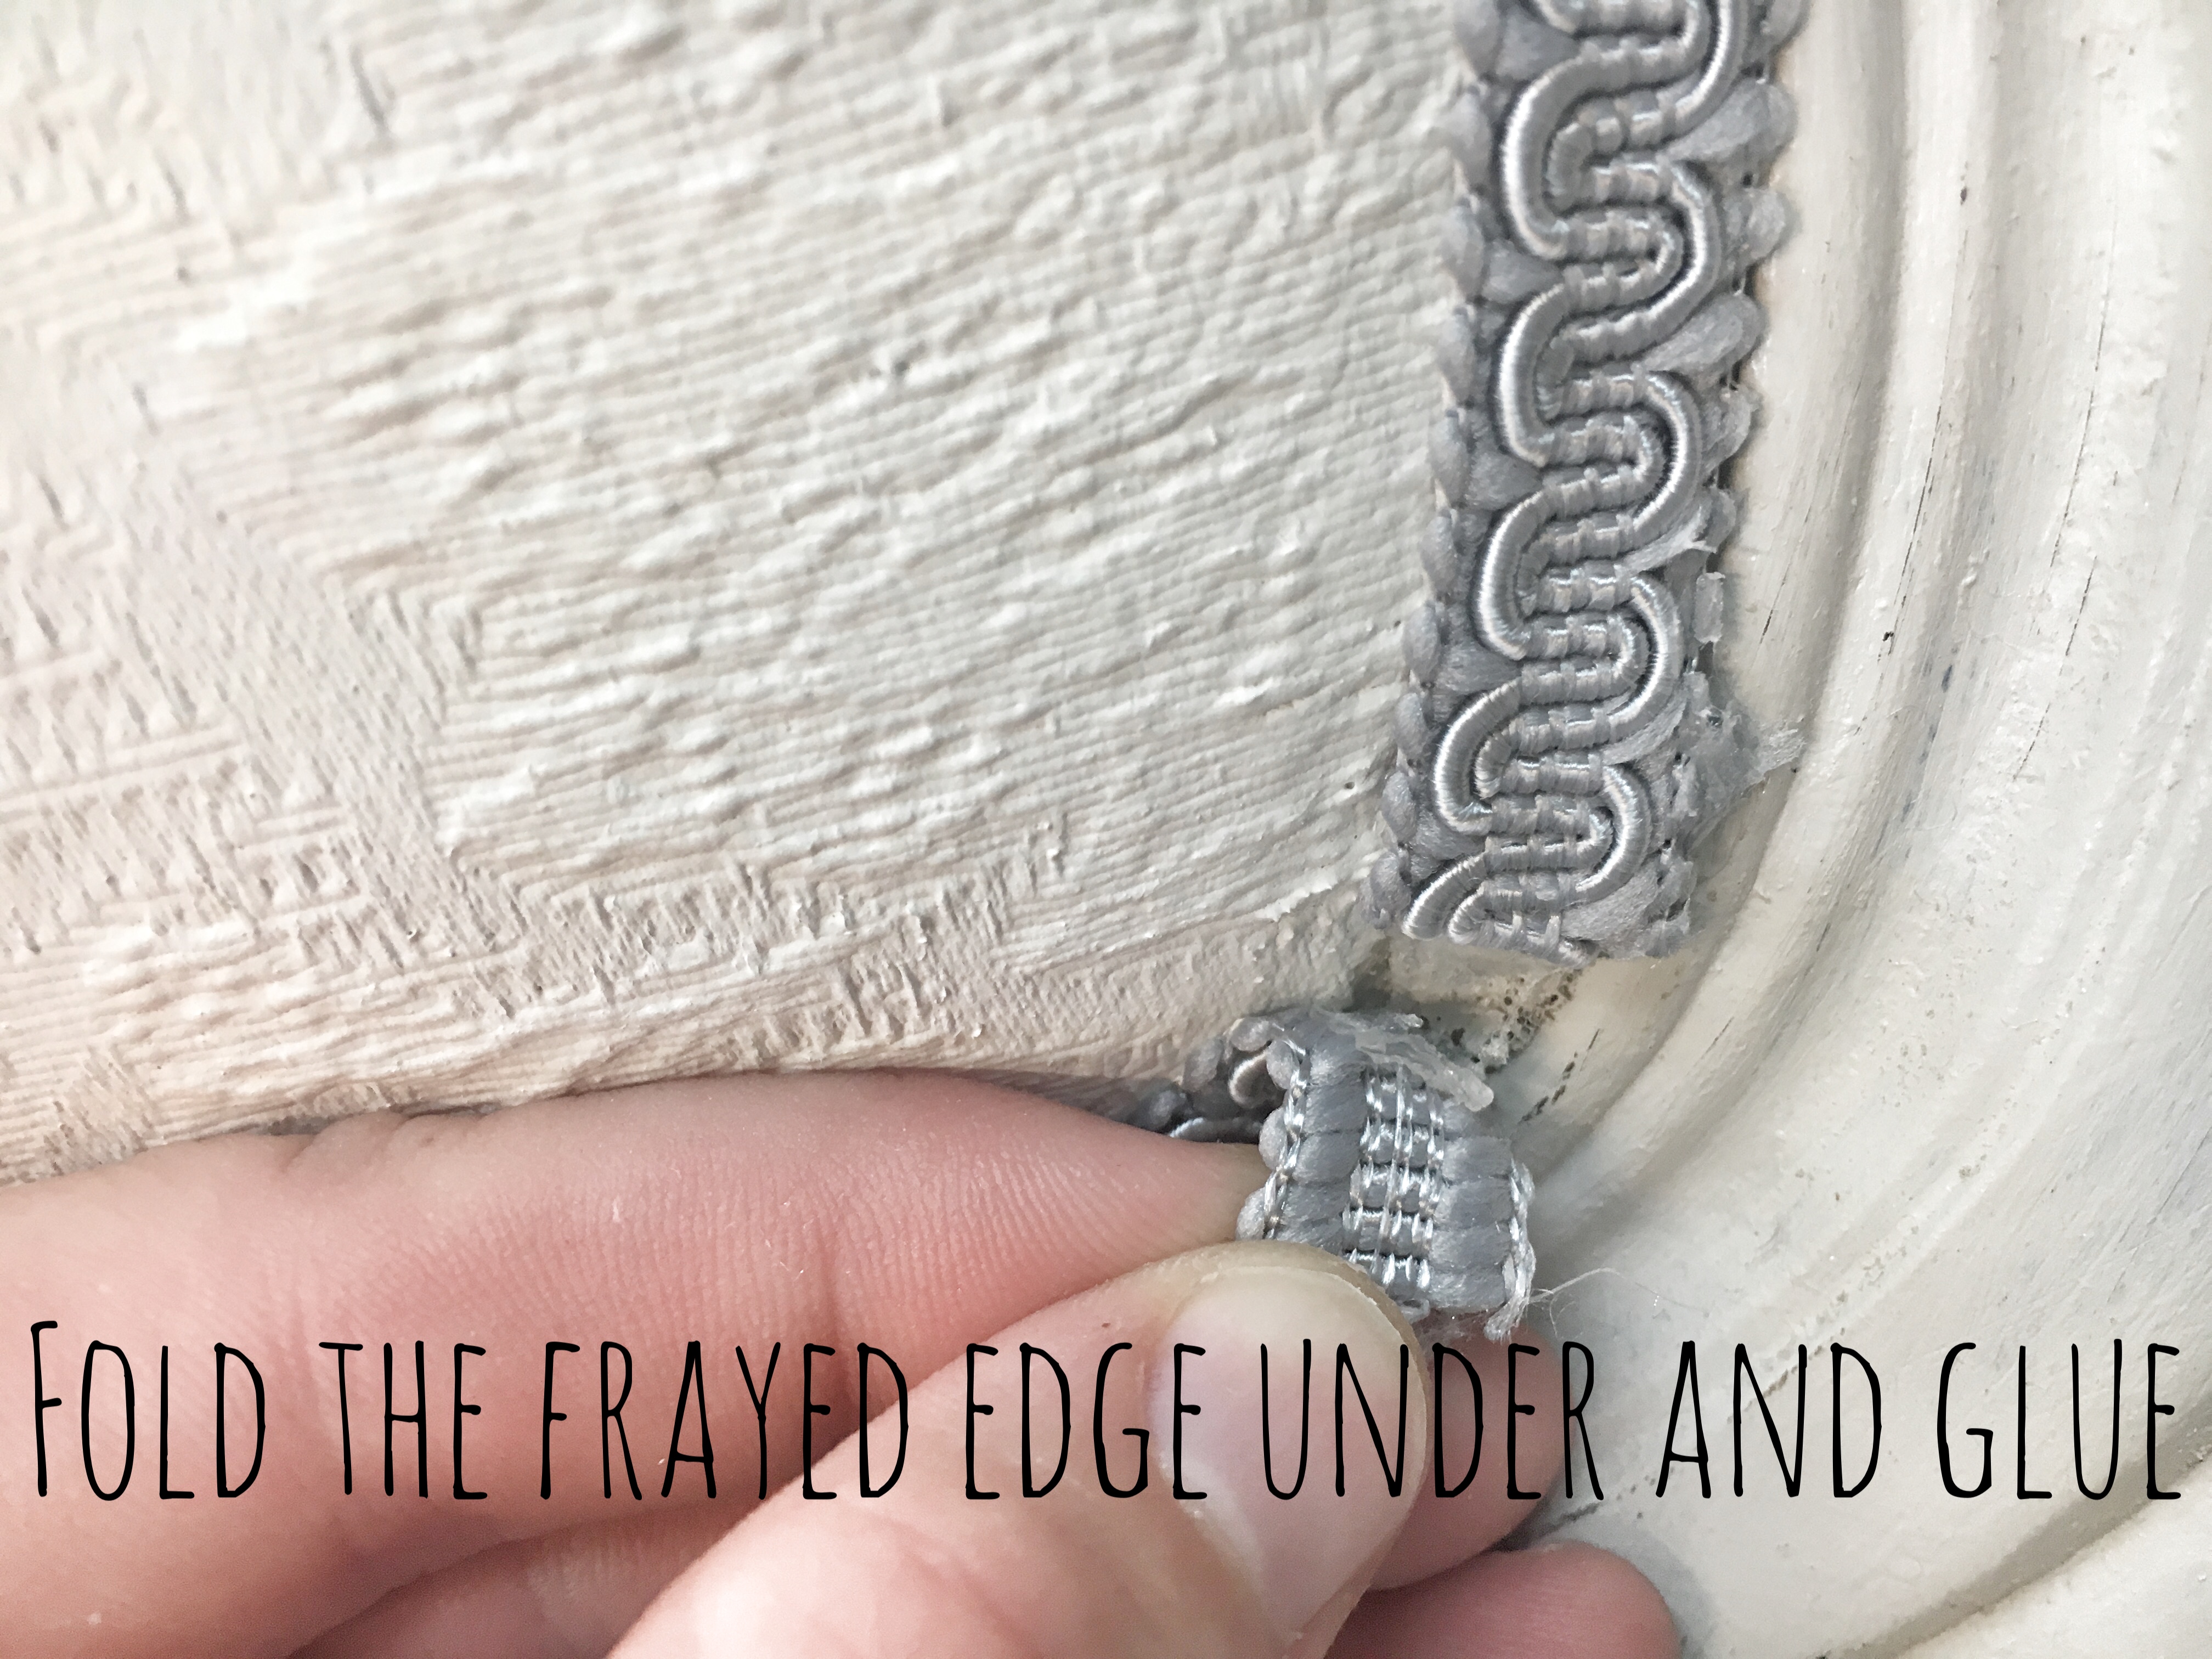
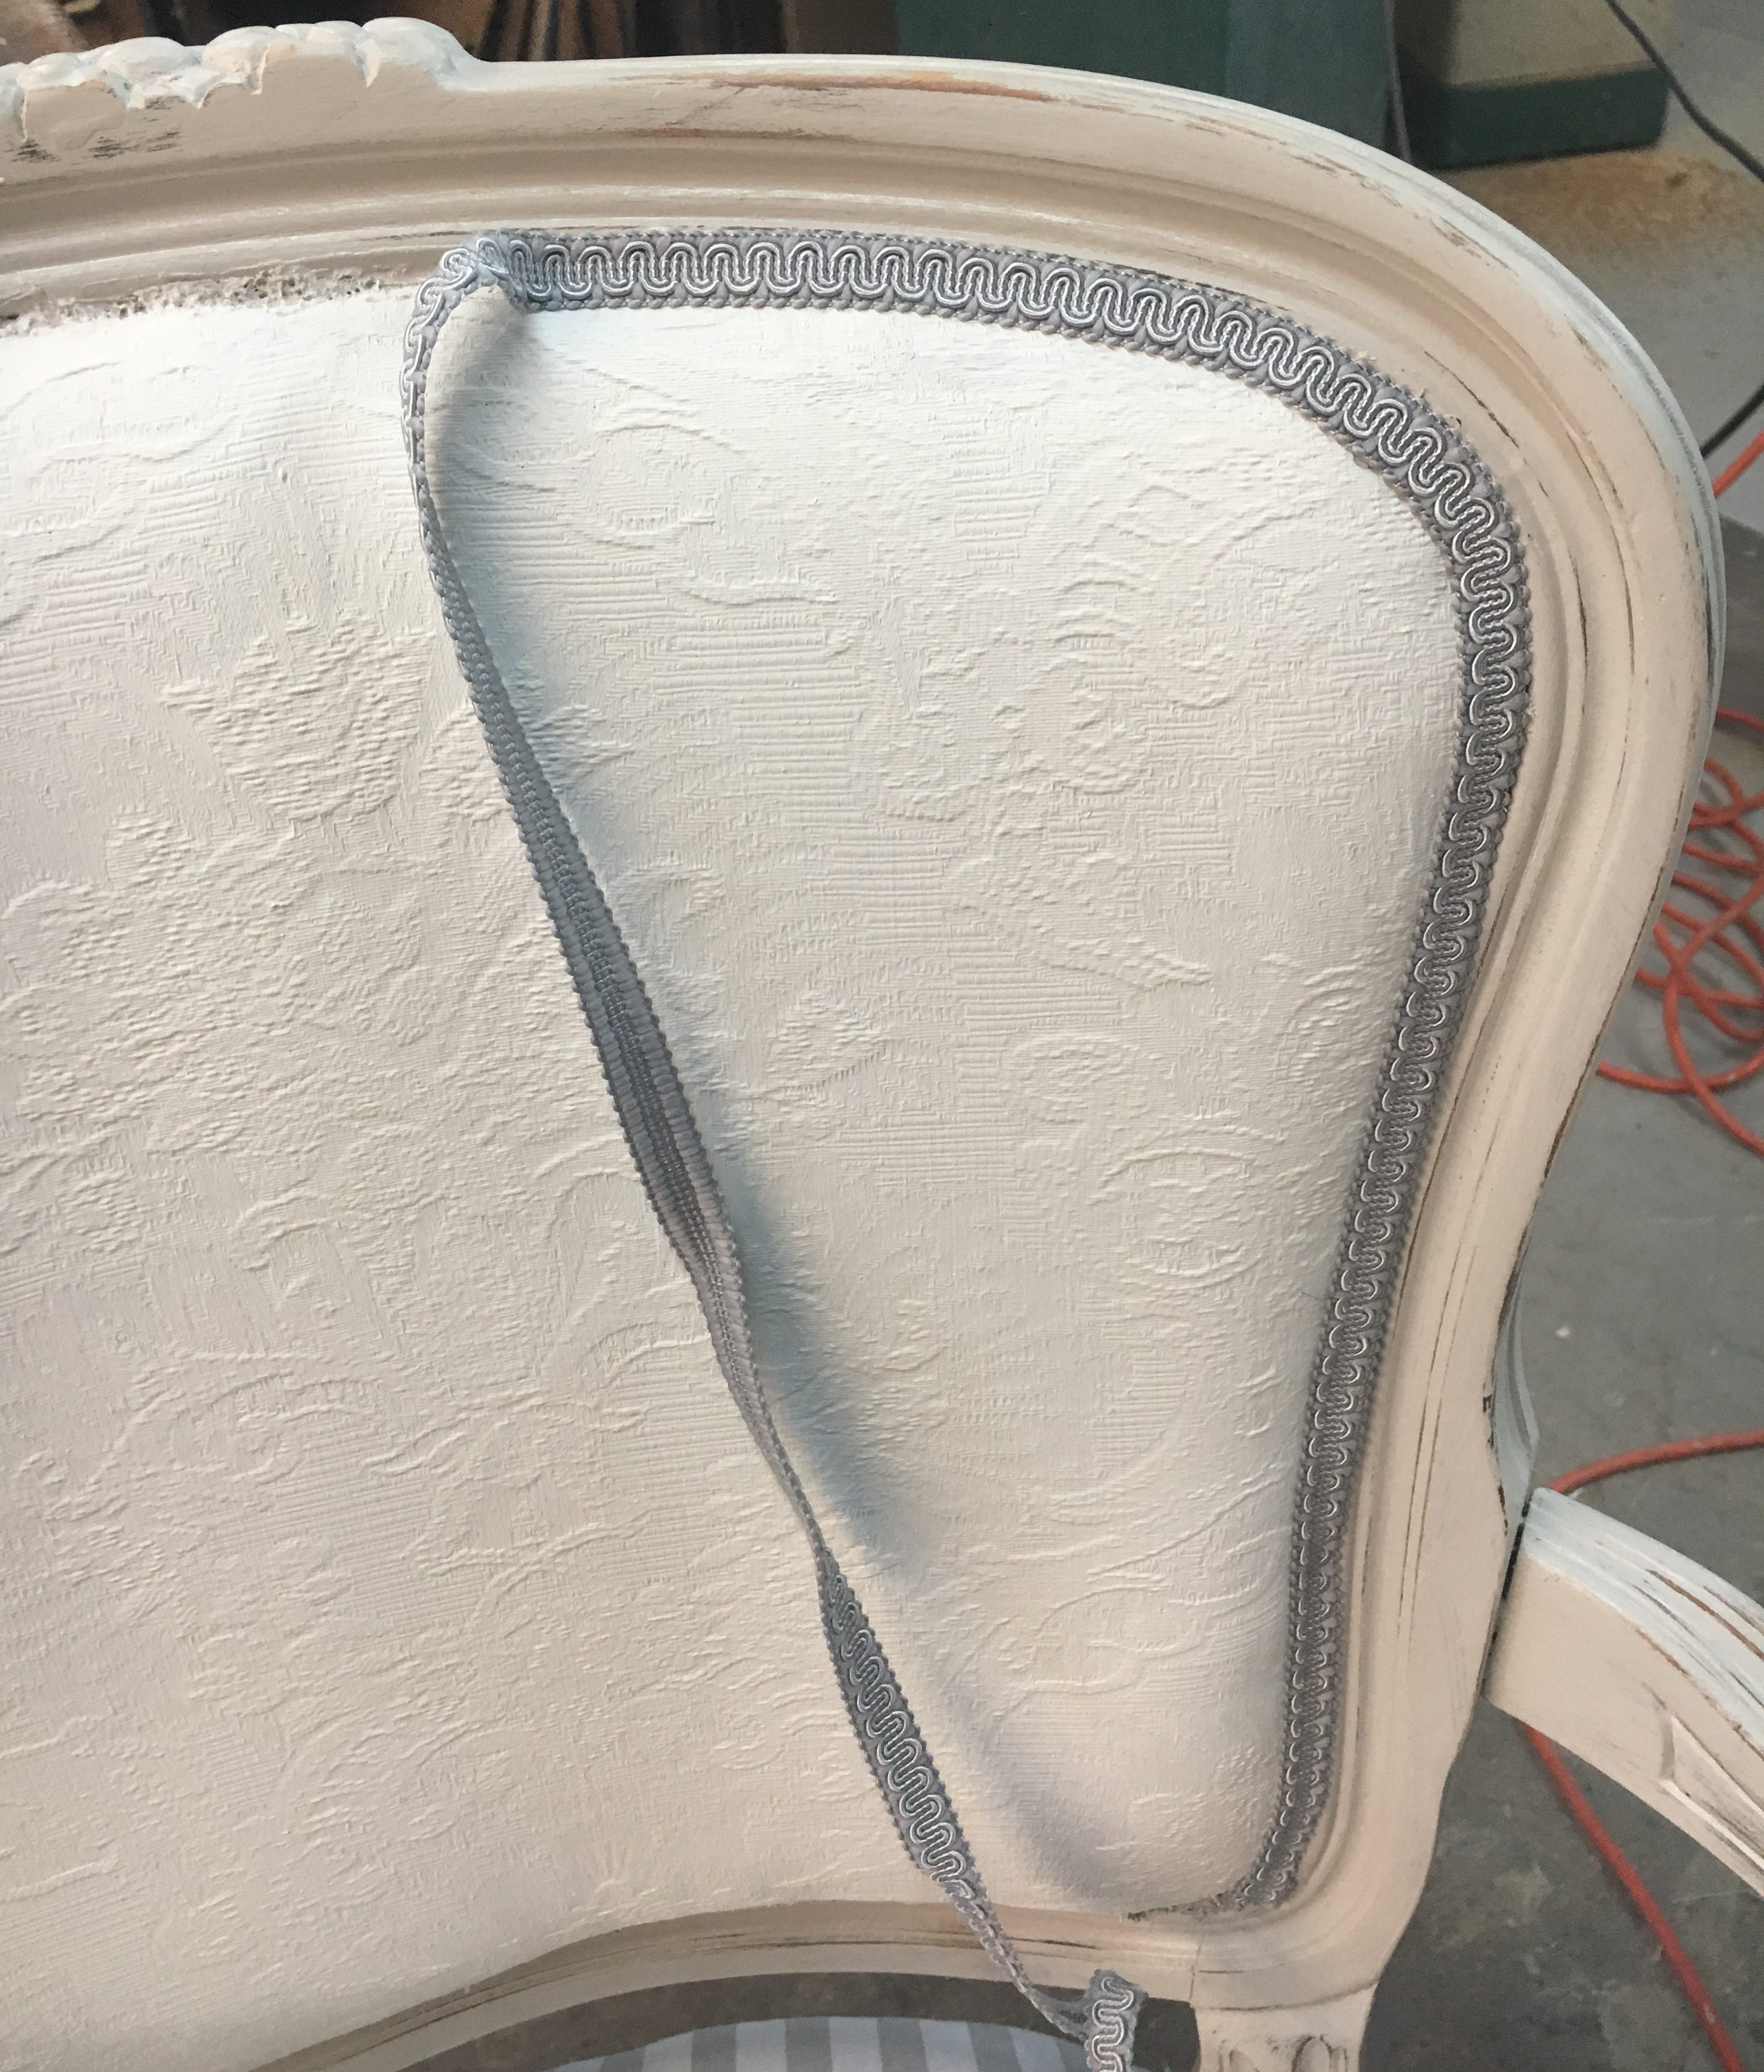
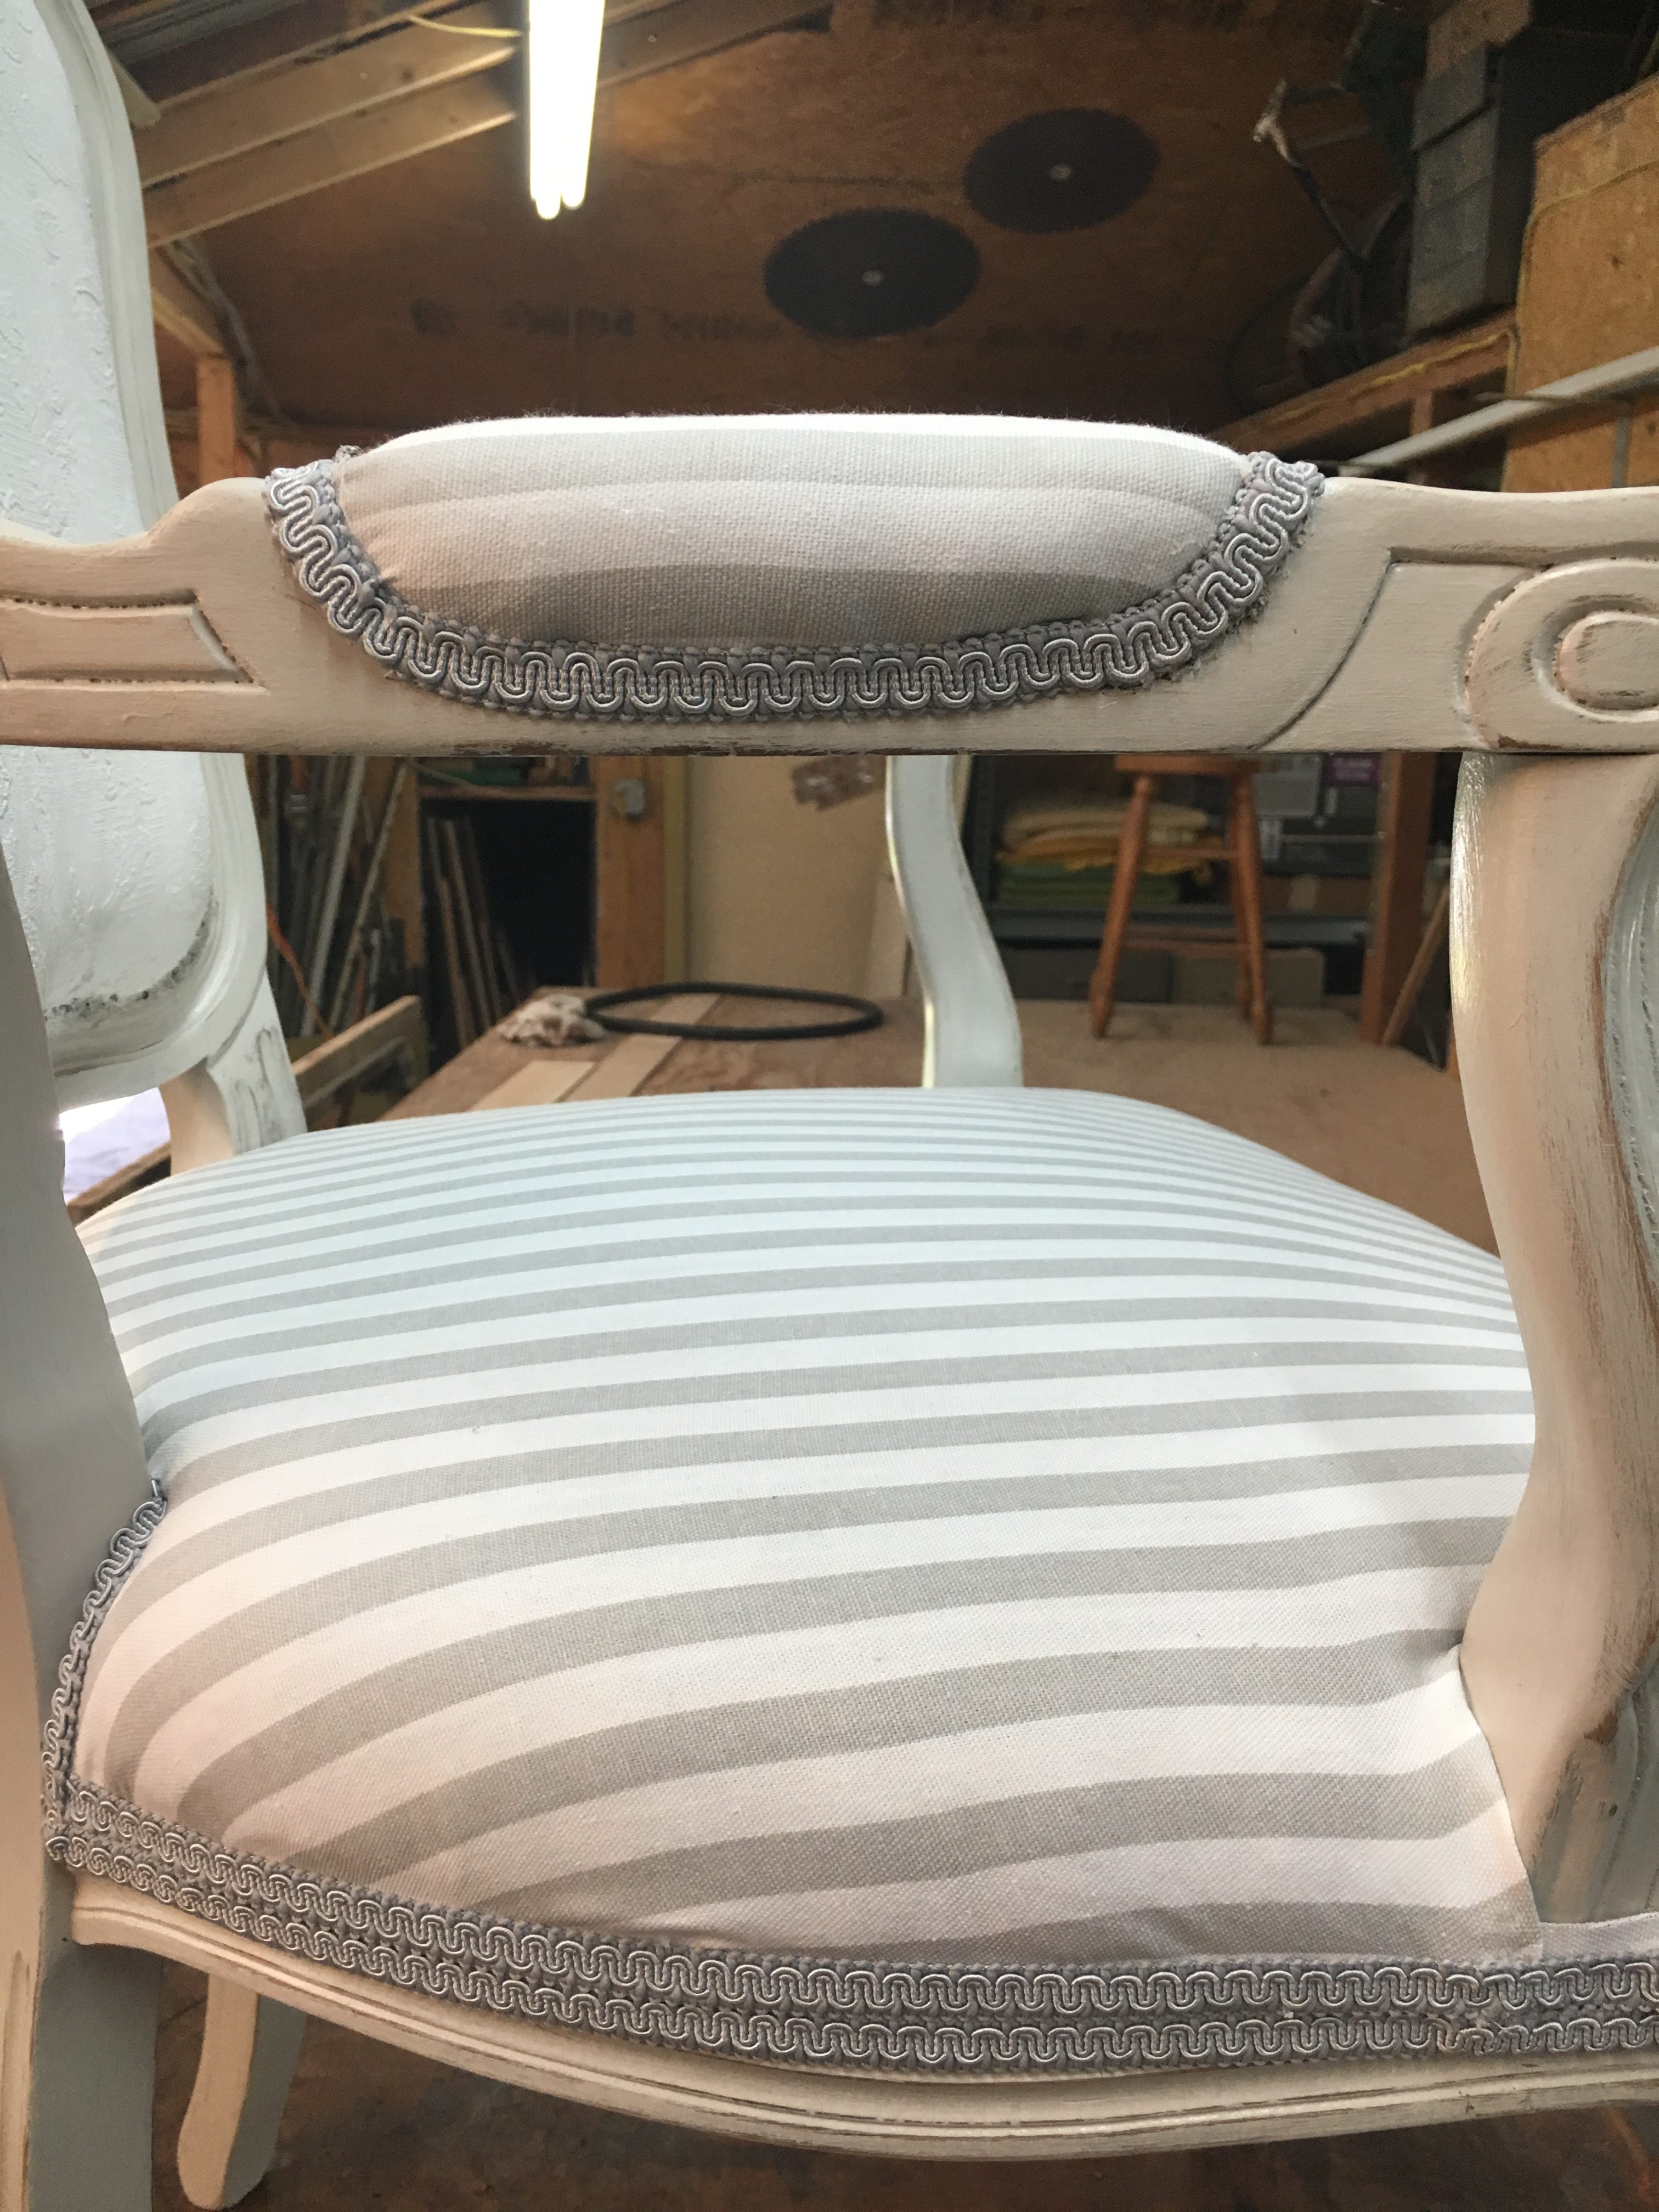
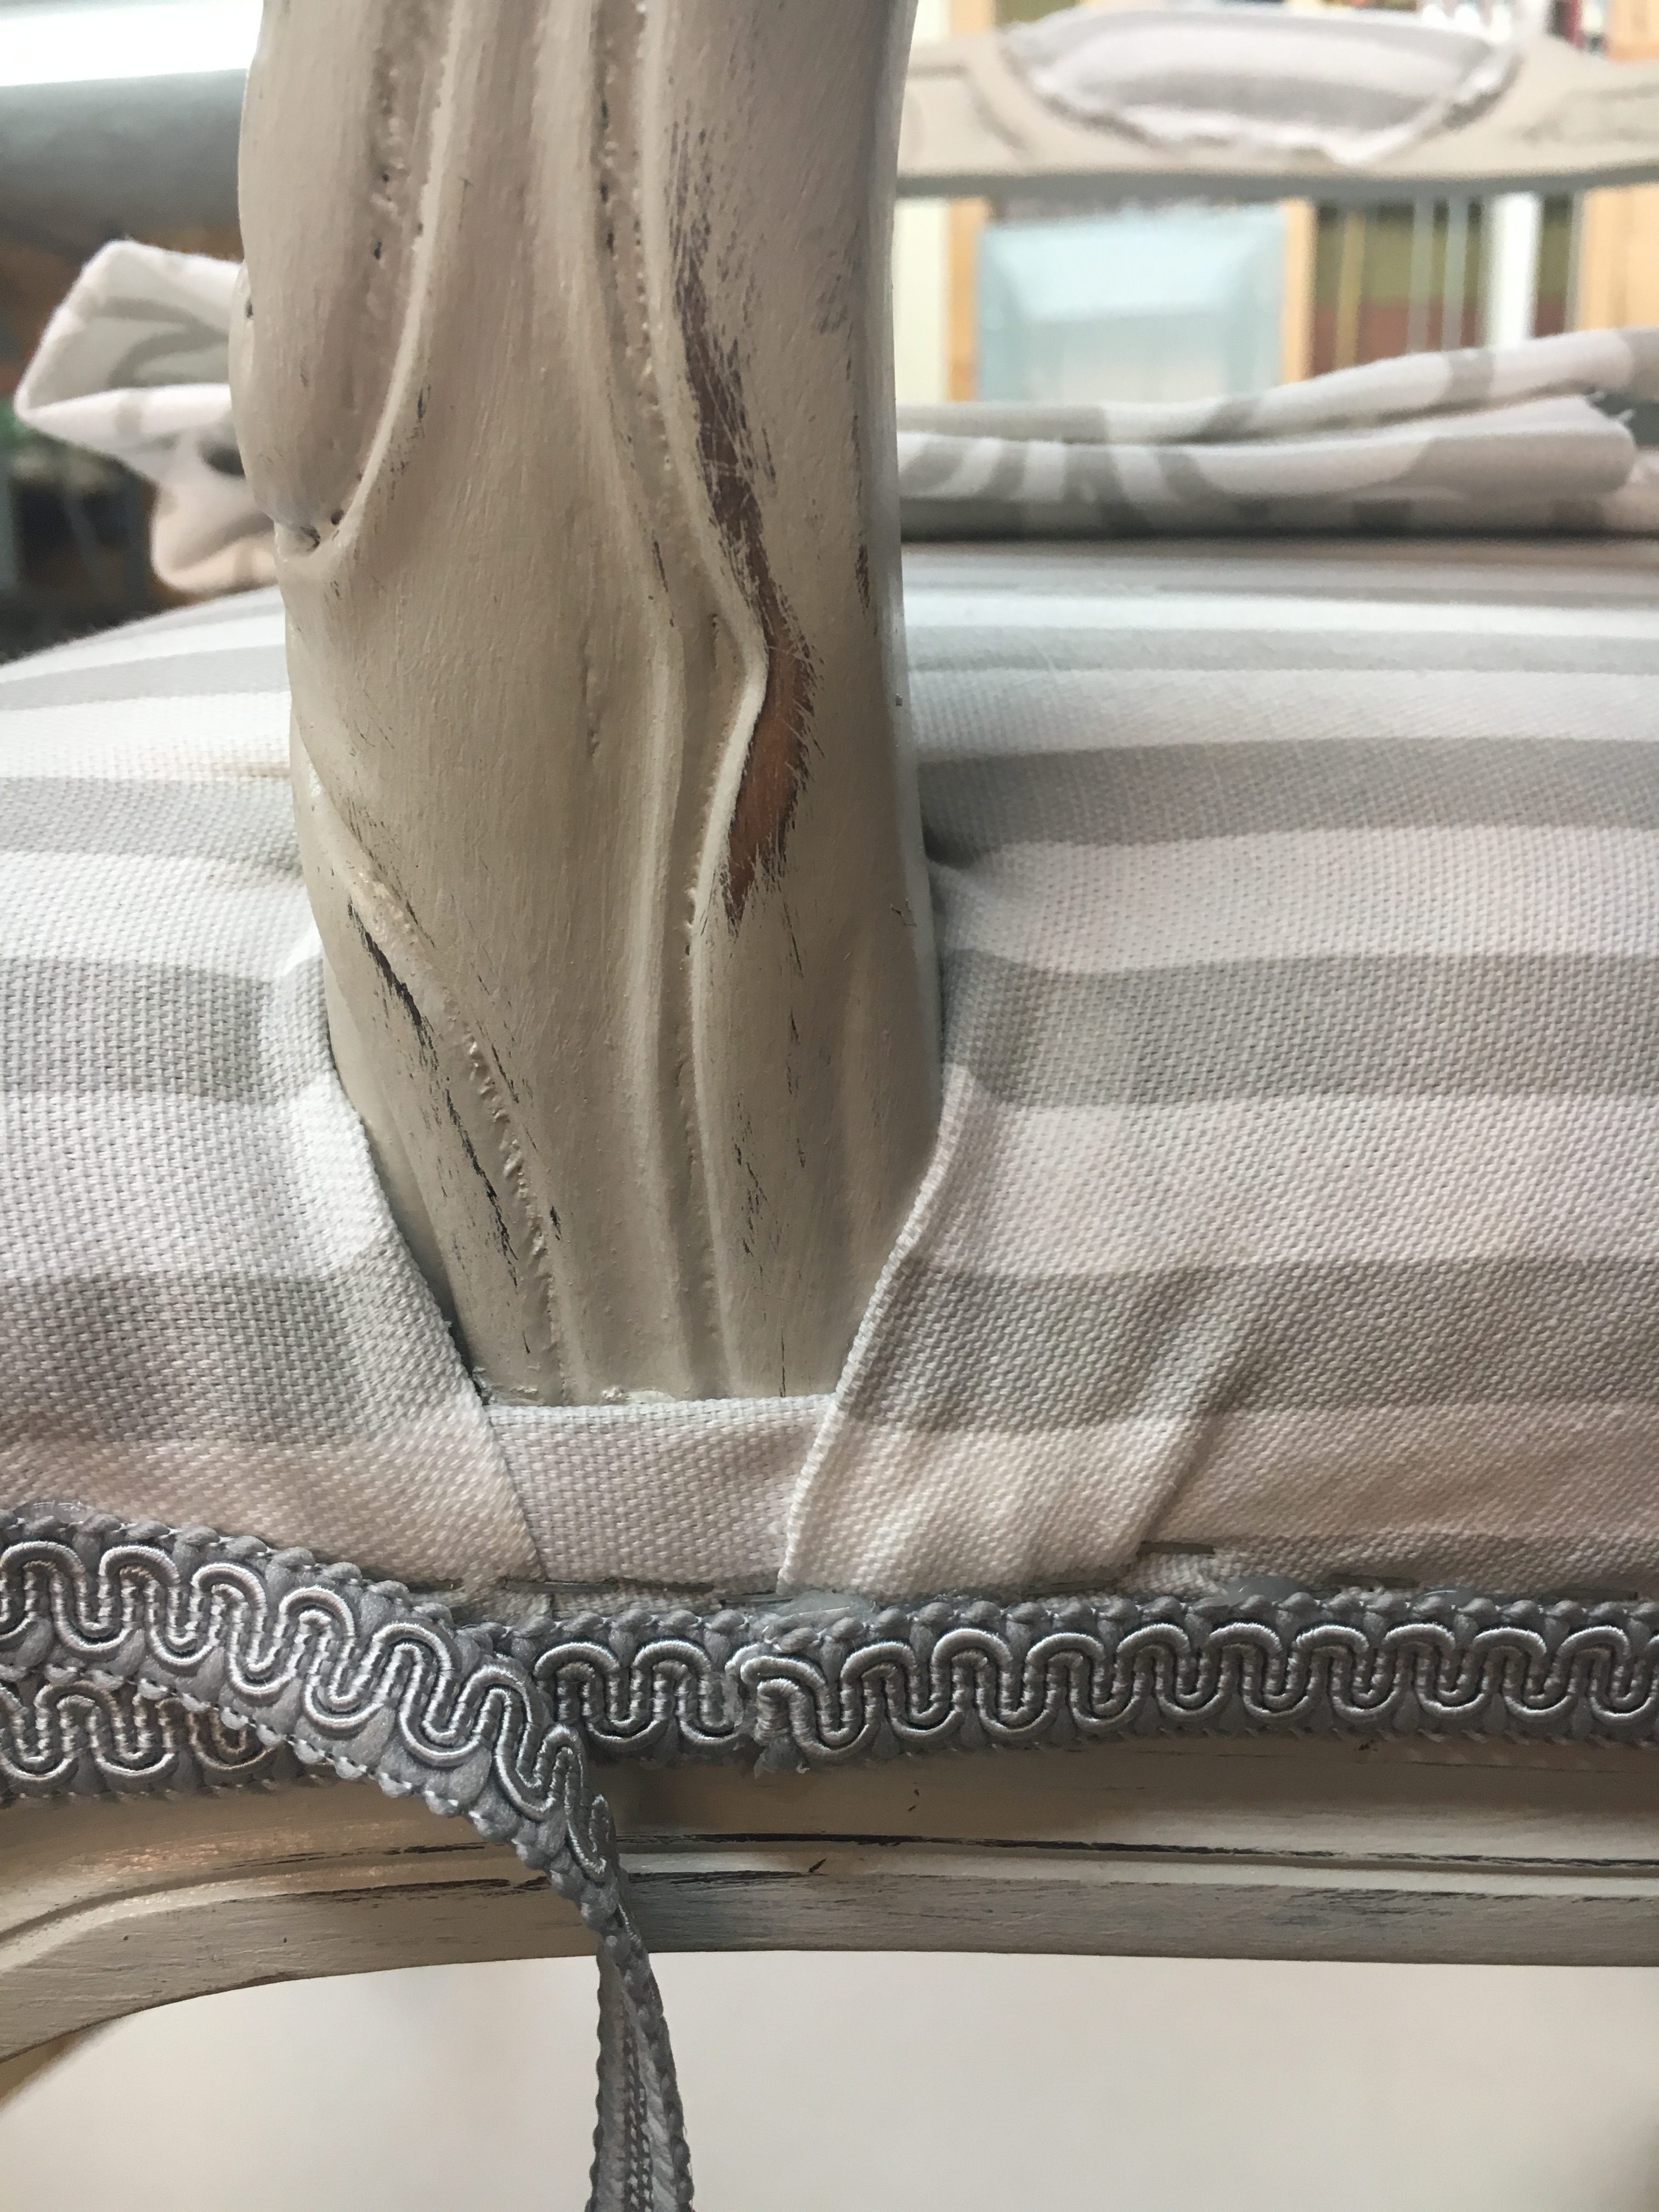
I wrapped the trim around where the back attaches to the seat to hide any gaps in the fabric. I could have skipped this and just had the trim stop at the chair leg like it was before, but I my cuts were a little off here, and I wanted to disguise them.
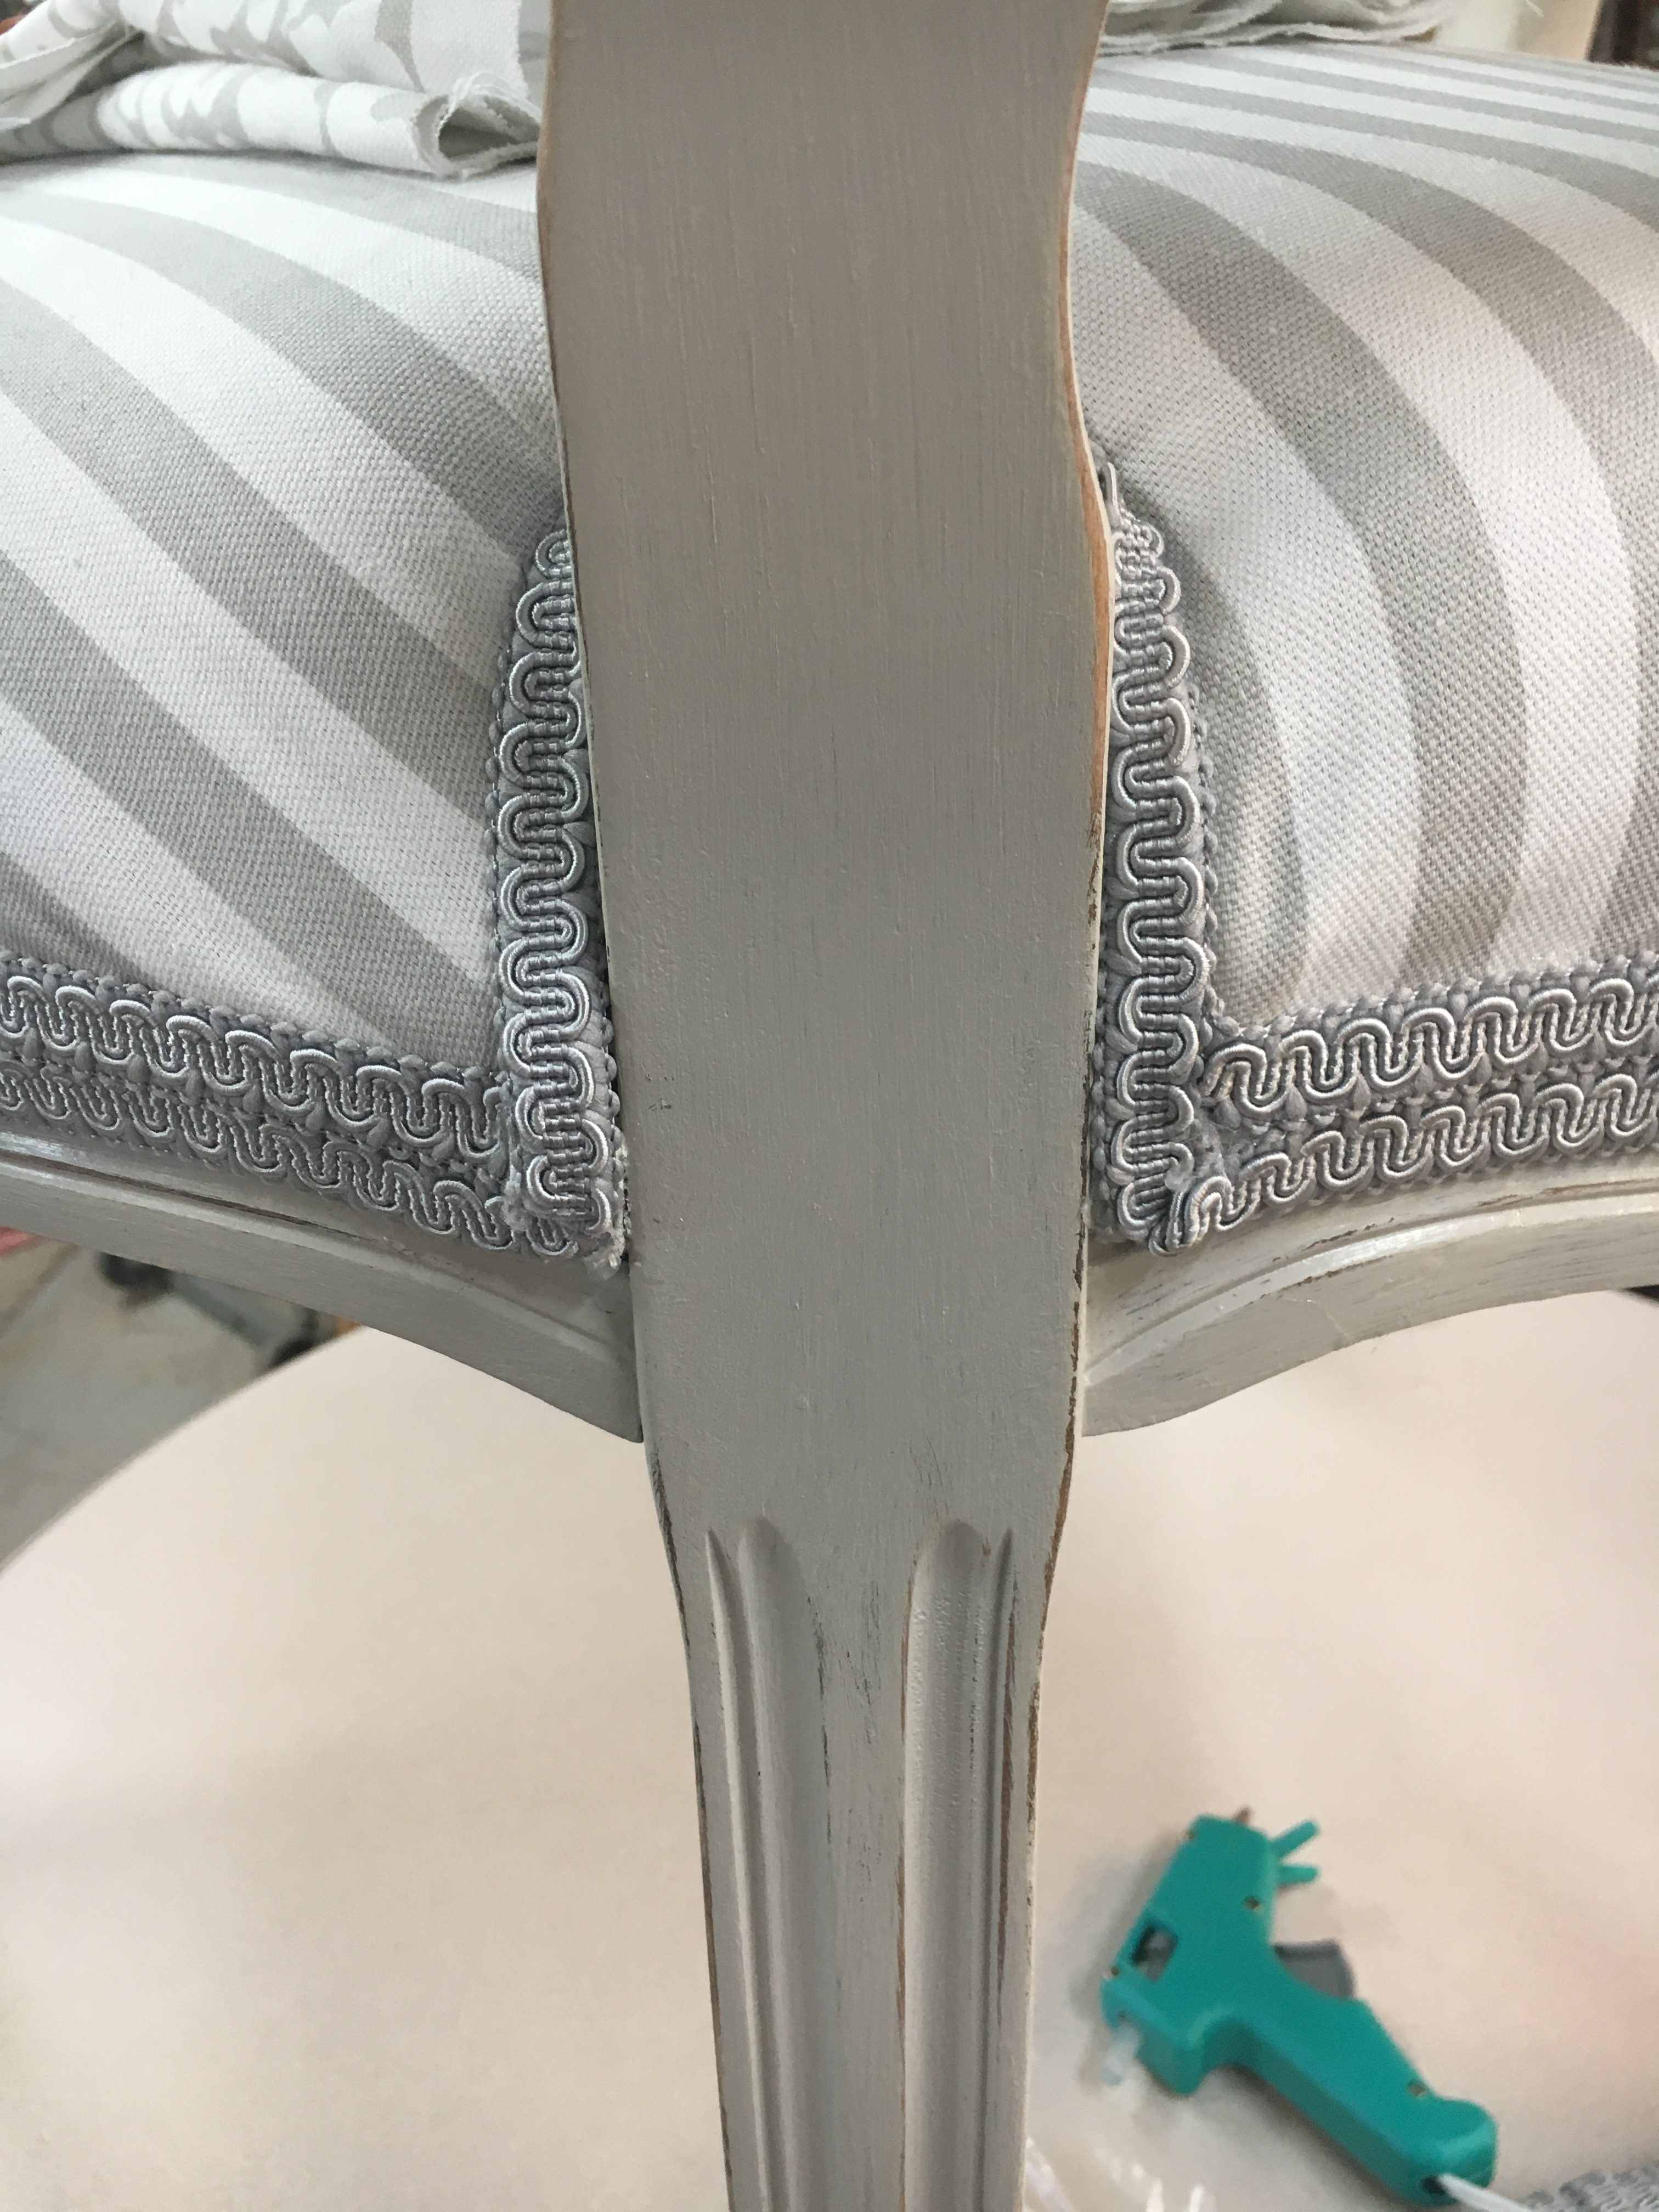
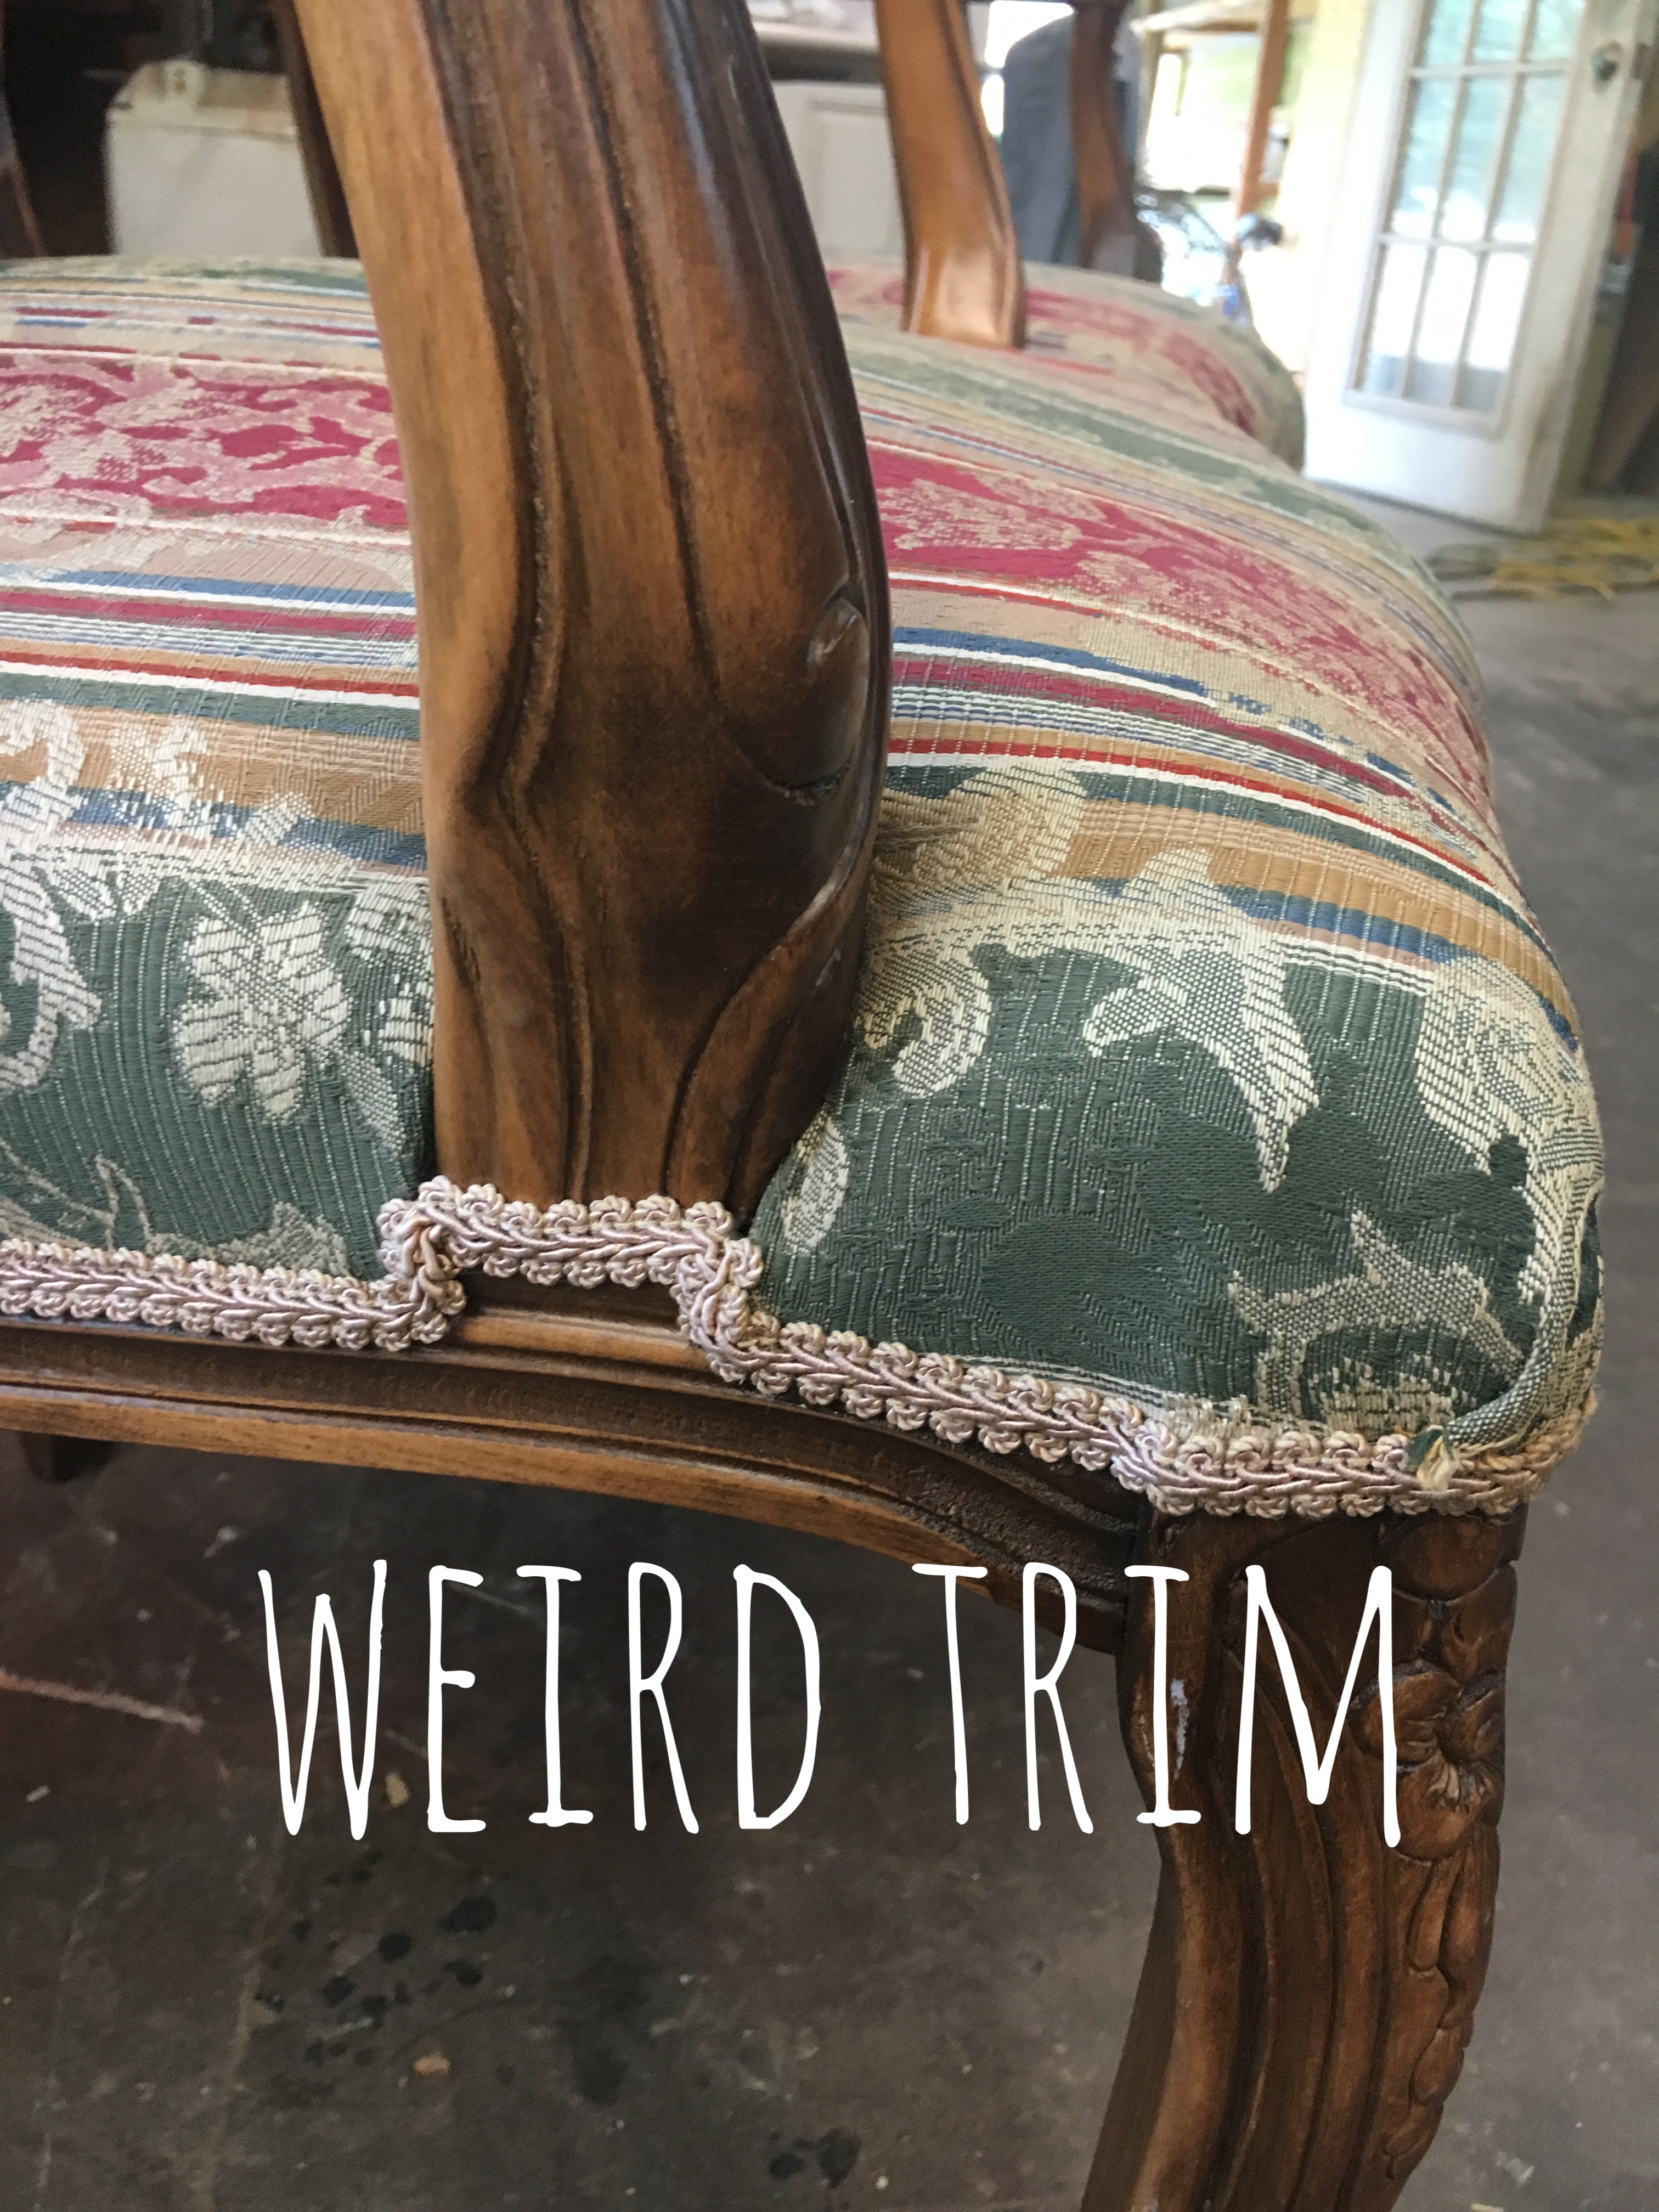
Another issue I ran into was a gap in the chair where the arms attached. This was covered by a strange looking trim job to begin with, and I wanted something different. So what I did was take a small scrap of the fabric and tried my best to line up the stripes. I used a thin piece of cardboard in-between the flap for stability and stapled it right over the gap. I tried to make it look like the fabric just continued on and the trim would cover most of it. Not a prefect solution, but definitely better than before, in my opinion!
What I Learned
• Be patient and wait for the right deal to come along!
• Don’t be afraid to try something way outside of your comfort zone… like painting fabric.
• Don’t do unnecessary work. If you can accomplish the same thing without the extra work, do it! Some people would disagree, but I’m glad I didn’t spend an hour on each chair taking the old fabric and staples out, just to wrestle with the padding while I attach the new fabric. This saved me a lot of time and headache! Now, if the old fabric is gross and falling apart or tearing, then by all means, take the time to remove it! In my case, however, skipping this step had no effect on the finished product.
• Don’t beat yourself up for making mistakes! I wish I had noticed sooner that the staples were too high, but you learn by making mistakes. You won’t get to enjoy the end reward if you are too critical on yourself!
• Trim can cover a MULTITUDE of sins. I’m glad I didn’t waste my money at the fabric store. For 1/4 of the price, I found the right color and size so I could have matching trim throughout, and double up at the bottom where the staples were showing. It took some hunting, though, let me tell you!
I know it isn’t perfect, and I may have ran into some issues, but most people would never know where I messed up! I feel very confident that I won’t make the same mistakes next time, and I’m glad I was able to conceal them so well on this project.
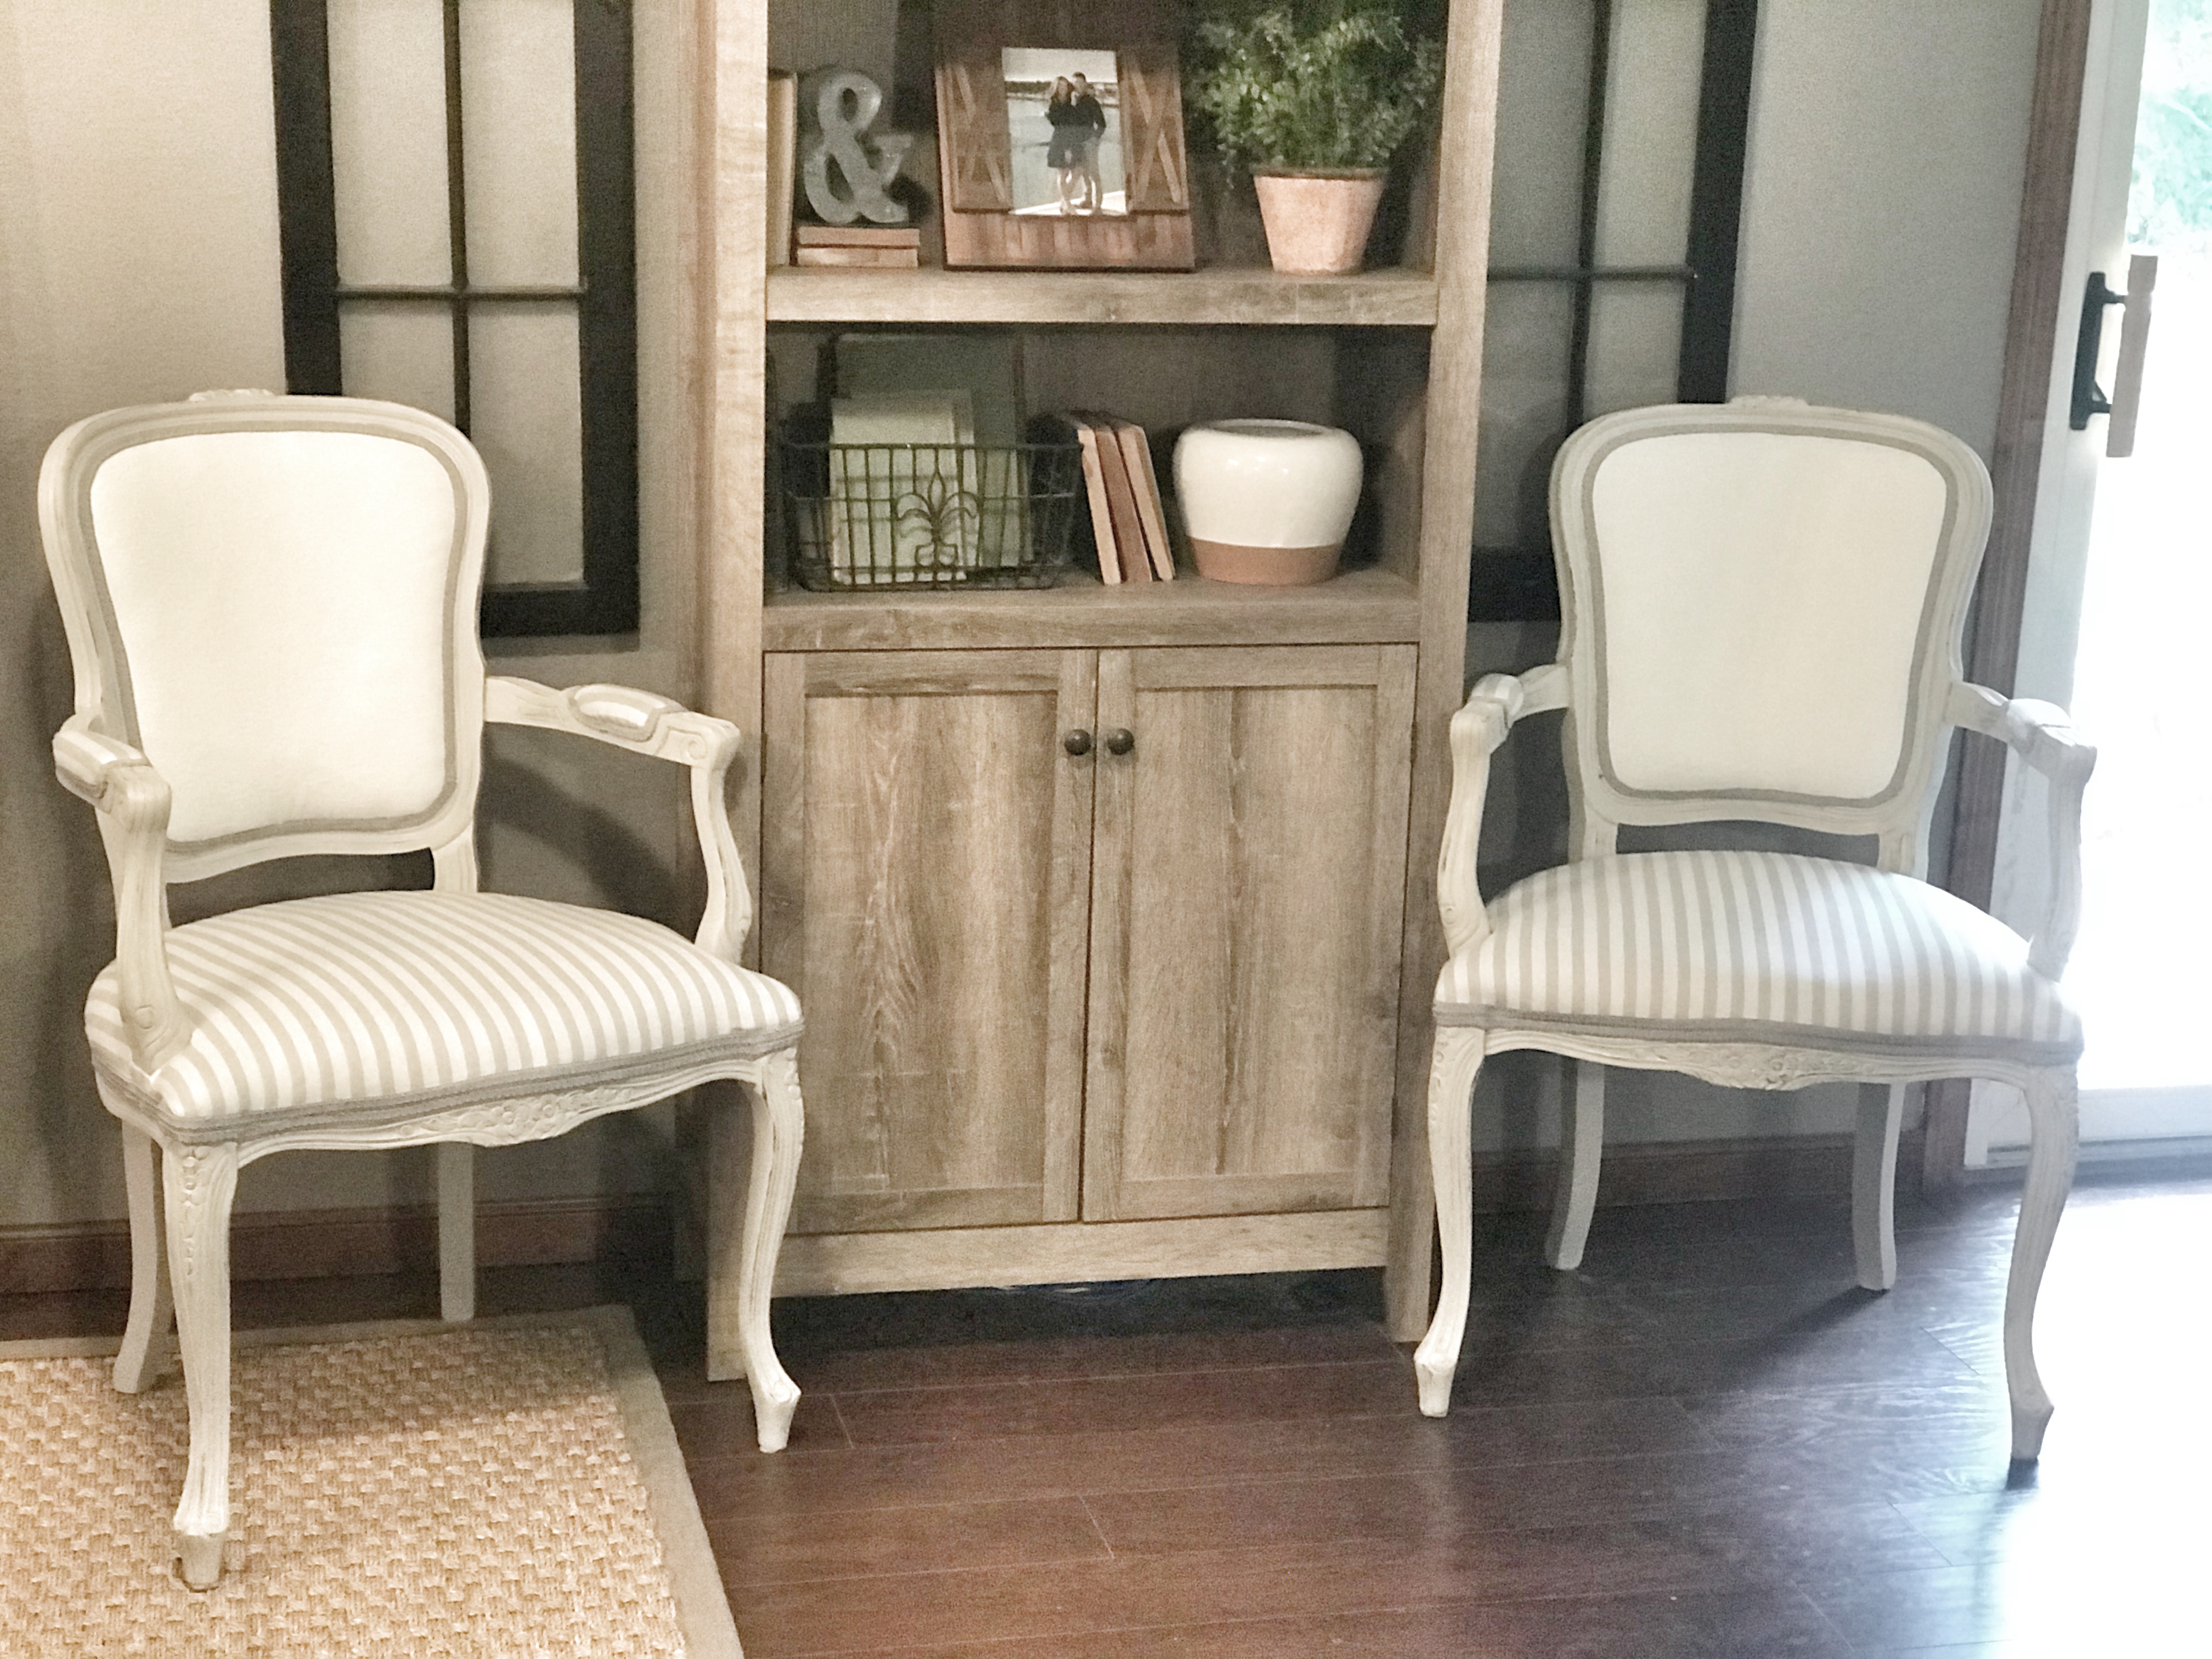
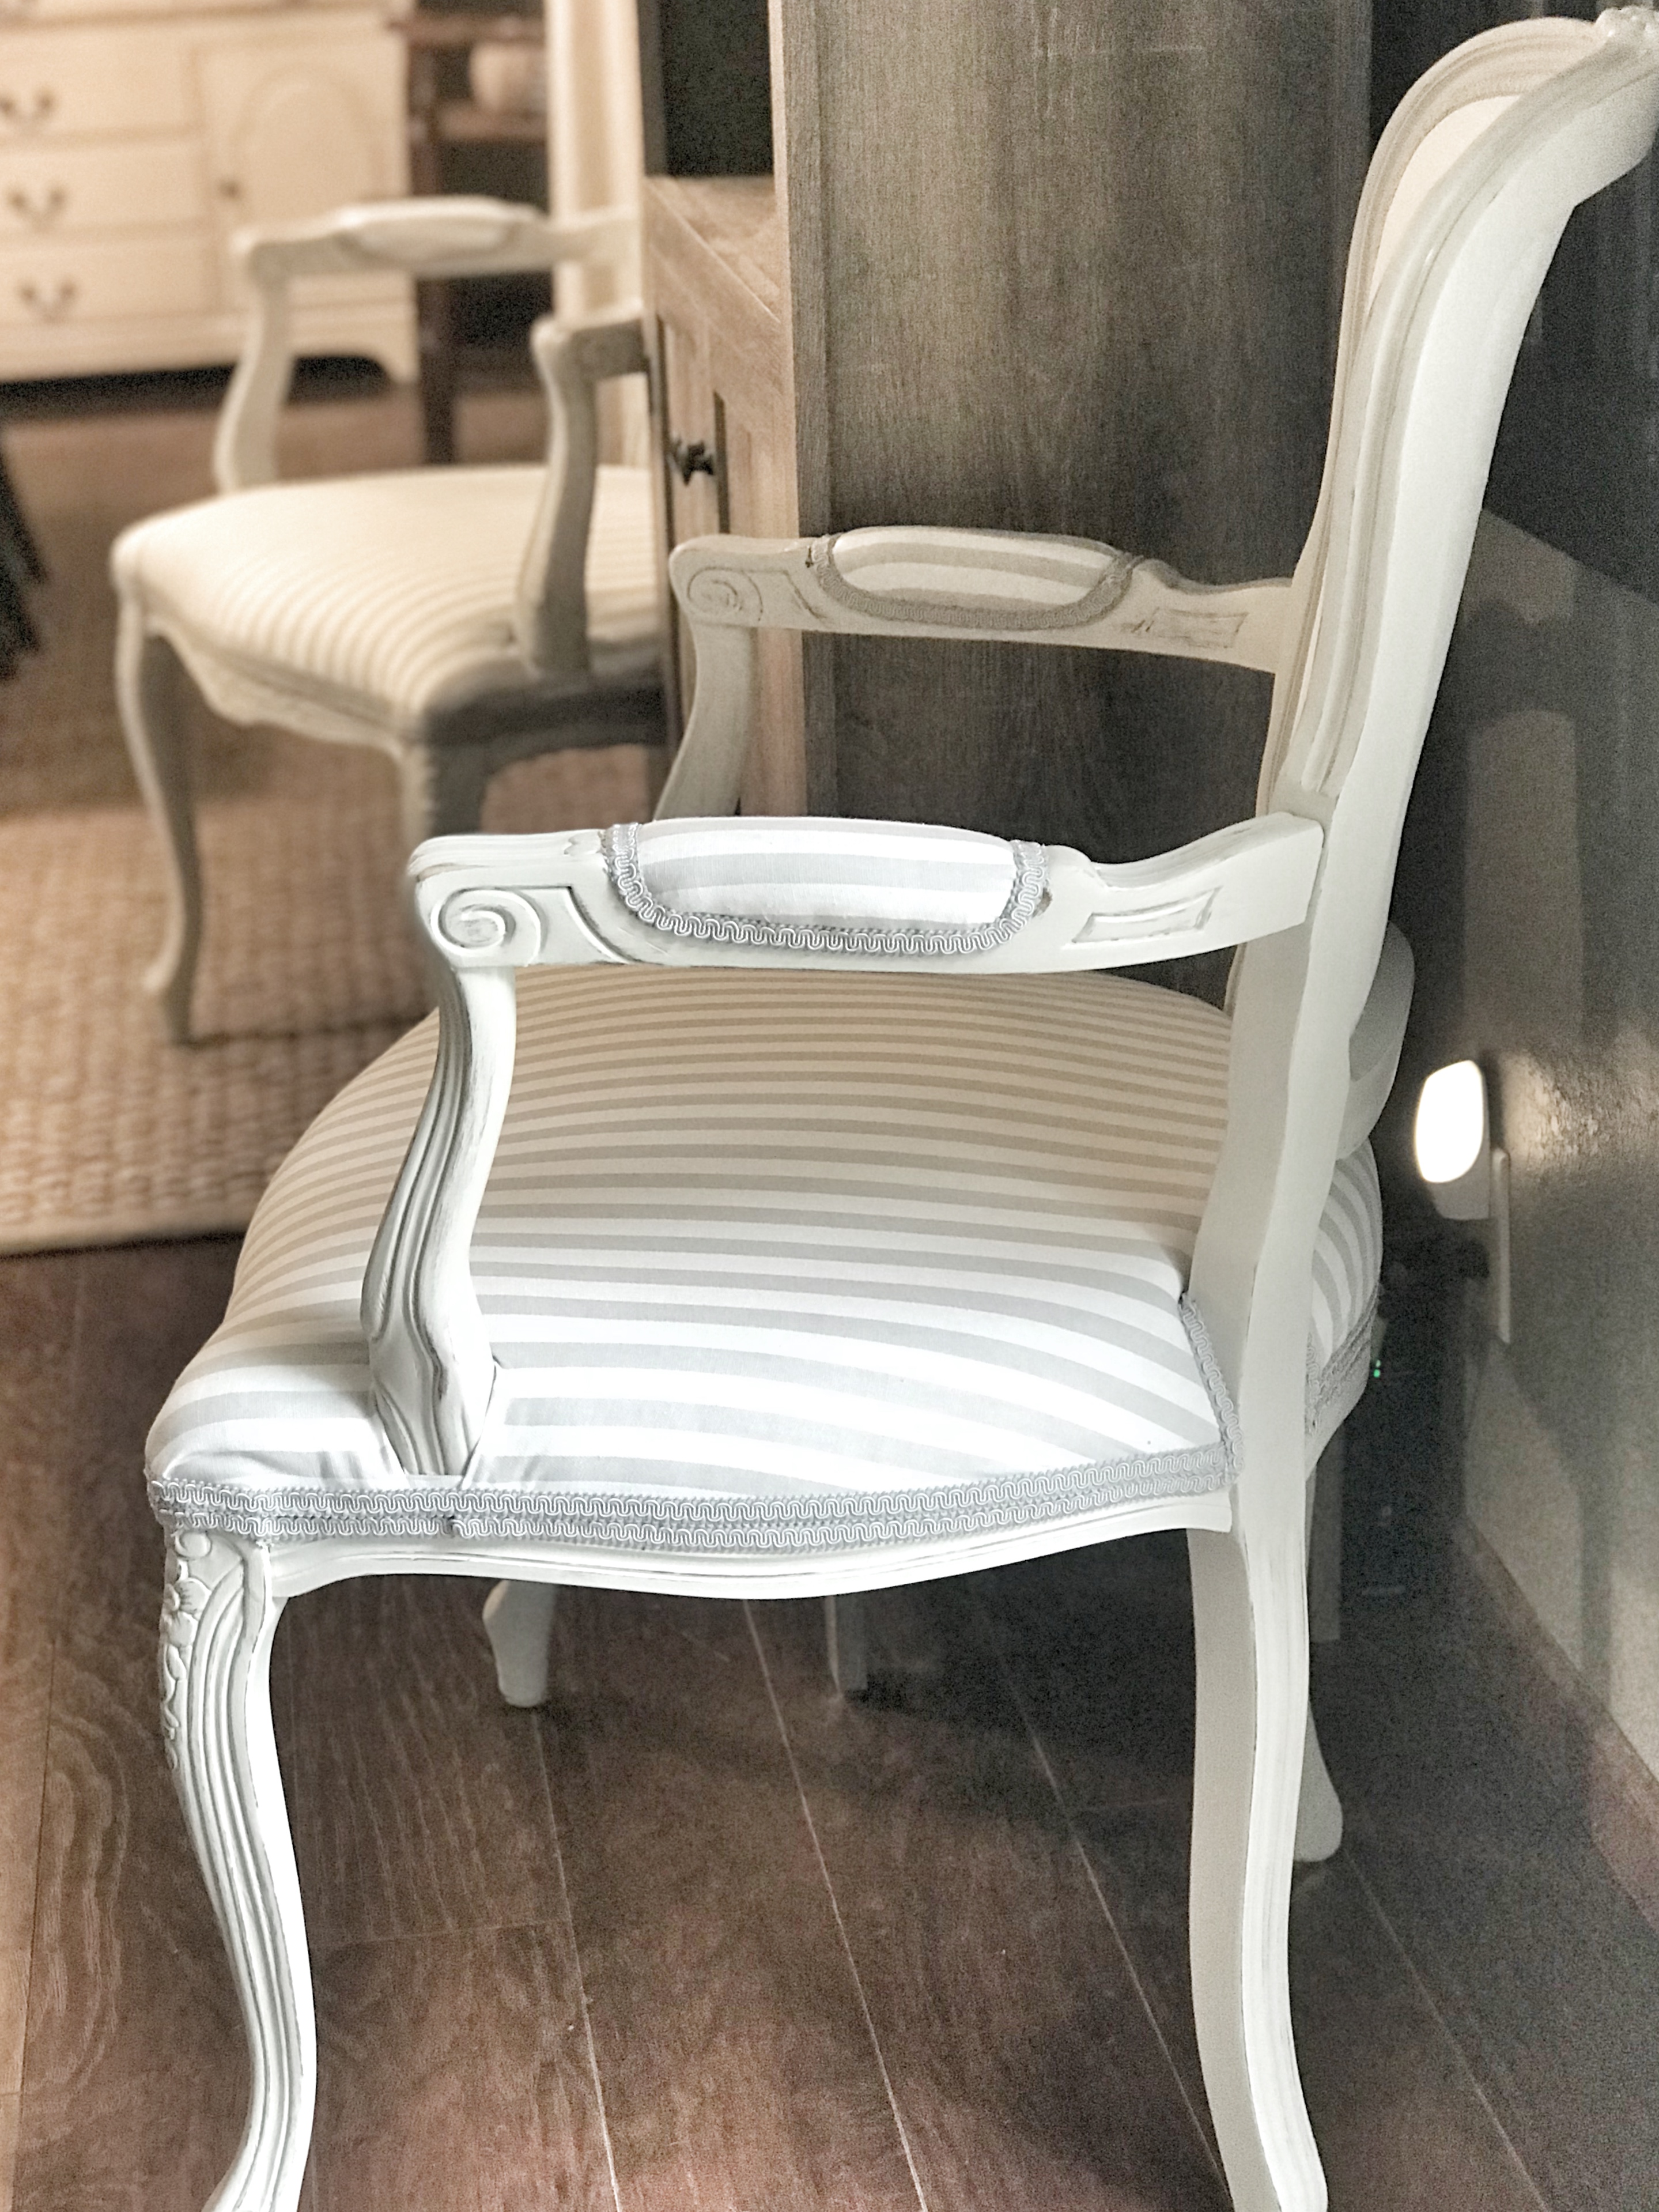
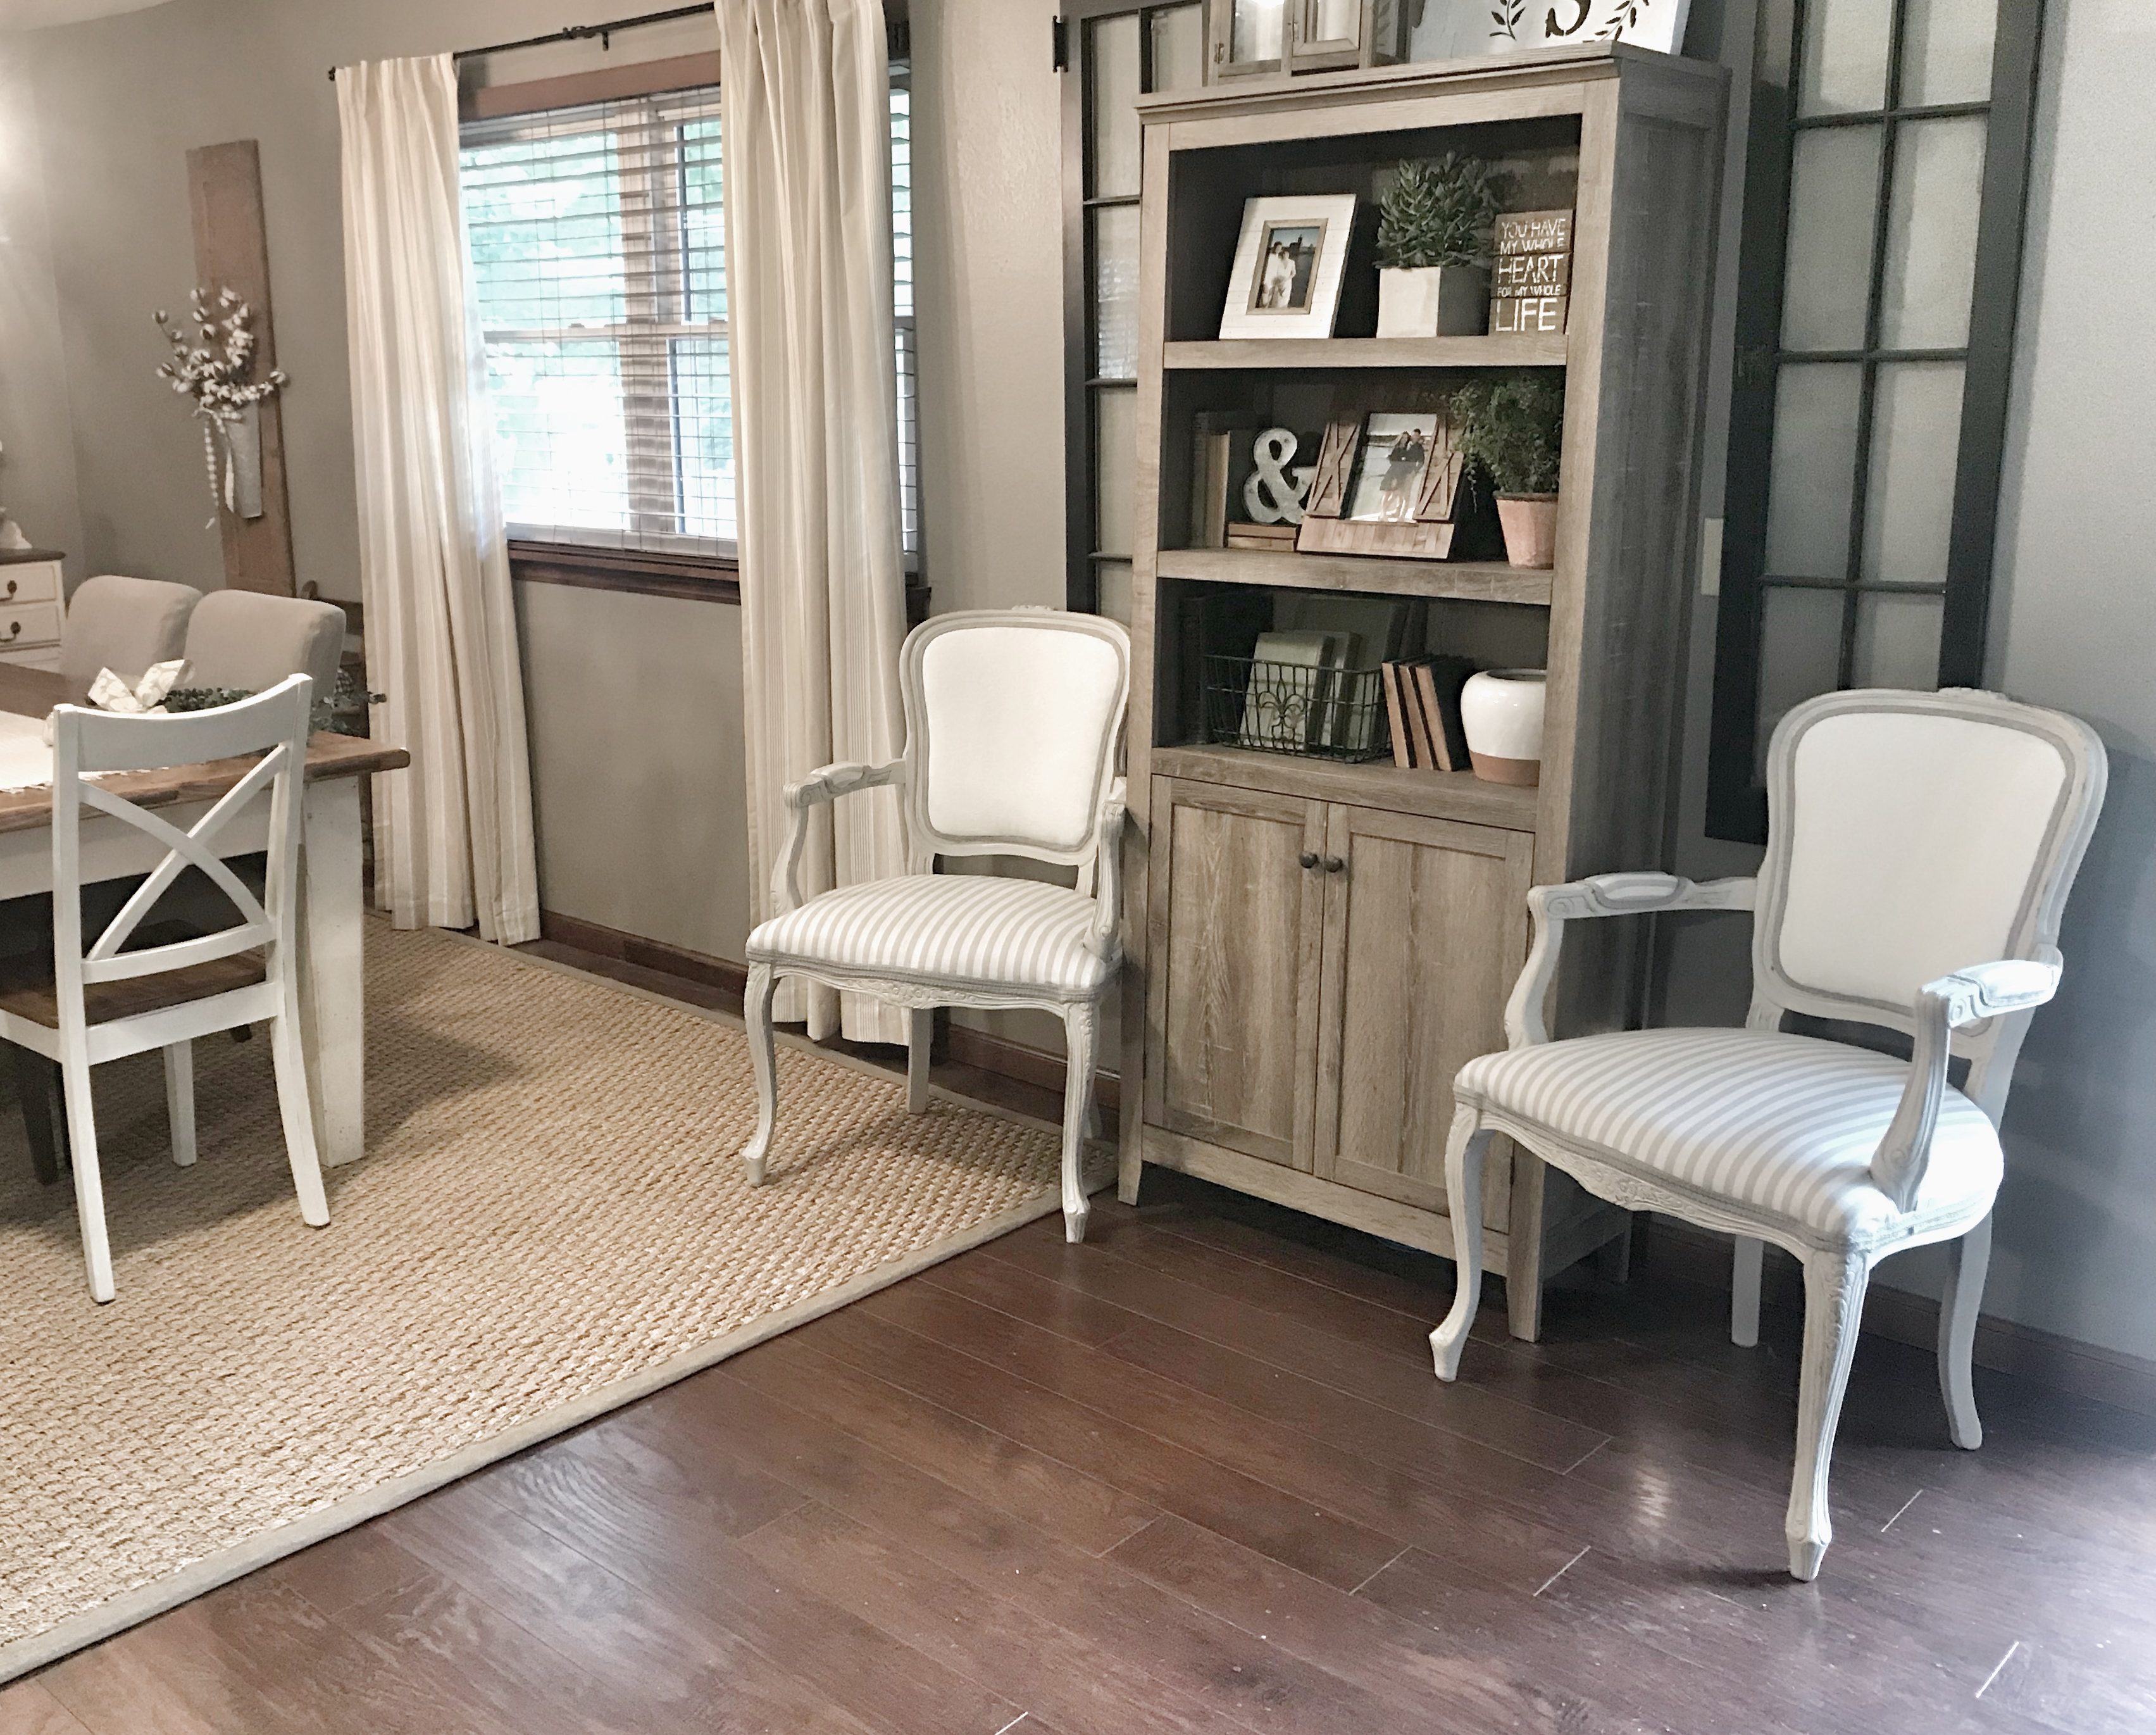
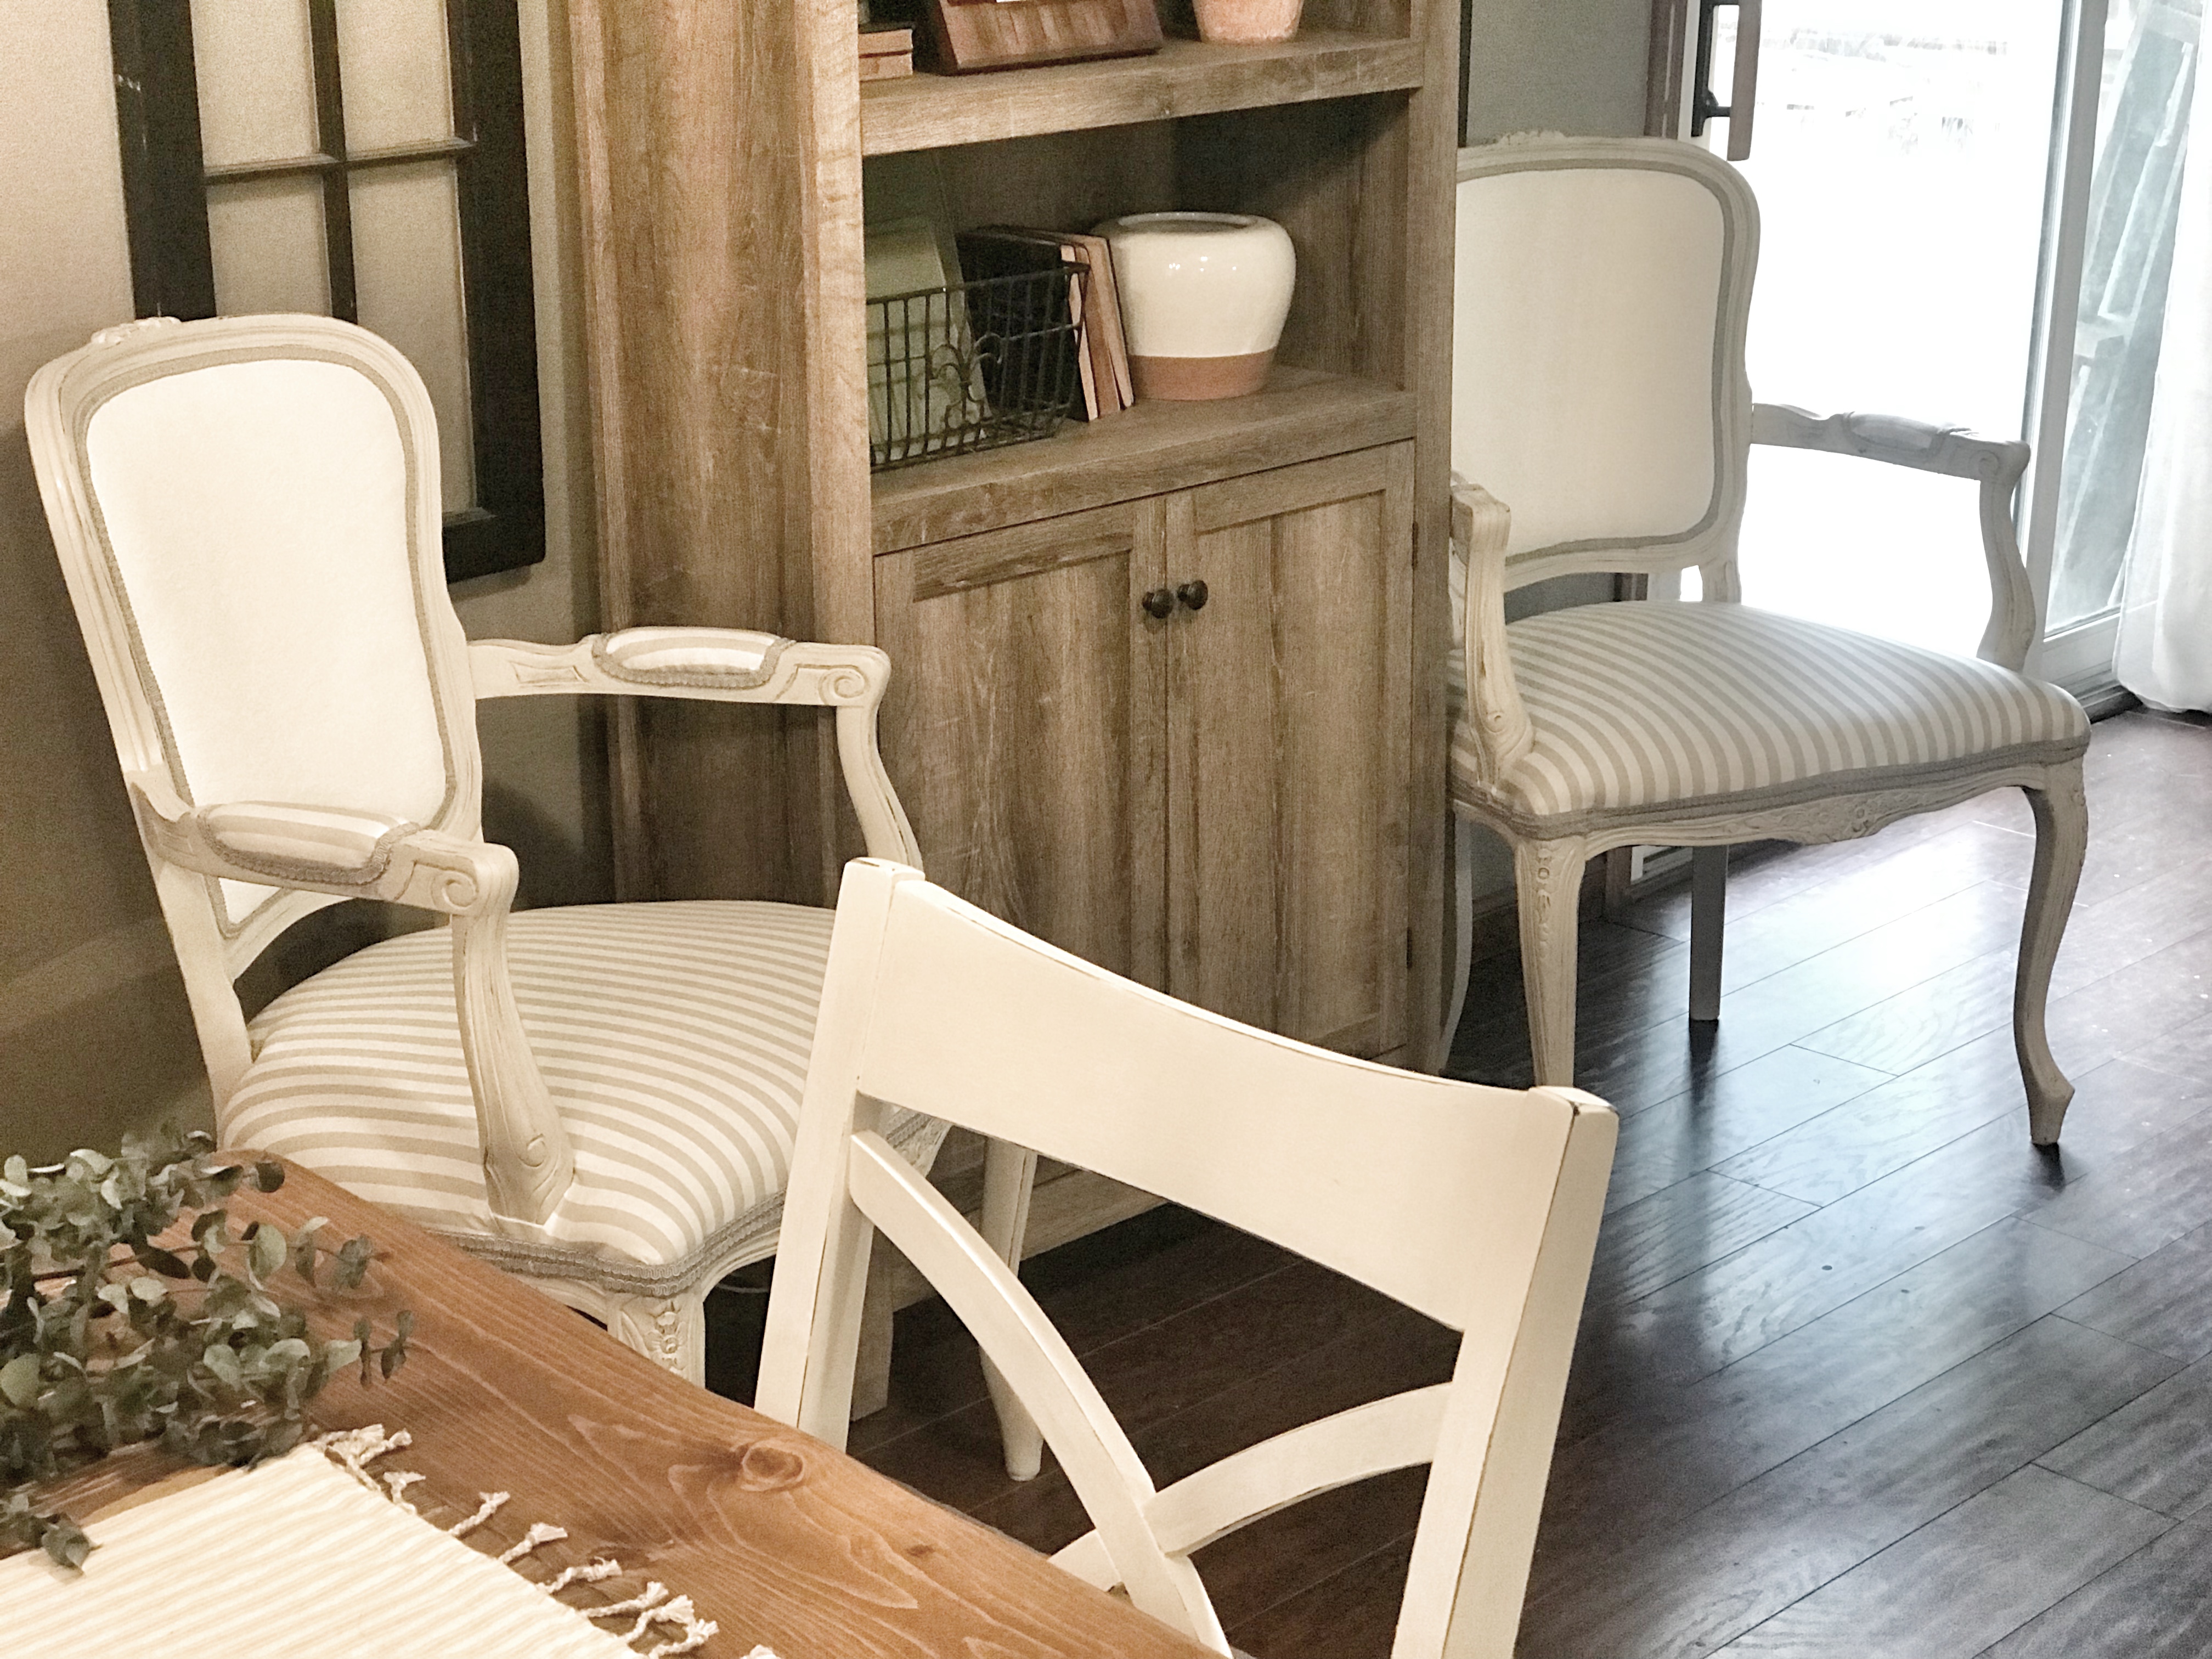
I absolutely love how the finished product turned out, and I am happy to say that I’m definitely not going to scrap these “practice pieces” ha! When it’s all said and done, these chairs really do look 1000x better, and they fit into the space very nicely. For about $100 TOTAL, I was able to bring these dated chairs back to life, and I learned a new skill. I would say that’s a win! The awkward area off of the dining room is no more. Nope, now it’s a cute little sitting area that I’m sure will be used quite a bit when we entertain!
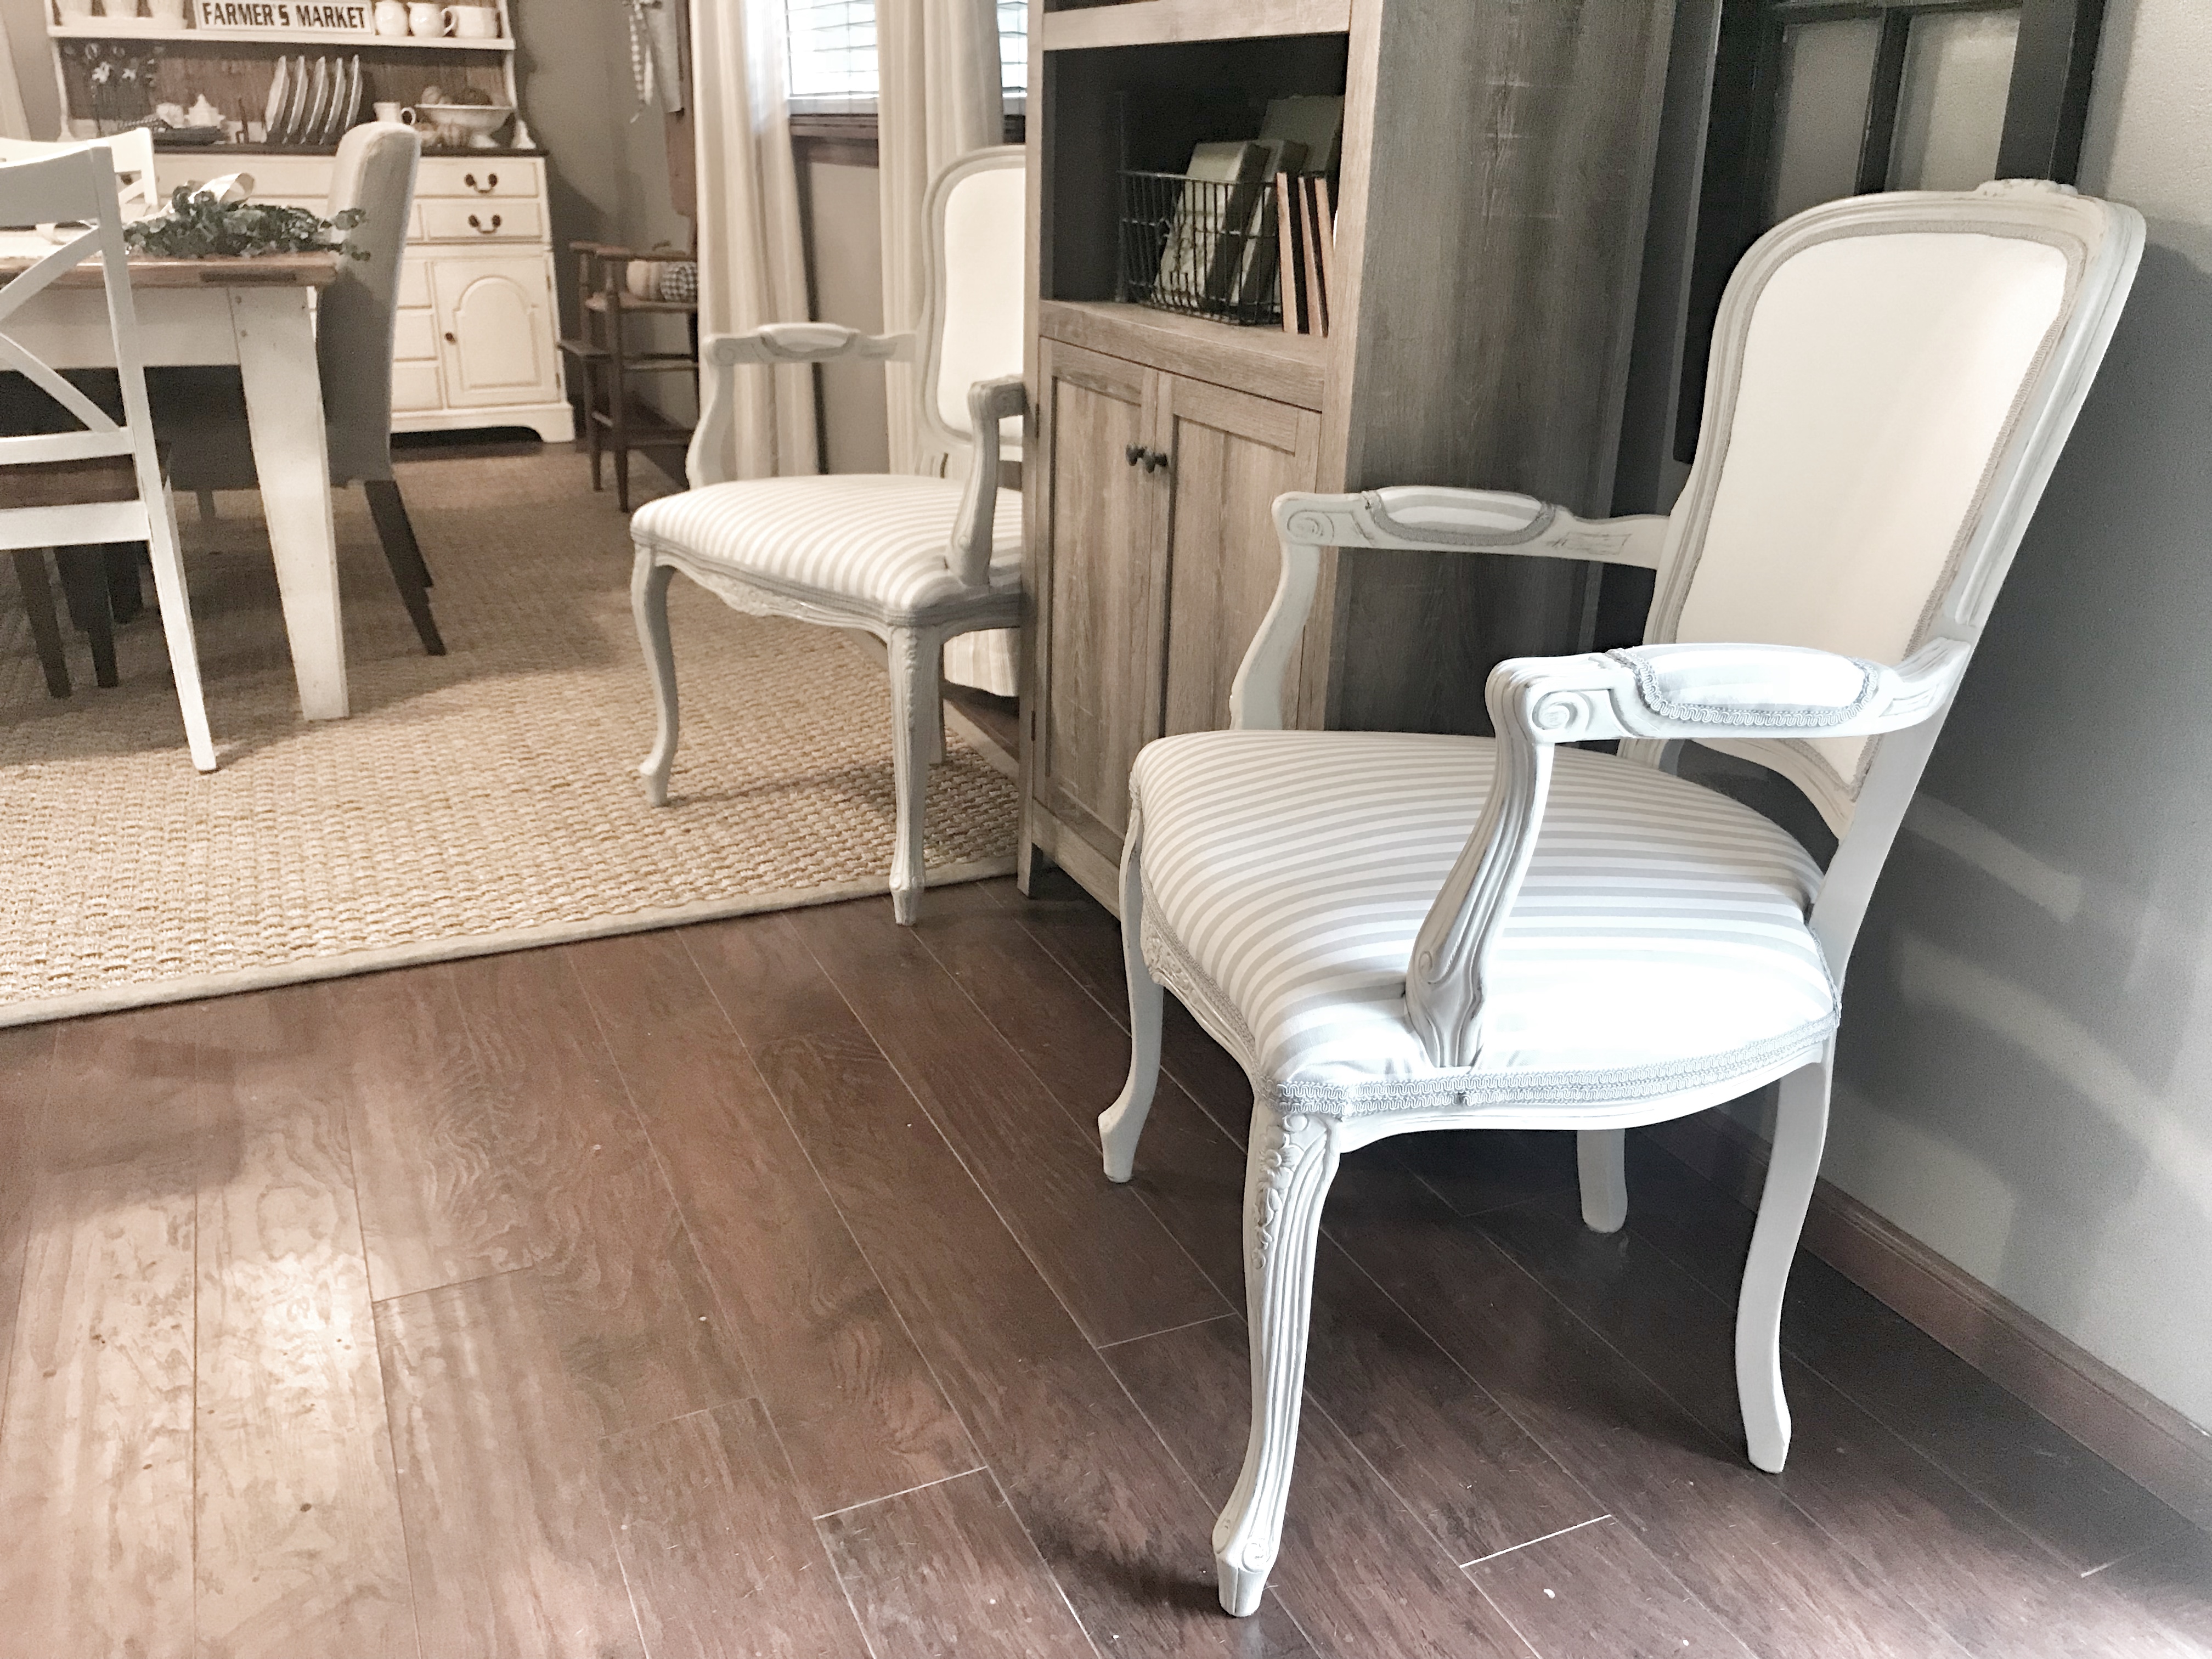
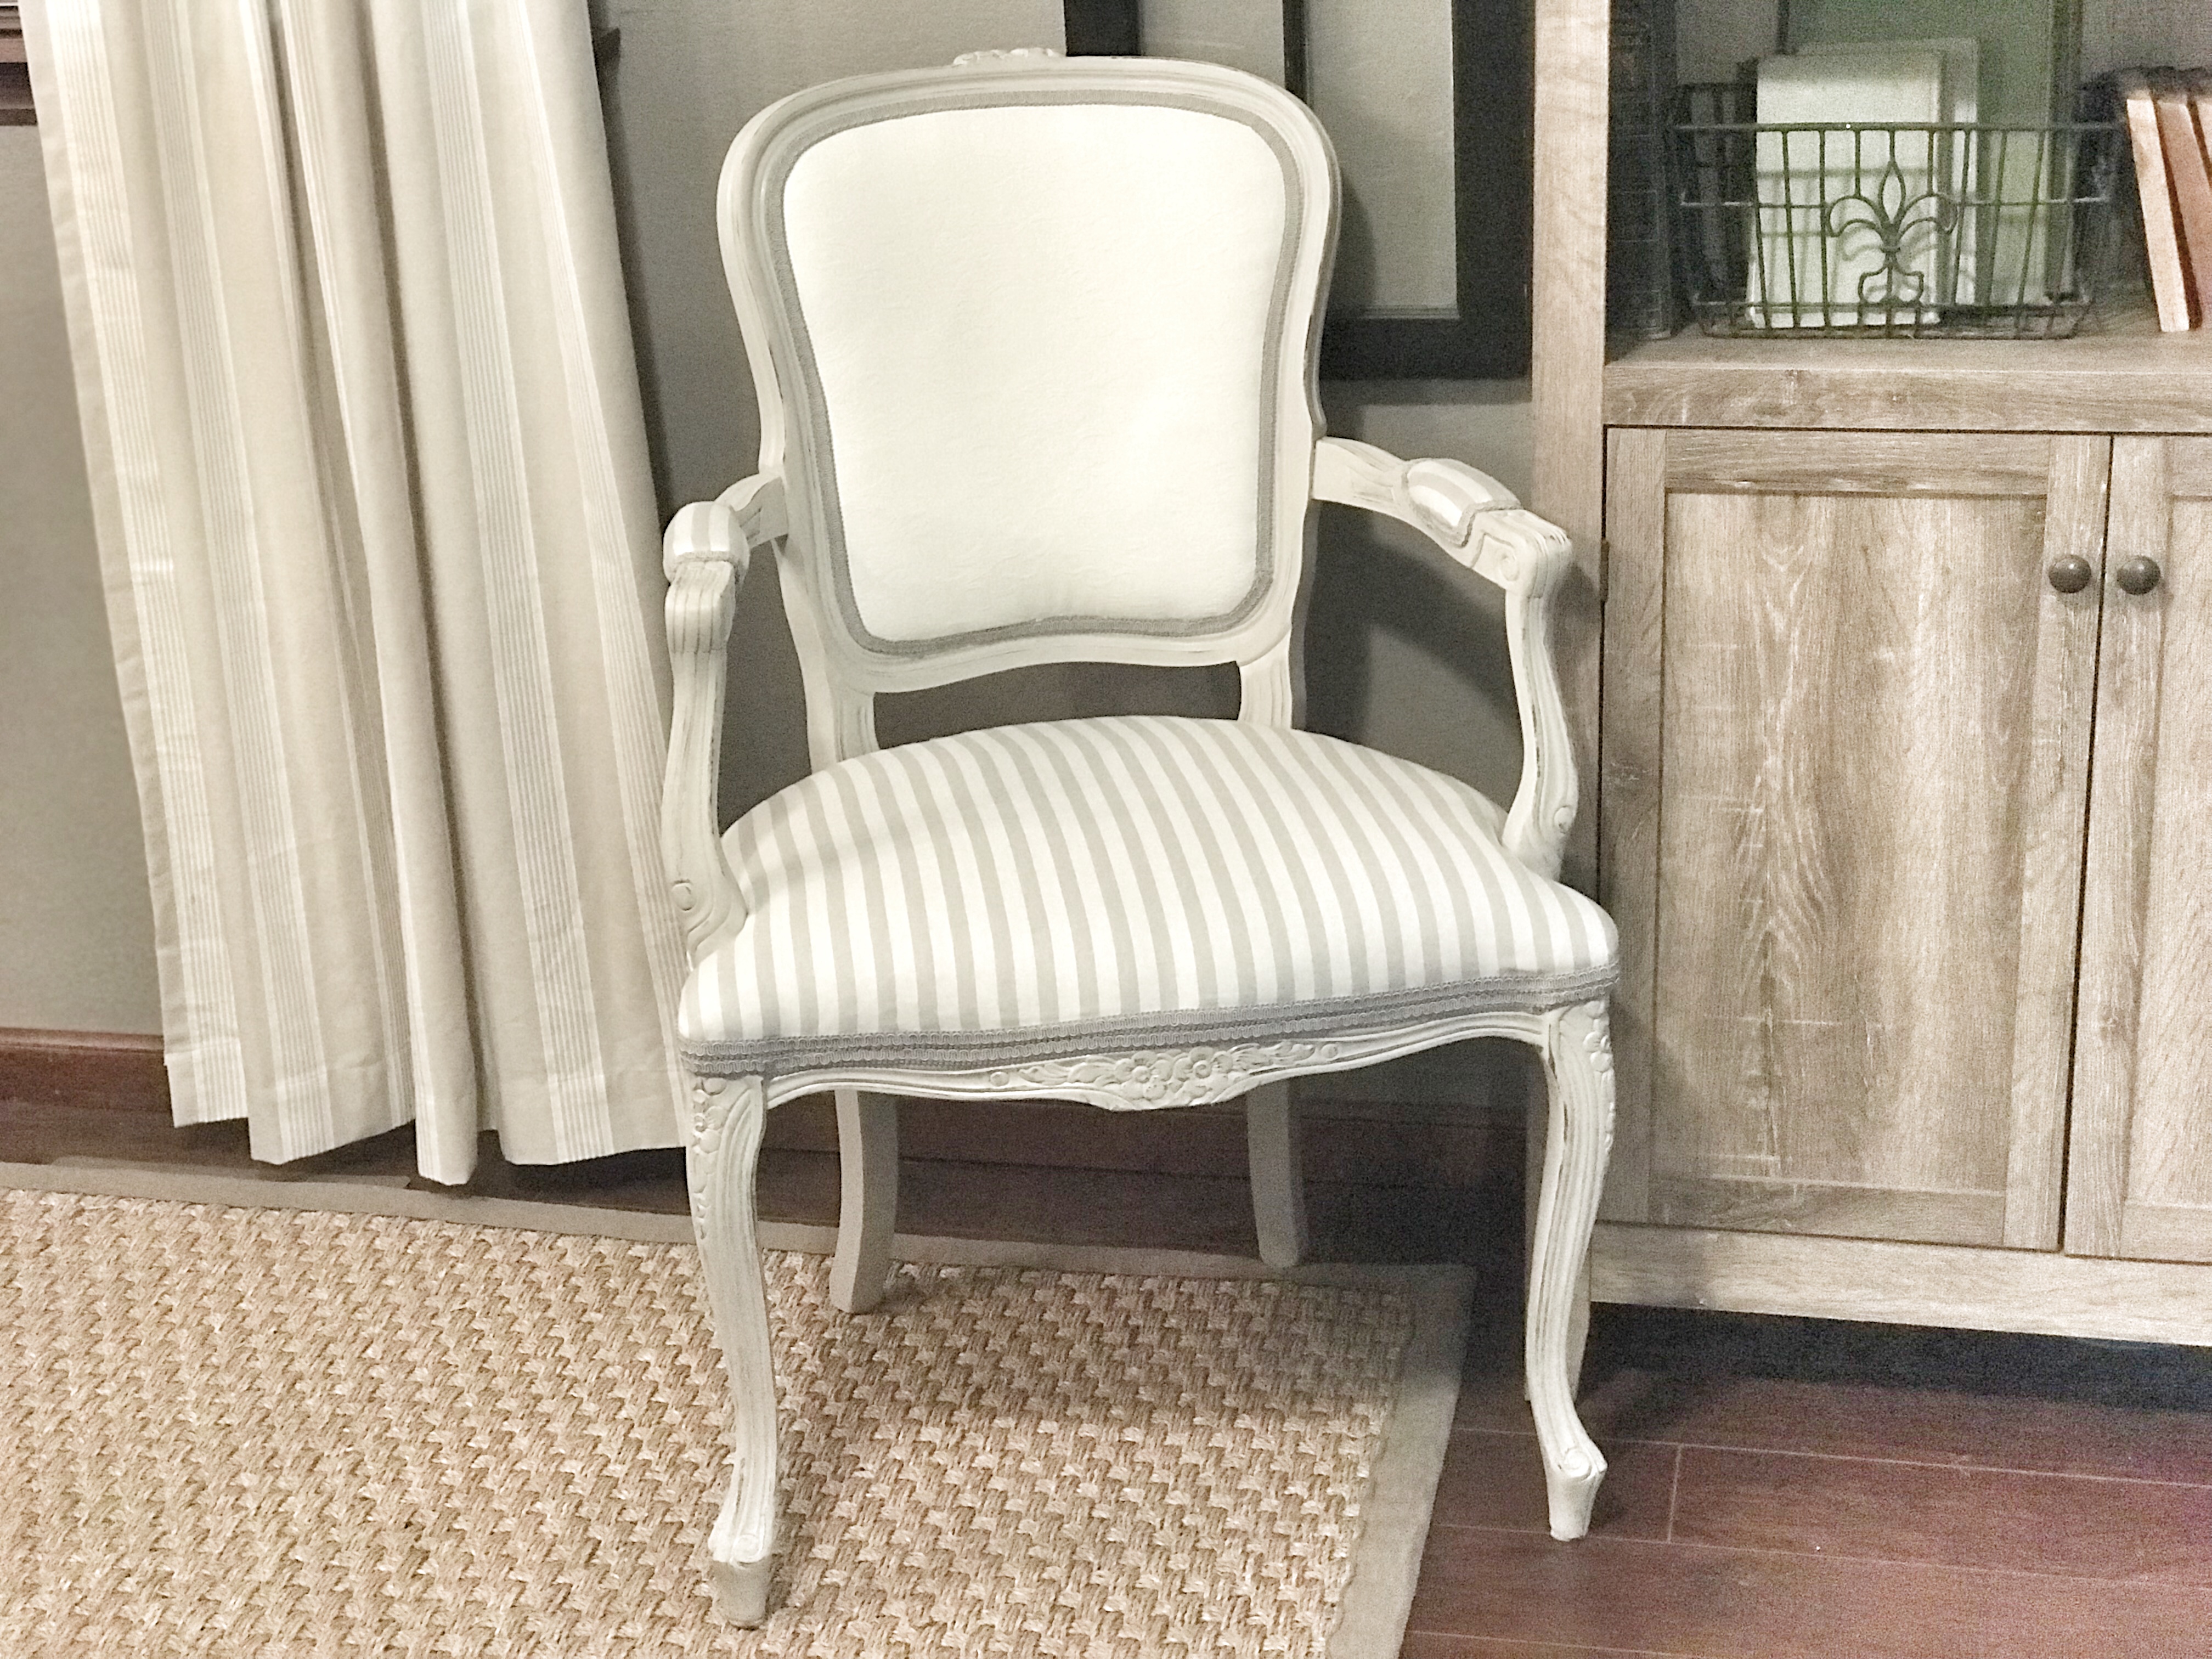
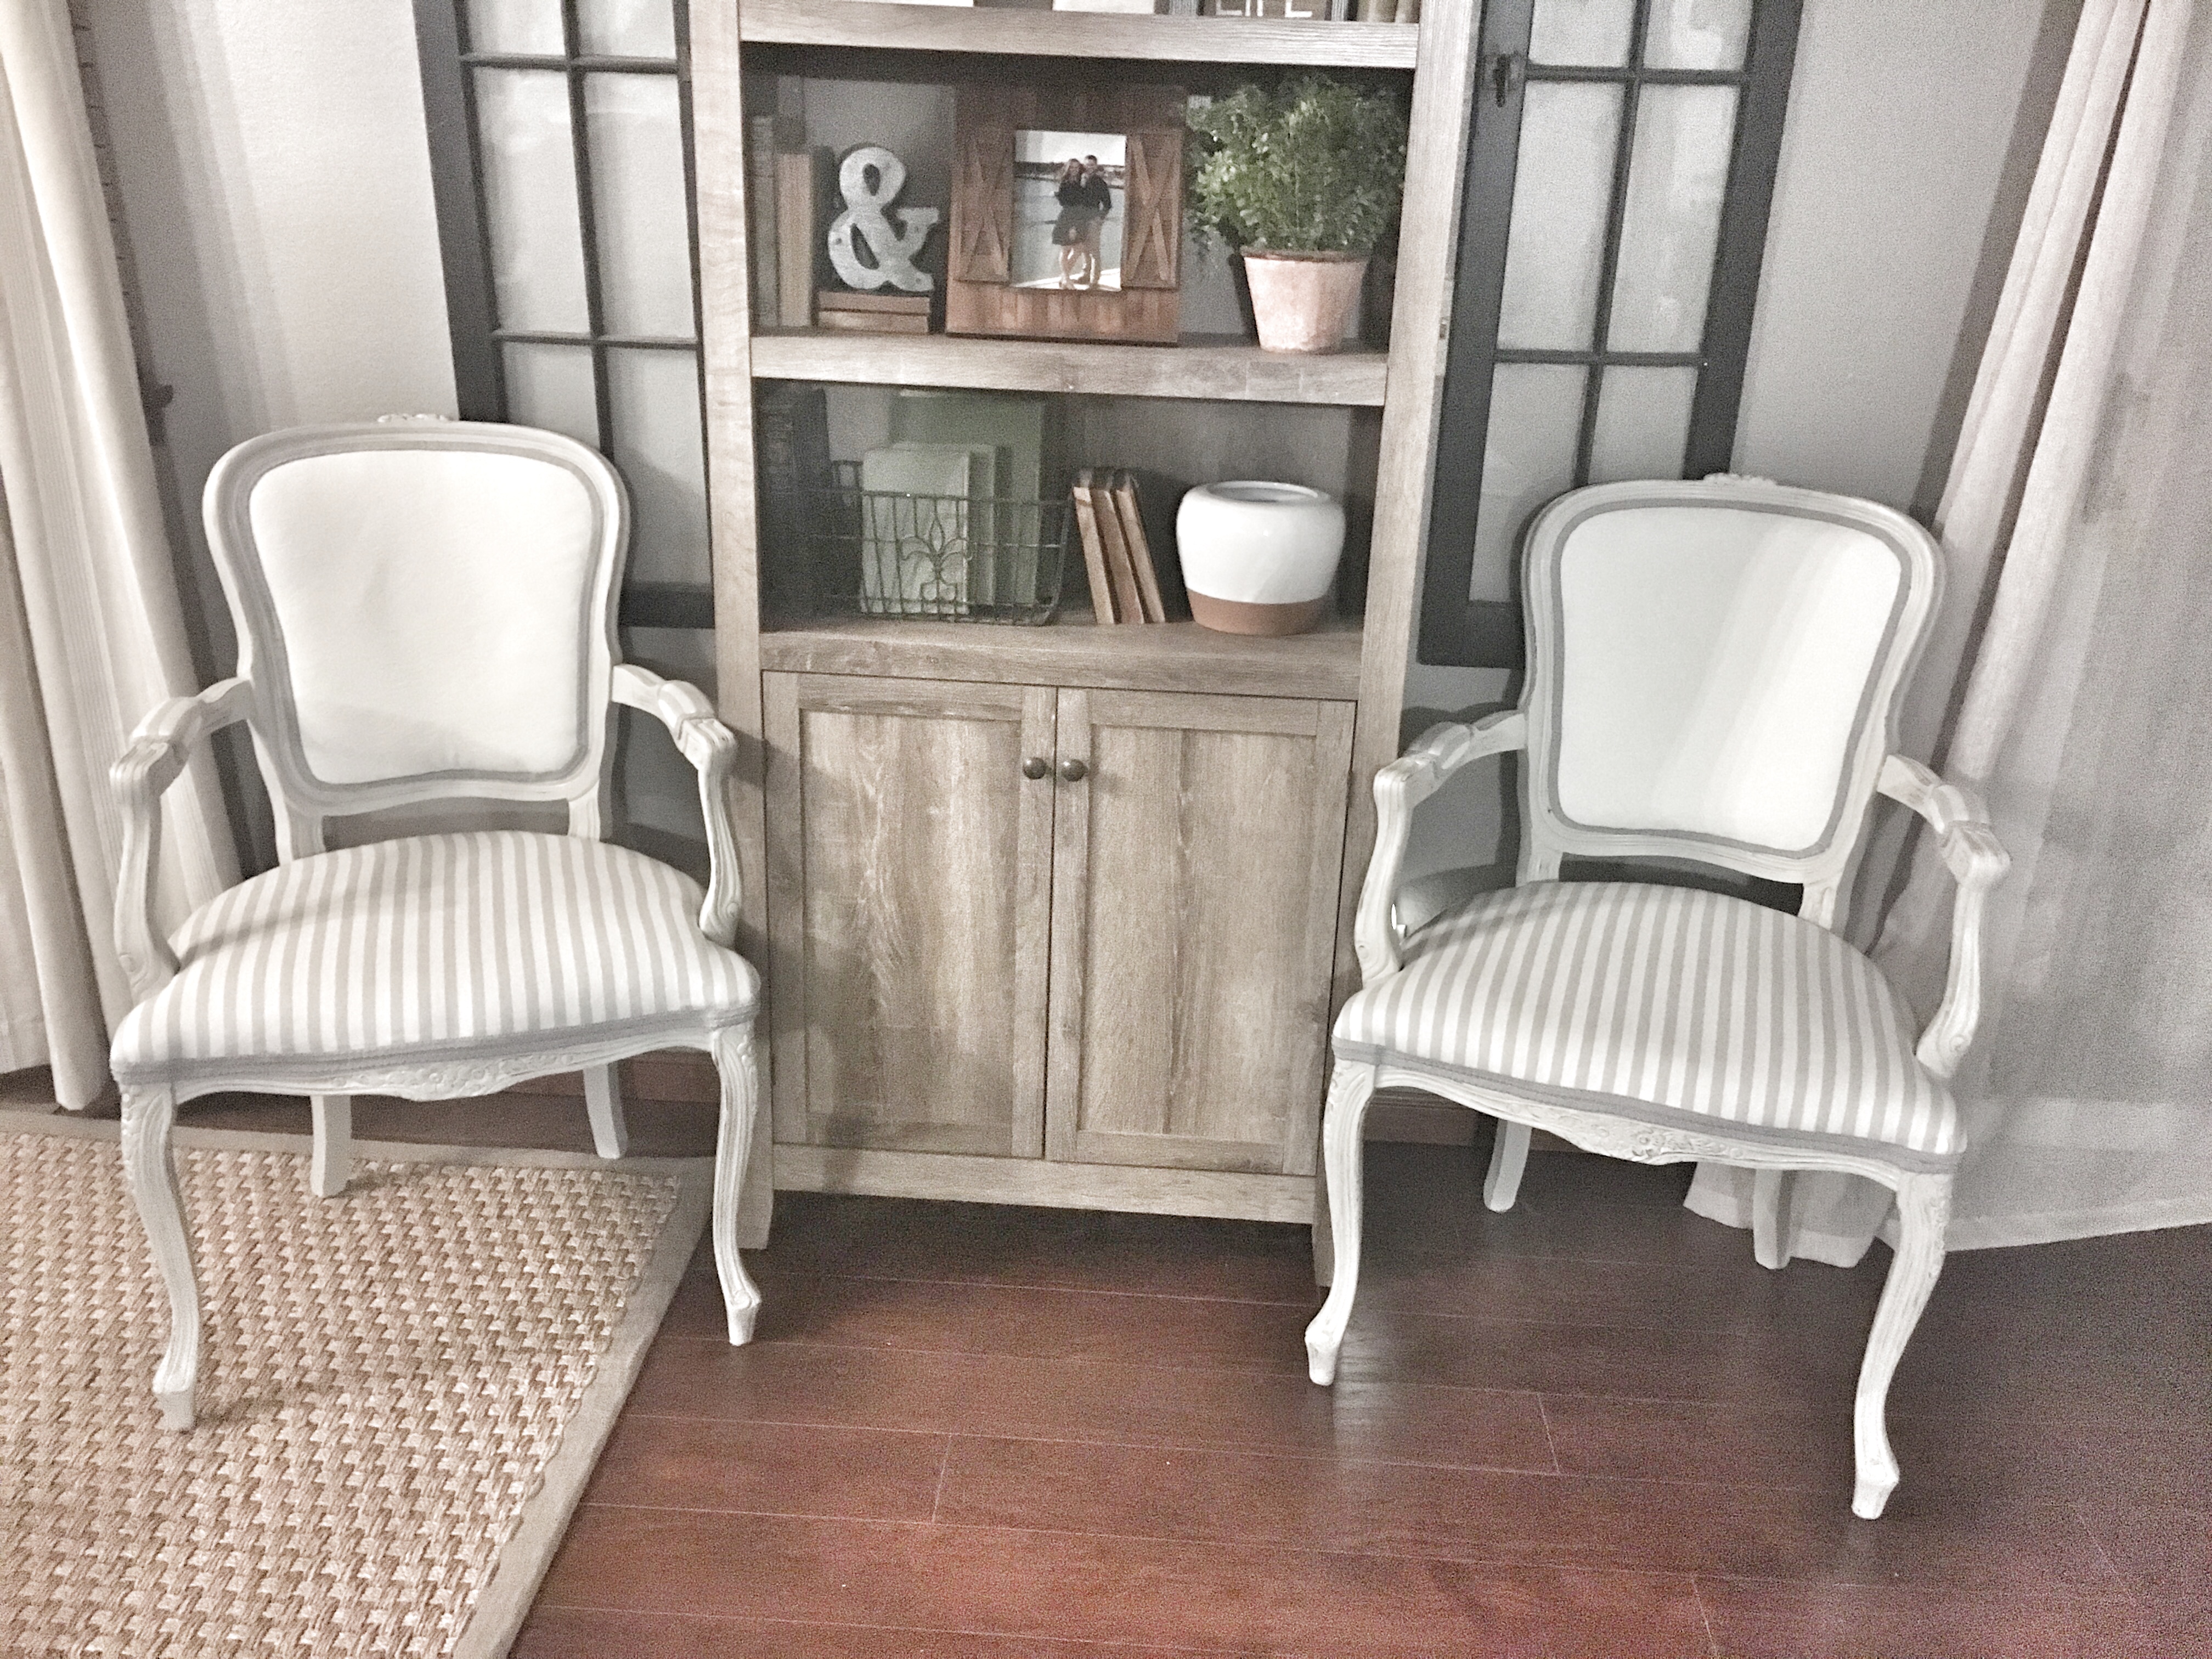
It’s safe to say my first reupholstery project was a success! Thanks to a lot of patience, some outside-of-the-box thinking, and great bargain hunting, these chairs finish off this unused space, and add the shabby chic, farmhouse style I love! I hope this was helpful to some other newbies out there who want to take on a reupholstery project! Thanks for reading, God bless!
XOXO
ASHLEY DIANN
