Master Bedroom Makeover (Part One)
Marriage means sharing a life with someone you love; but it also means integrating and sharing your old furniture that you don’t love. For awhile at least, until you can afford (and/or agree on) something new, you just live with the husband’s bedroom furniture that he had before you were married.
This was the problem we faced in our master bedroom, specifically with our dressers. We both had nice, functional dressers, but they were totally different colors and styles and didn’t make sense in our room. I like mismatched furniture when it still coordinates, but these dressers were clashing big time, and for awhile we couldn’t agree on what to do.
After months of searching online for stylish, inexpensive dressers that still had the same amount of storage we were used to, I finally came to this conclusion; since I care more about style, and he cares more about function, why don’t I change the style of the dressers we have and MAKE them coordinate? That way we don’t have to compromise storage for style!
This didn’t just mean painting them: I would have to modify both of them beyond that. I would be taking two totally different pieces of furniture and making them look somewhat coordinated (hopefully). I’m always up for a challenge, though, and when Logan was on board I got to work almost immediately!
(I was so excited to update it, I didn’t think to snap a before picture until four of the drawers had already been painted…oops, lol. You get the idea).
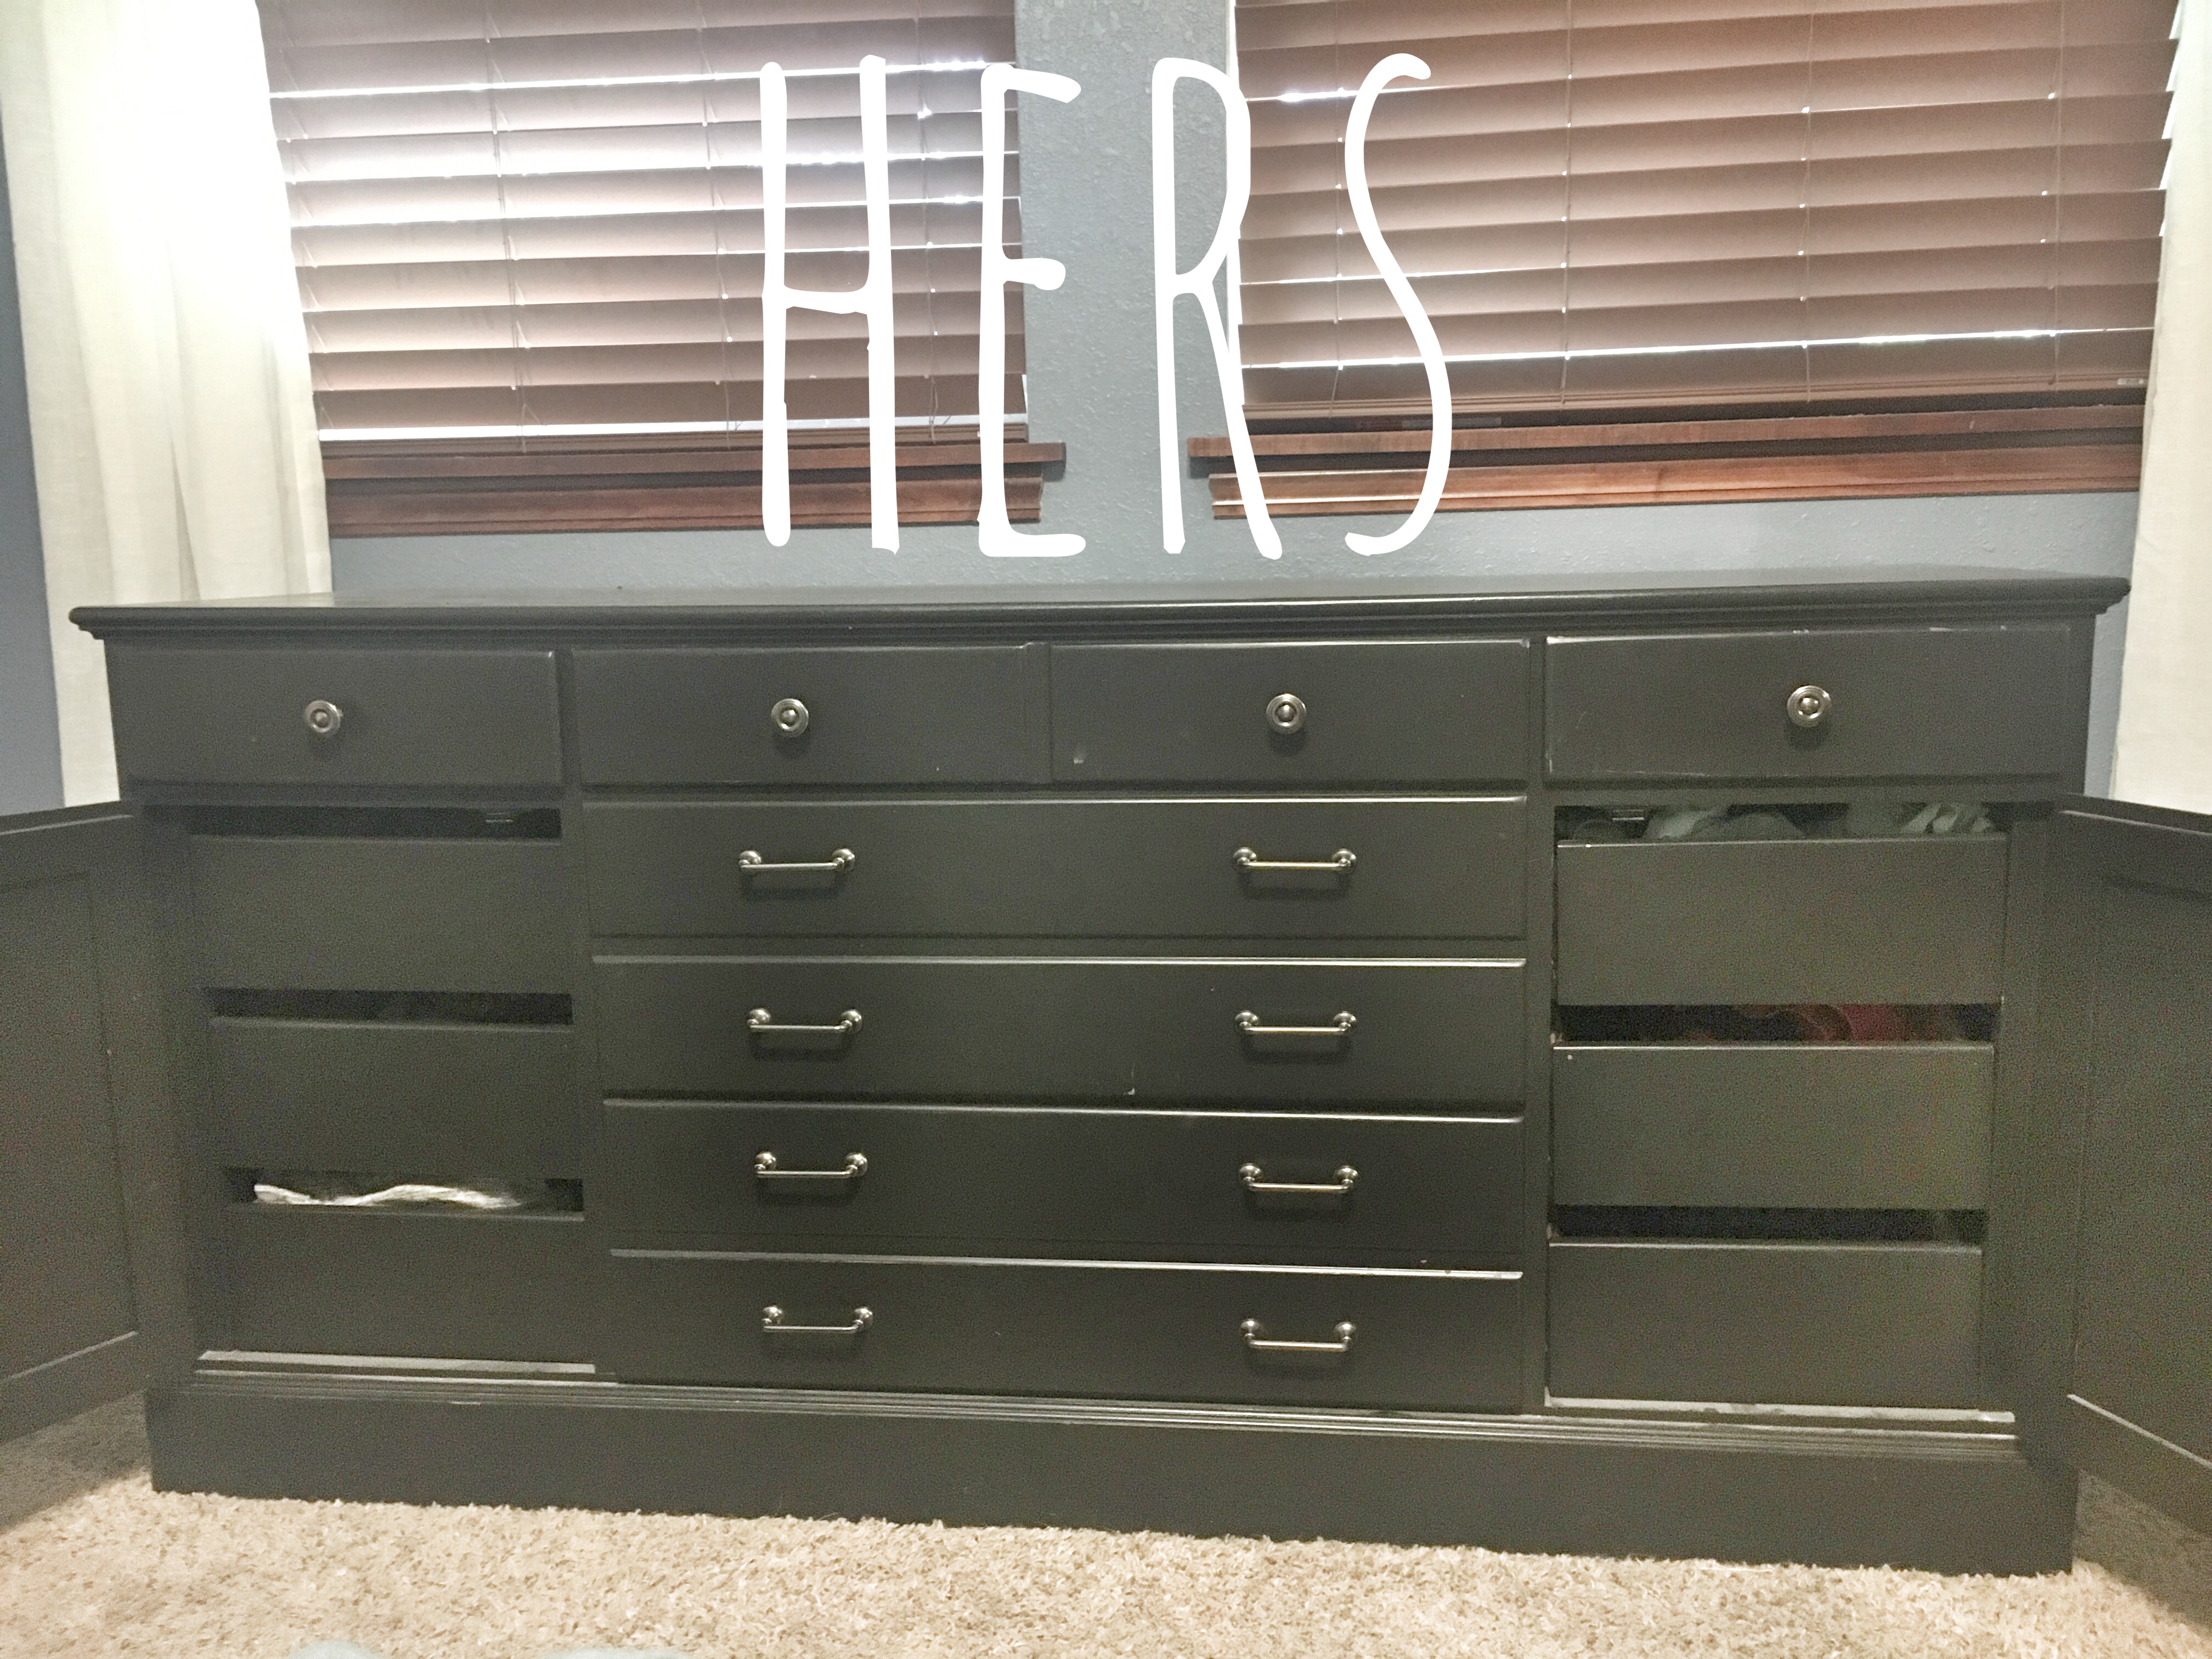
My Dresser
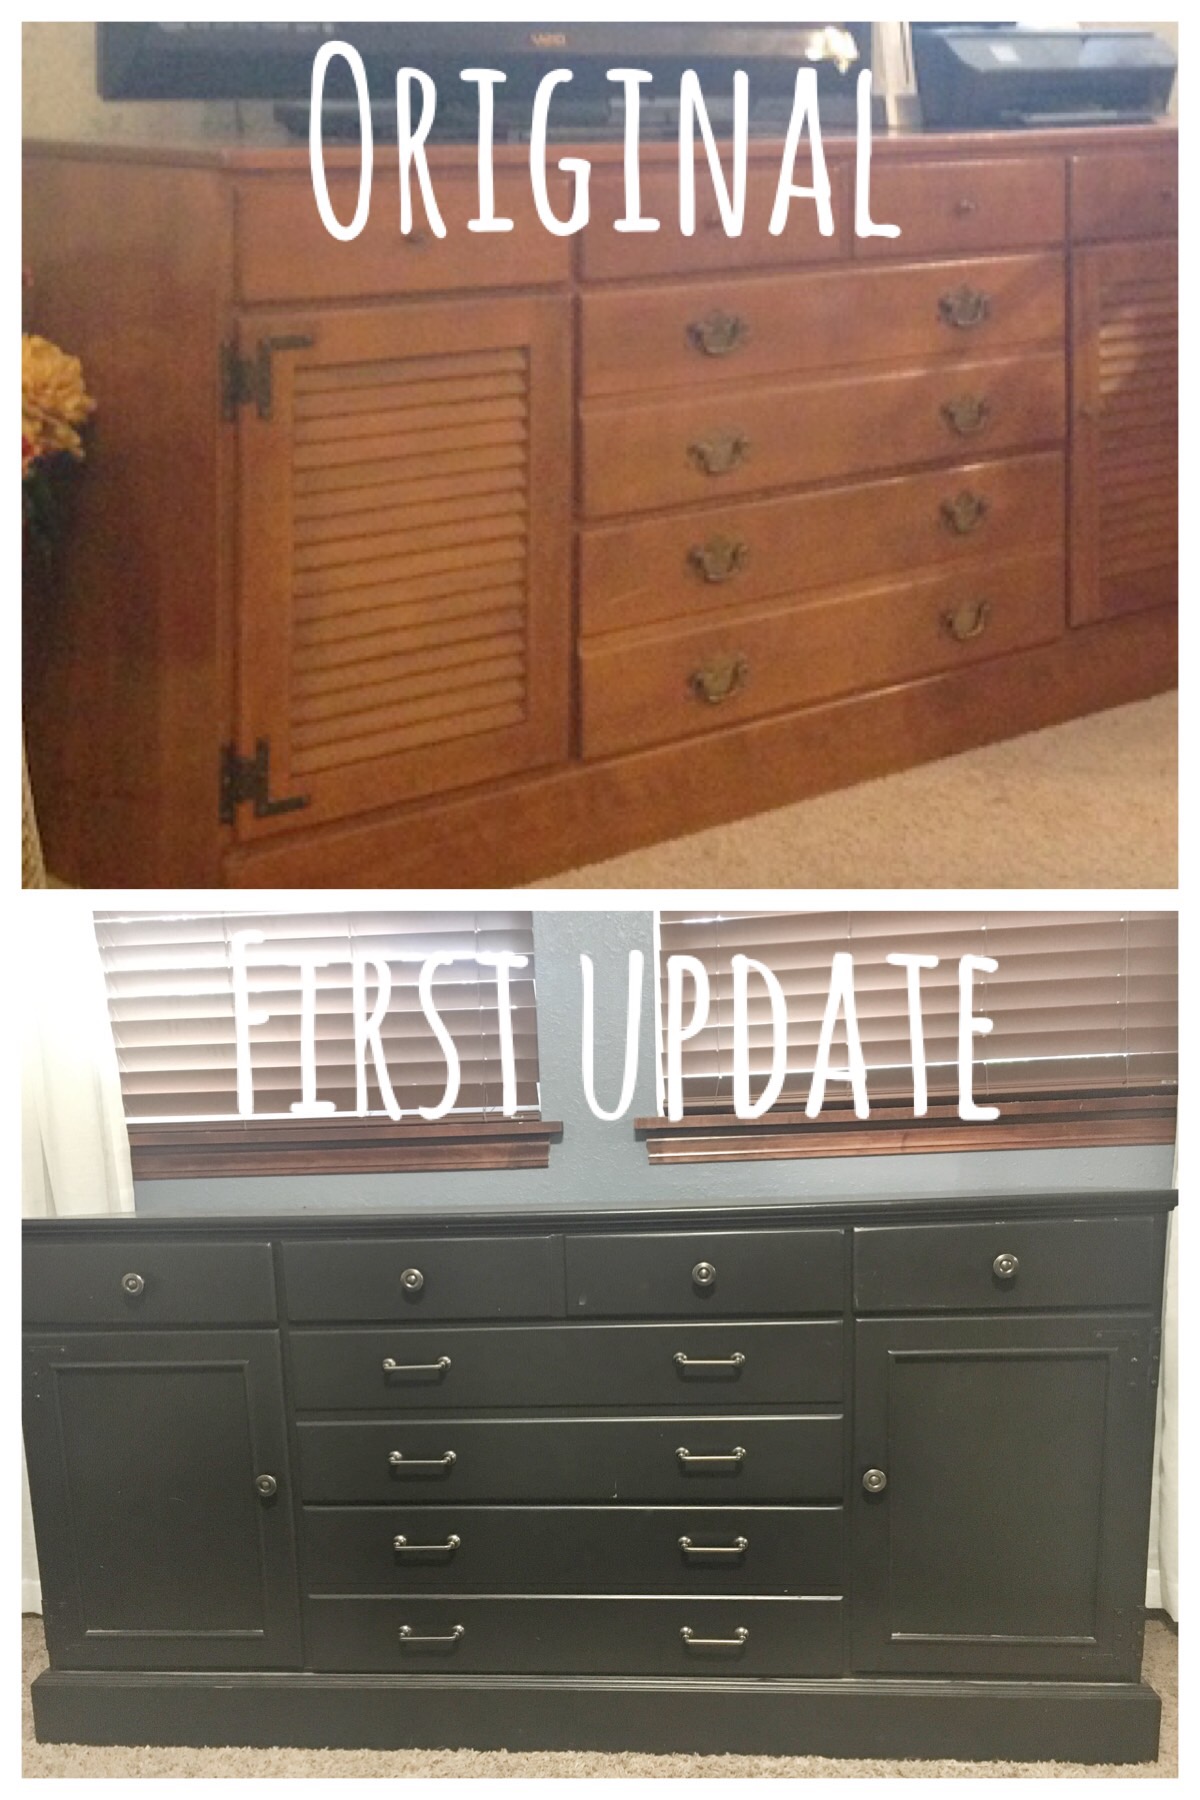
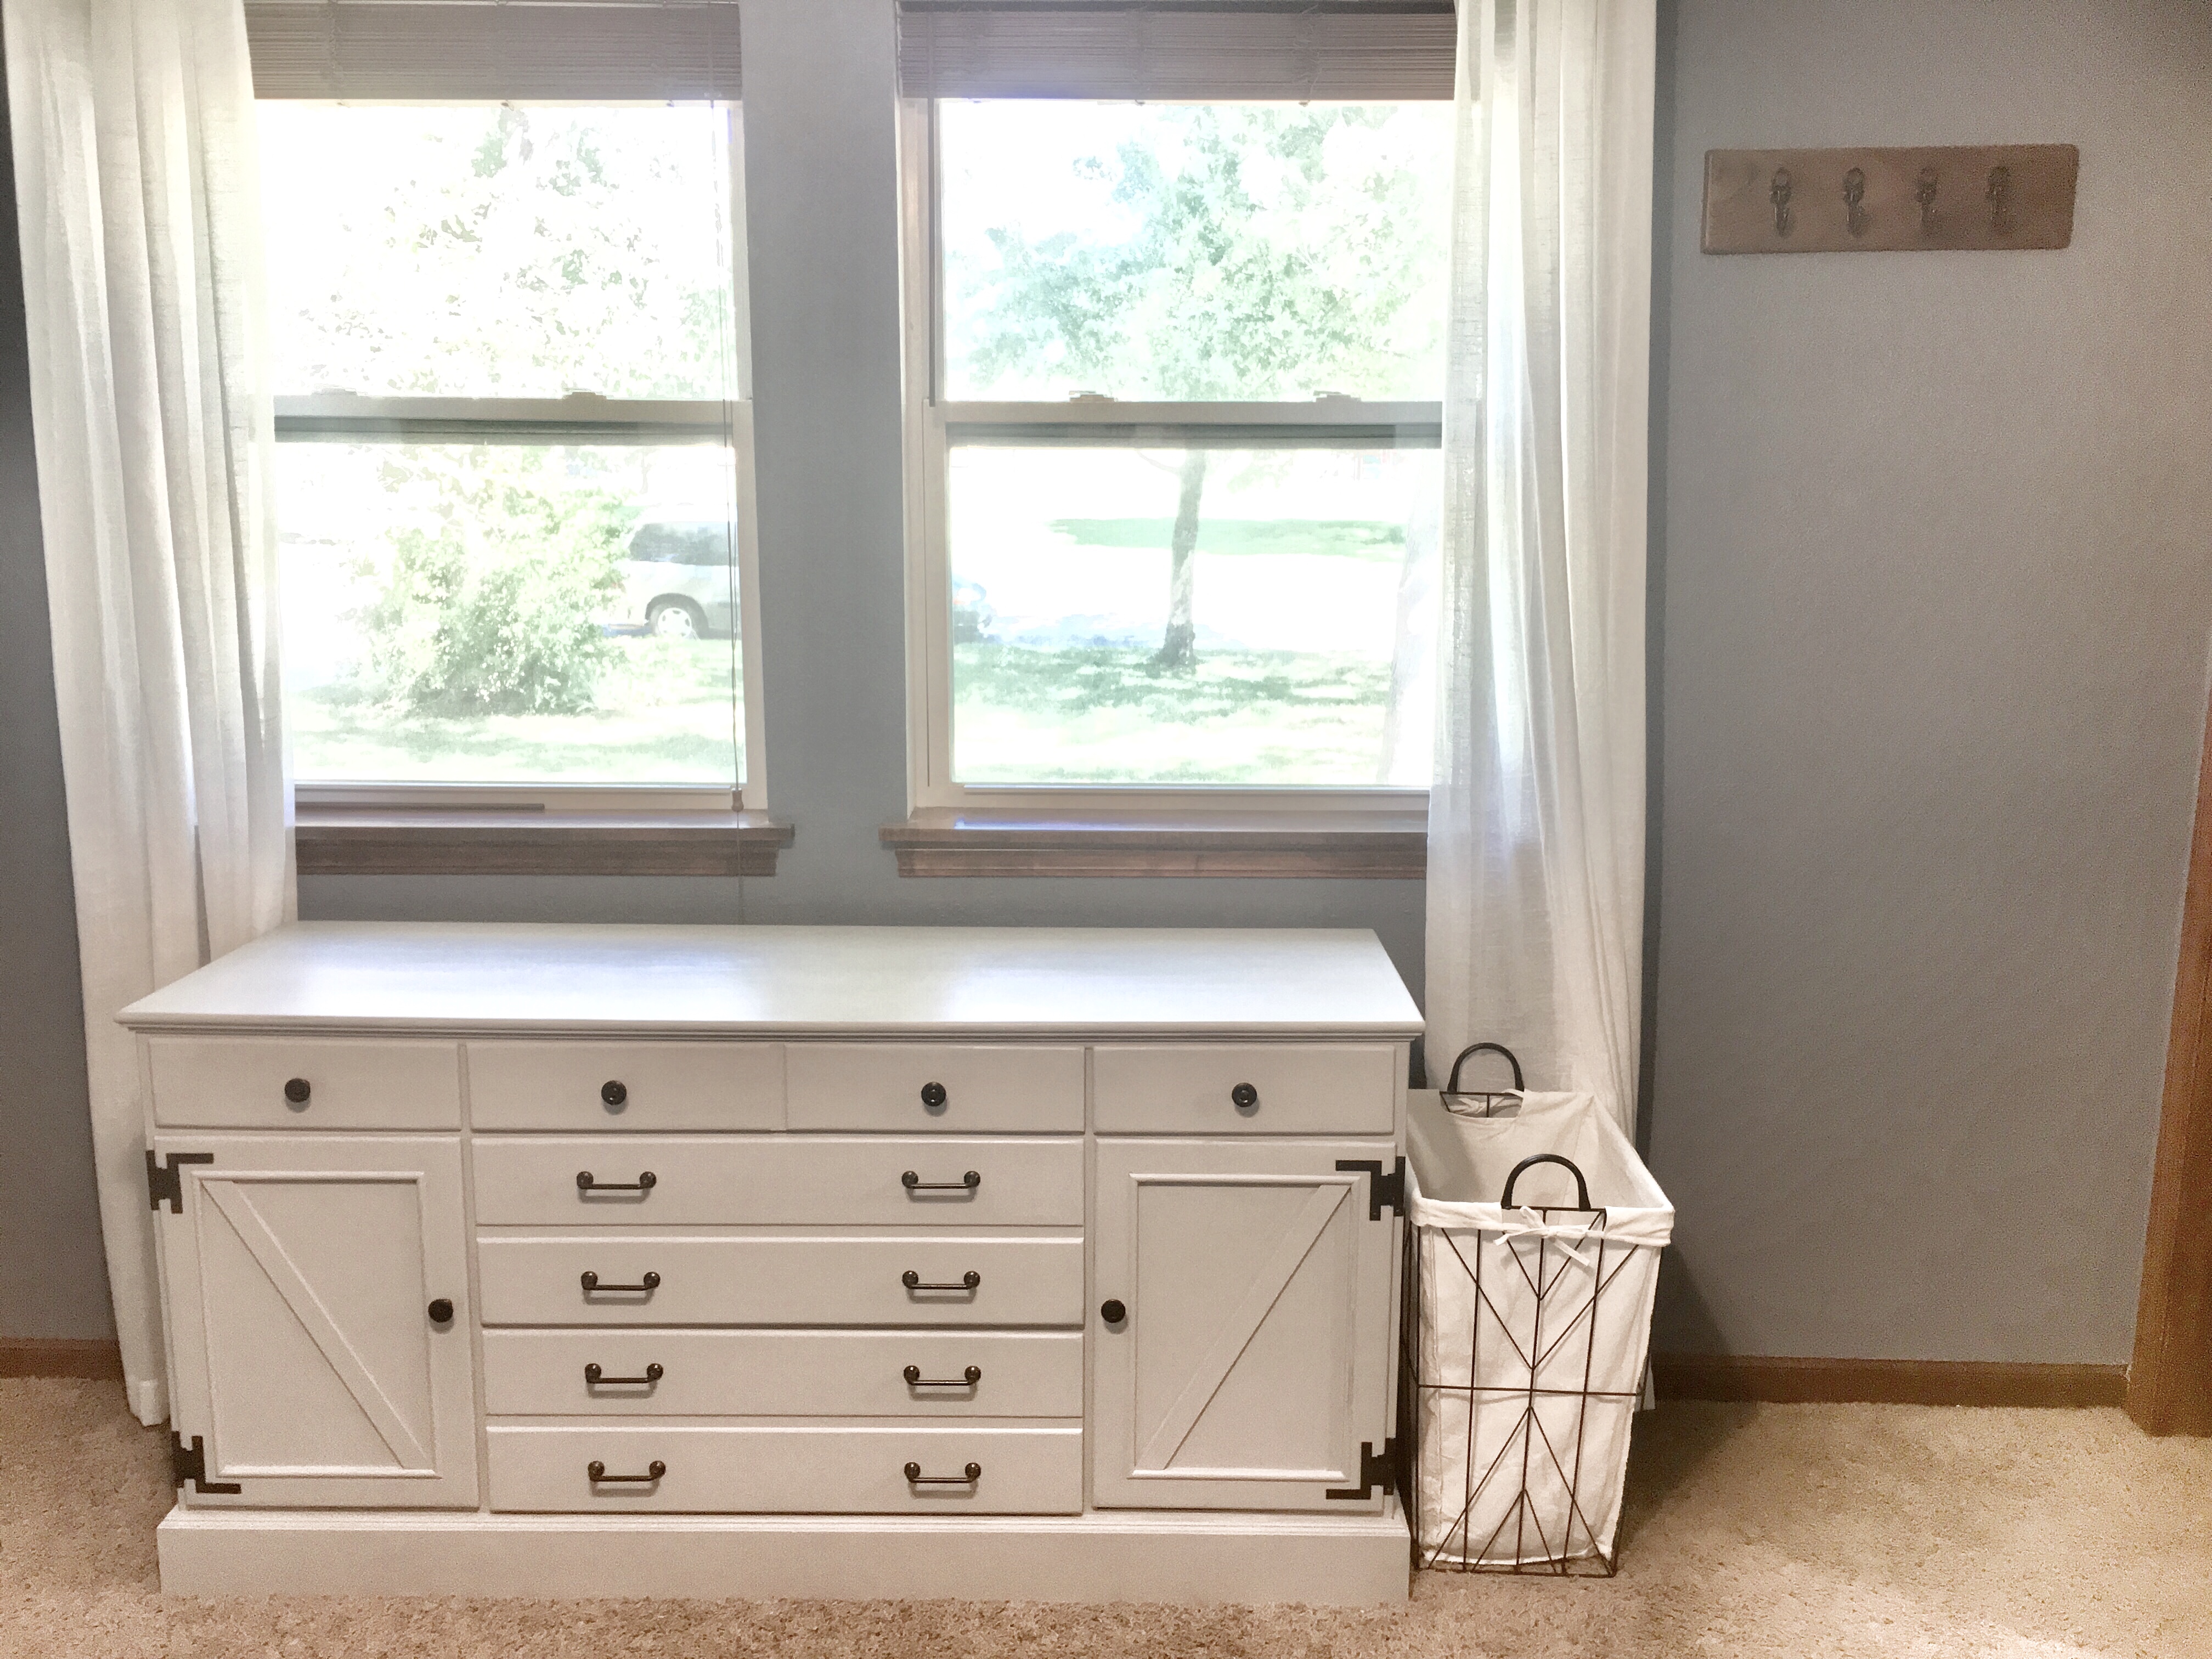
A little back story: I inherited an Ethan Allen dresser from my grandmother when she passed away. This is a very nice piece of furniture, and back when I received it, I was living on my own in an apartment. I decided to spruce it up by:
- Adding some trim to the top and bottom
- Taking out the shutter-style doors and putting in a panel
- Painting it a sleek black
- Changing the hardware to something more modern
For my little studio apartment, this was perfect, and it matched my other furniture.
 Fast-forward to today
I’m married and it no longer goes with anything we own (sad). However, I couldn’t bring myself to let it go because it’s sentimental, but also because it is probably the best quality piece of furniture we own and anything else would basically be a down-grade. So that meant it was time to update it again!
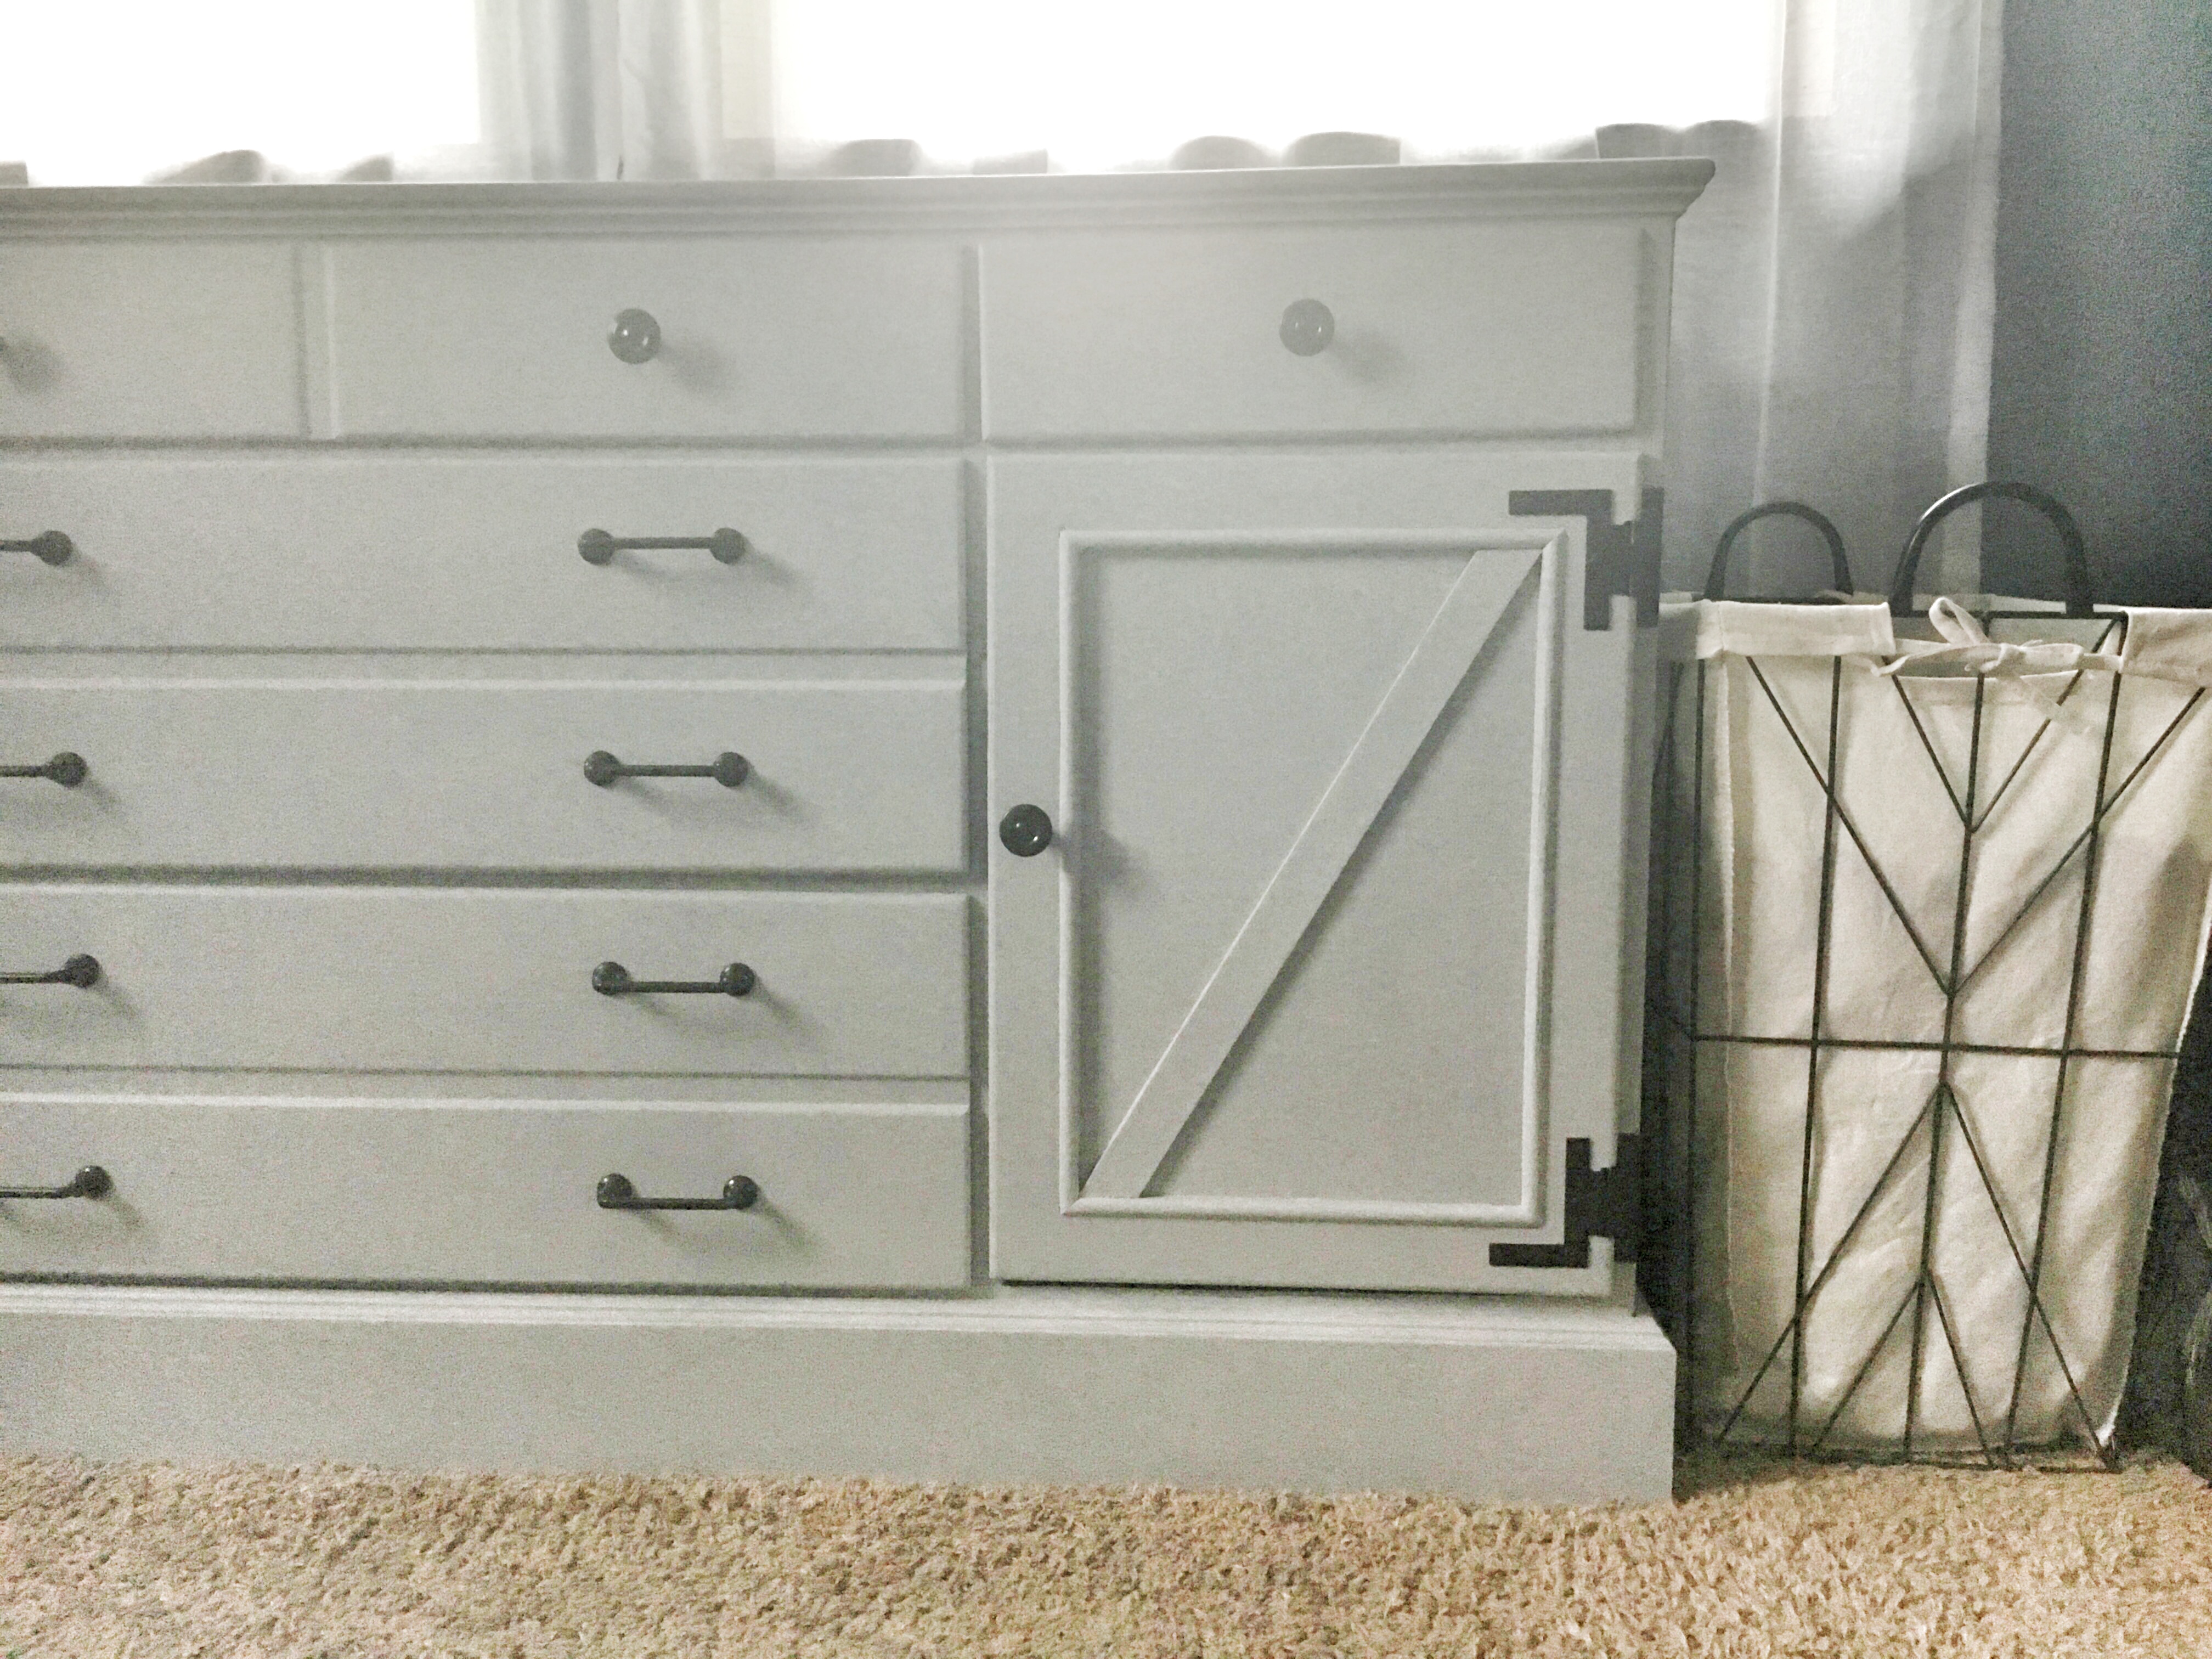
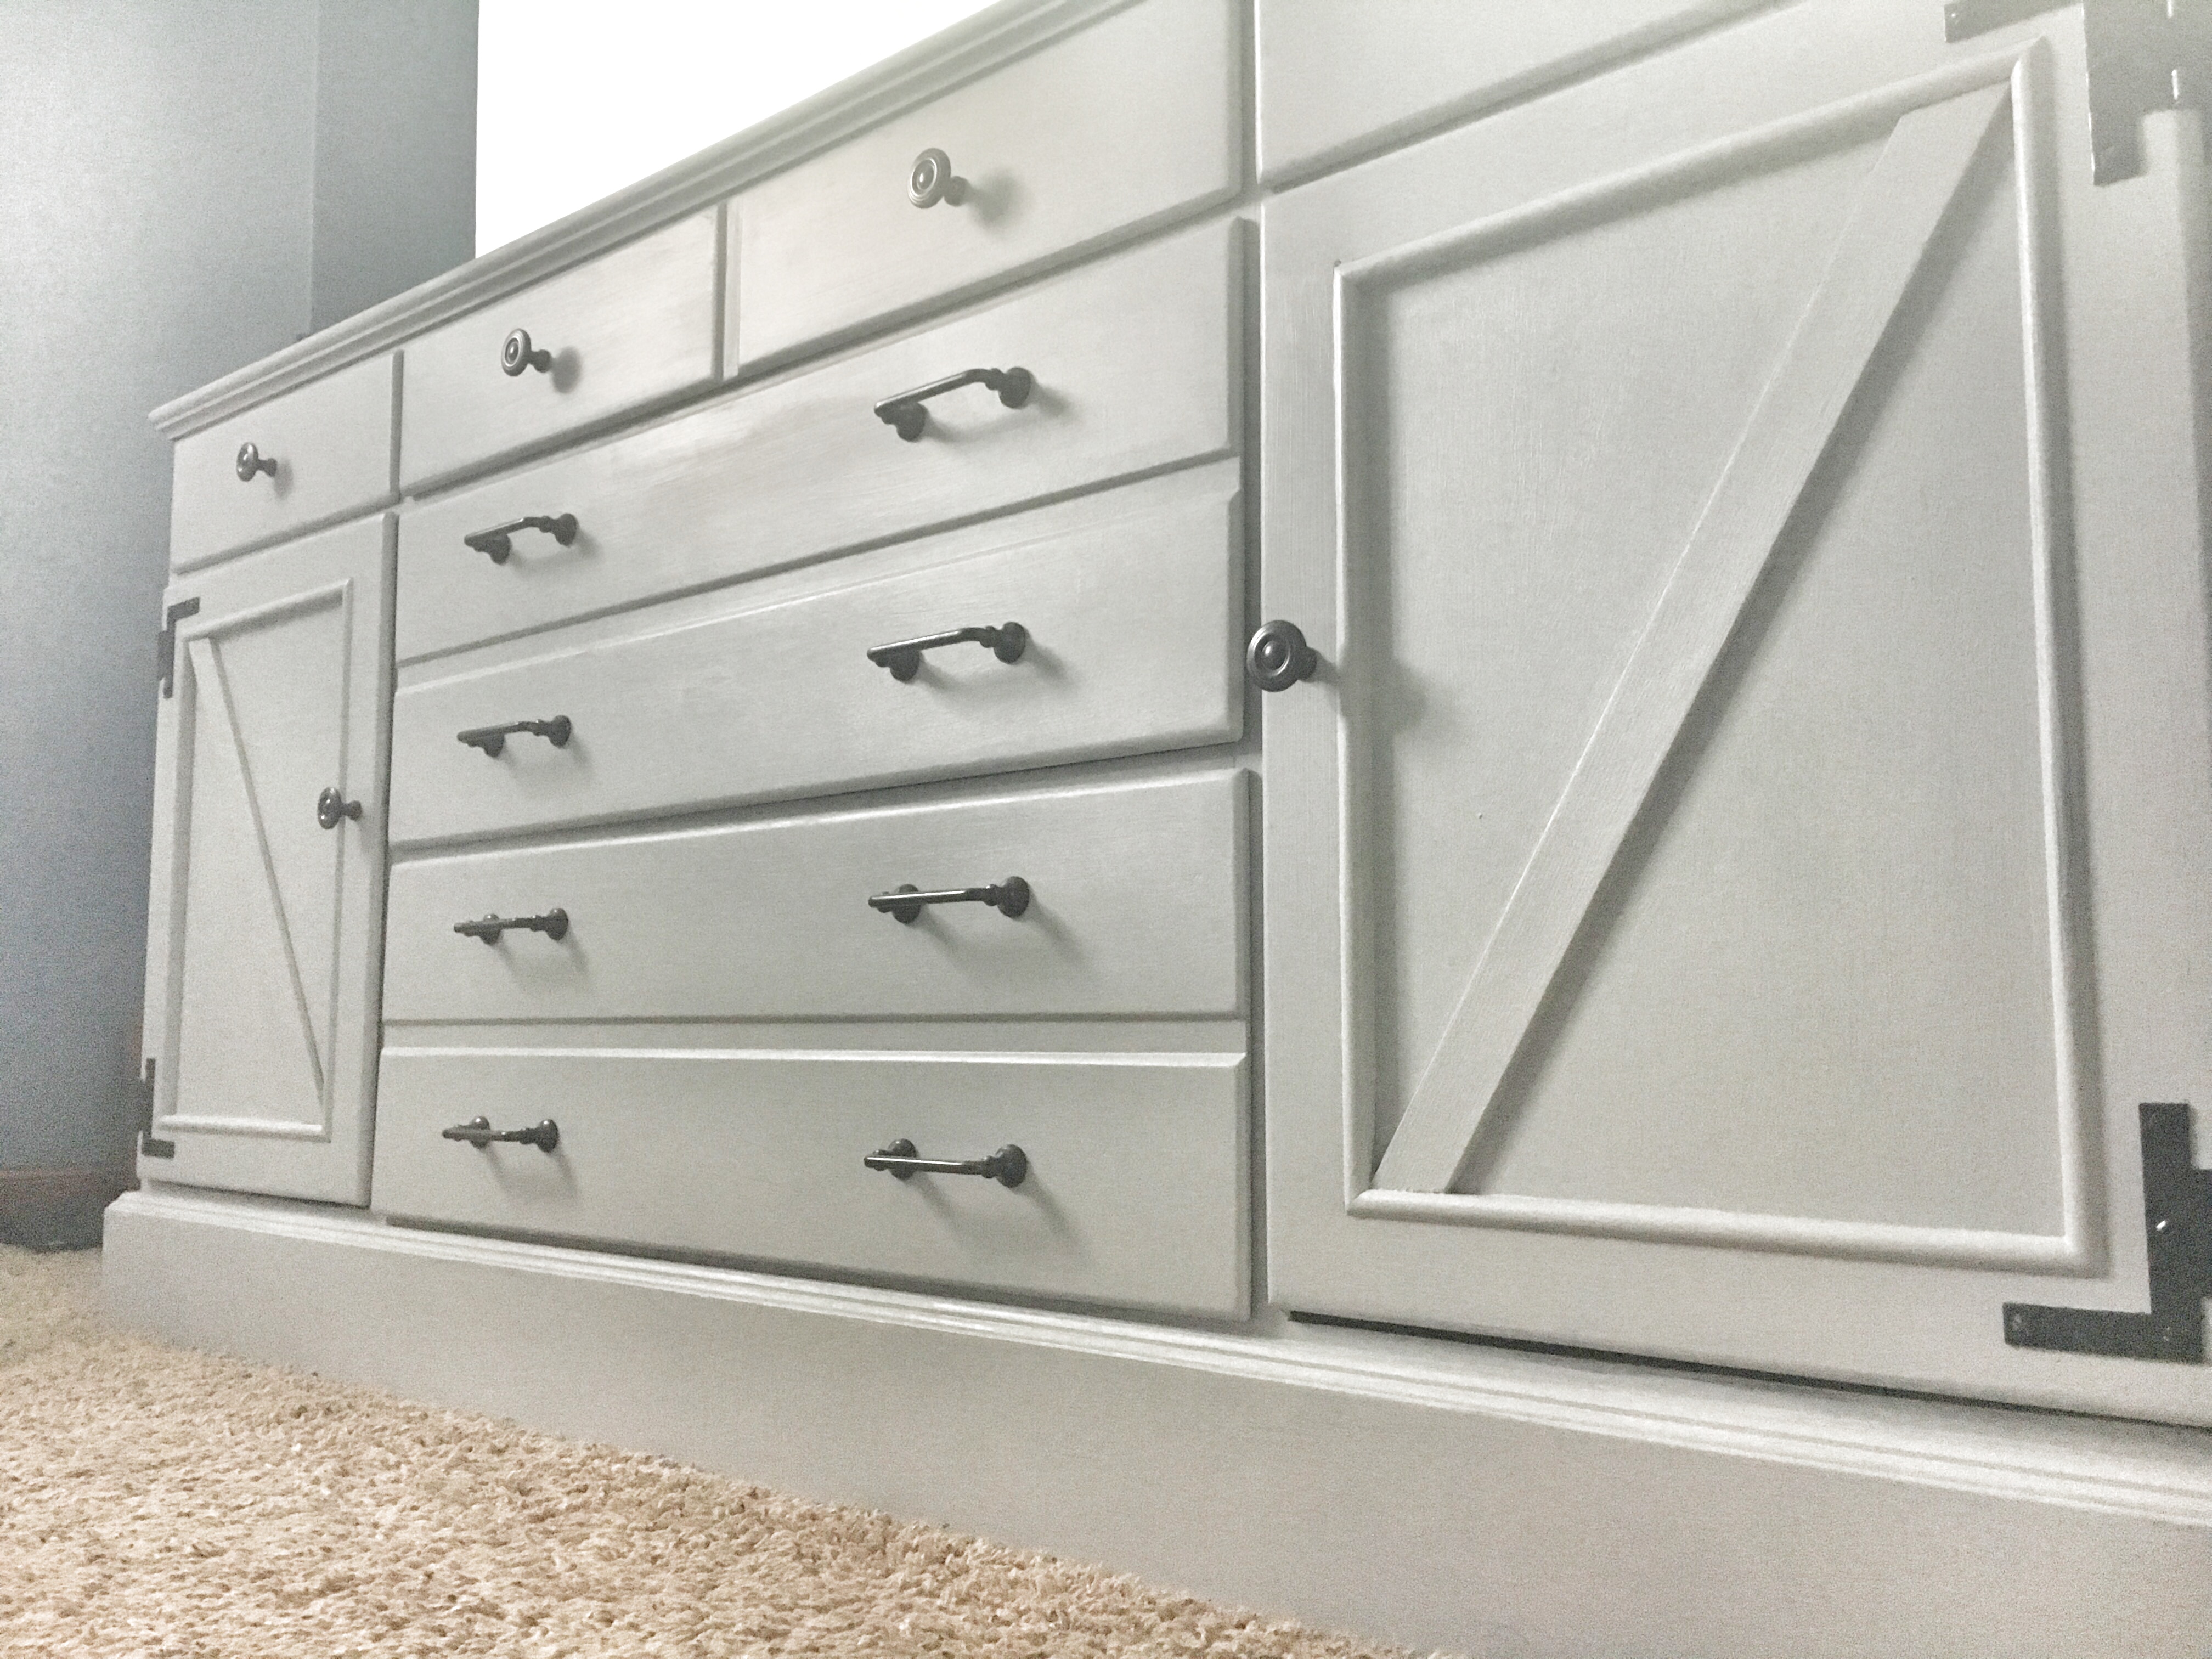
Most of the major changes were done the first time I fixed it up (four-ish years ago), but this time around I wanted the farmhouse style, so I:
- Added the angled trim to look like barn doors
- Painted the hardware black
- Painted the whole thing with a light gray chalk paint
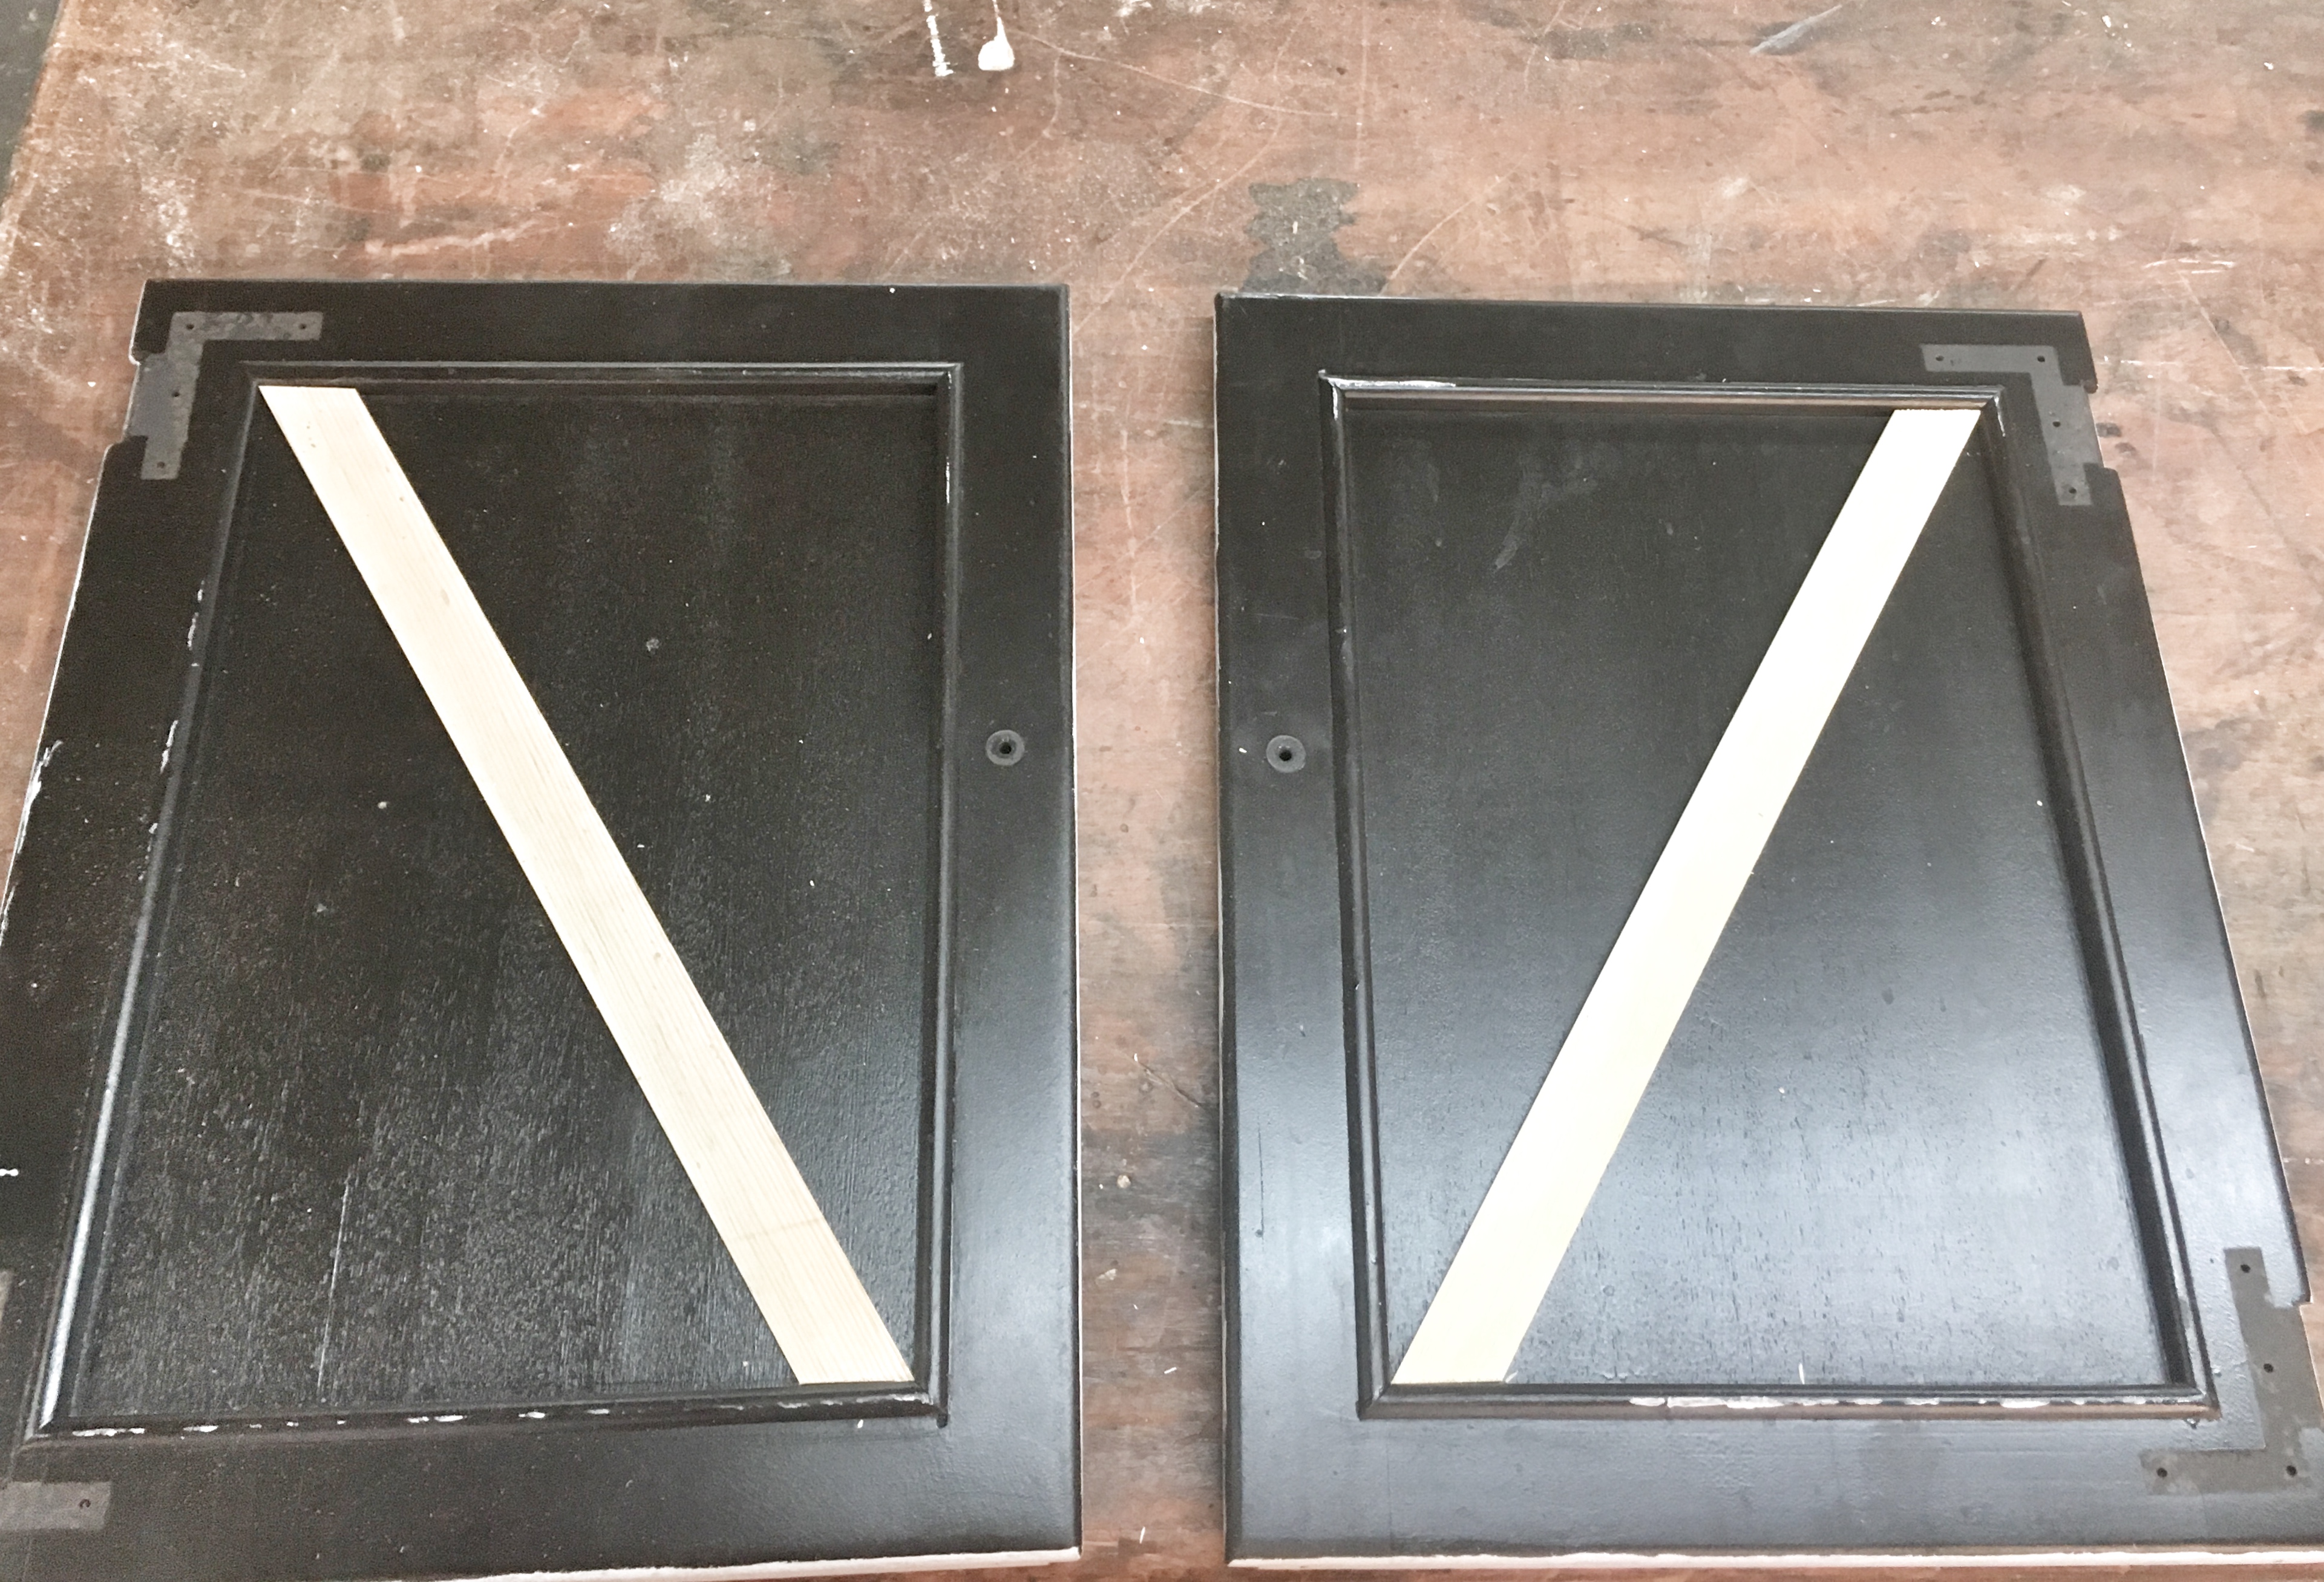
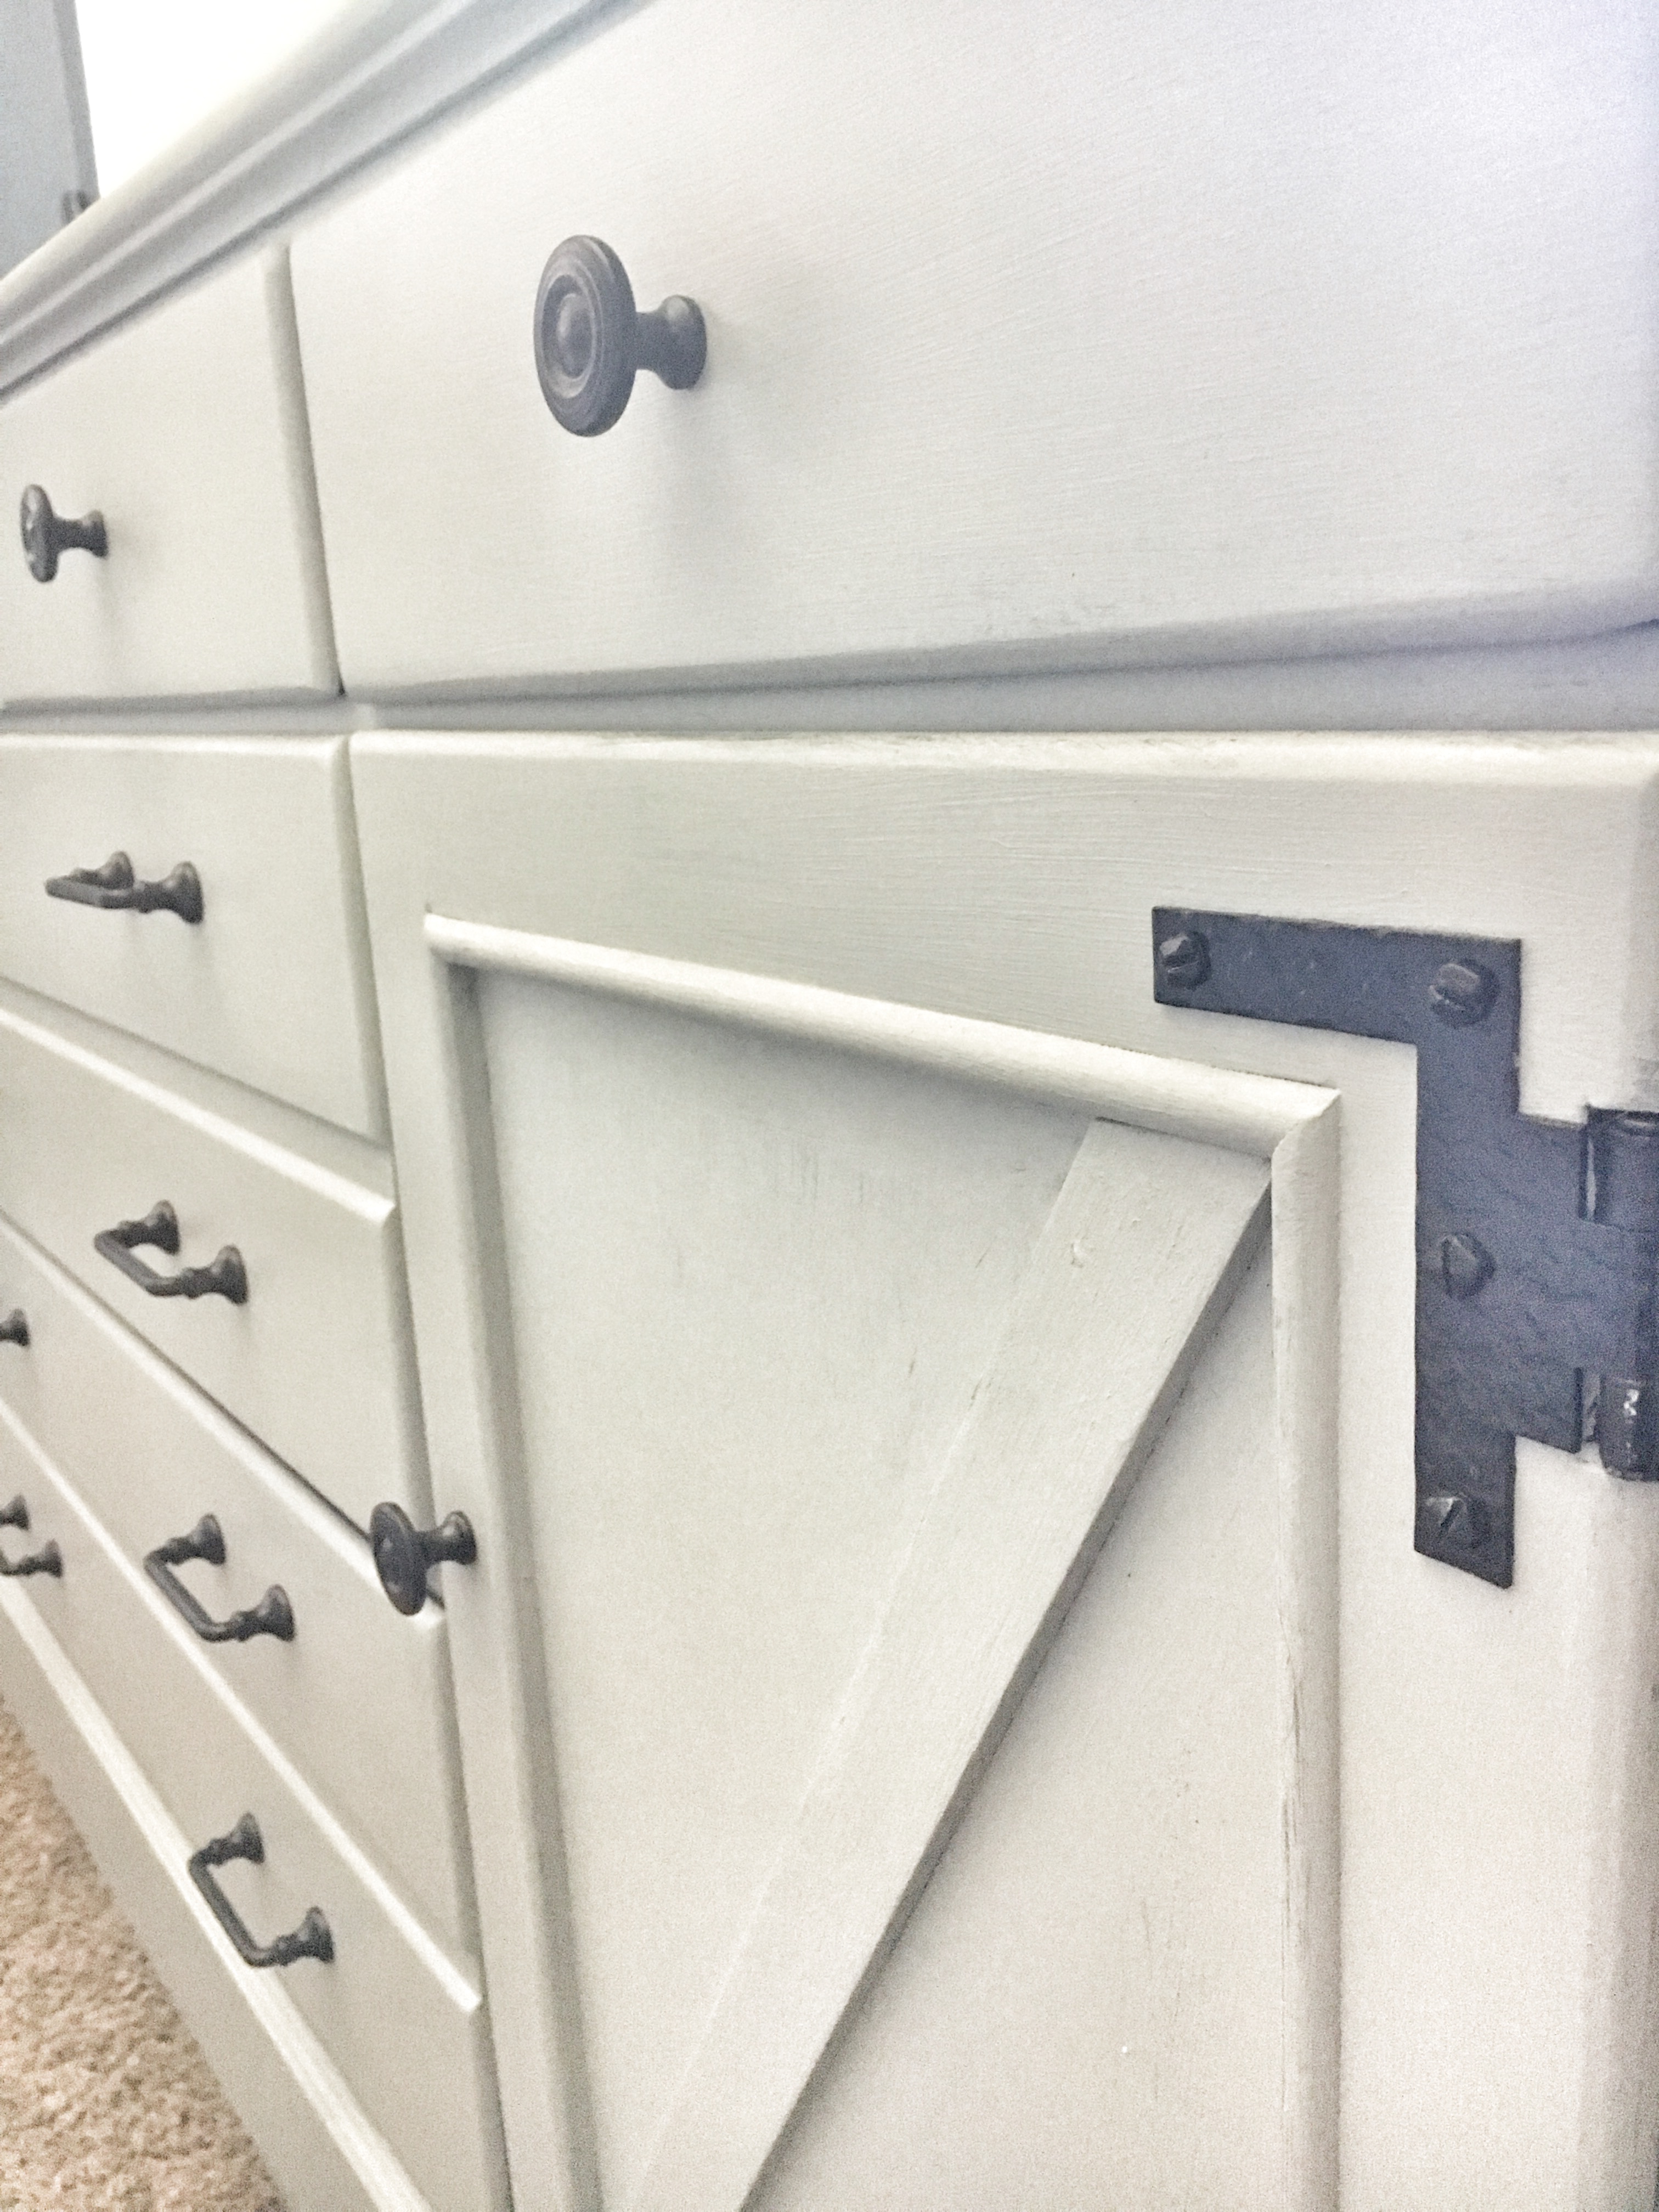
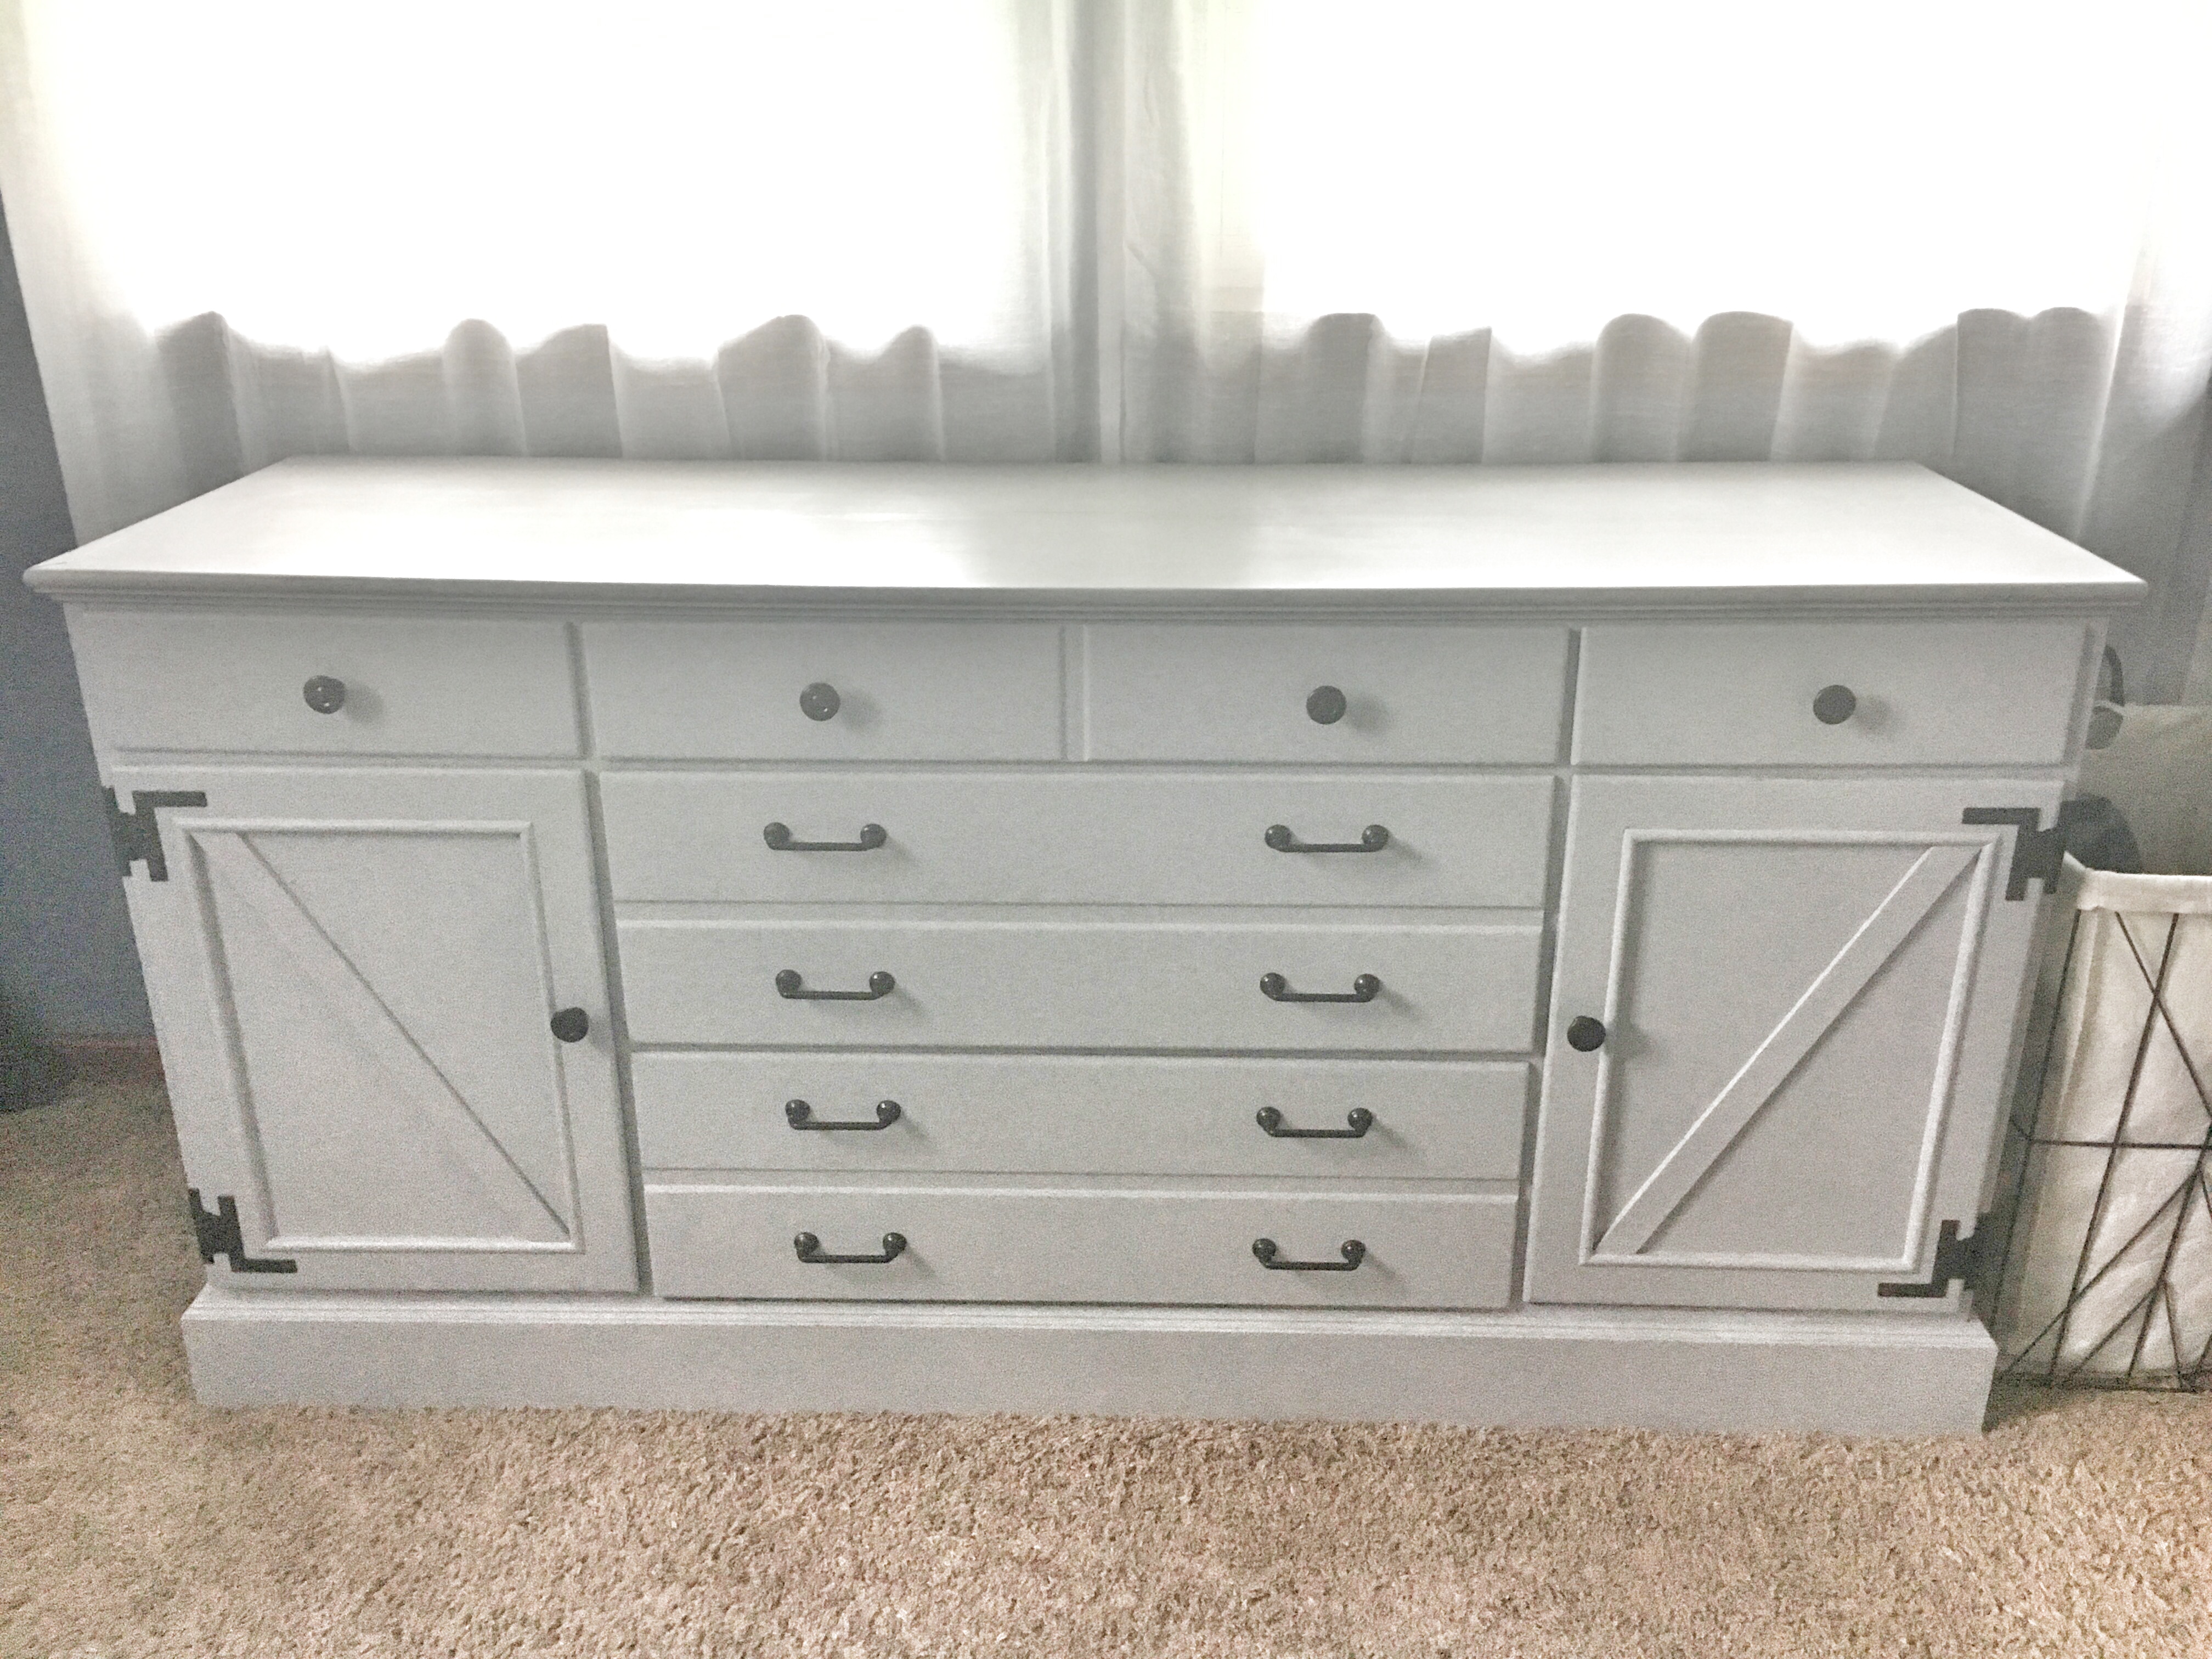
I chose not to distress this piece (gasp) because I wanted to conceal the black paint underneath and not have any hint of it showing. I really feel like adding the barn door panels and the chalk paint give enough of the farmhouse style to compensate for skipping this step.
Chalk Paint
Let’s talk about this for a moment. If there was an area of my life that was perfect, it would be chalk paint. For real, I love using chalk paint for many reasons:
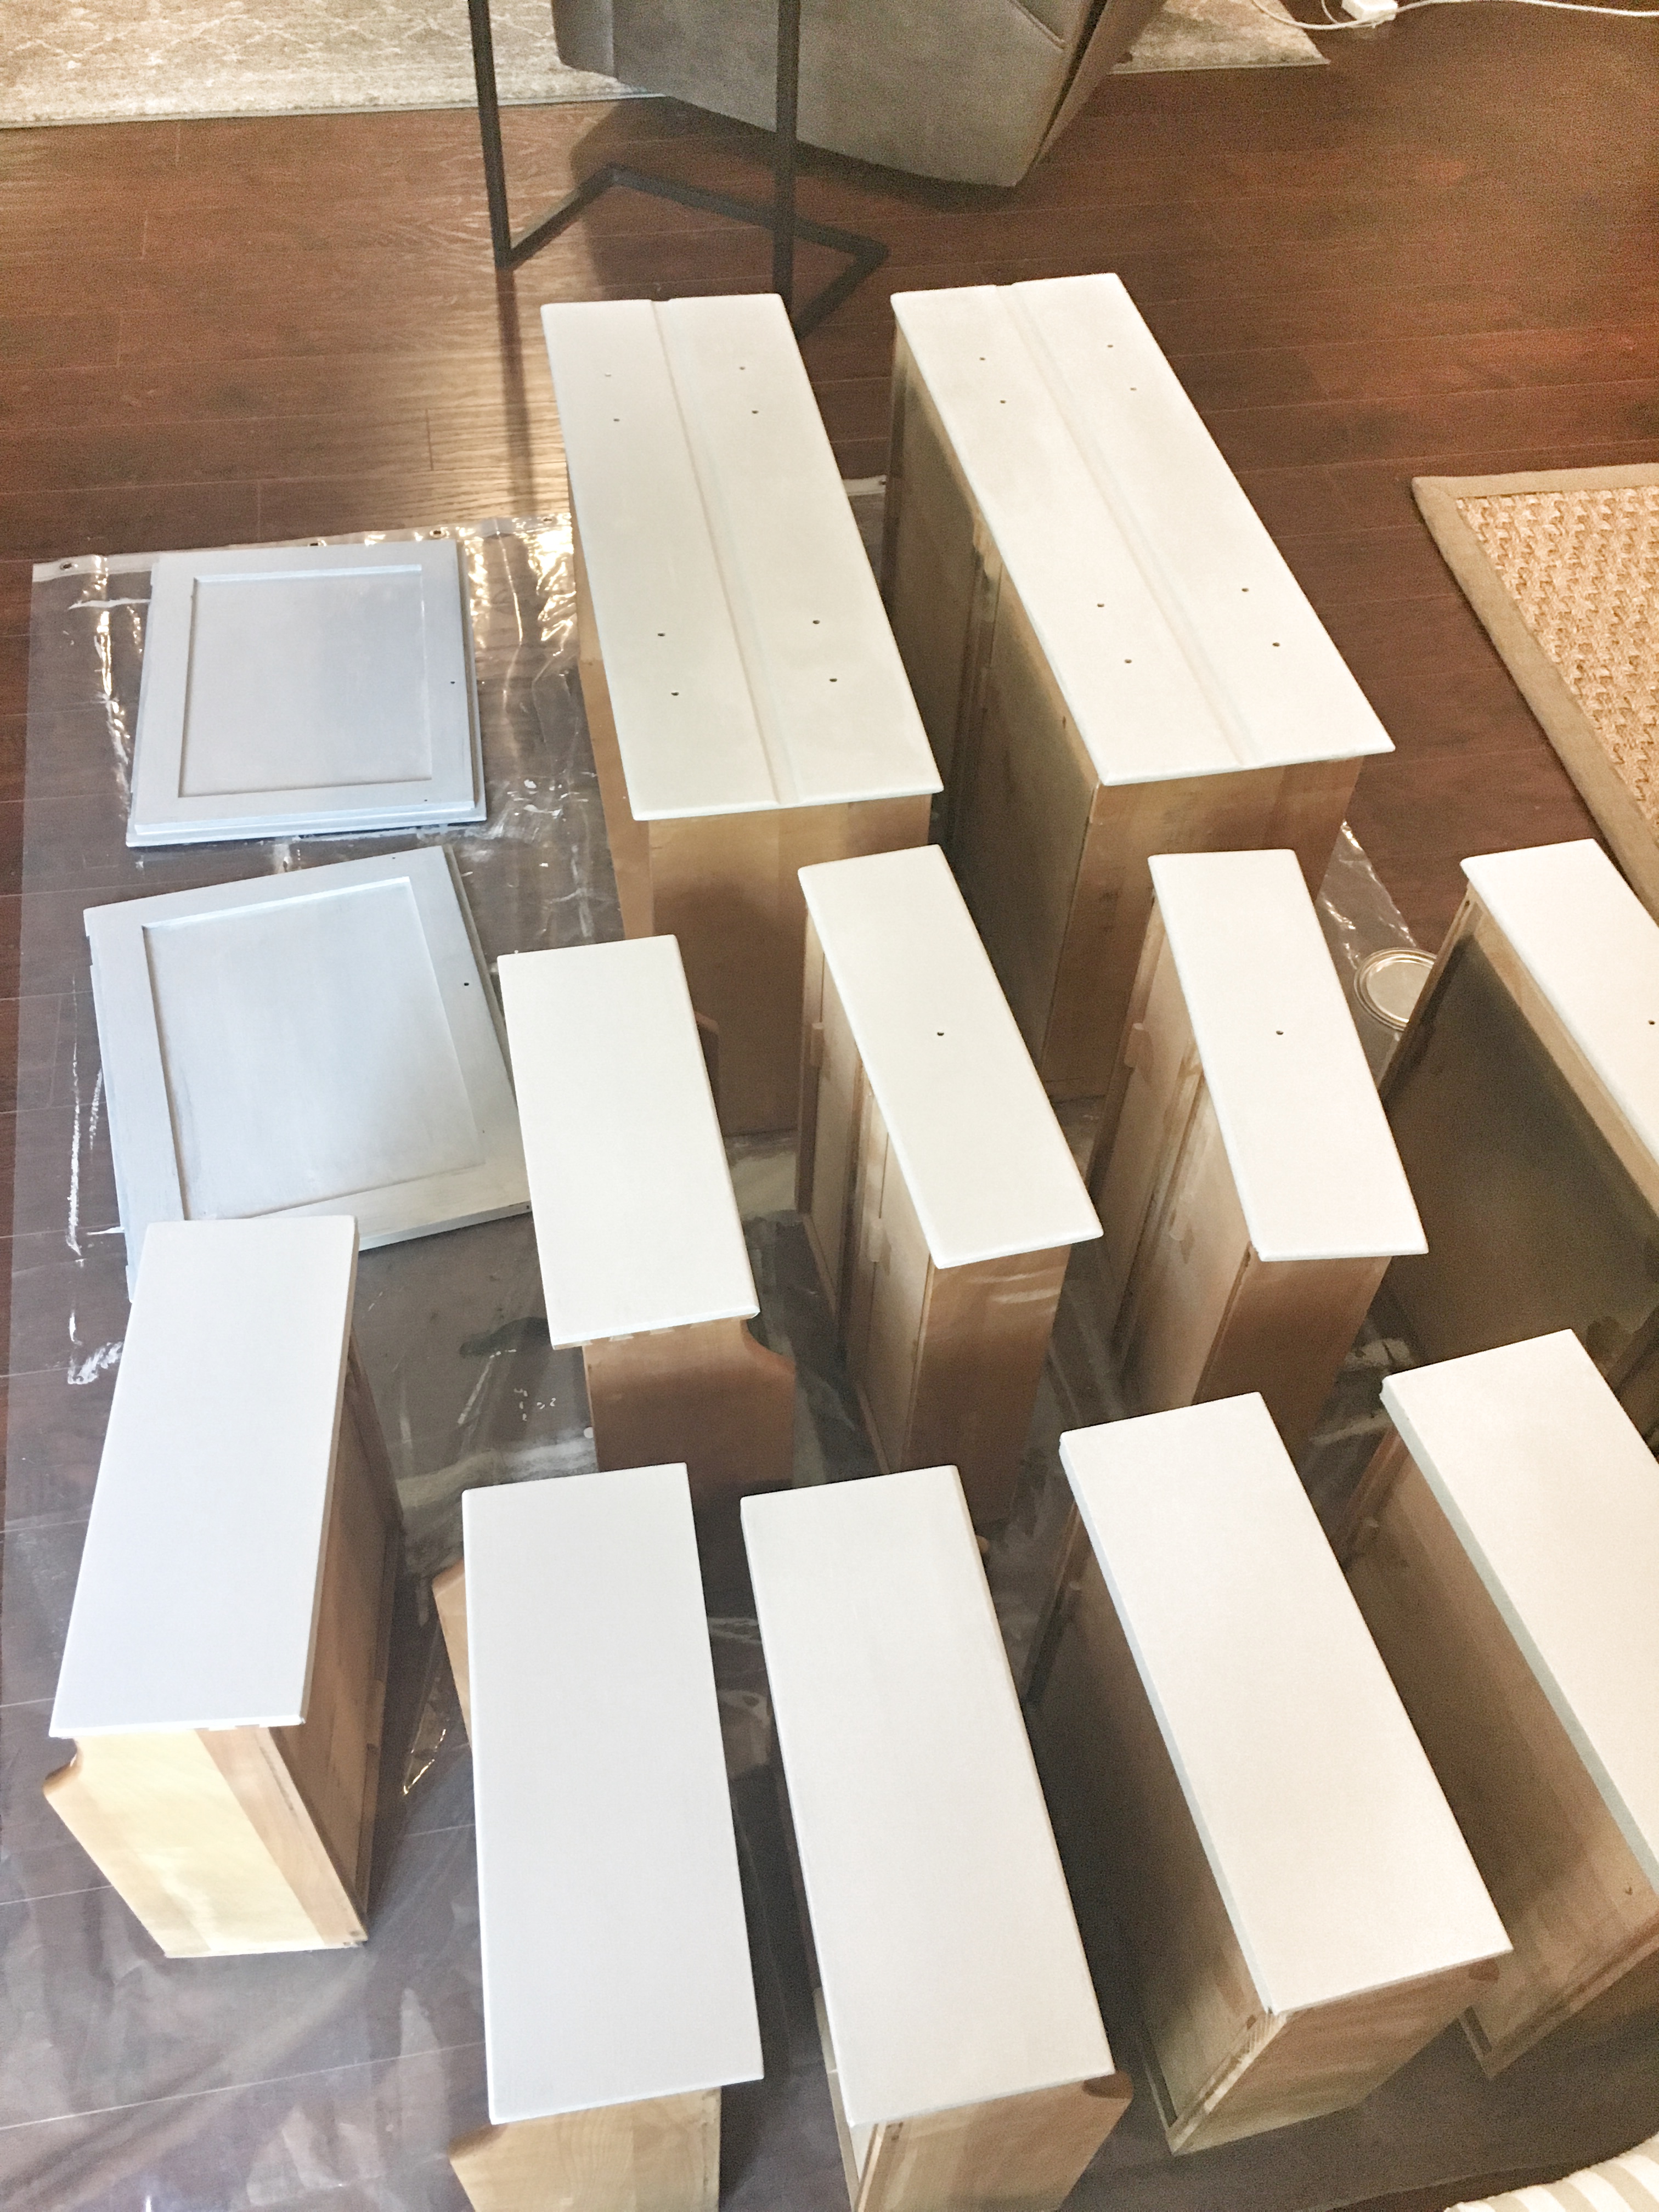
- It requires little to no prep work. That means hardly ANY sanding! And what THAT means (for me at least) is that I can put a drop cloth down and paint the piece right where it is my house. Before, I would have to haul it to the work shop, spend several days on one piece of furniture sanding it, waiting for paint to dry enough to distress it, and then top coat everything. A project like these dressers would have taken me two weeks or so, but with chalk paint I was done with both of them in two days!
- A little goes a long way. I wasn’t sure I would have enough to finish both dressers because I’m used to having to put three coats of paint on. This paint, however, goes on thicker and requires only 1-2 coats of paint. I have so much paint leftover I’m already thinking about what I could paint next! I’ve used other chalk paints before, but this time I bought a quart of Rustoleum Chalked paint in the color Aged Gray. I was very pleased with this product and the price is the best I have found.
- The top coat is brush-able and has very little oder. I love a spray lacquer finish (what I normally use when I can), but I wanted to try something new with a clear matte top coat. Again, this is easy to use, doesn’t require a fancy spray gun, doesn’t have a strong oder, and dries within an hour with a matte finish.
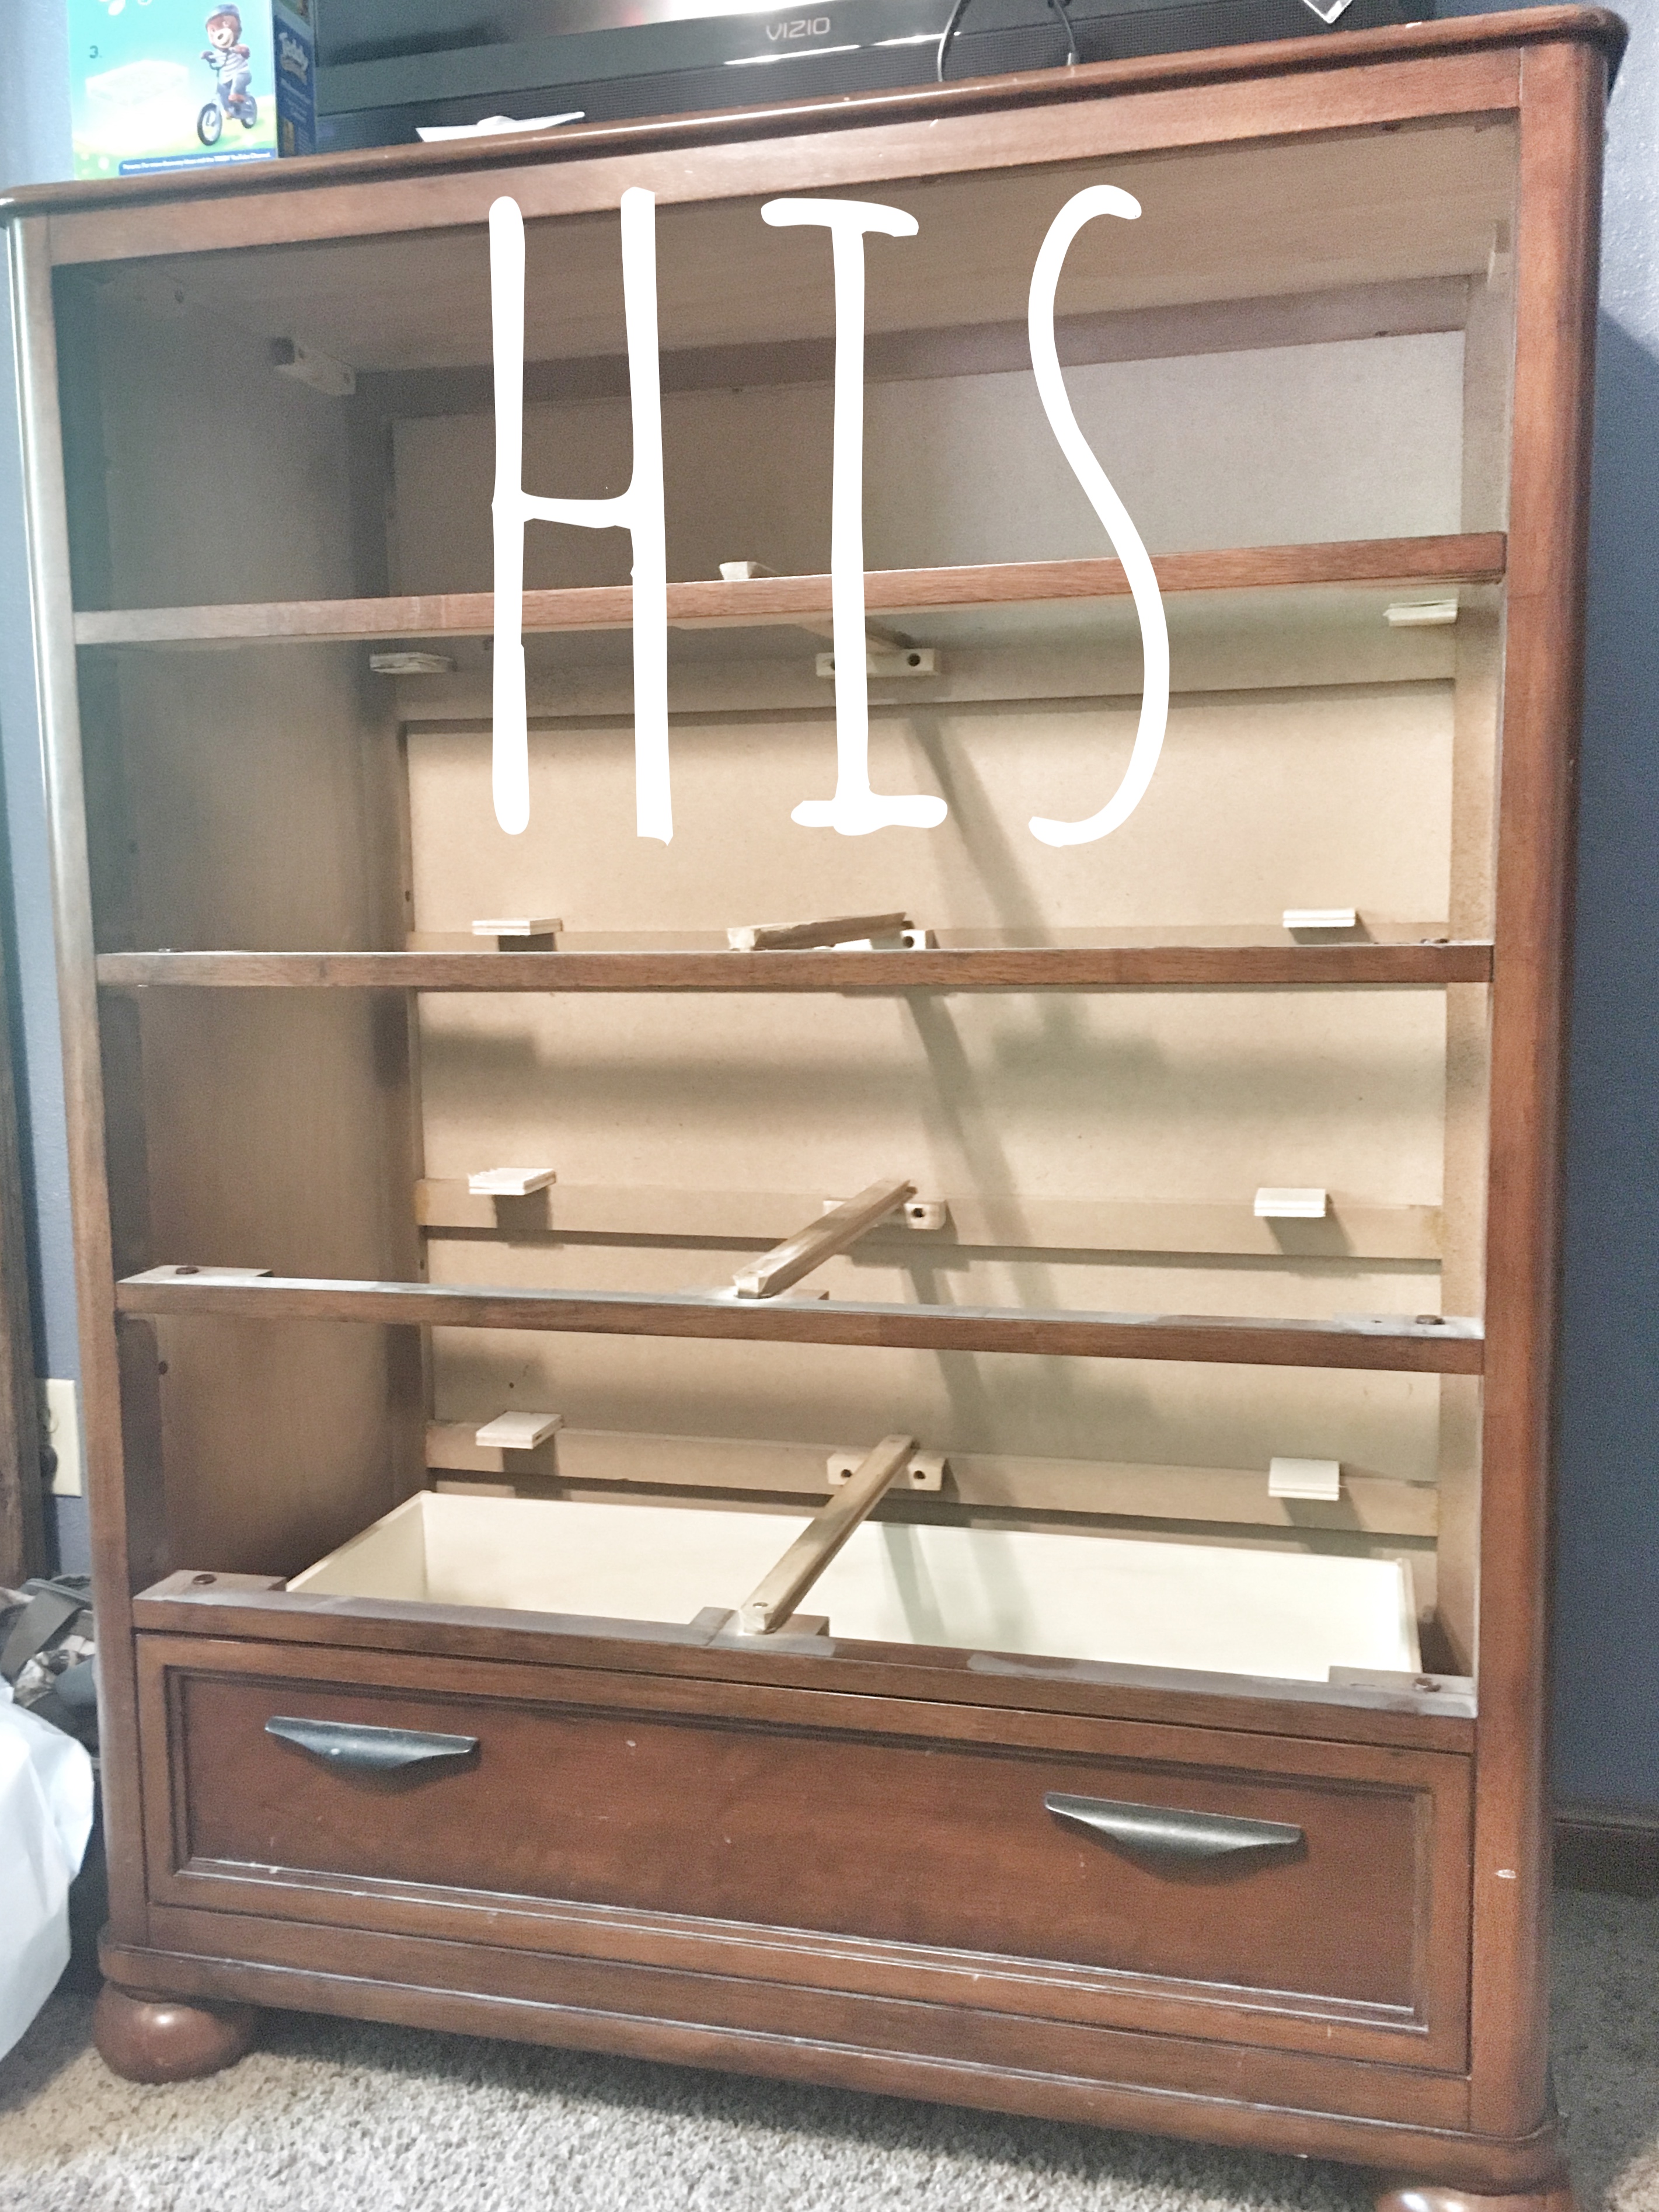
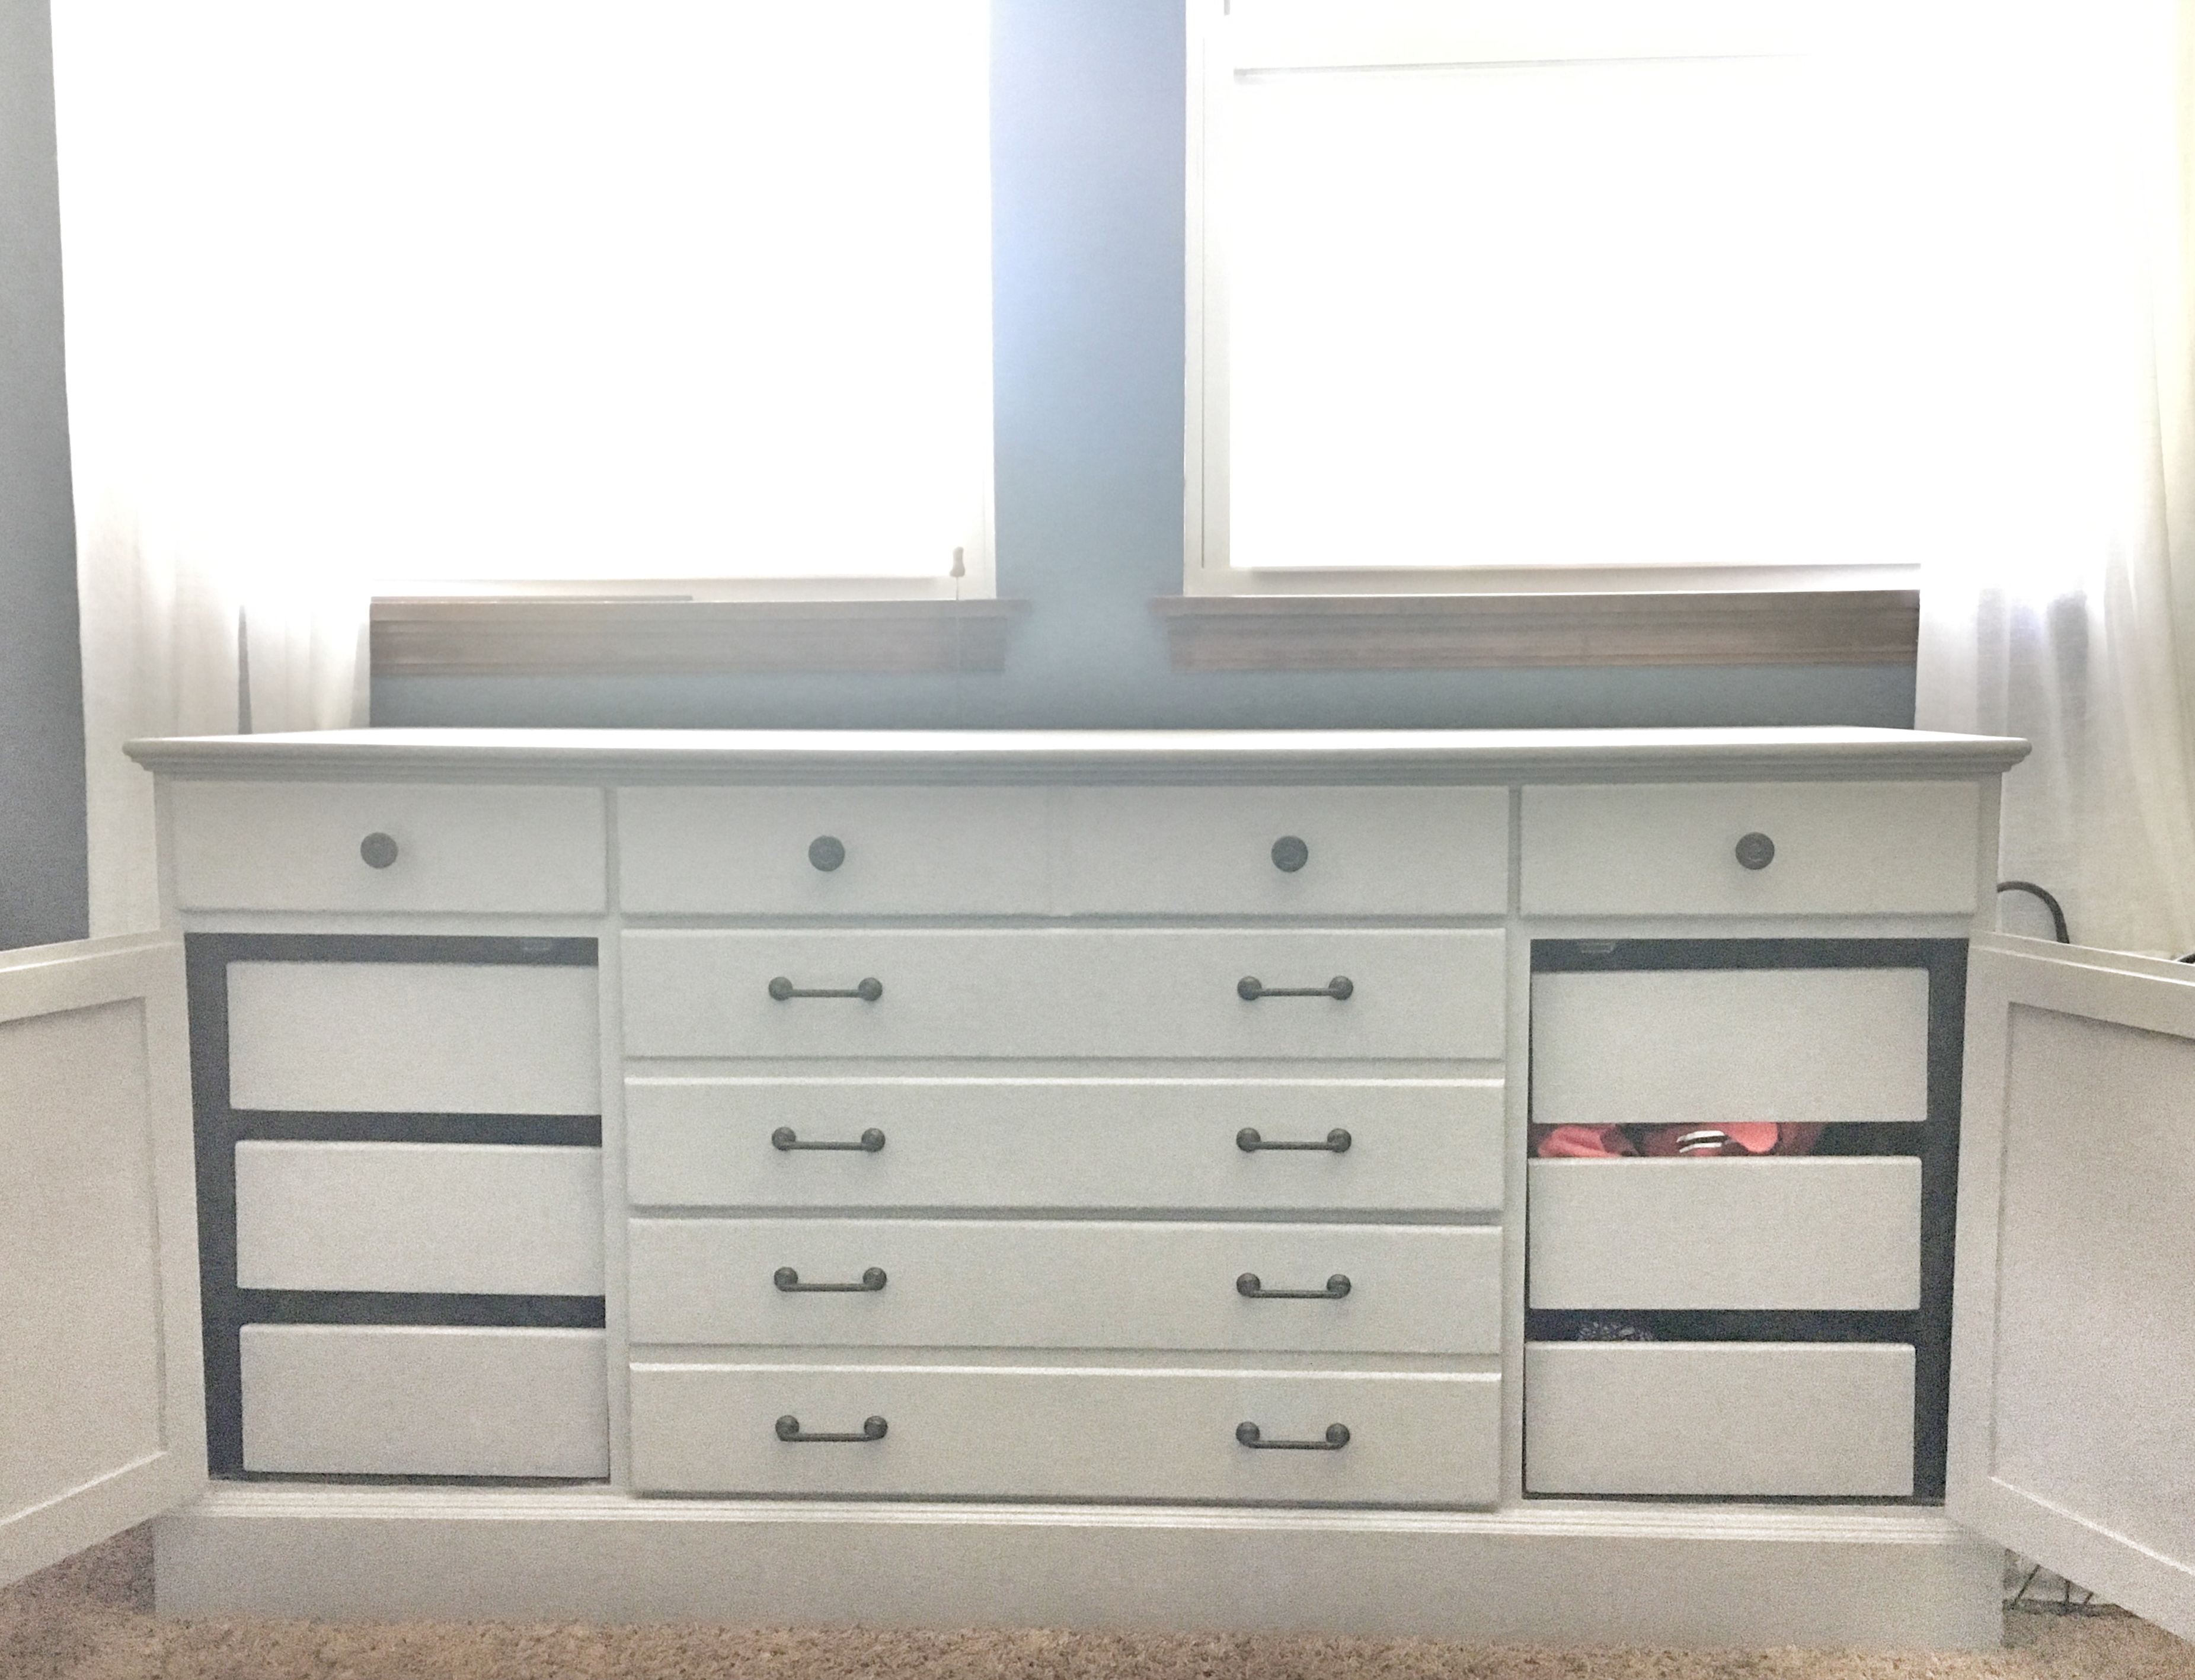
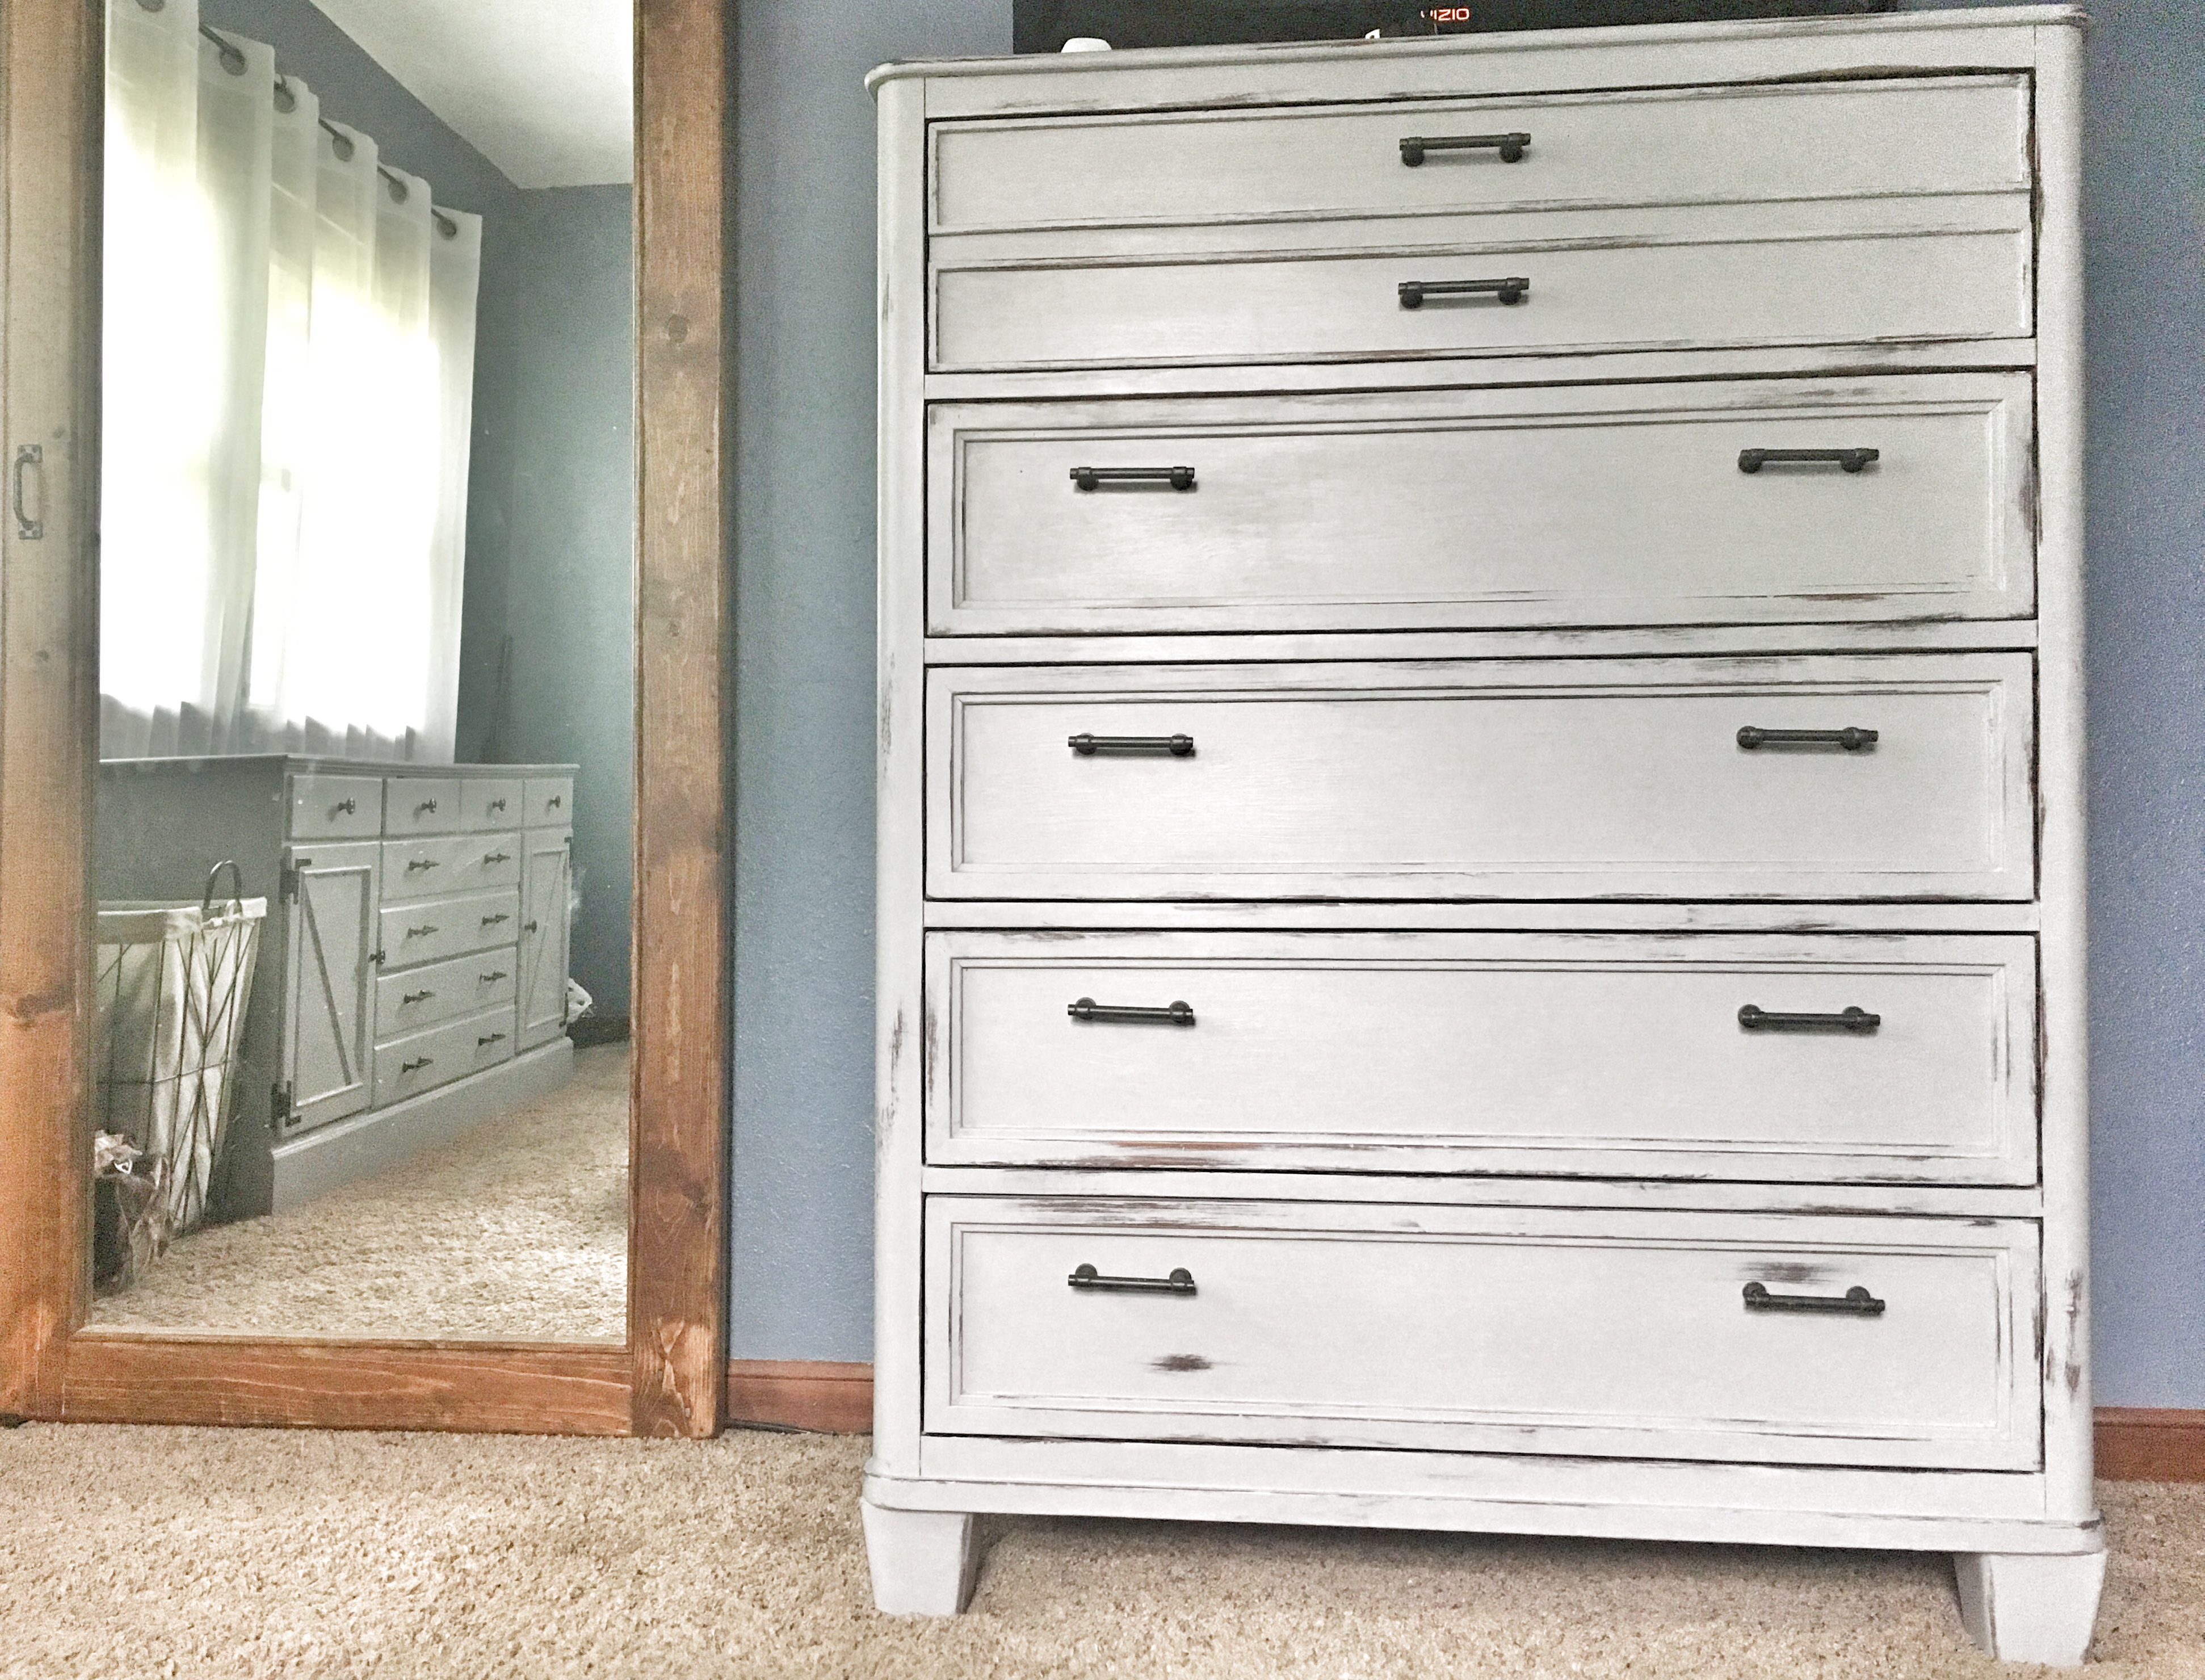
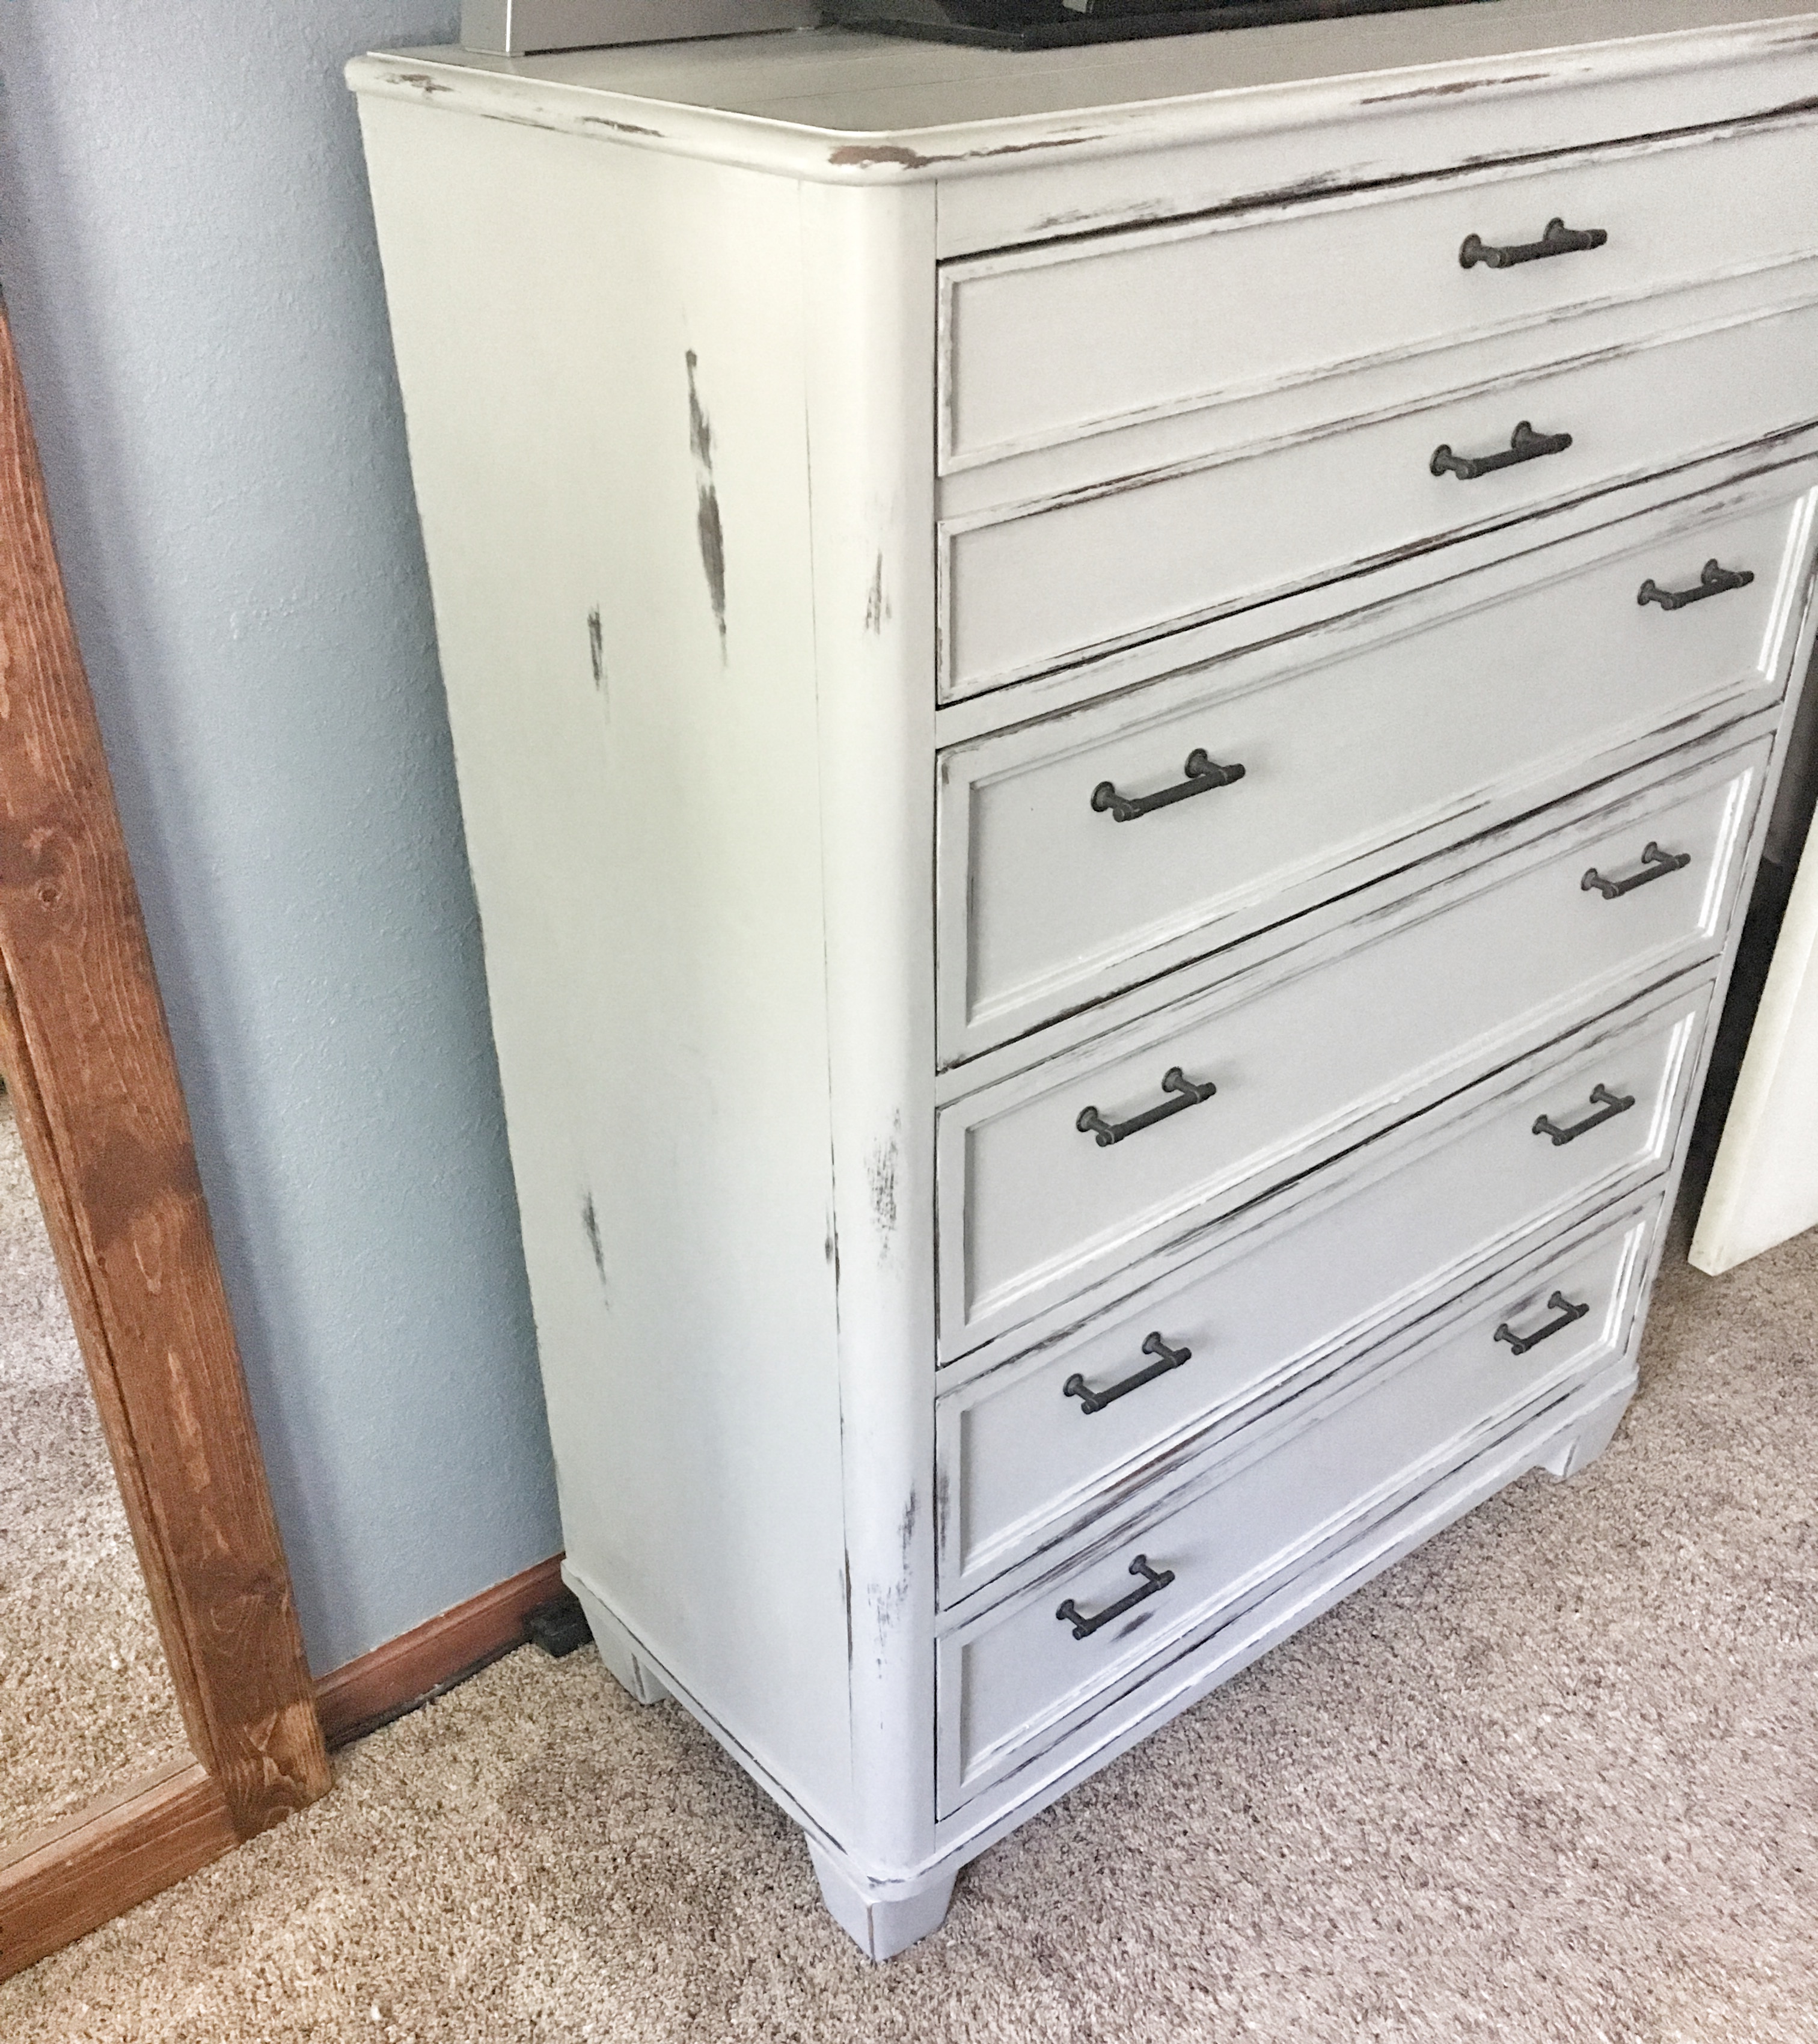
Logan’s Dresser
Now that I’m done declaring my love affair with chalk paint, let’s move on to the updates to Logan’s dresser (chest of drawers if you want to get technical).
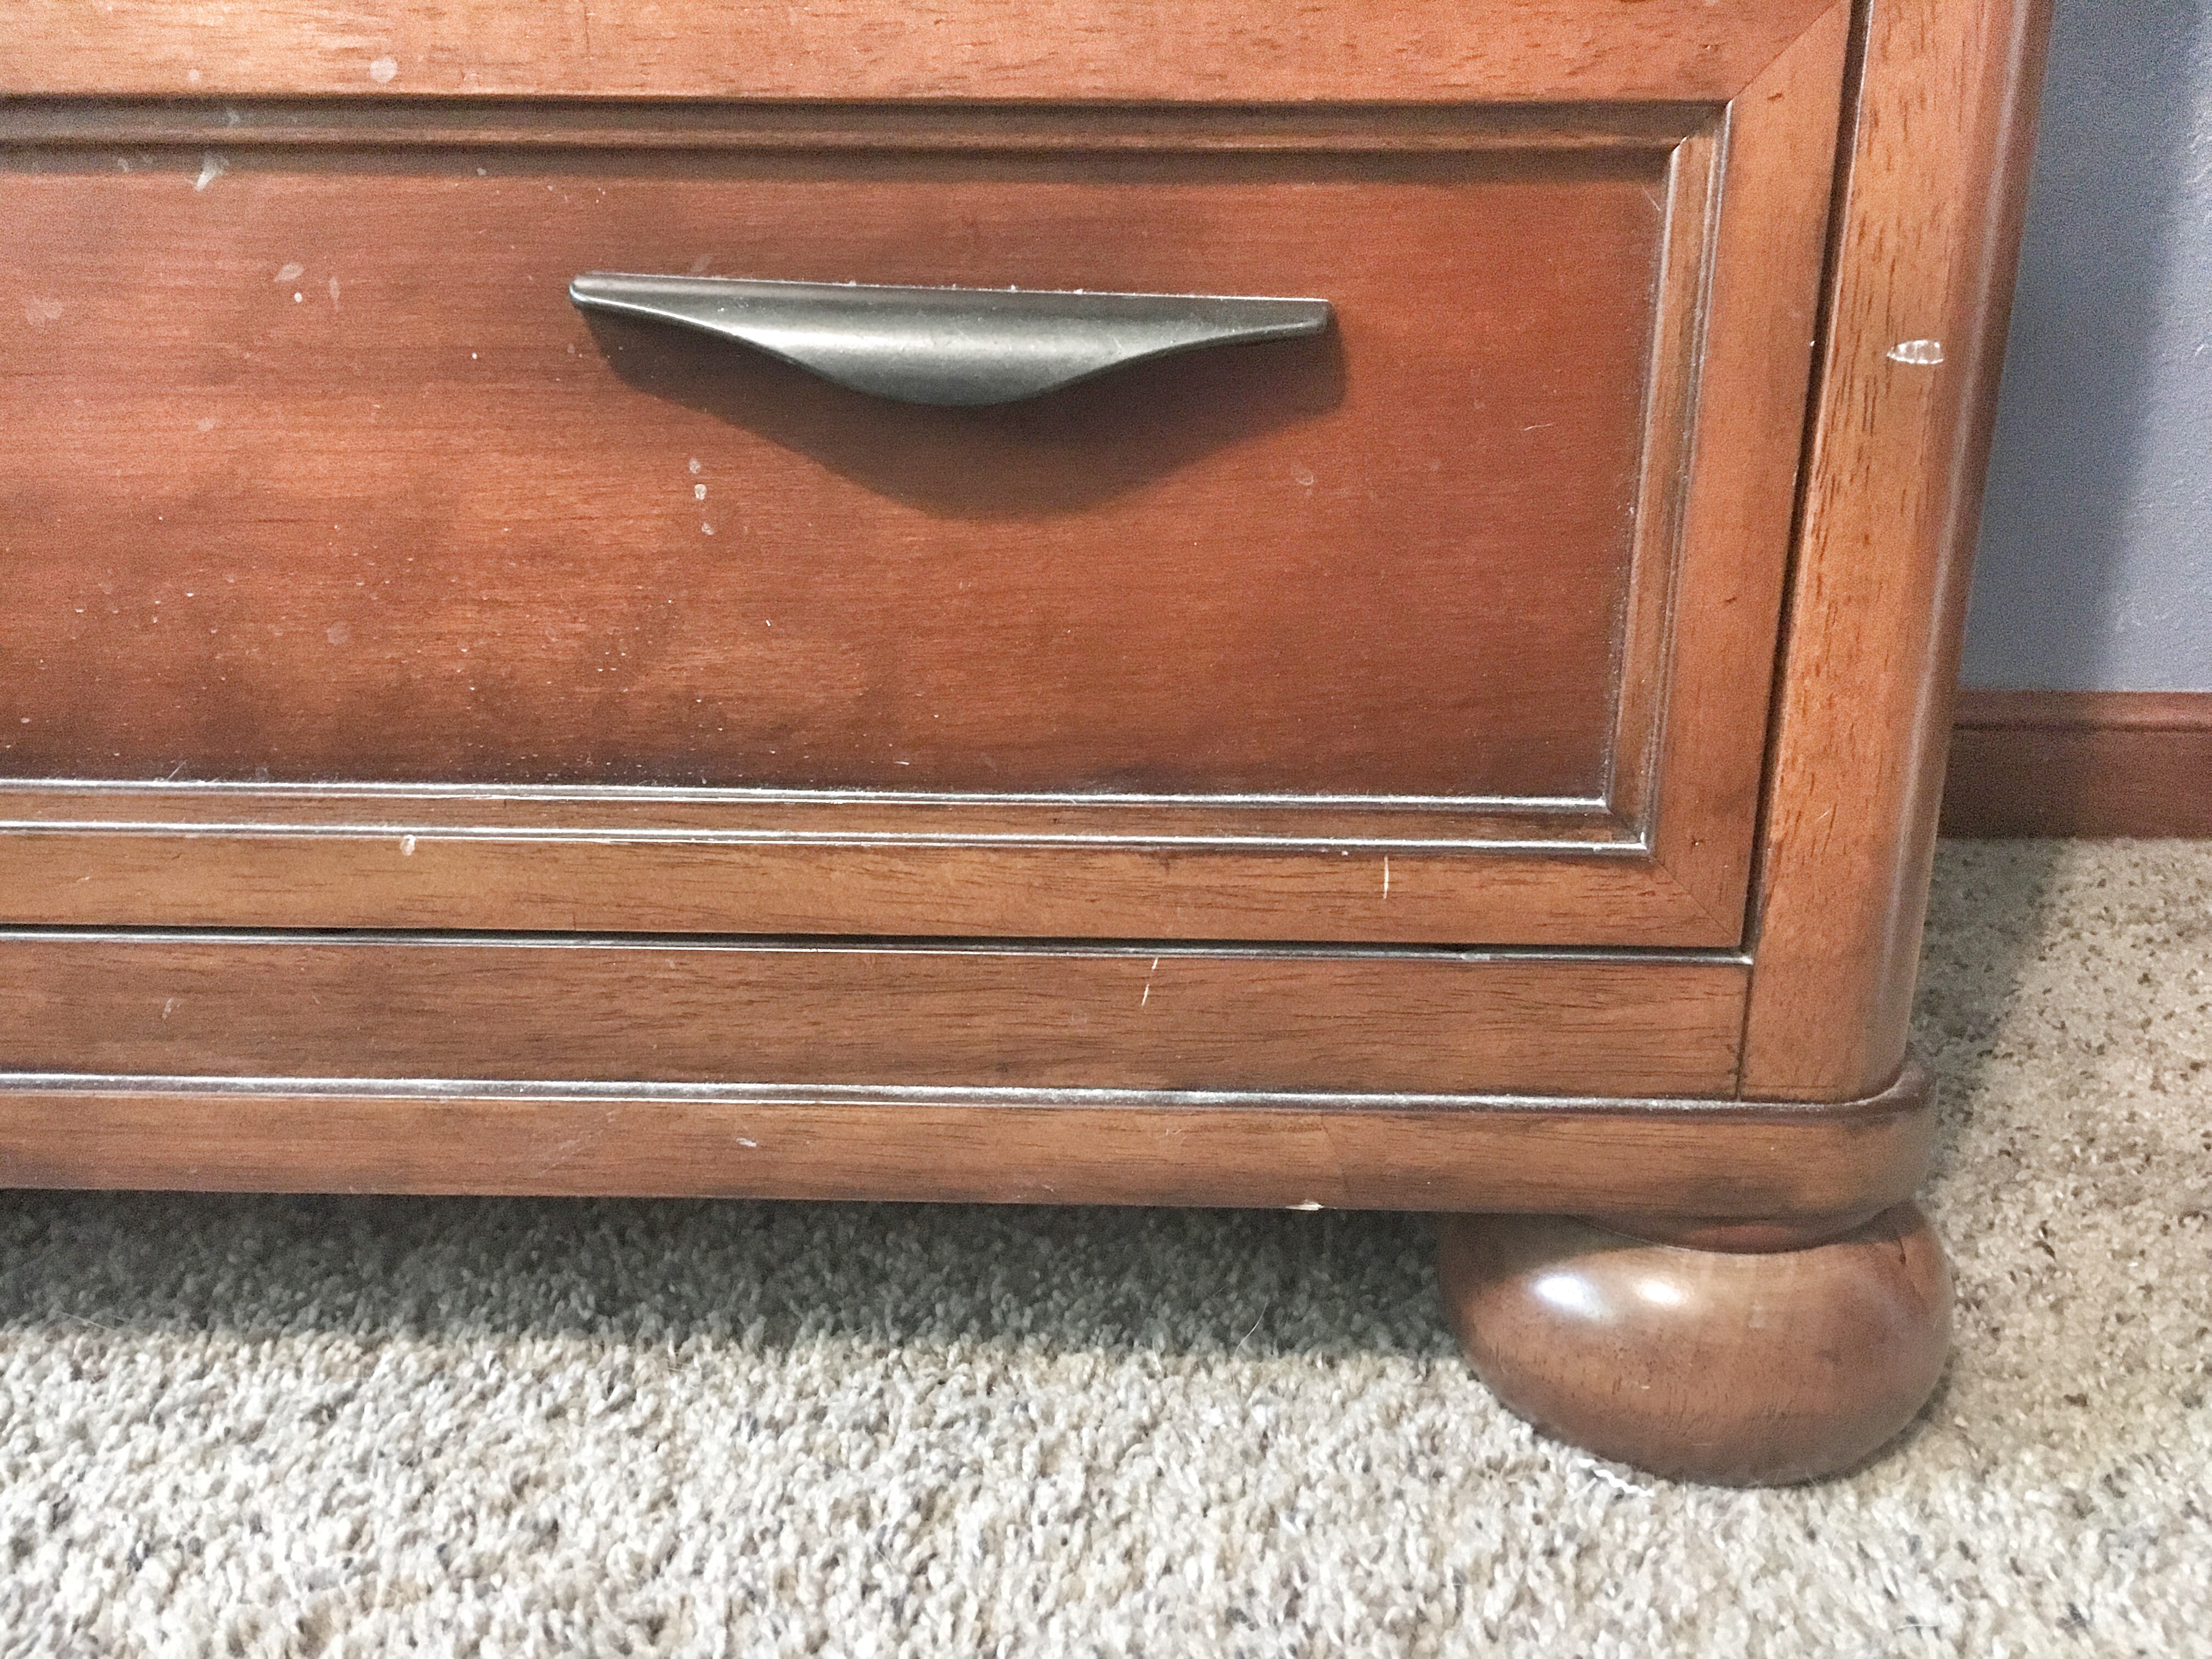
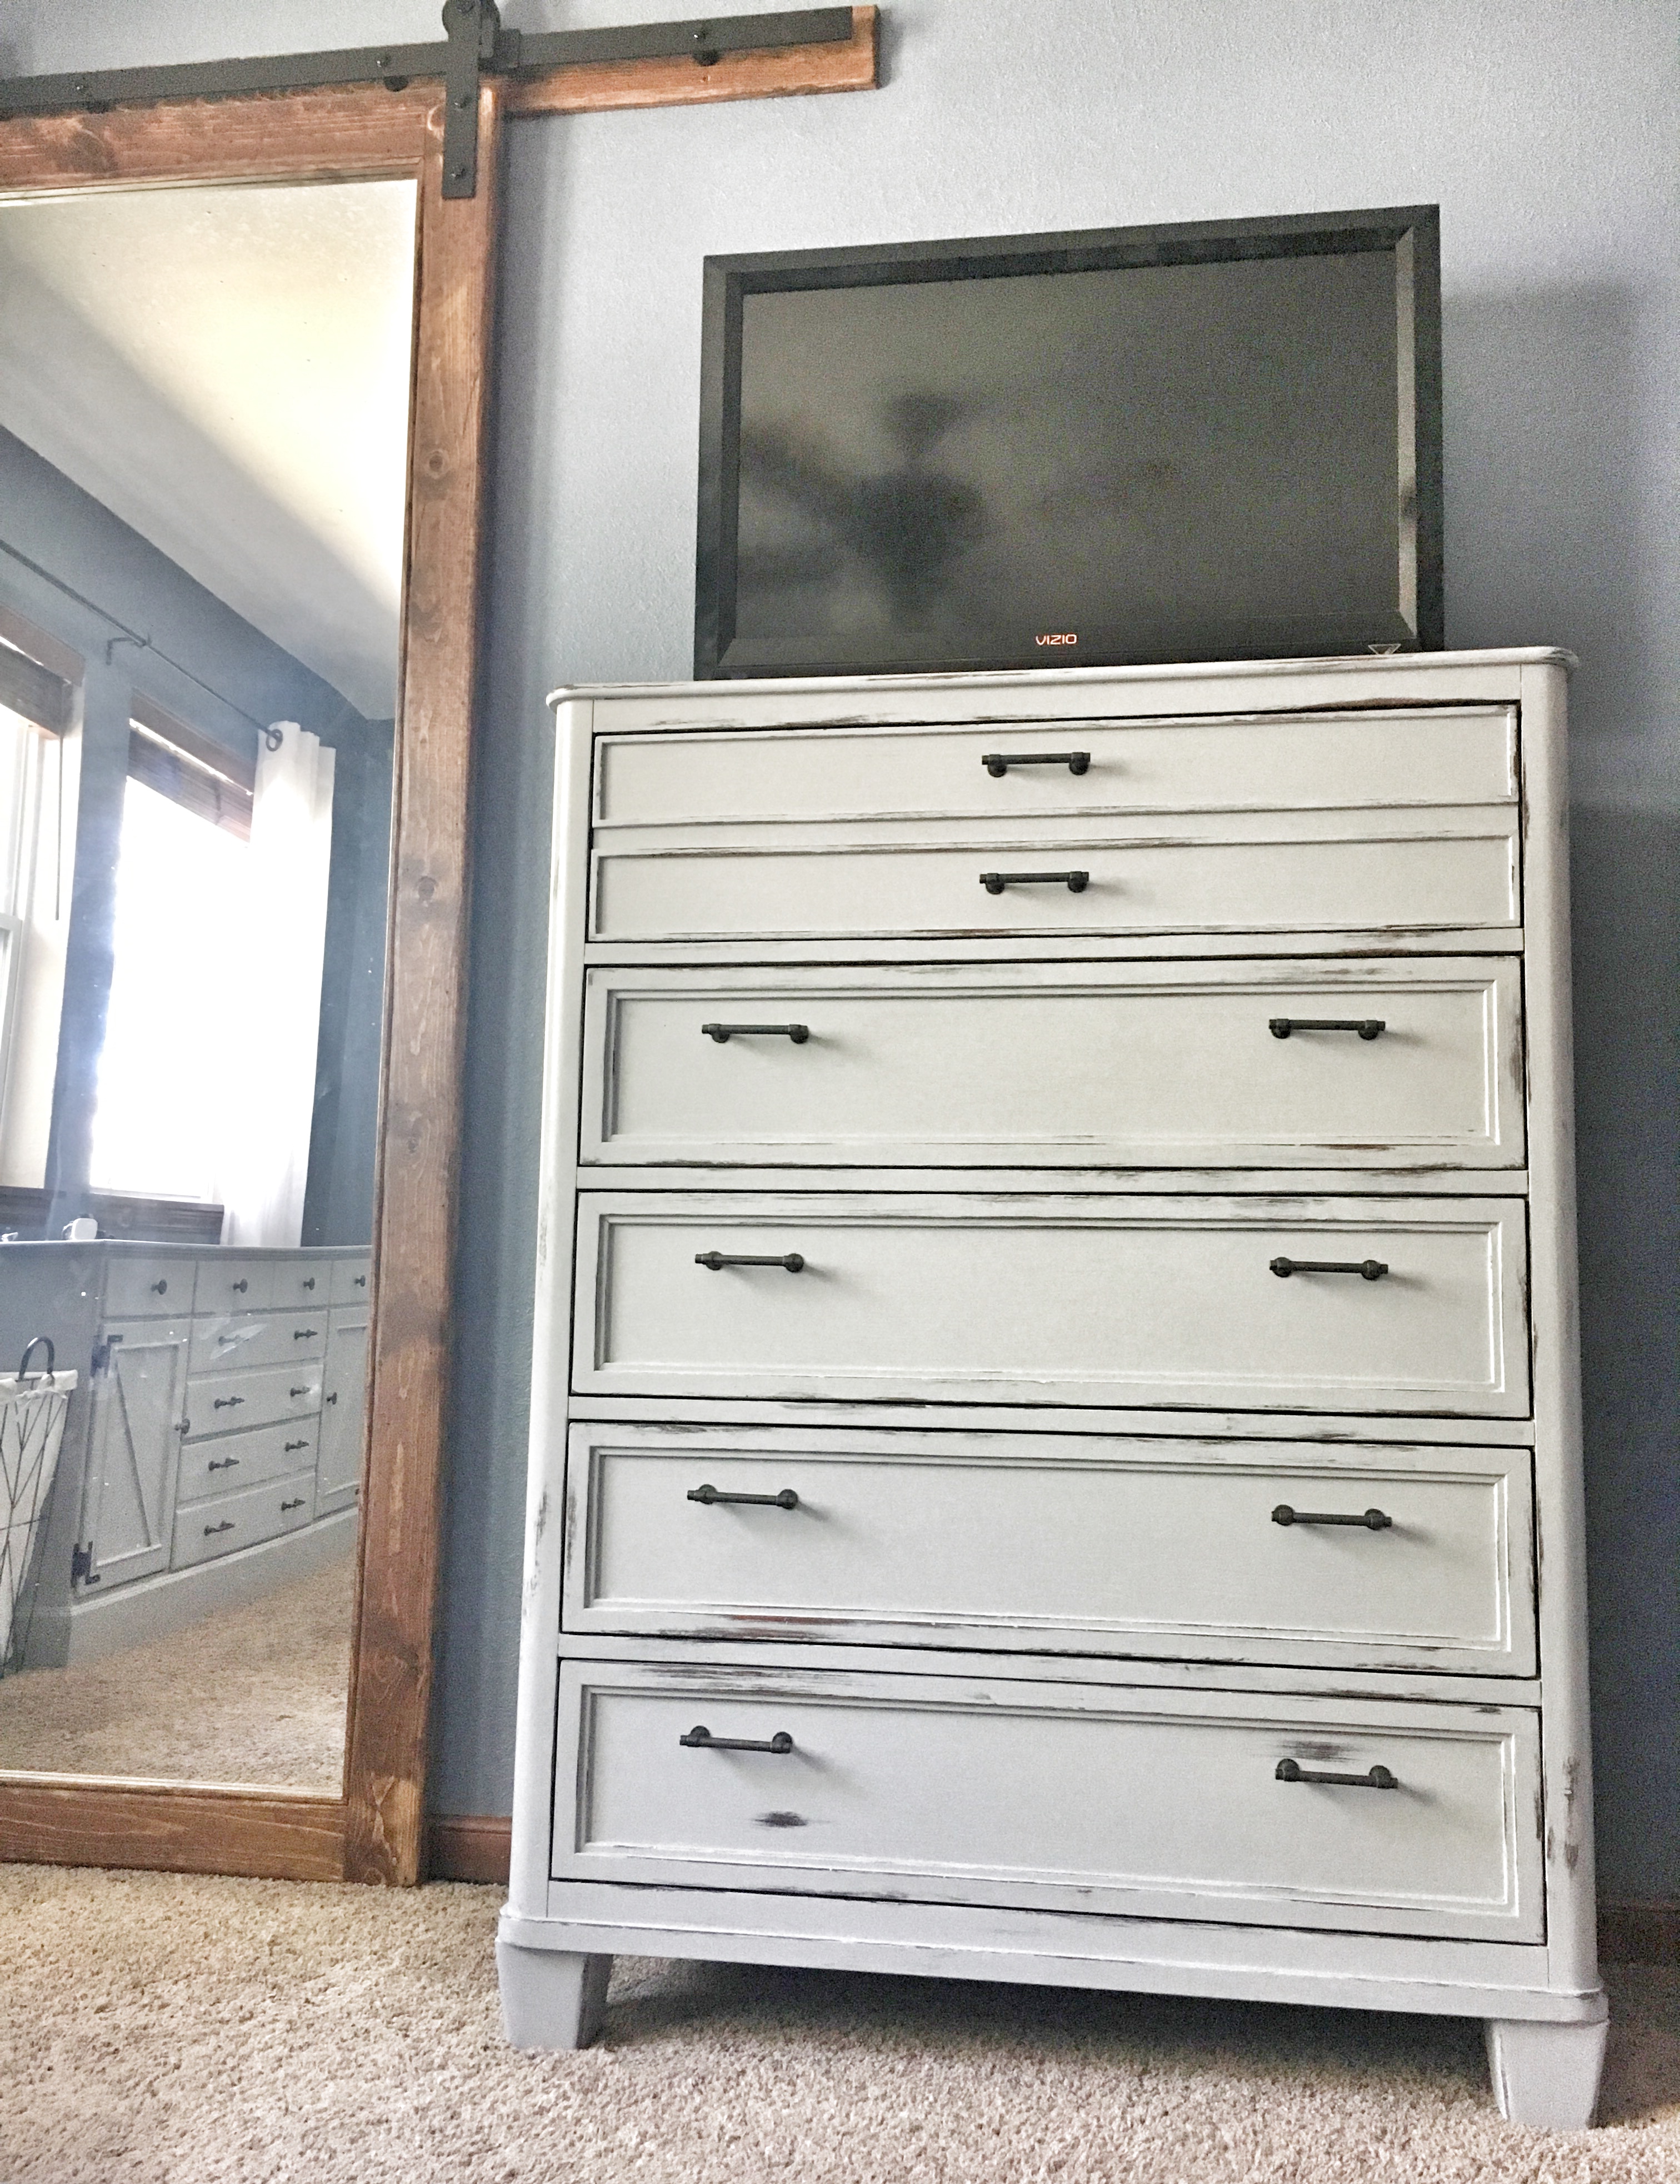
He has had this for many years. I believe this was the dresser that matched his bunkbed set growing up, so it has been through a lot! It is solid wood and still in great shape. But, since I wasn’t crazy about the style I began to break down what it was that I disliked: the hardware, the legs, and the color. I knew that updating these things would completely change the style and make everything coordinate!
- The Hardware
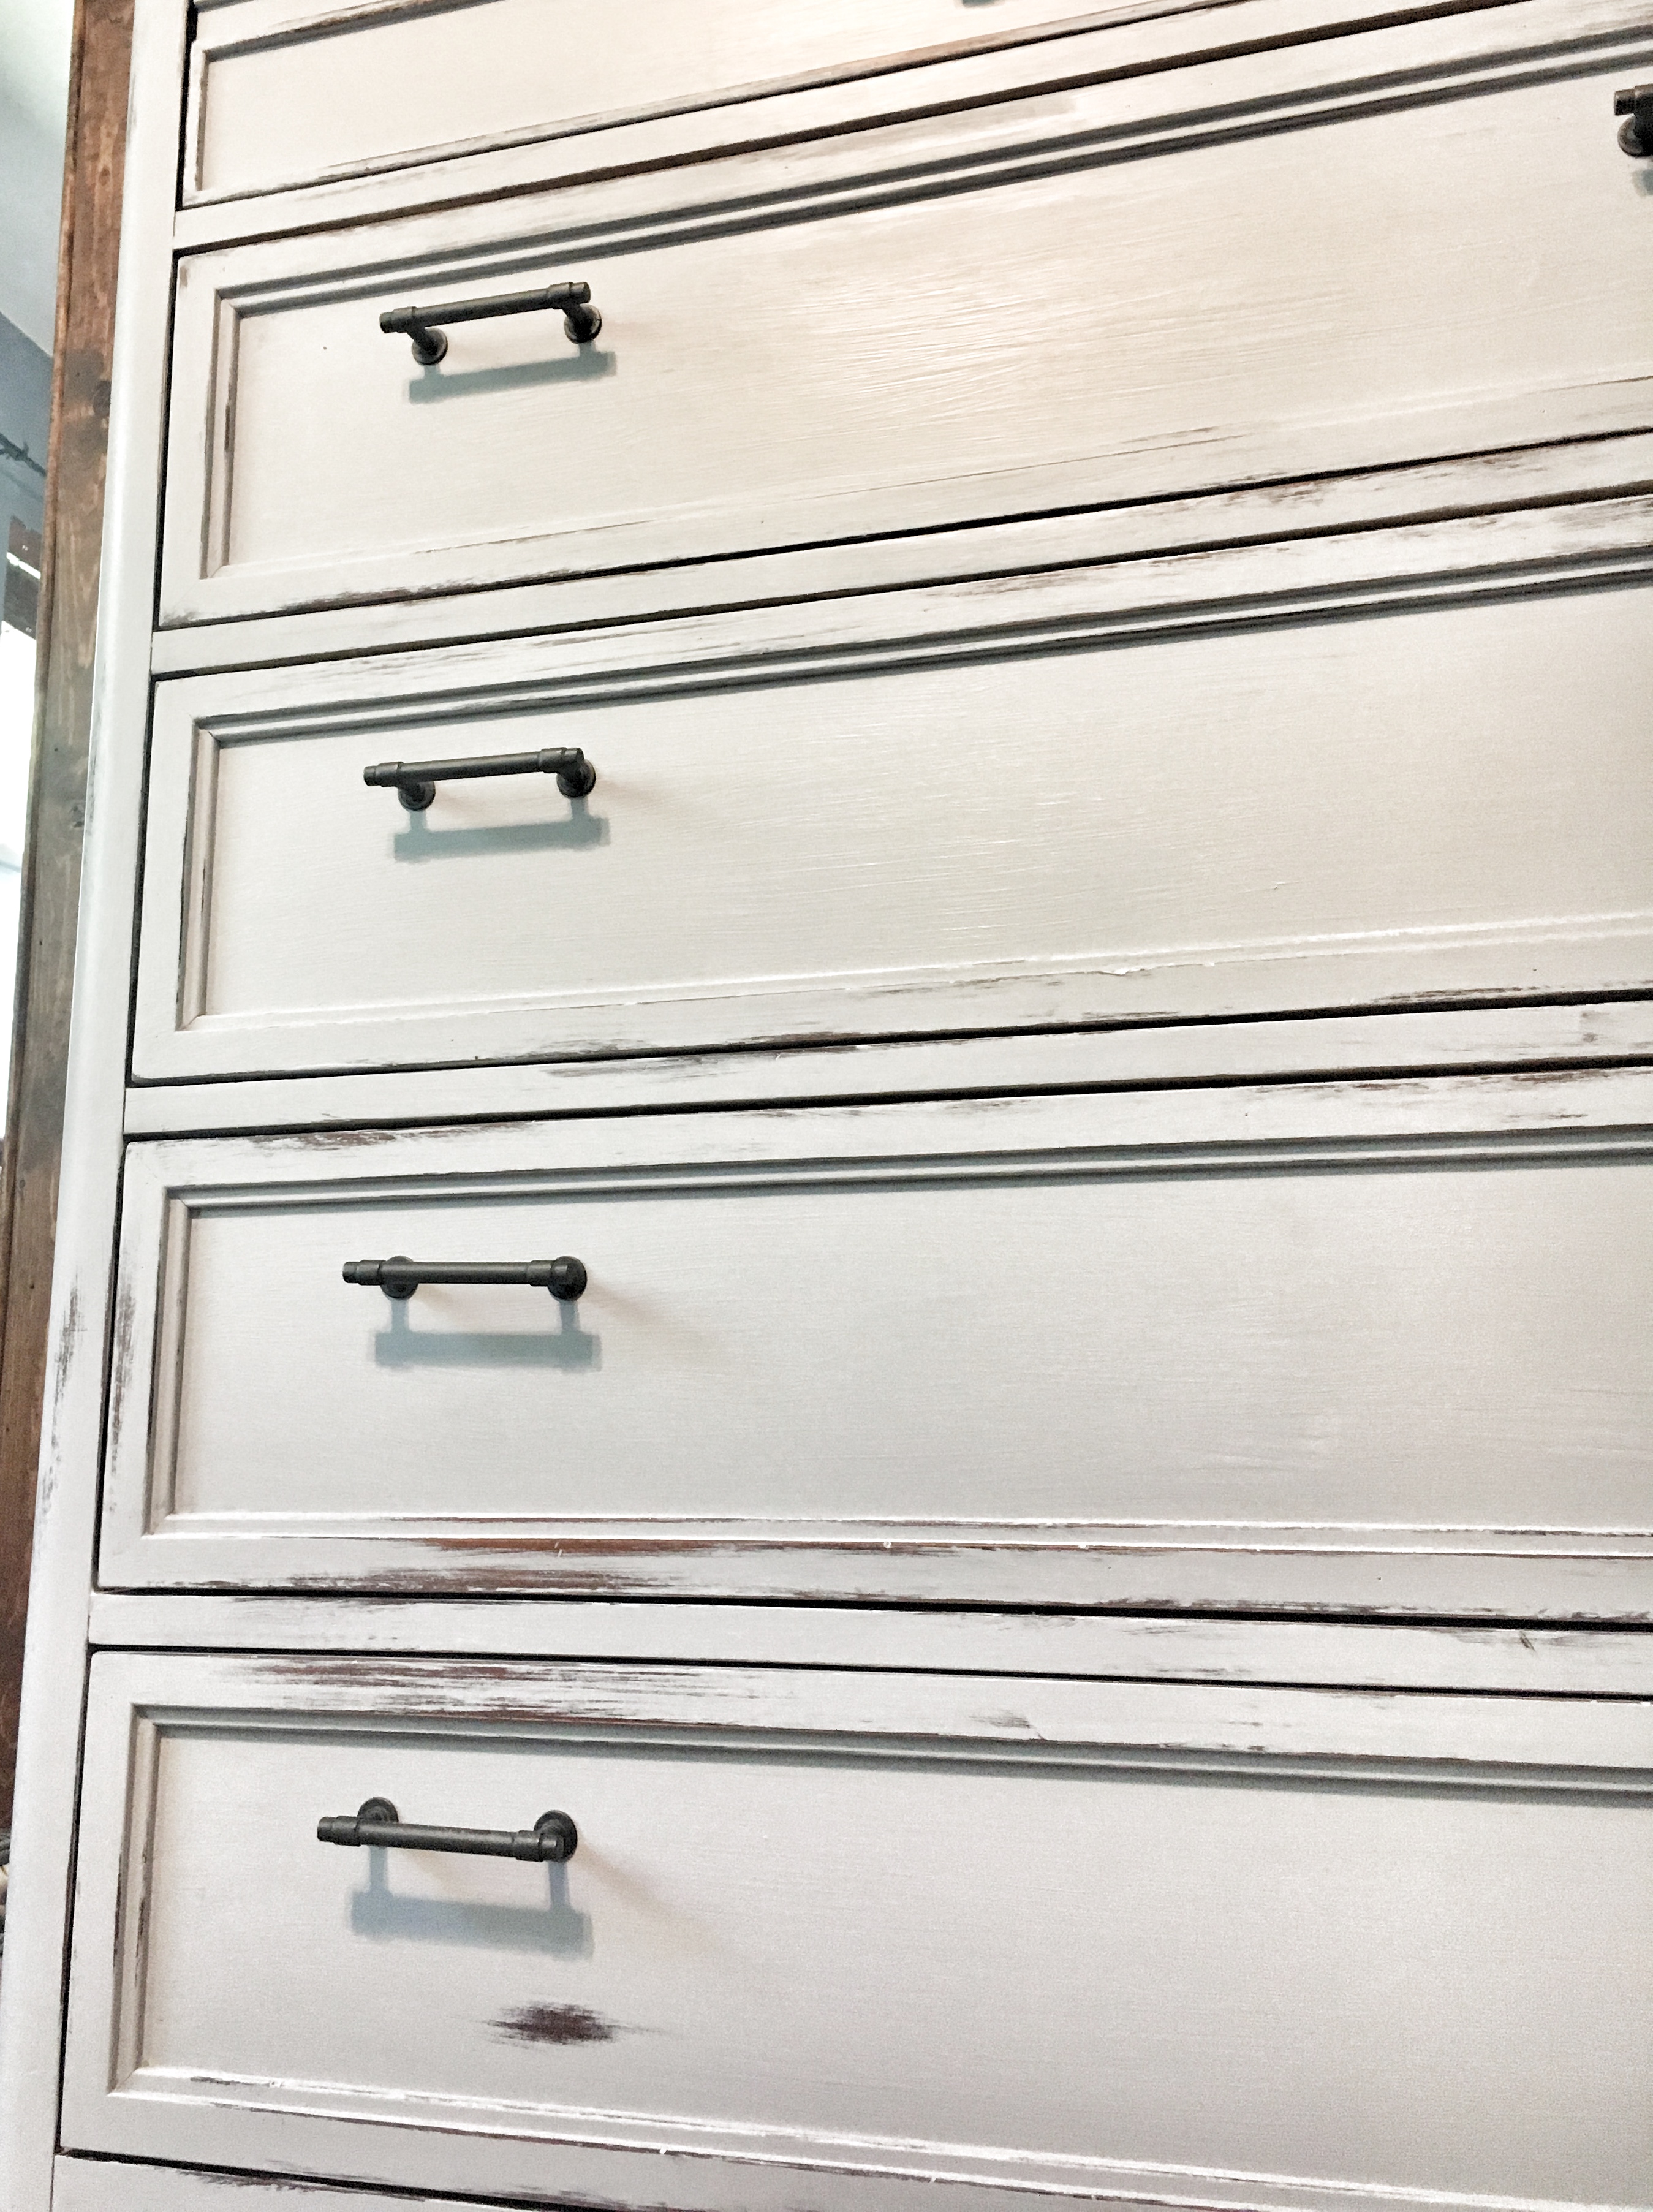
As far as I know this was the original hardware that came on it, and it wasn’t adding much interest. I wanted something that would say modern farmhouse, and I found some drawer pulls that are perfect! They are oil-rubbed bronze and slightly more masculine looking, but close to the same shape as the pulls on my dresser (coordinating but not matching). They came in a pack of ten.
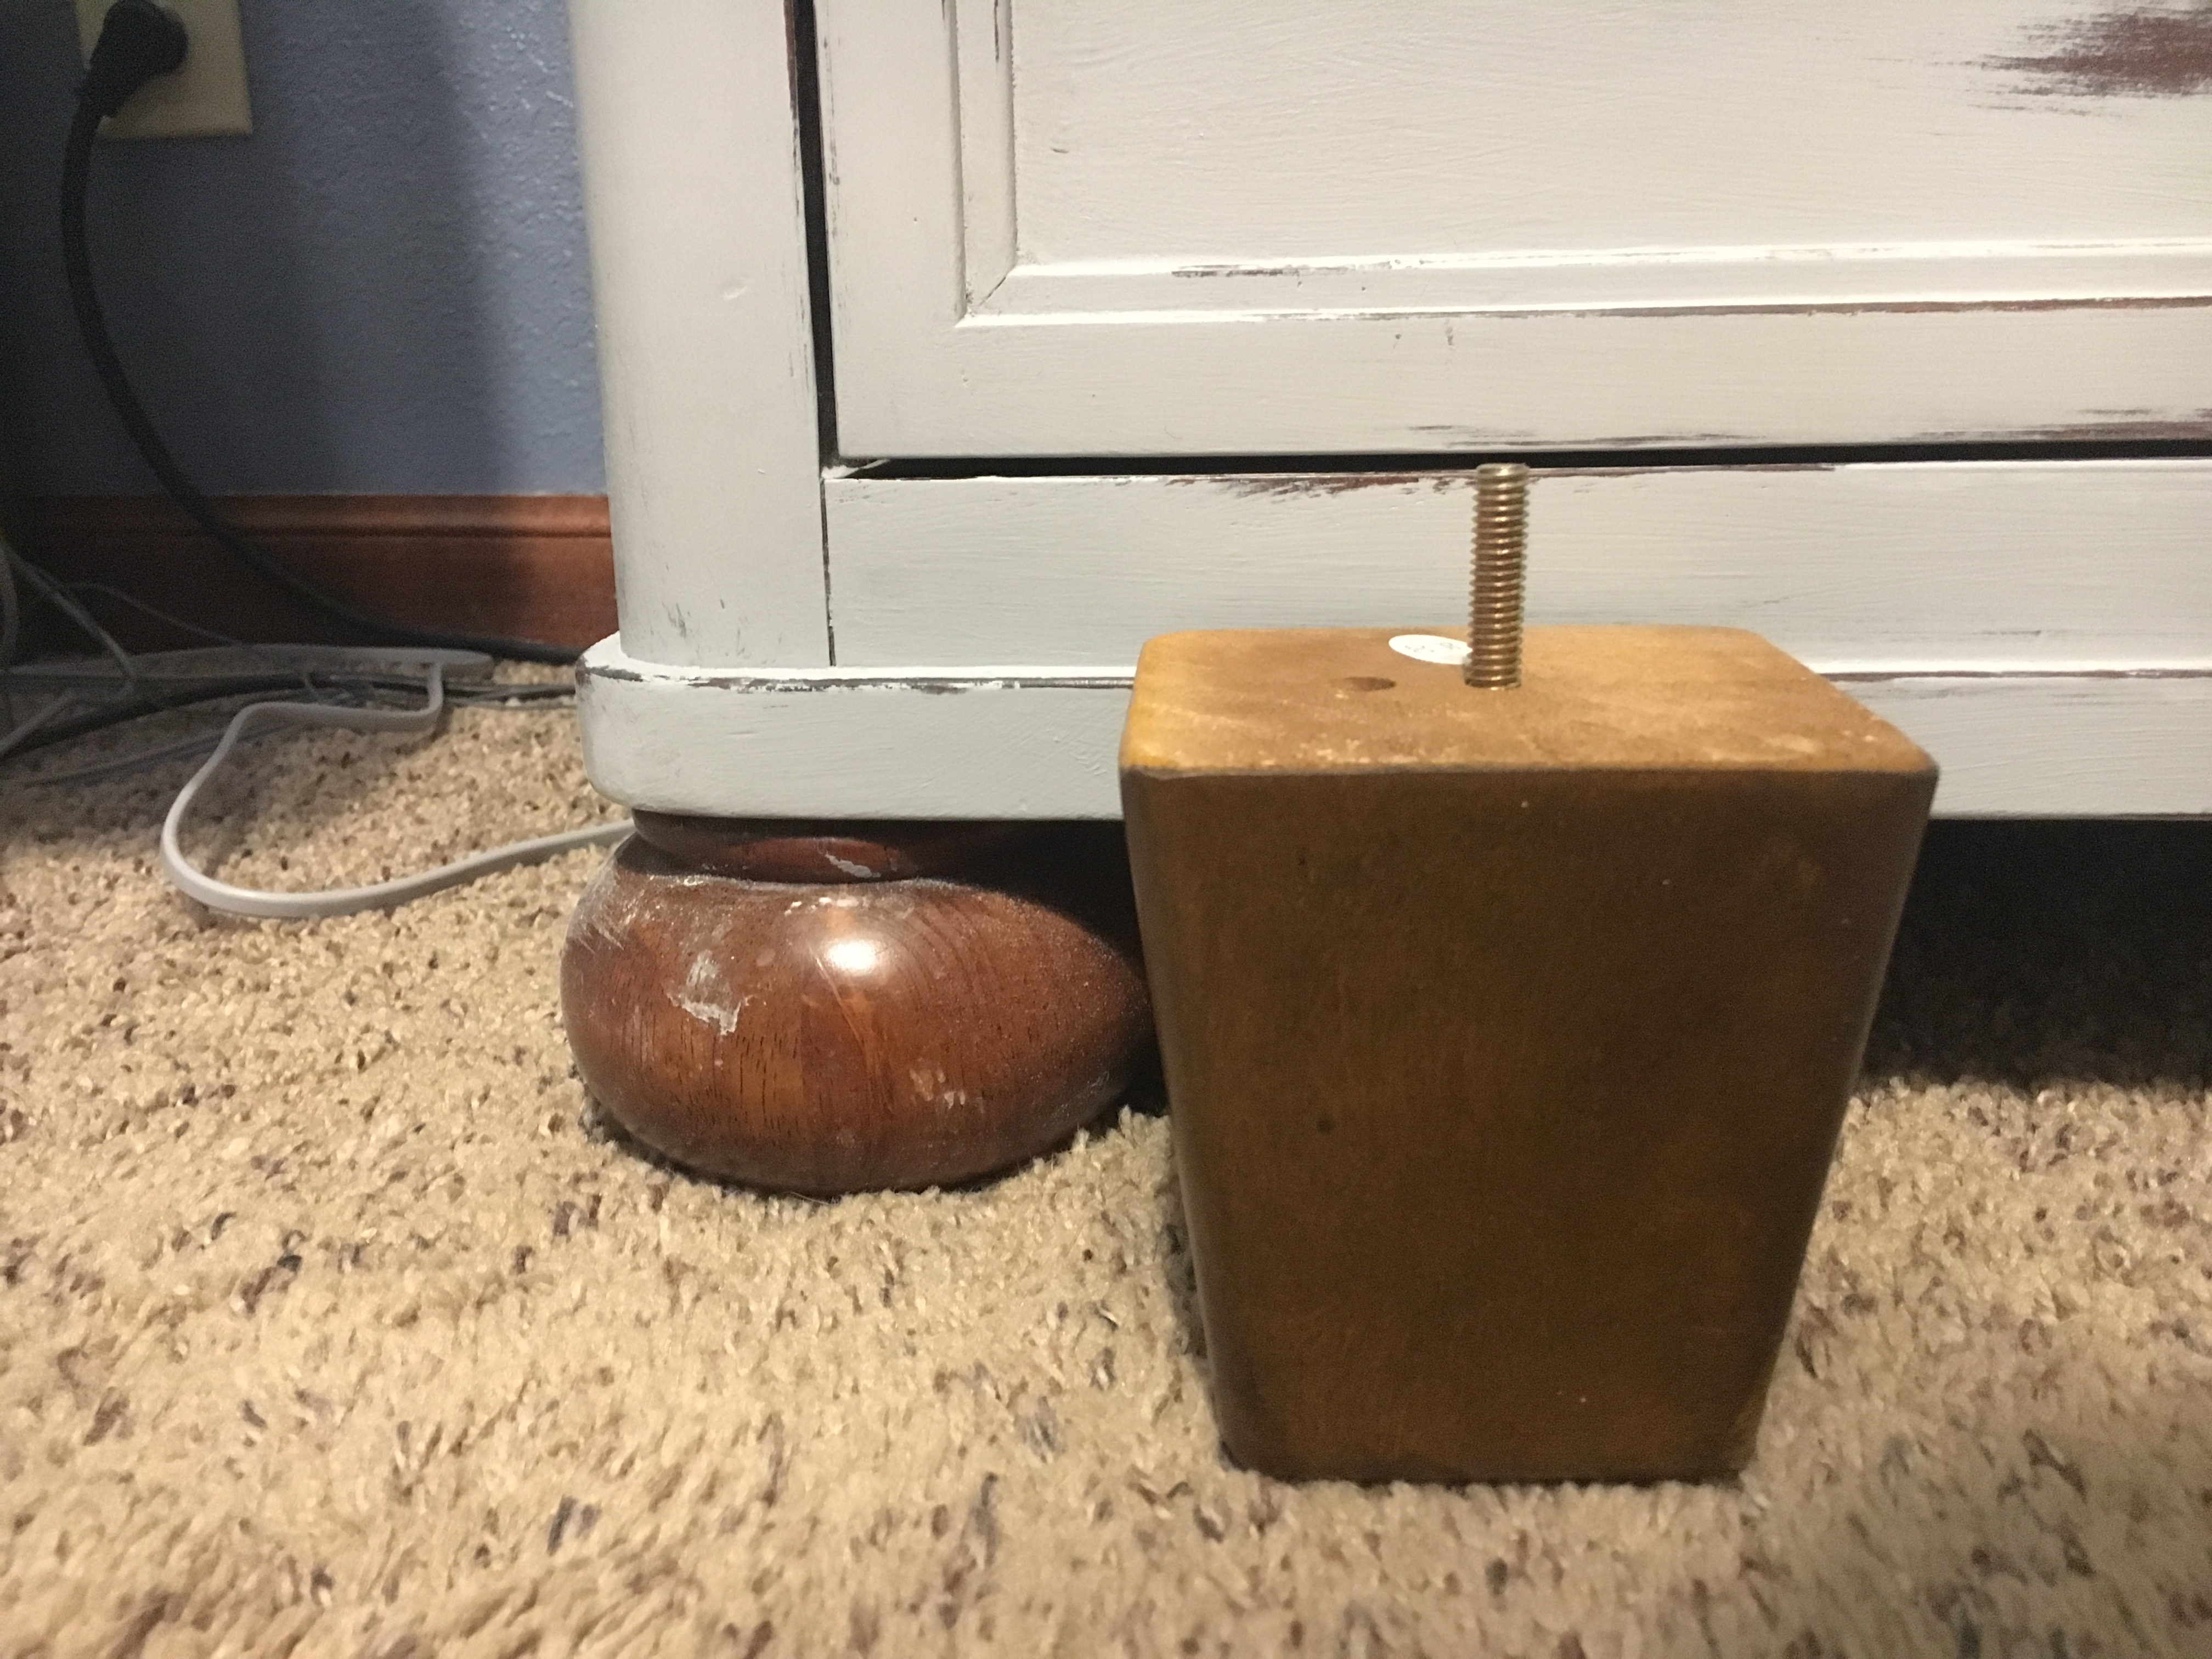
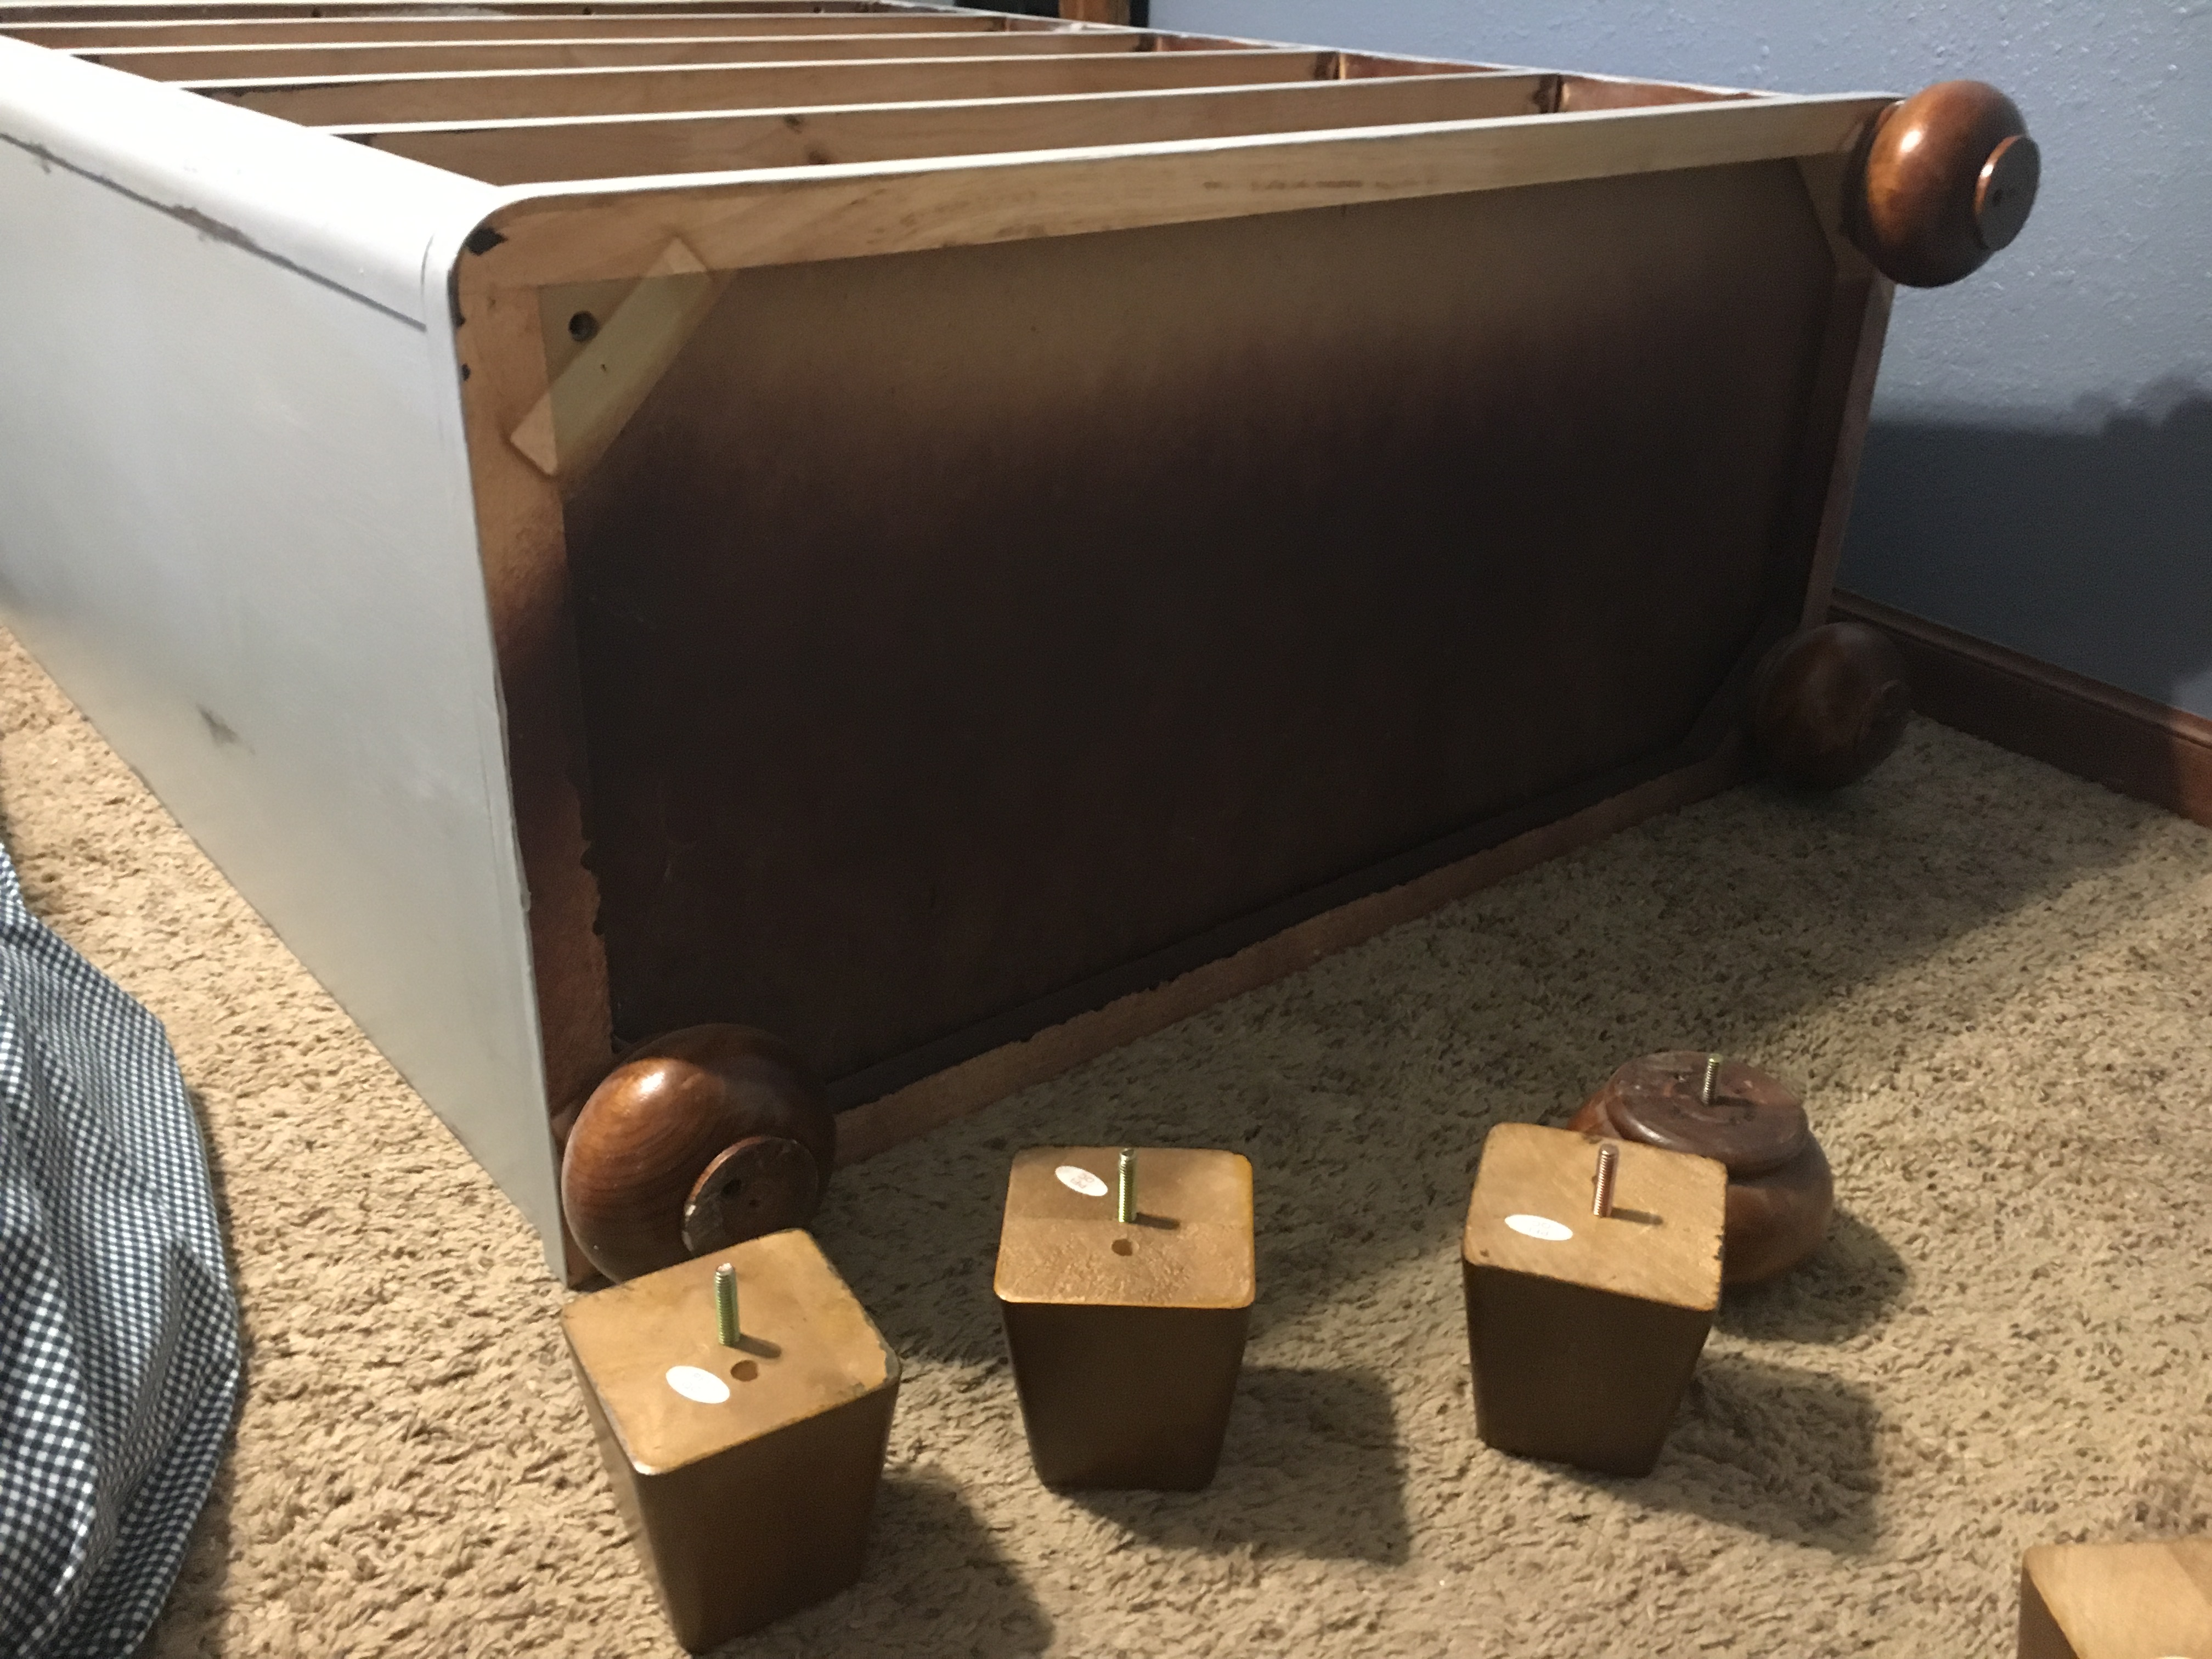
- The Legs
I am a fan of turned legs, but these bun feet weren’t working on this dresser at all. I don’t know the exact word that comes to mind when I look at these: stubby? stumpy? chunky? To me, it looked like the dresser had dwarf legs, and it seriously bothered me, lol.
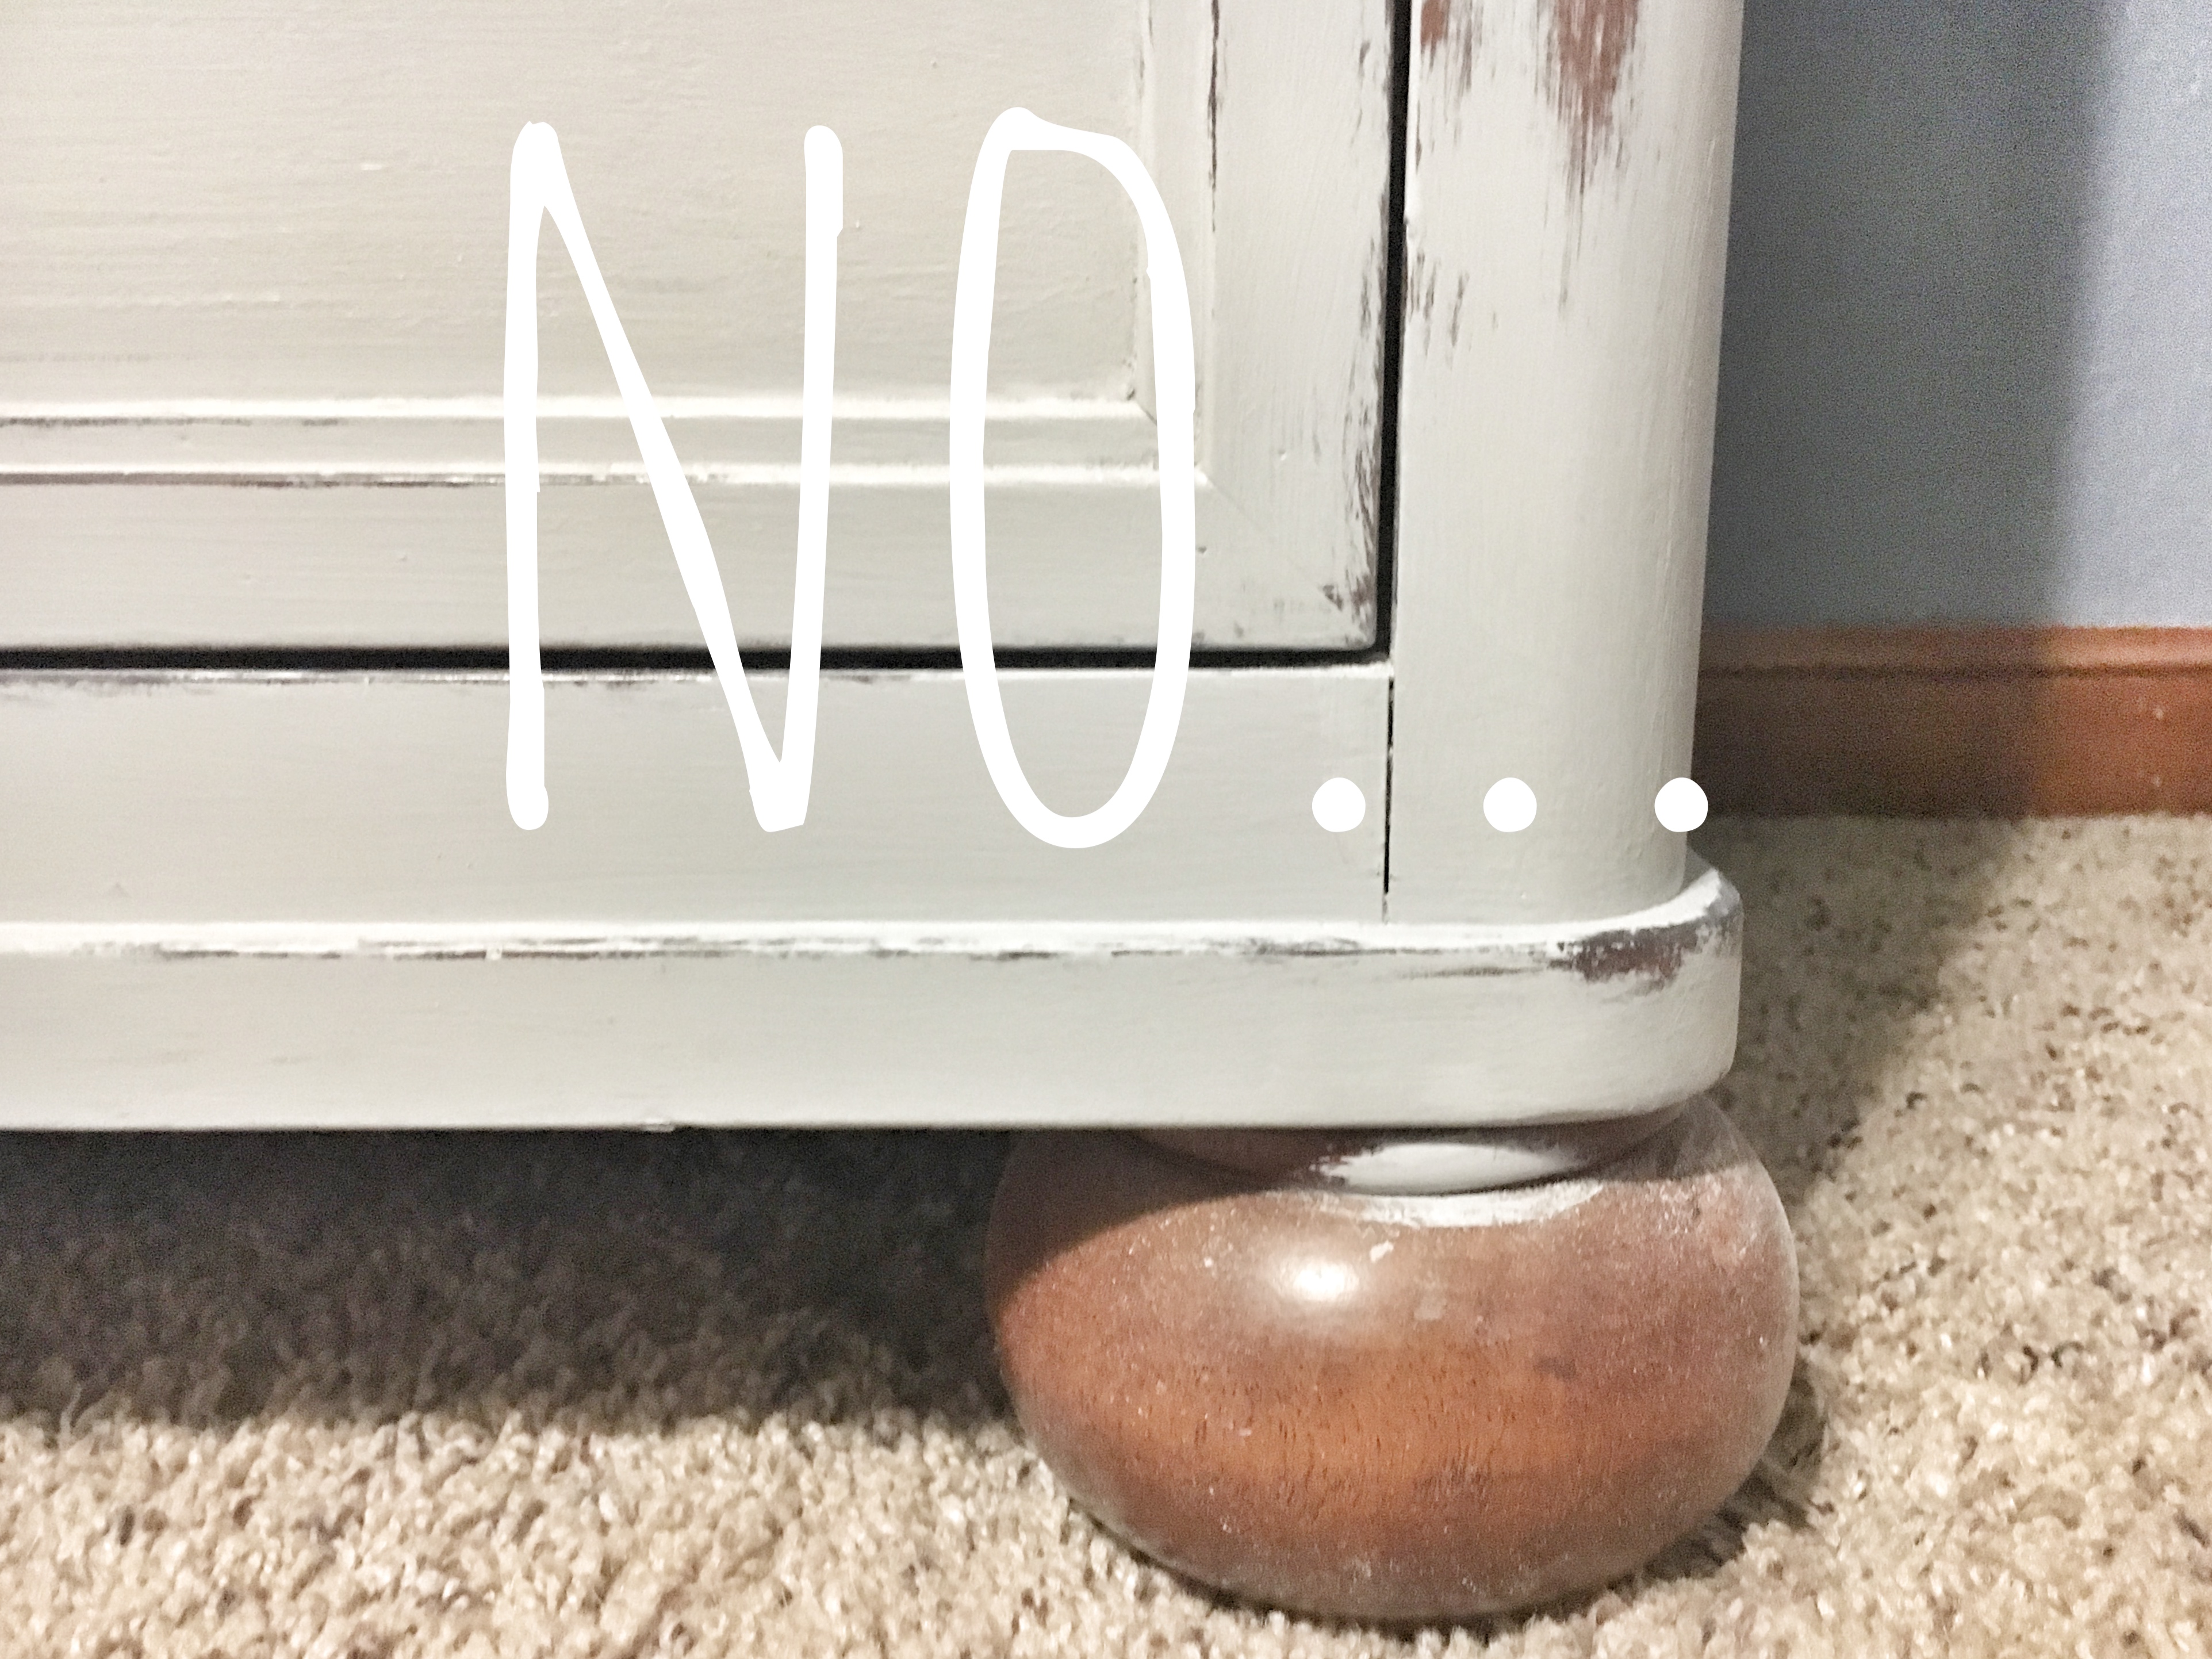
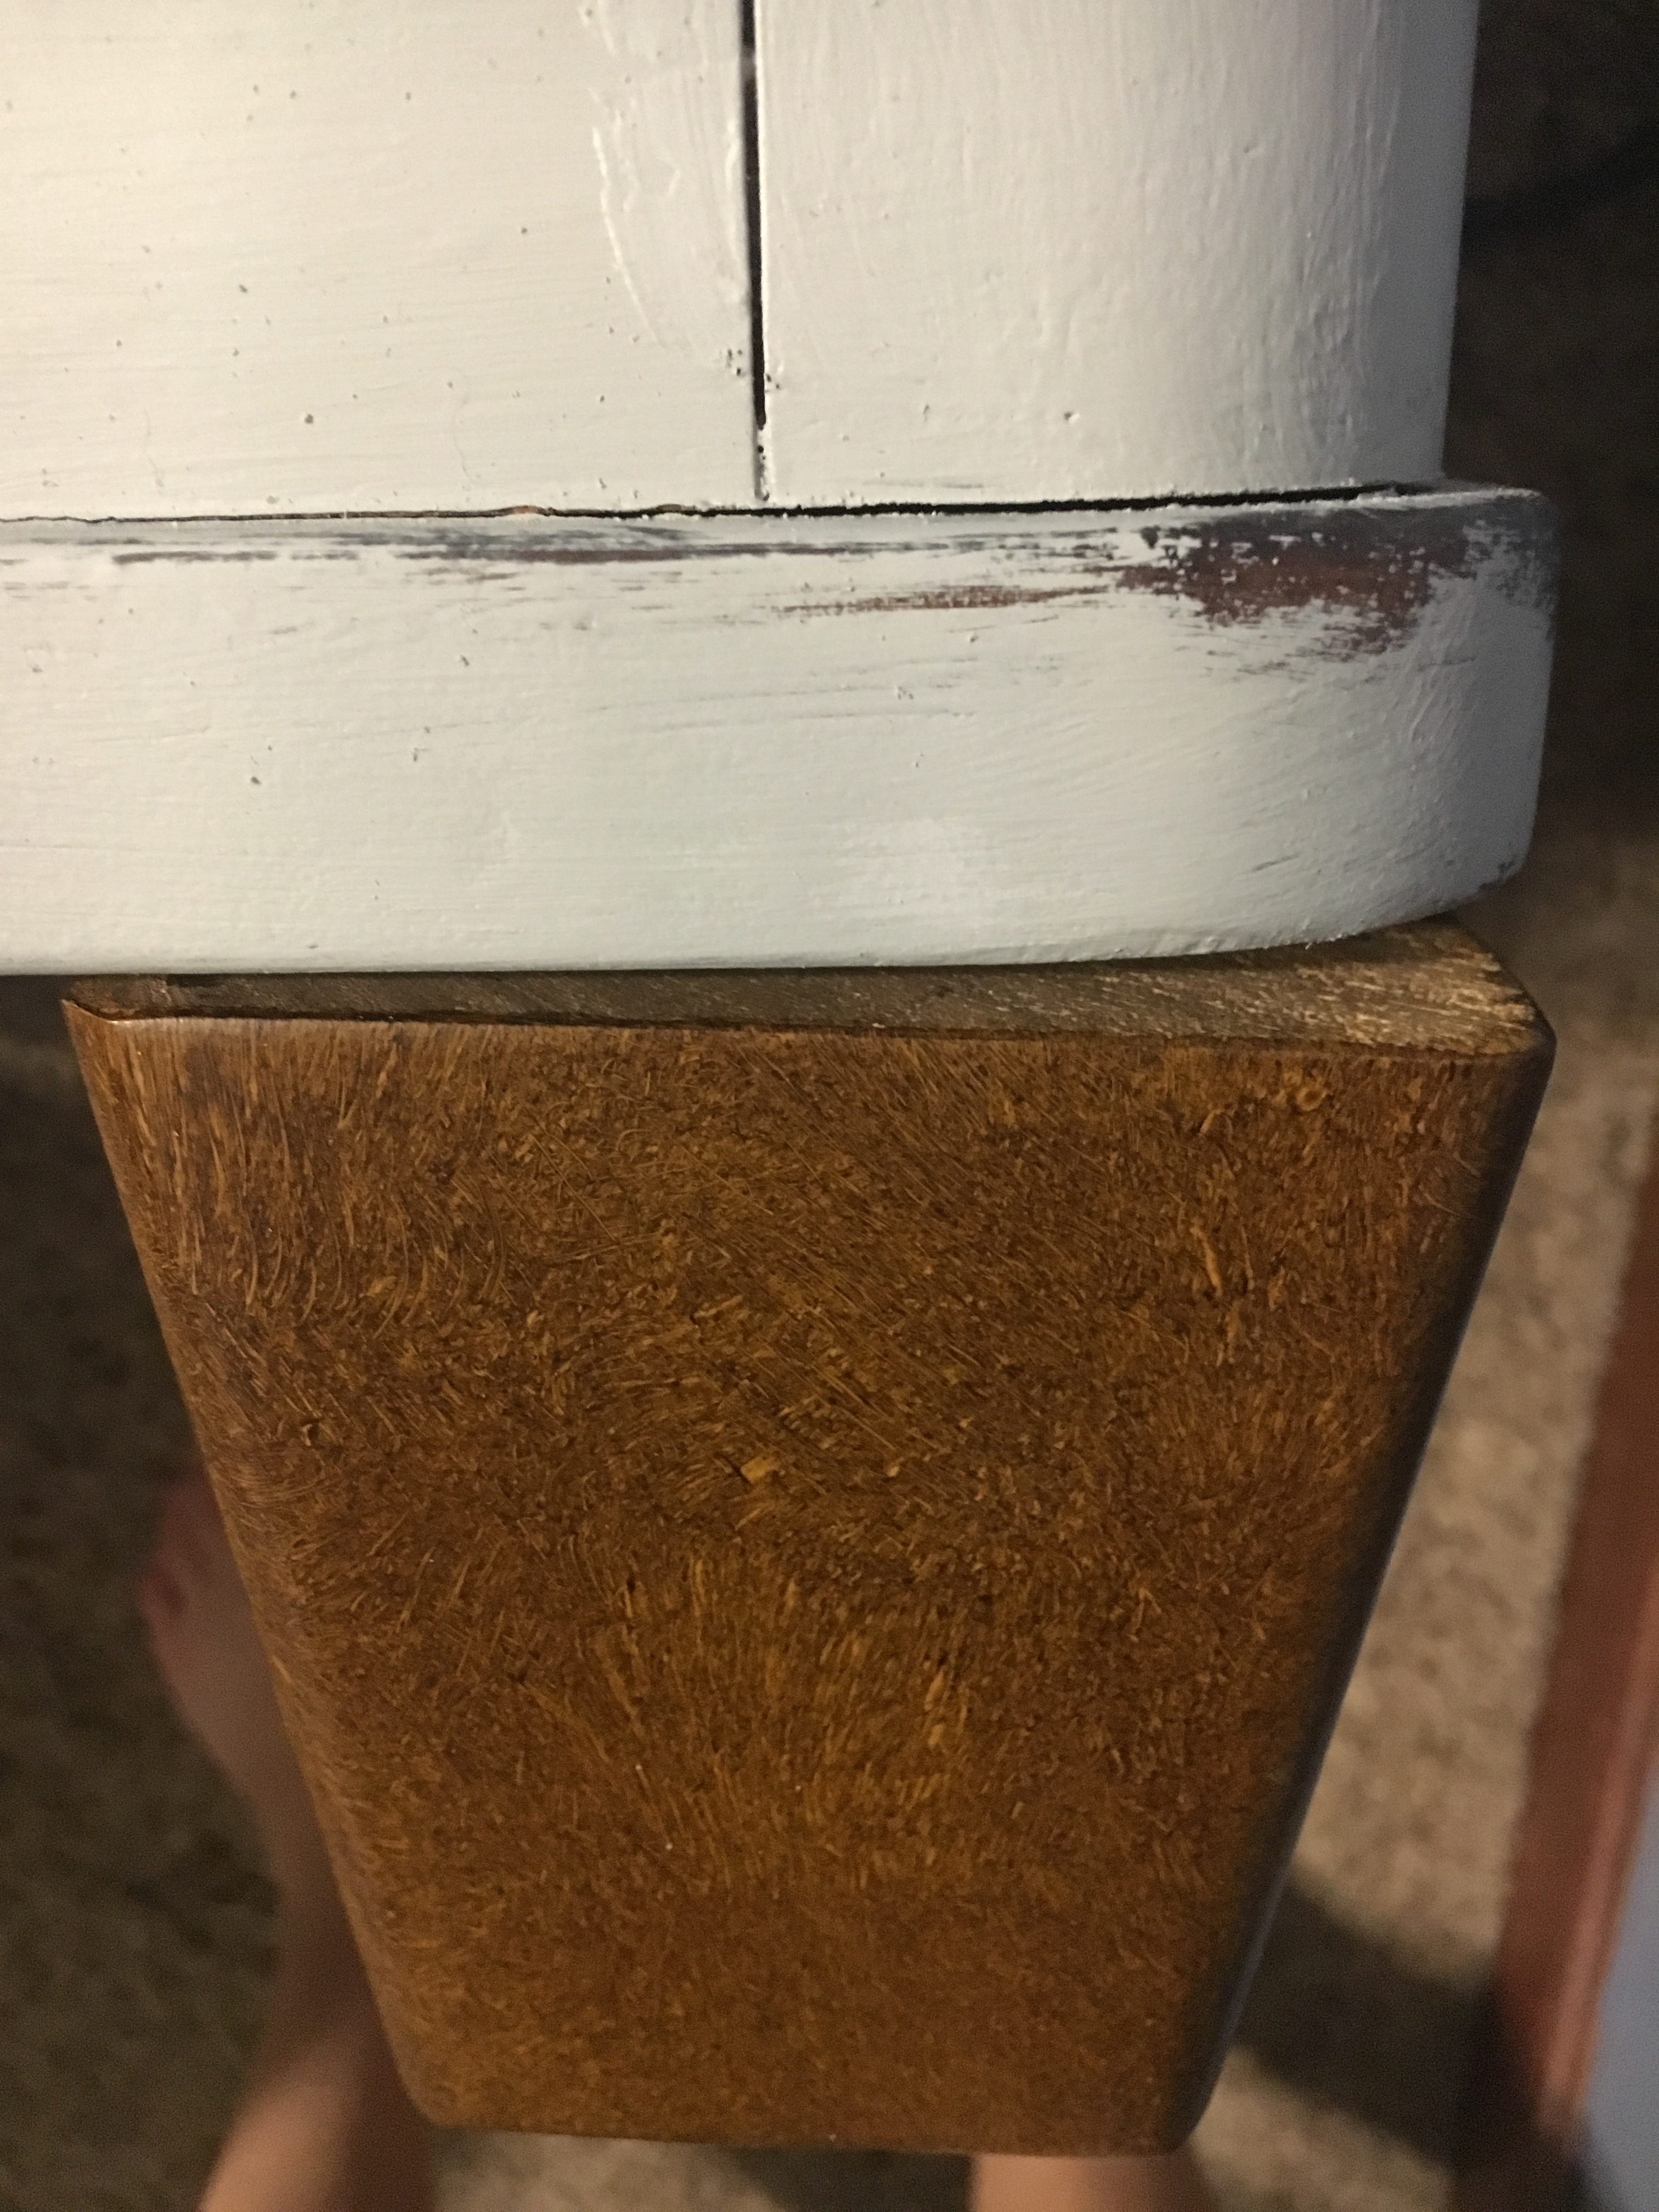
Since the corners of the dresser are rounded, I wanted to get some taller, tapered legs that are also rounded on the edges. I found some sofa legs that matched that description perfectly! I had to drill new holes on the bottom of the dresser when I attached these because the rounded corners stuck out too far, but overall these worked great!
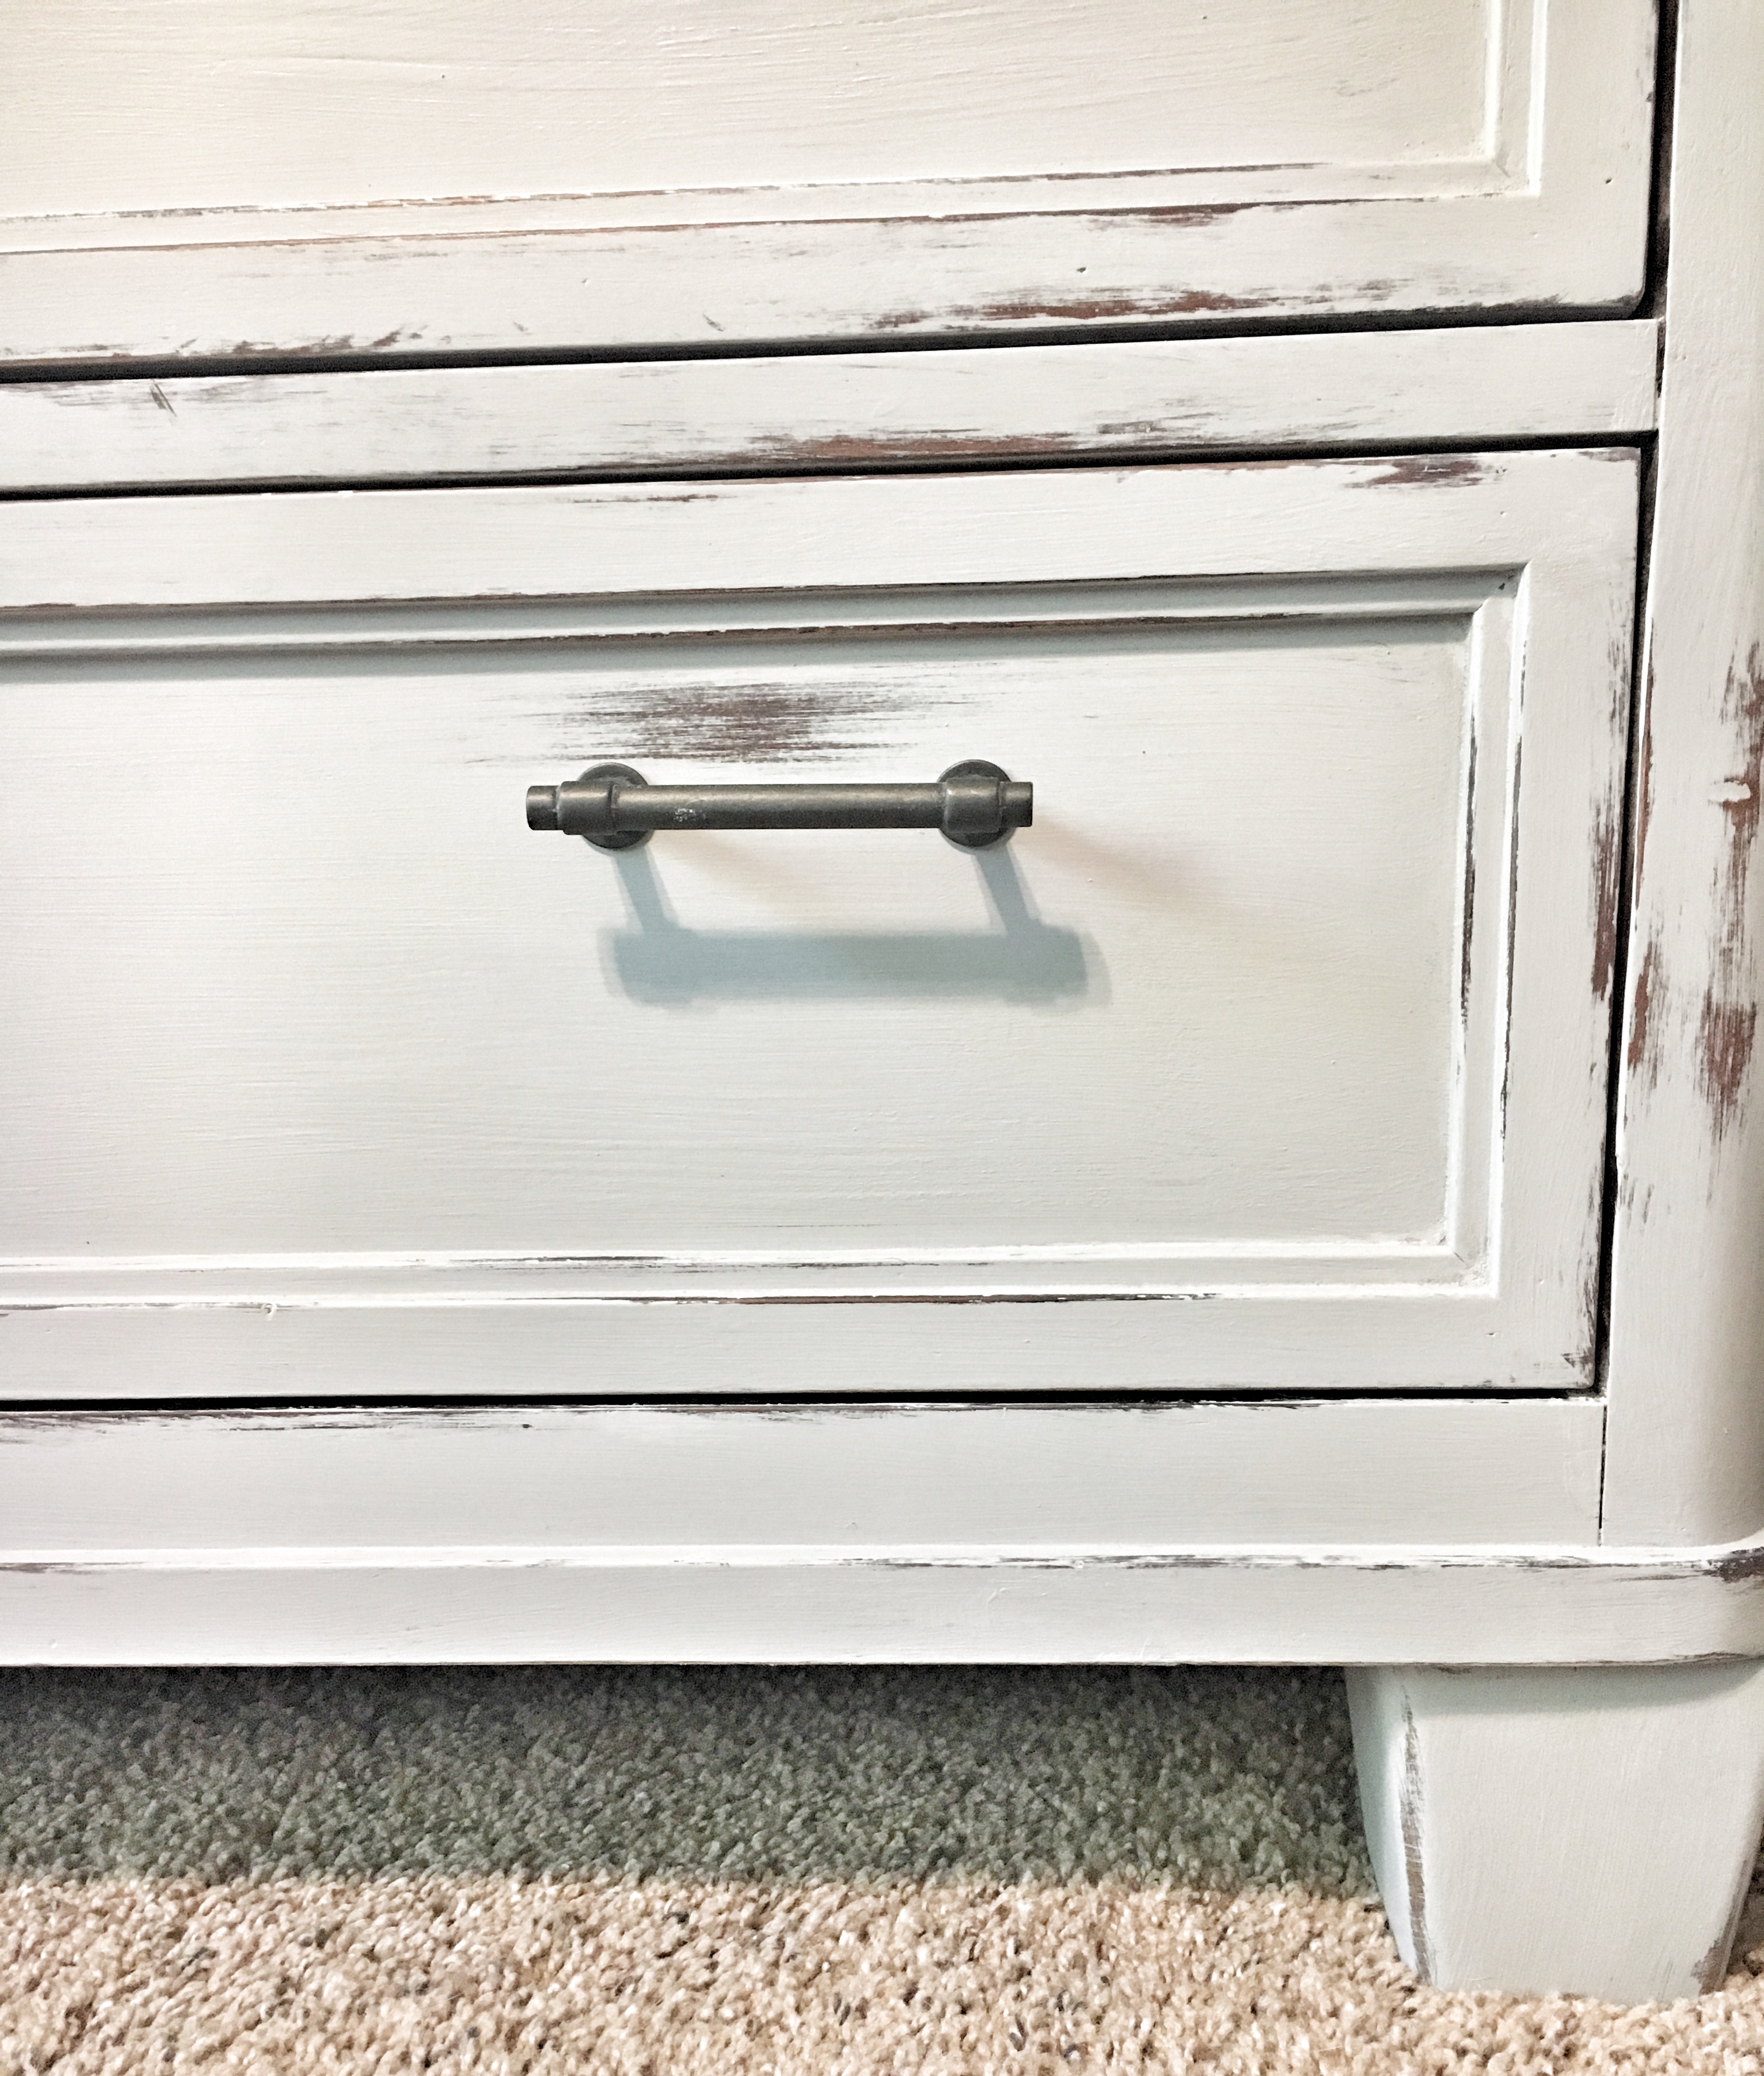
- The Color
The color was the part that would pull it all together. I used the same paint as my dresser, but this time I did distress it. I wanted Logan’s dresser to coordinate with mine, but also be distinguishably more masculine. I think I accomplished this with the pulls and distressed paint. The new legs make it slightly taller, but not noticeably, and it finally looks like it should have to begin with in my opinion!
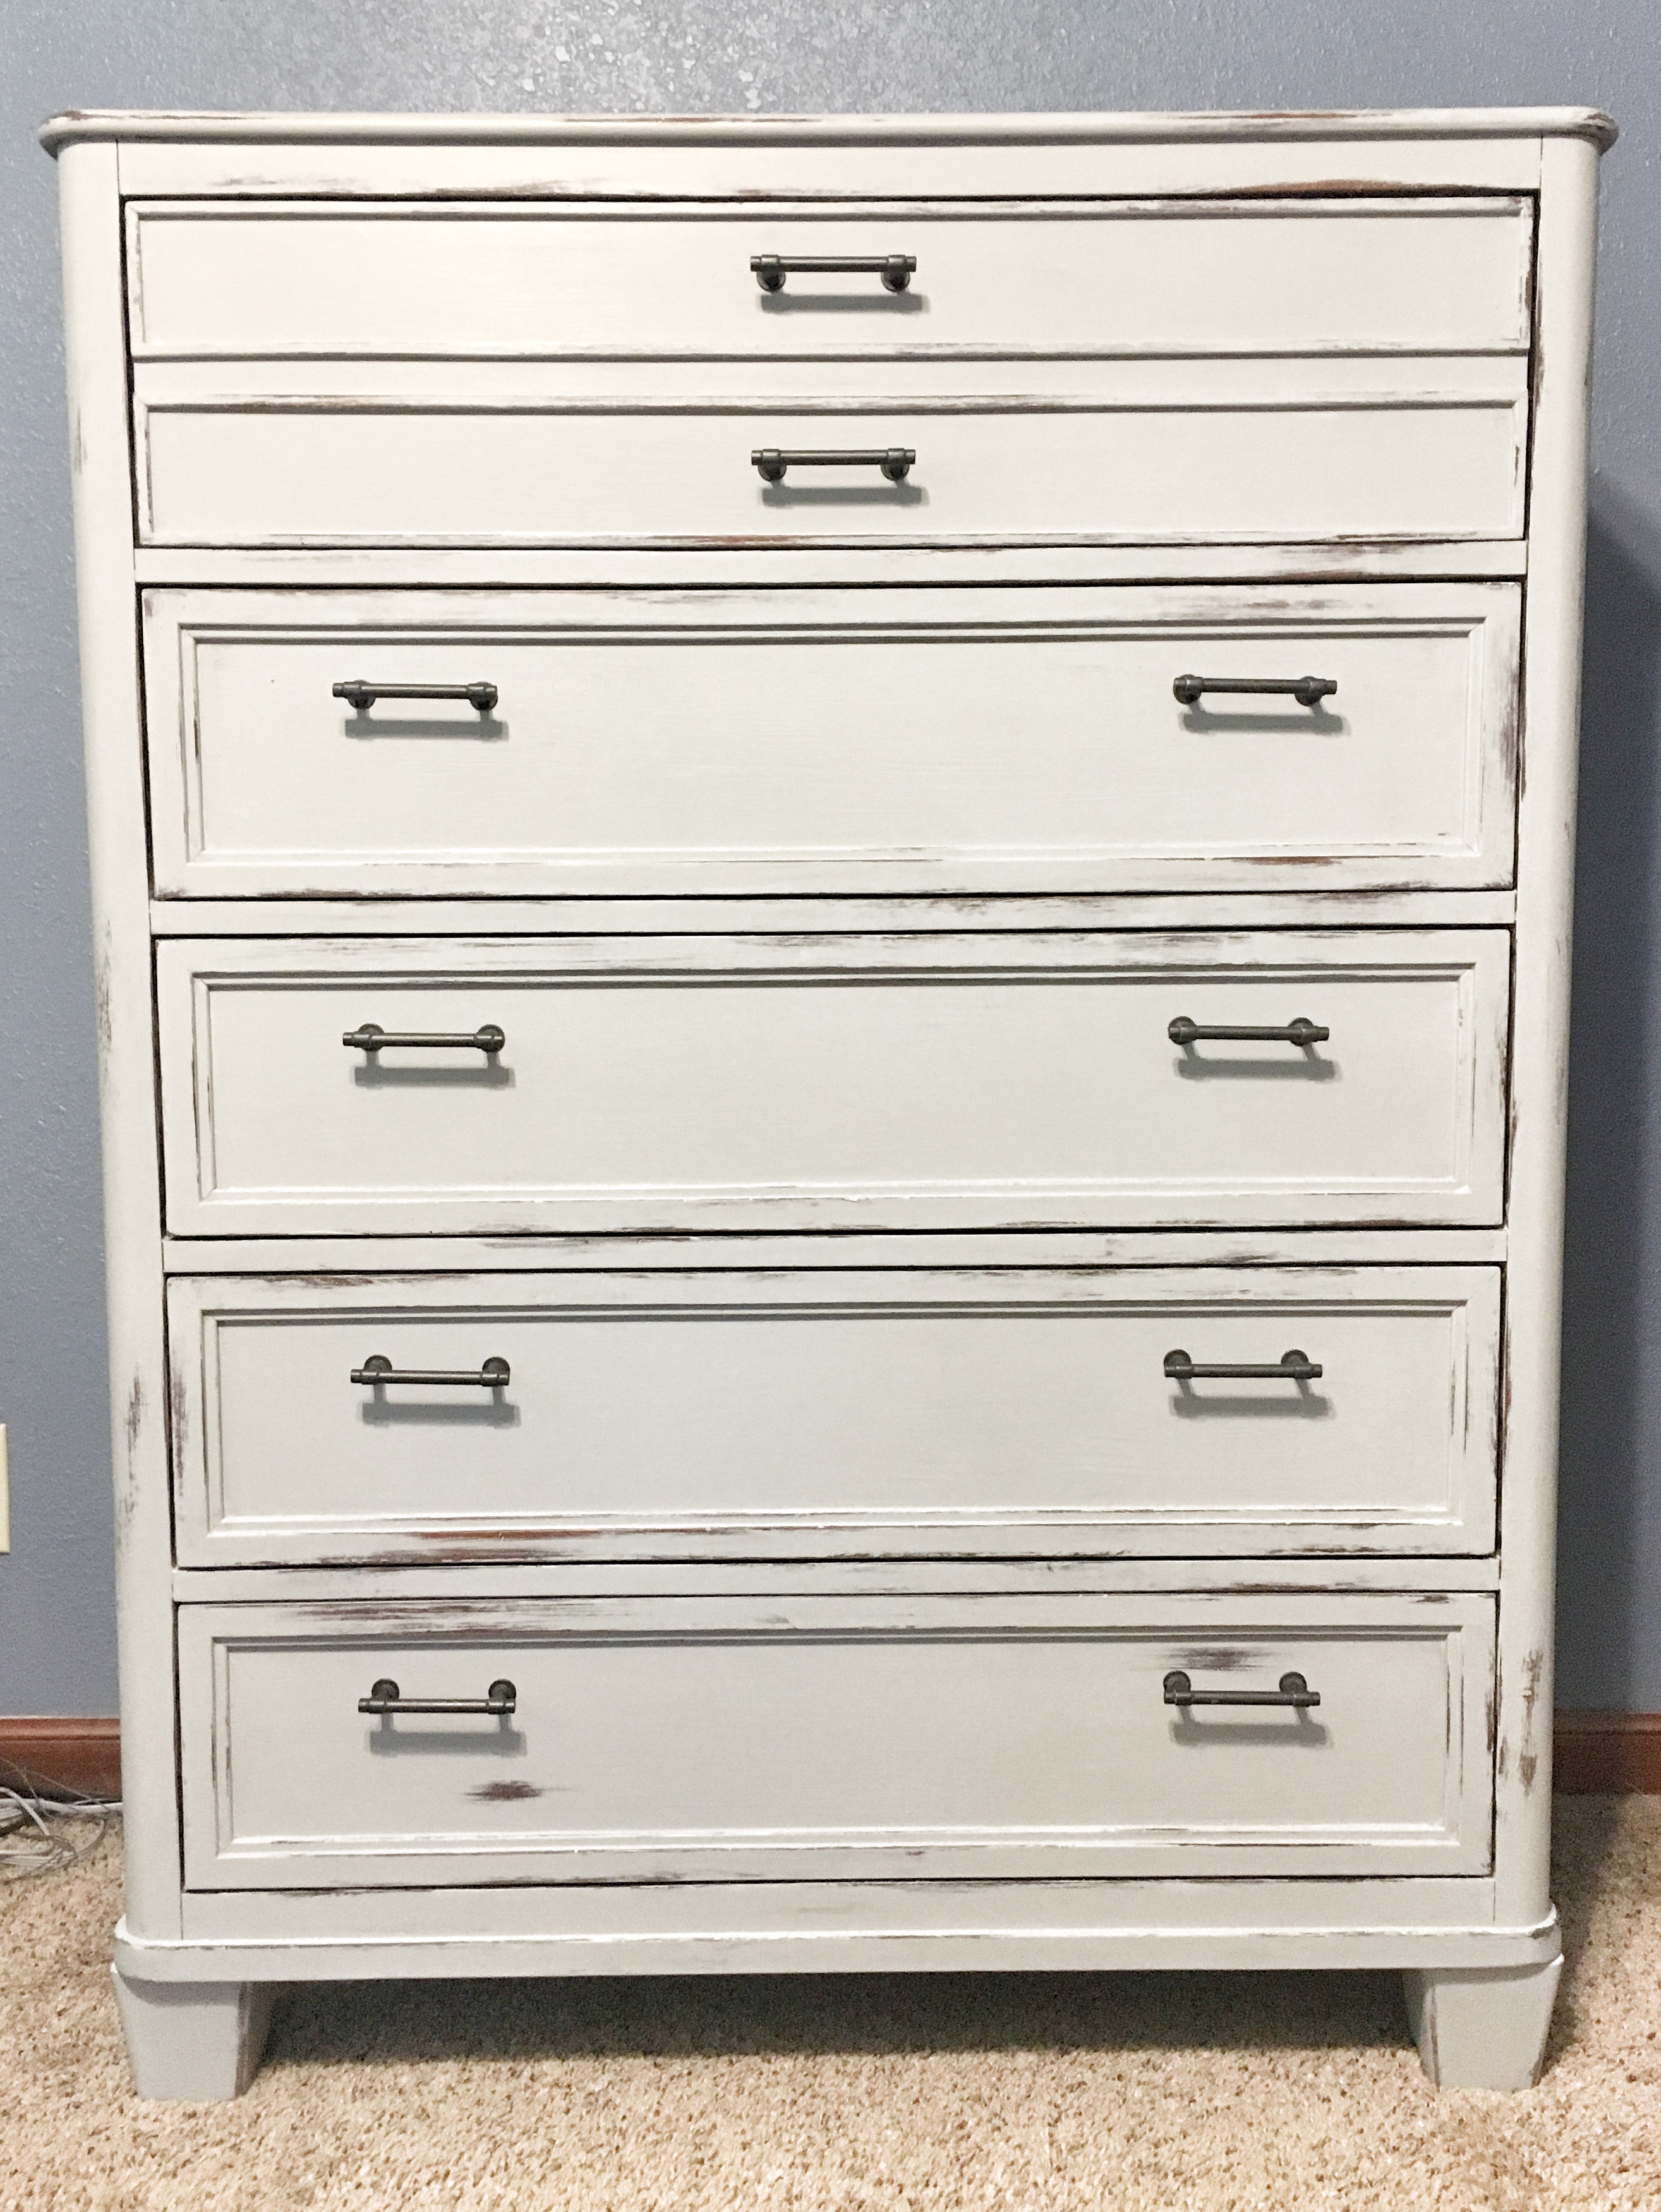
It’s amazing to me that just making a few tweaks to the style, and slapping on some paint completely changes the look of the entire piece. I’m so glad I decided to take the chance and update the dressers we already had. Now the style matches our taste and we didn’t have to comprise on the storage!
I have a few more updates in the works to really pull our master bedroom together, but the coordinating dressers have already done so much to update the room! I couldn’t be more happy! Stay tuned for our master bedroom makeover part two: farmhouse storage bed!
XOXO
ASHLEY DIANN


You do such an amazing job!! Love it and your creativity!
Thank you so much!
I’m excited to try chalk paint on a built into the wall hallway cabinet. I wouldn’t have thought to use chalk paint without your post. The dressers look amazing.
Thank you! I’m so glad! You’ll have to show me how it turns out!
Thanks to the excellent guide
Your web site has outstanding material. I bookmarked the site