DIY Rustic Floating Nightstands (2)
Intermediate 3-Part DIY | $250 Total | One Weekend
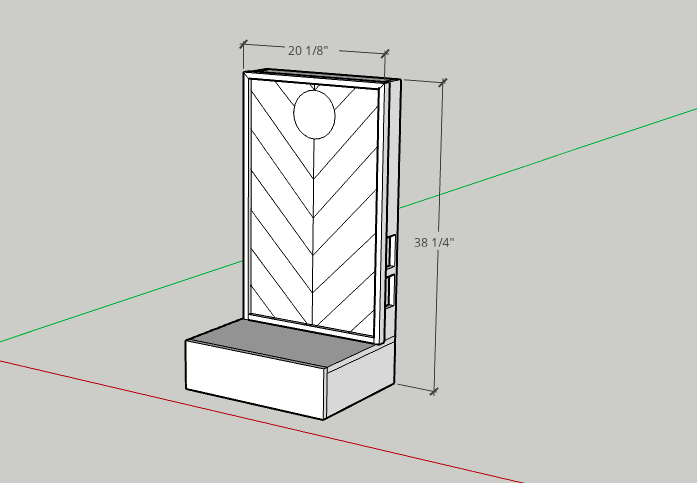
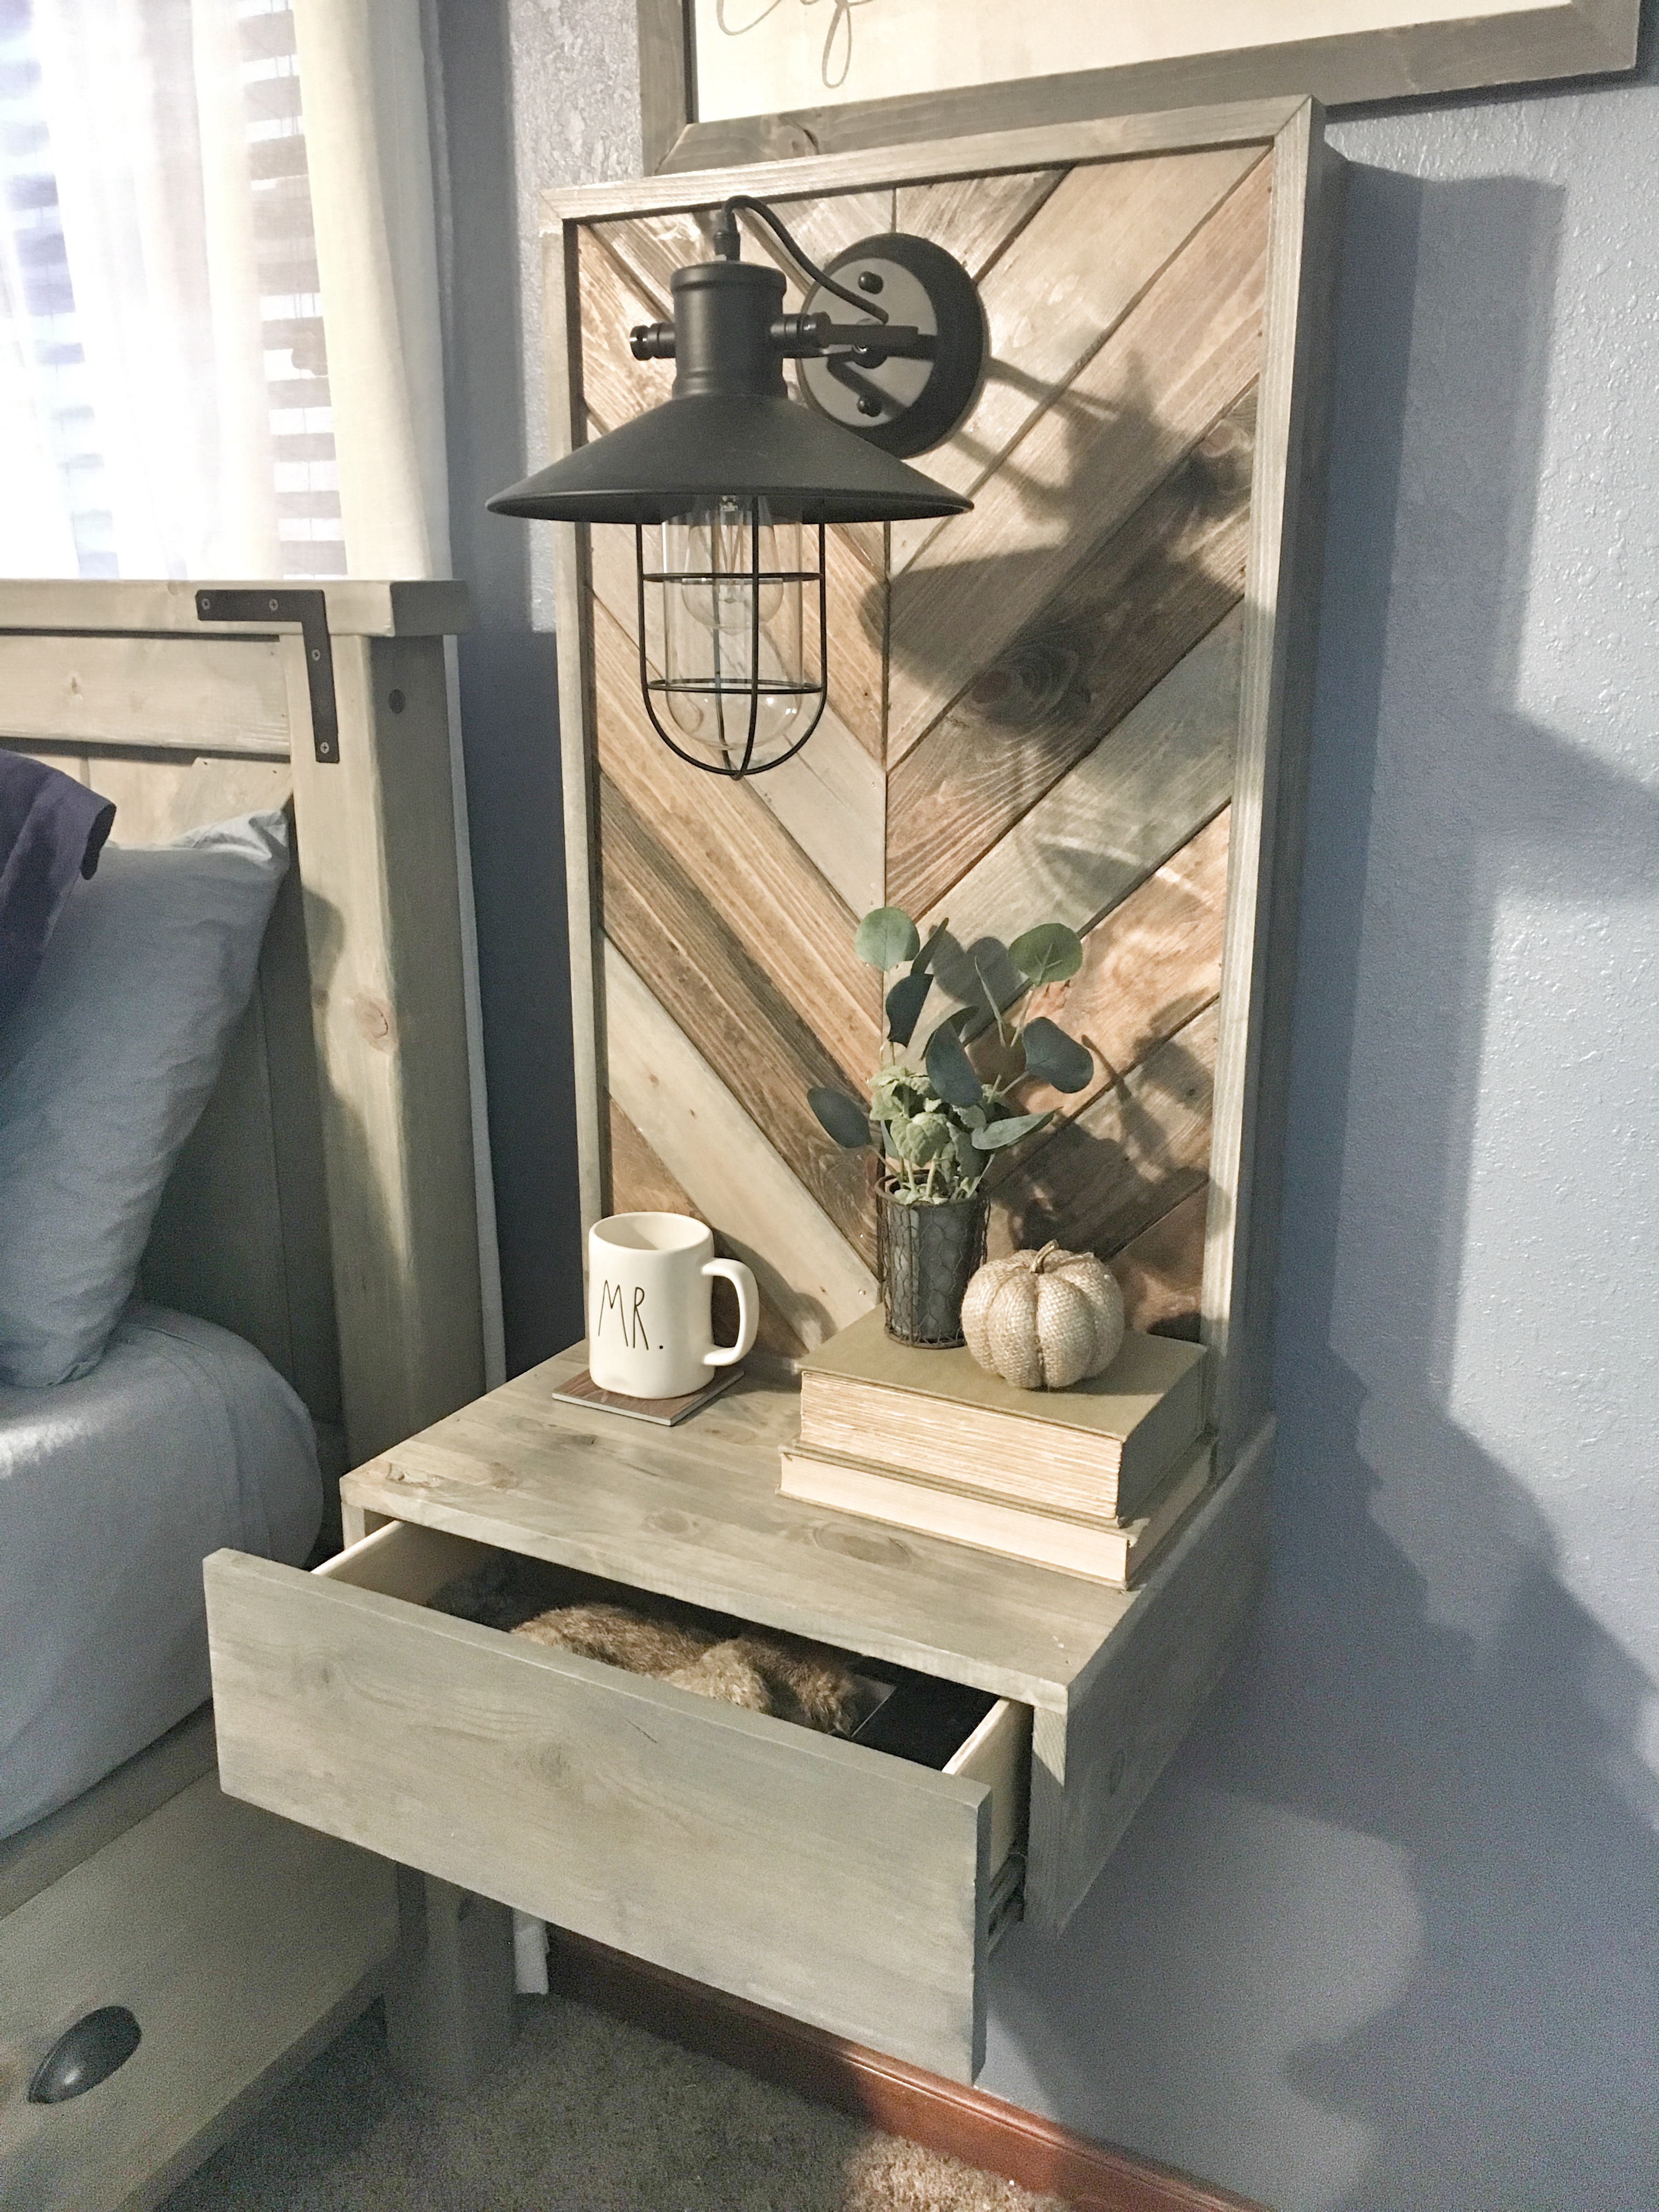
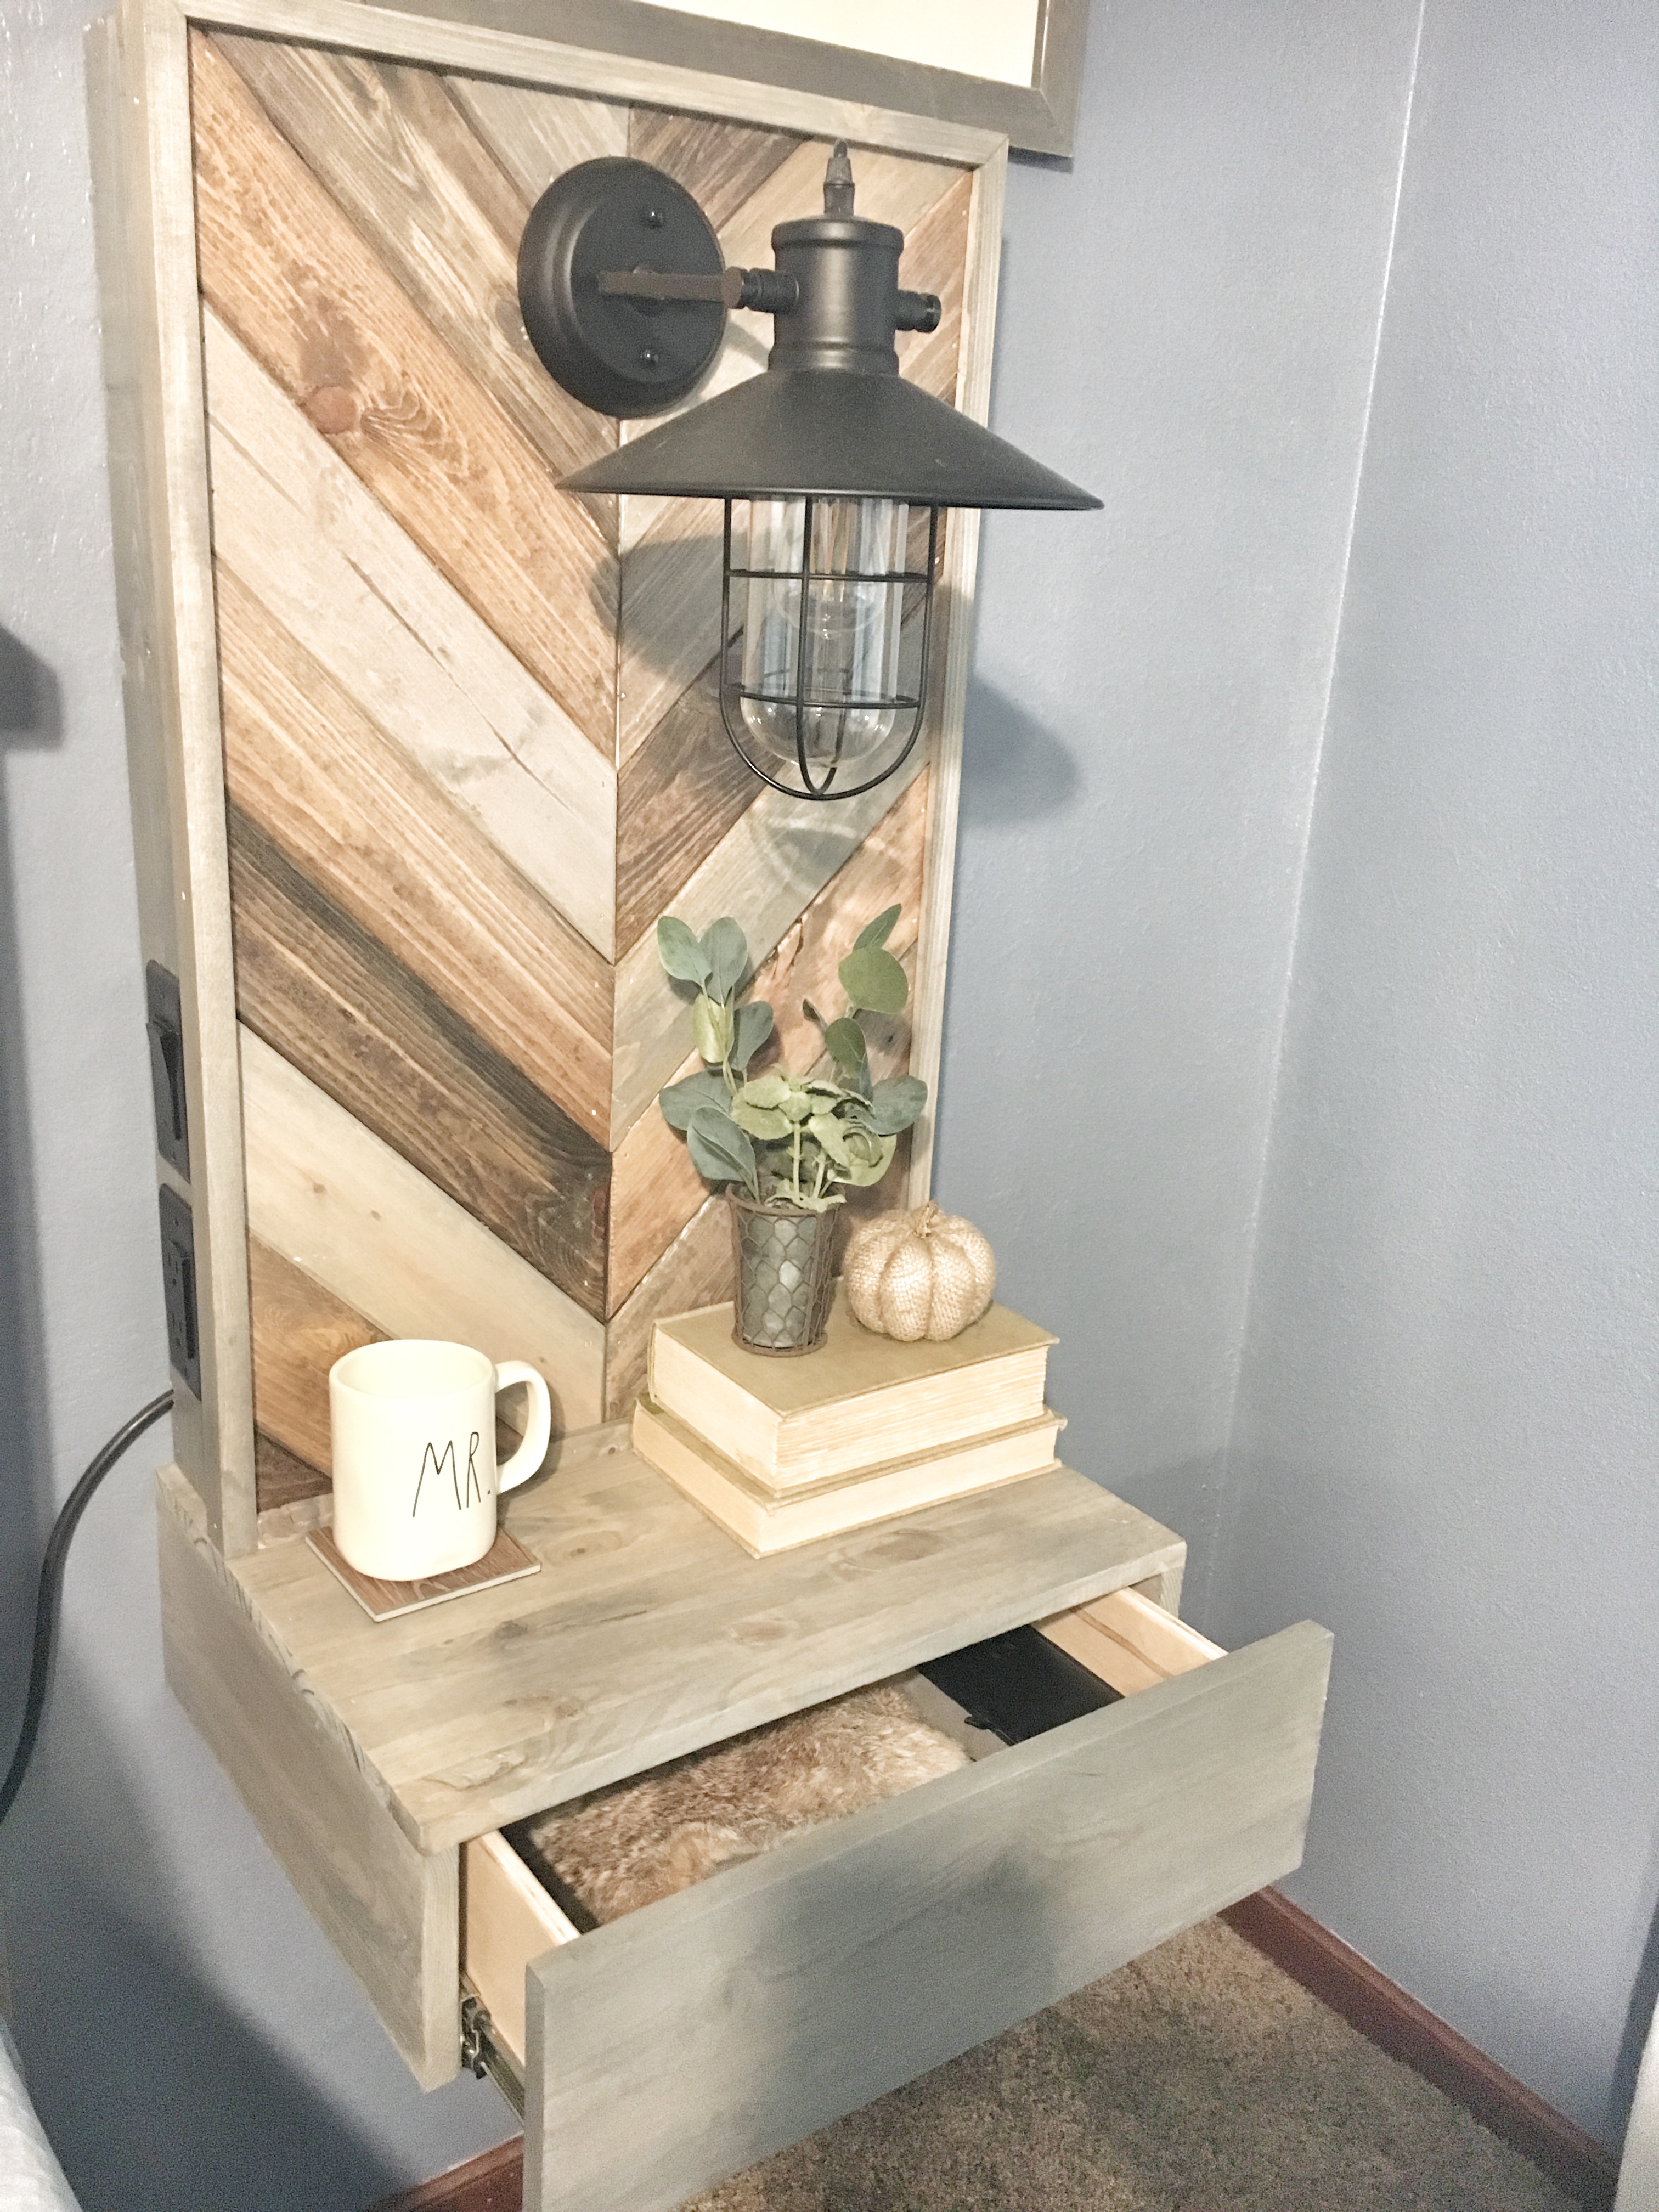
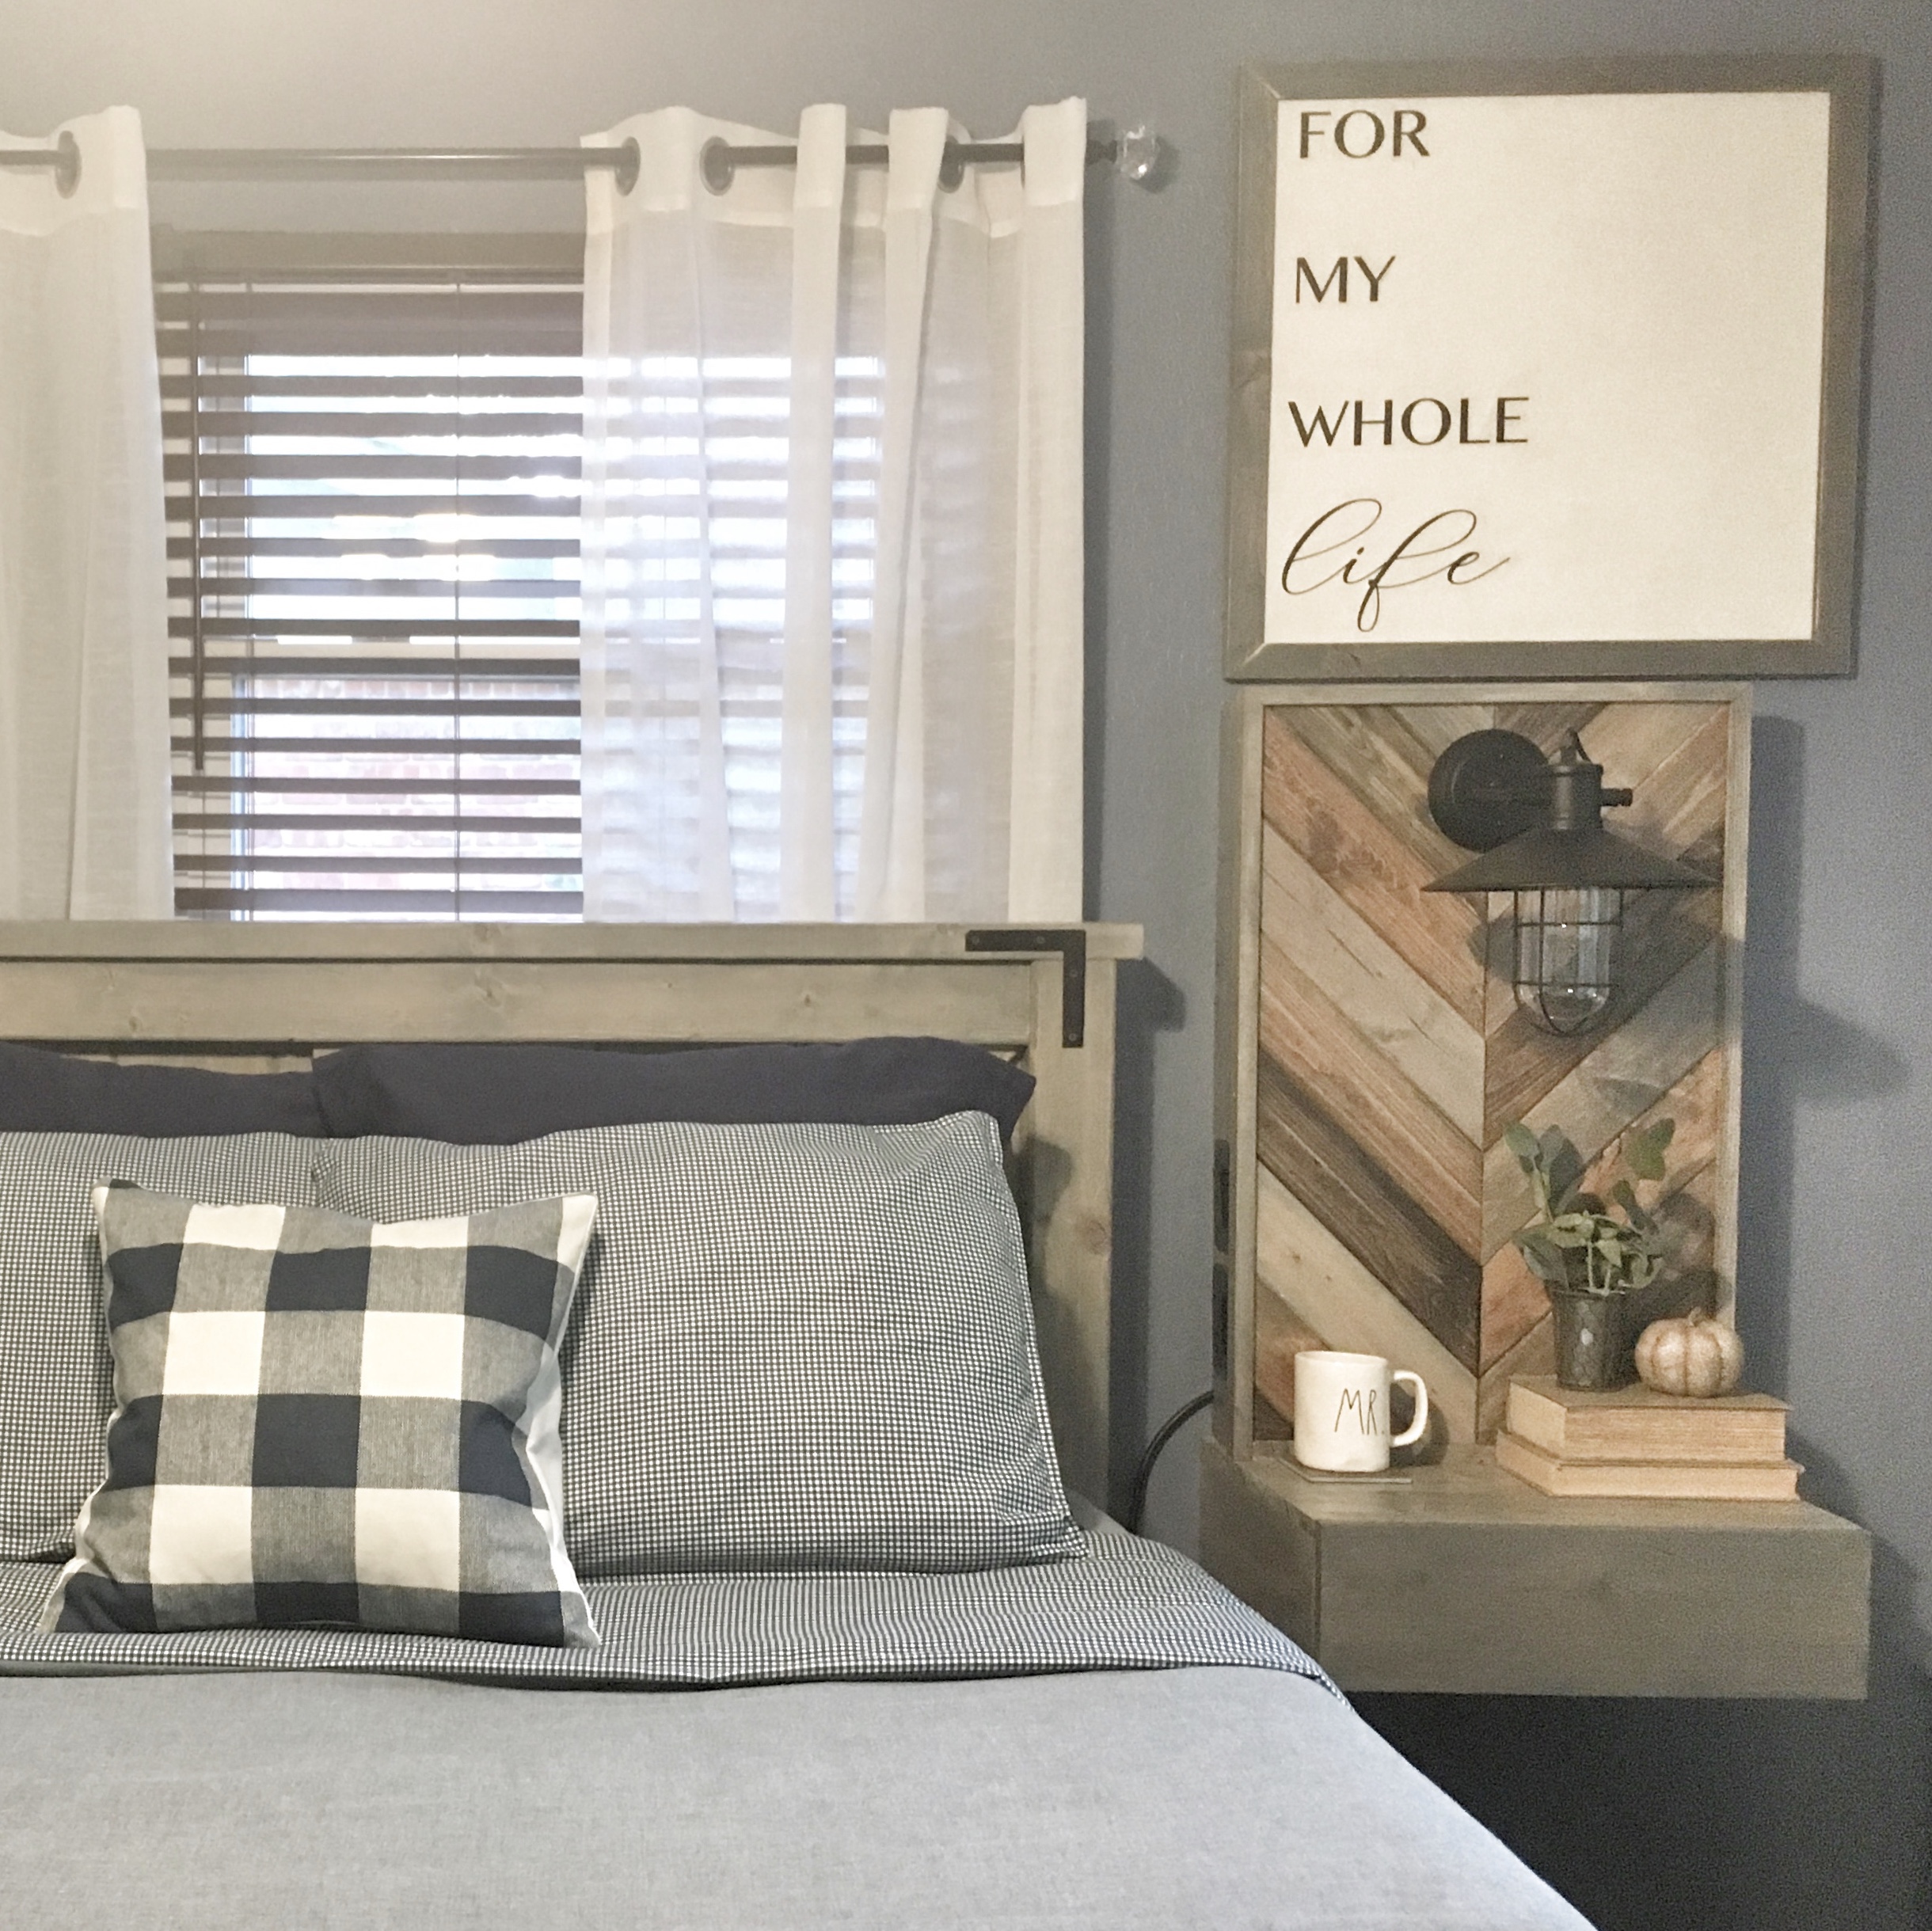
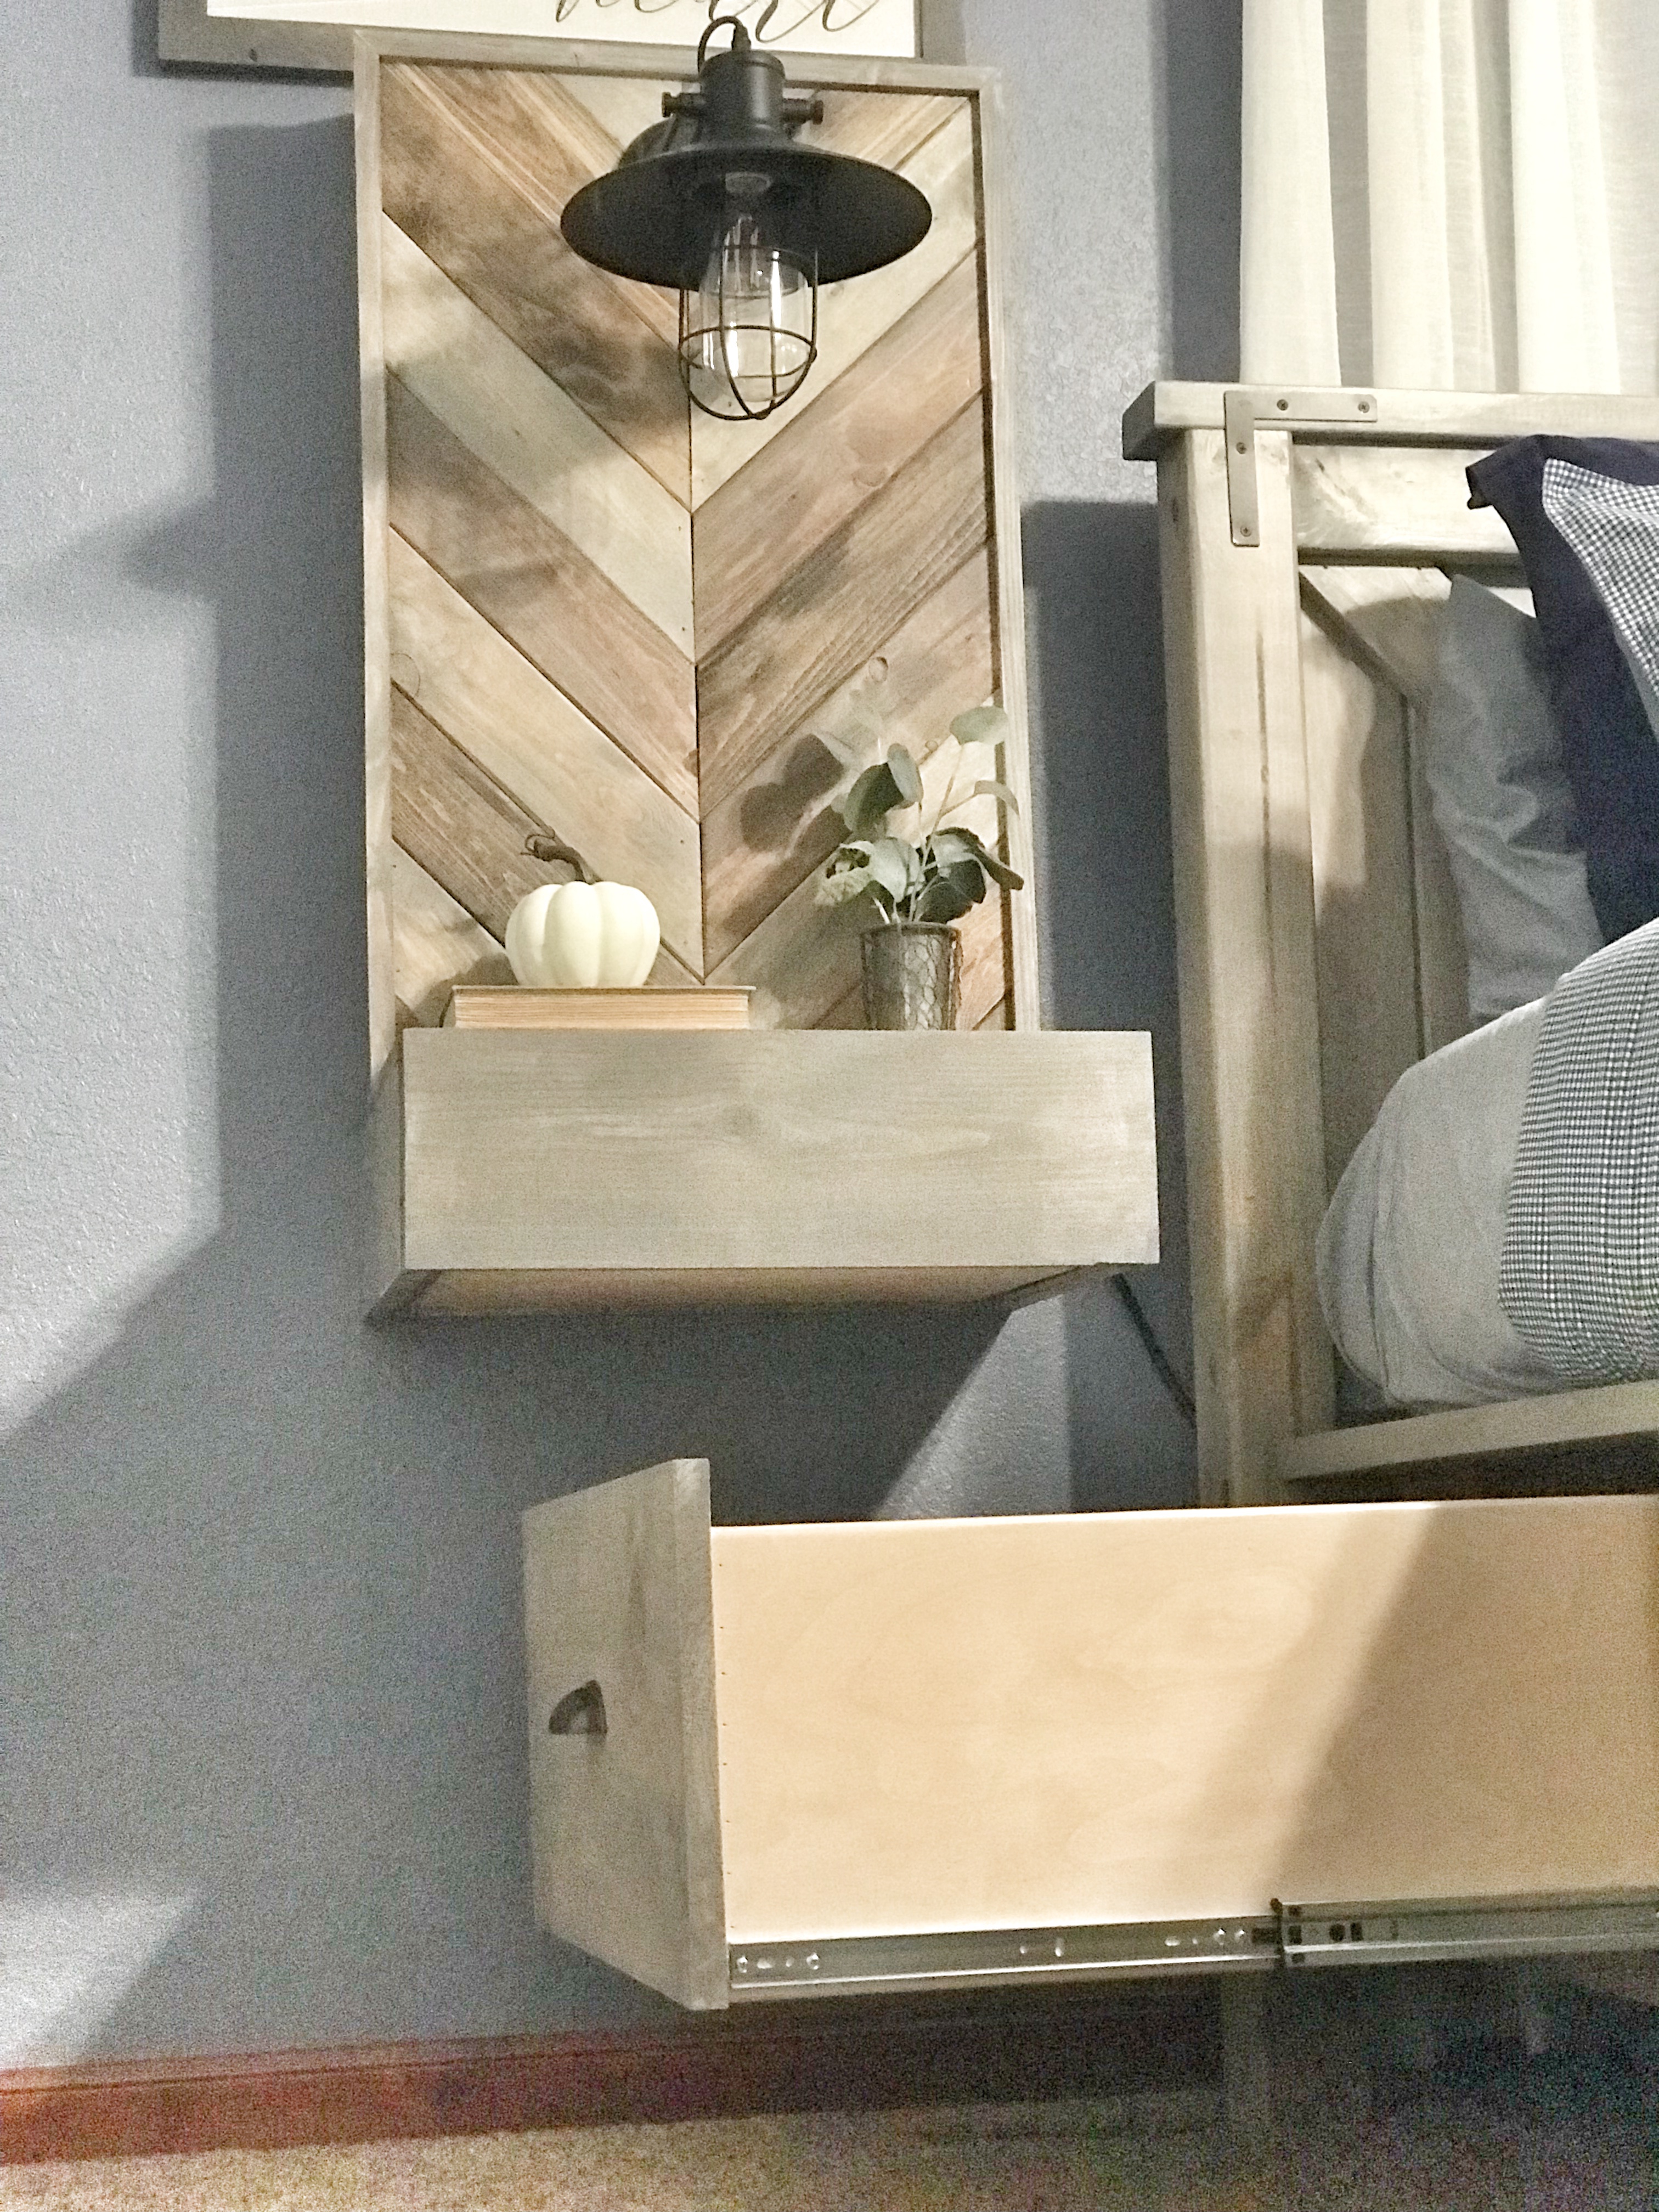
These floating nightstands are a great solution if you need easy access to storage under your bed, or if you simply want a statement piece in your room! The plans I put together go into detail on the exact size and measurements we used to build ours completely from scratch.
We mainly used scrap wood leftover from building our farmhouse storage bed and other projects, but I’ve provided a supplies list if someone were to buy all the material we had on hand. This is enough material to make TWO nightstands. To see more pictures and read about the design plan, check out our master bedroom makeover part three!
Supplies List:
1. Structure
- One- 8′ 2×4 (top and bottom of frames)
- One- 4×8 Sheet of 1/2″ Plywood (back panels and drawer sides/fronts/backs)
- One- 4×4 Sheet of 1/4″ Plywood (drawer bottoms)
- Four- 8′ 1x4s (sides of frames and herringbone pattern)
- One- 16″x3/4″x48″ Project Panel (table tops)
- One- 10′ 1×6 (sides and backs of drawer boxes)
- Two- 8′ 1×8 (finished drawer fronts and trim)
- Two pairs – 12″ Full extension drawer guides (KV 8400)
2. Electrical and Other Materials
- Four- Single gang old work electrical boxes
- Two- 3 1/2″ round old work boxes
- Wires & Wire Nuts
- Two- 6′ Extension chords (heavy duty)
- Two- Switches & Plate Covers
- Two- Outlets & Plate Covers
- Two- Sconce Lights
- 1 1/4″ Nails
- Screws: 1 1/4″, 1 1/2″, and 2″
- Wood Glue
- Three- Stain Colors (We used Minwax: Classic Gray, Dark Walnut, and Early American)
- Clear top coat
Tools Needed:
- Table Saw
- Miter Saw
- Jig Saw
- Router (flush cut, & 1/4″ round over bits)*
- Circular Saw*
- Nail Gun
- Impact Diver/drill
- Tape Measure
- Pliers
- Sander and 80 grit sand paper
Part 1: Back Panels
Cut List:
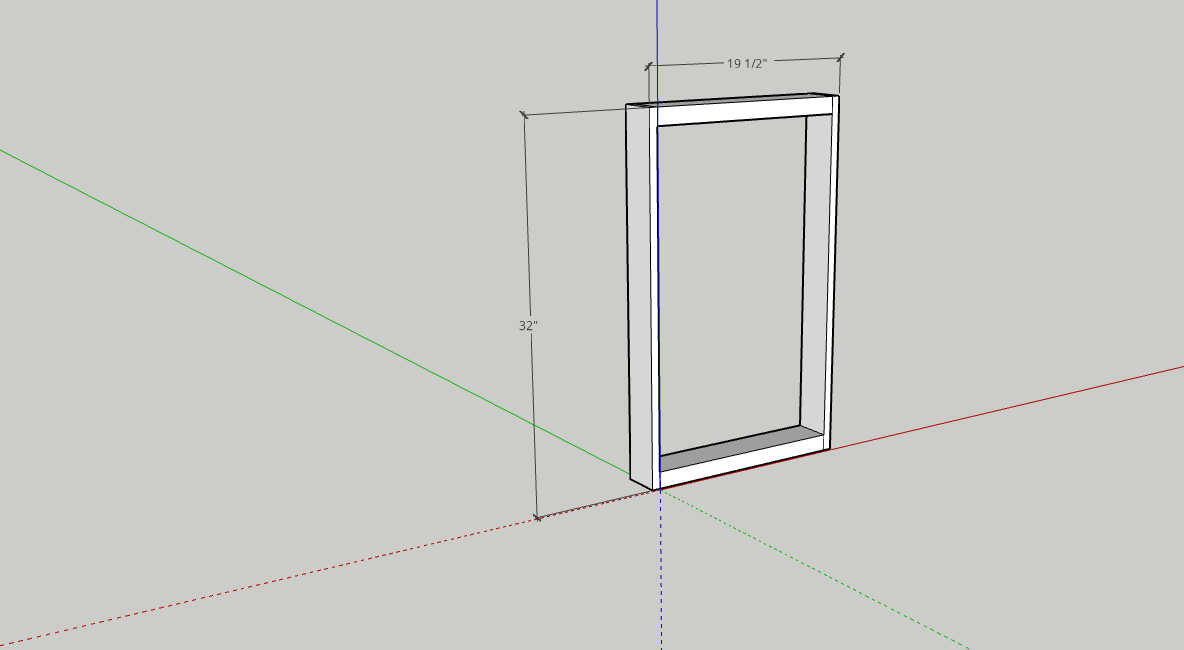
- 2×4- Four @ 18″ (top and bottom of frames)
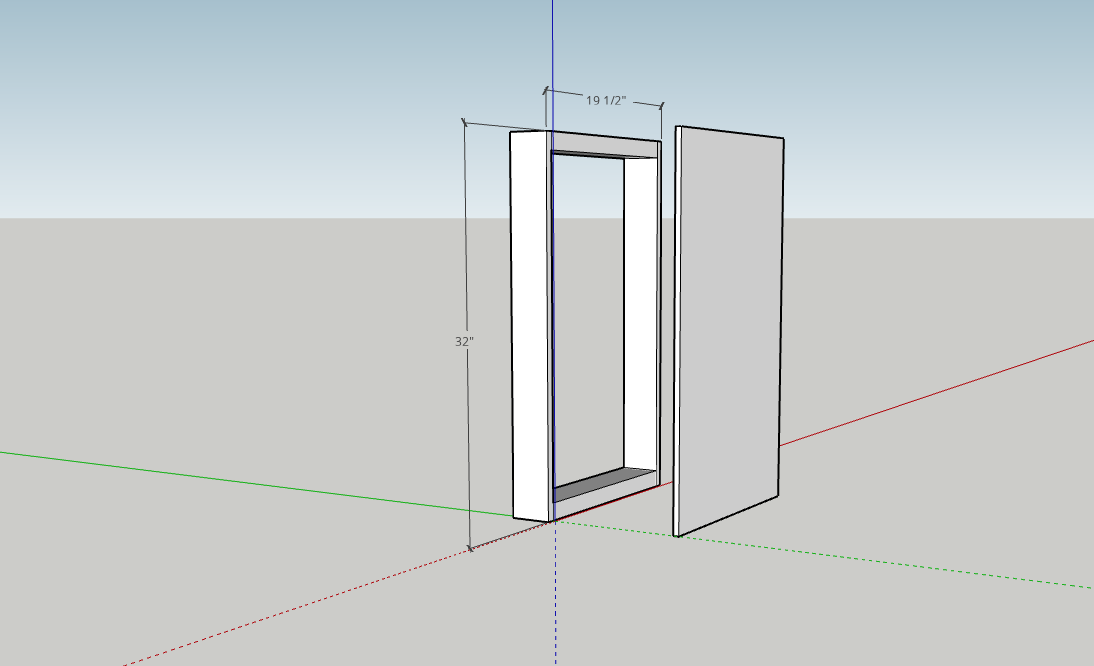
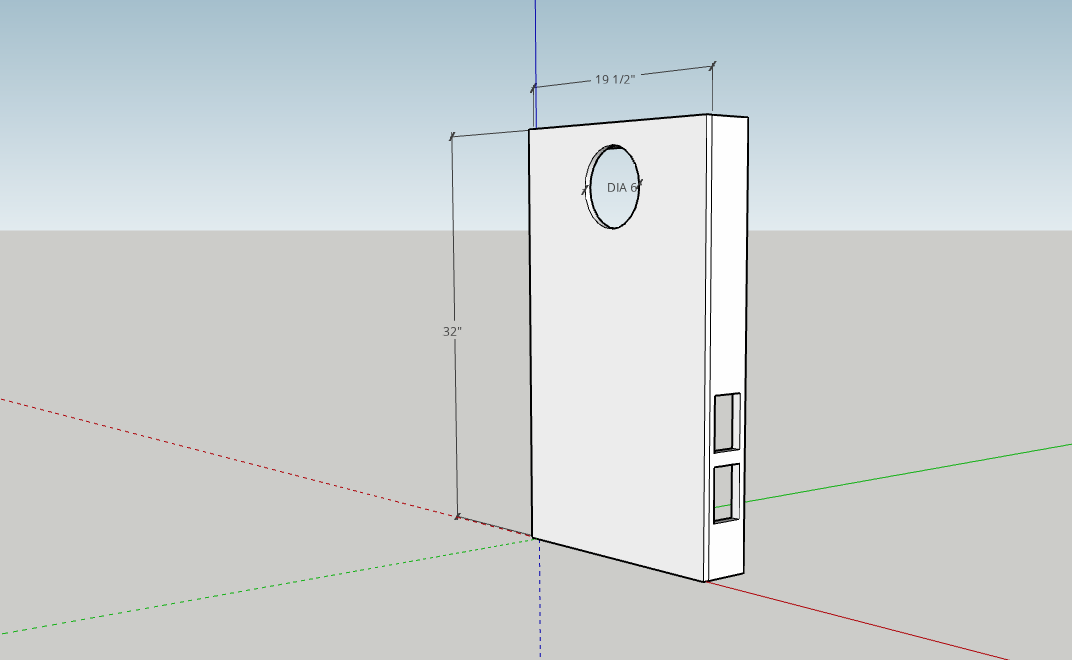
- 1/2″ Plywood- Two @ 19 1/2″x32″ (backing)
- 1×8- Rip one board @ 1 1/4″ (trim)
- 1x4s- Four @ 32″ (sides of frames)
***(The rest of the 1x4s will be set aside and used to make the herringbone pattern).
***Measure and cut as you go***
Step 1: Using wood glue and finish nails, attach the 2x4s to the inside of the 1x4s to create the frame.
Step 2: Measure and cut the plywood backing. Attach it to the frames using wood glue and finish nails. (This backing is structural, but it’s mostly there to have something to attach the pieces for the herringbone to).
Step 3: At this point, you will want to cut the pieces for the herringbone pattern so you can stain them. I’m sure there are other ways to do this, but we just started out by cutting a few miters following a line down the middle, and rough cutting them to length on the sides.
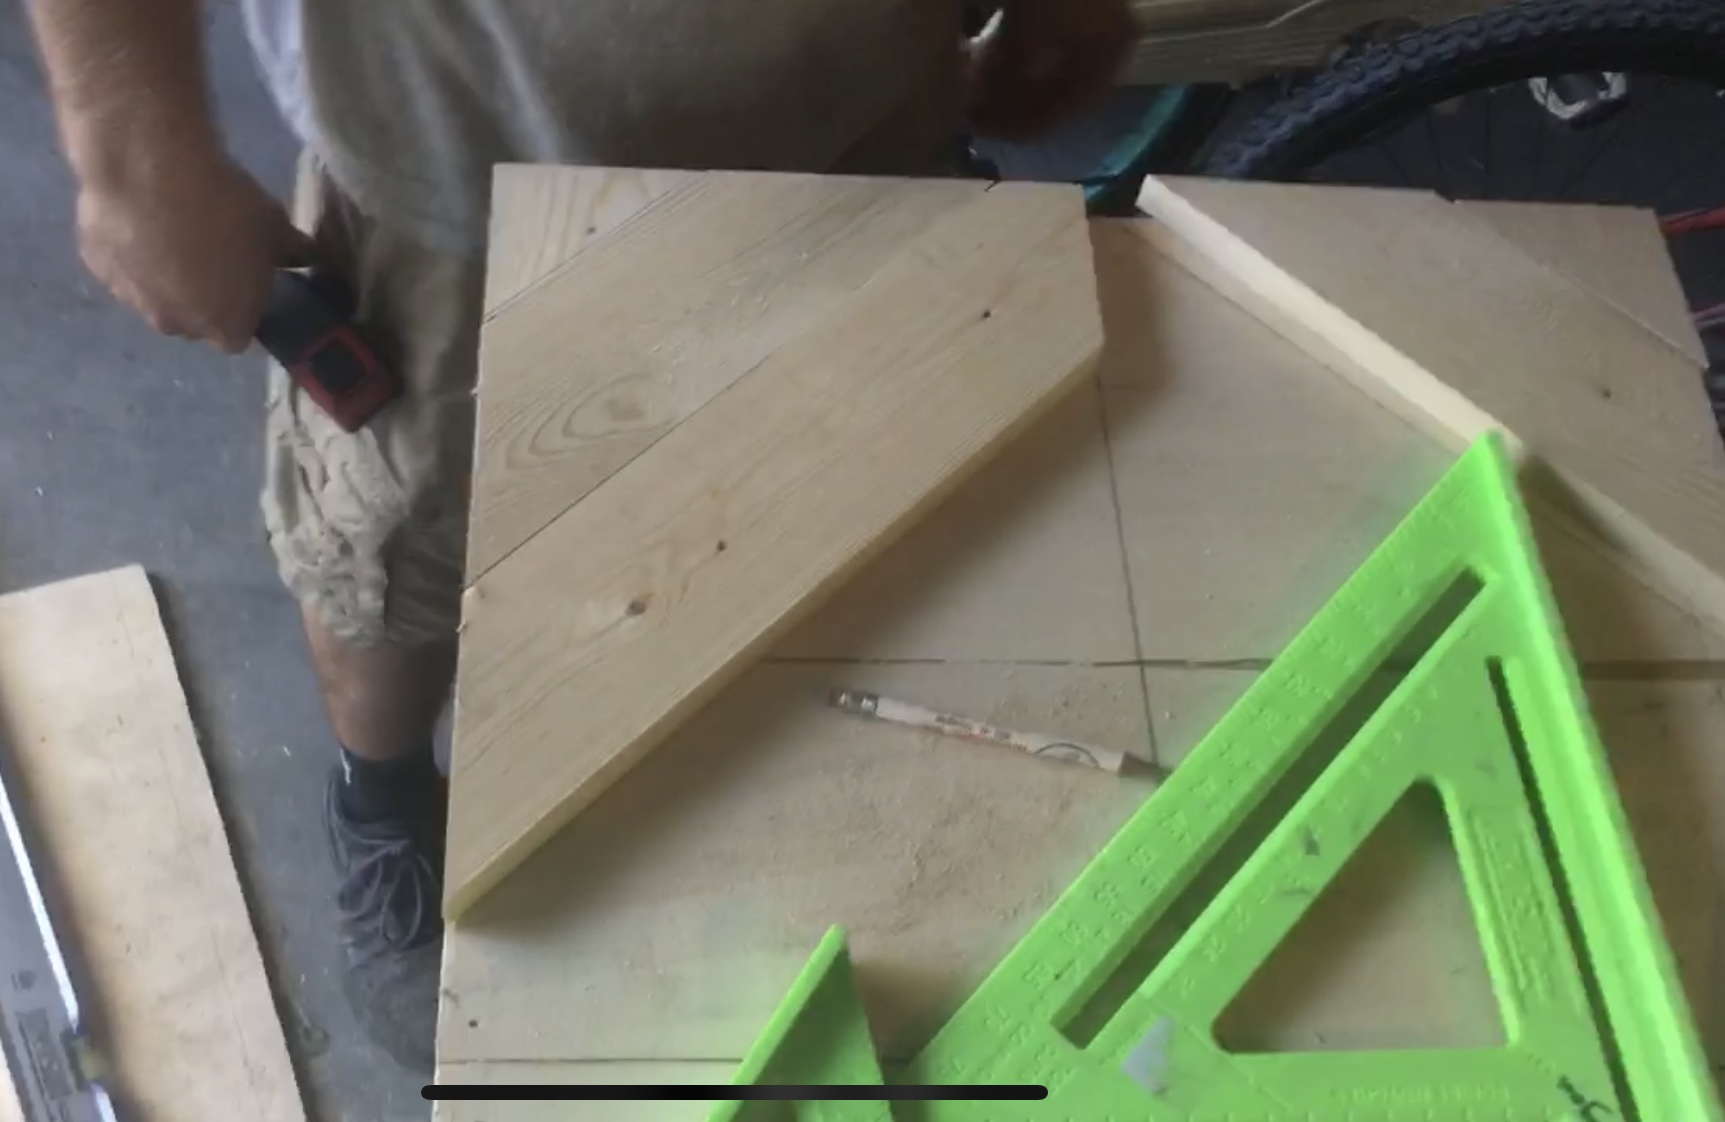
We didn’t worry about getting them exact at this point, because once we attached them, we cut off the excess and used a router to get a straight edge. Once you have them rough cut, sand and stain the herringbone pieces, as well as the back panels/sides.
***There is no pattern to the stain colors. Just set them in the order they will go and try to space out the colors and even mix some colors! Just get creative with this part.
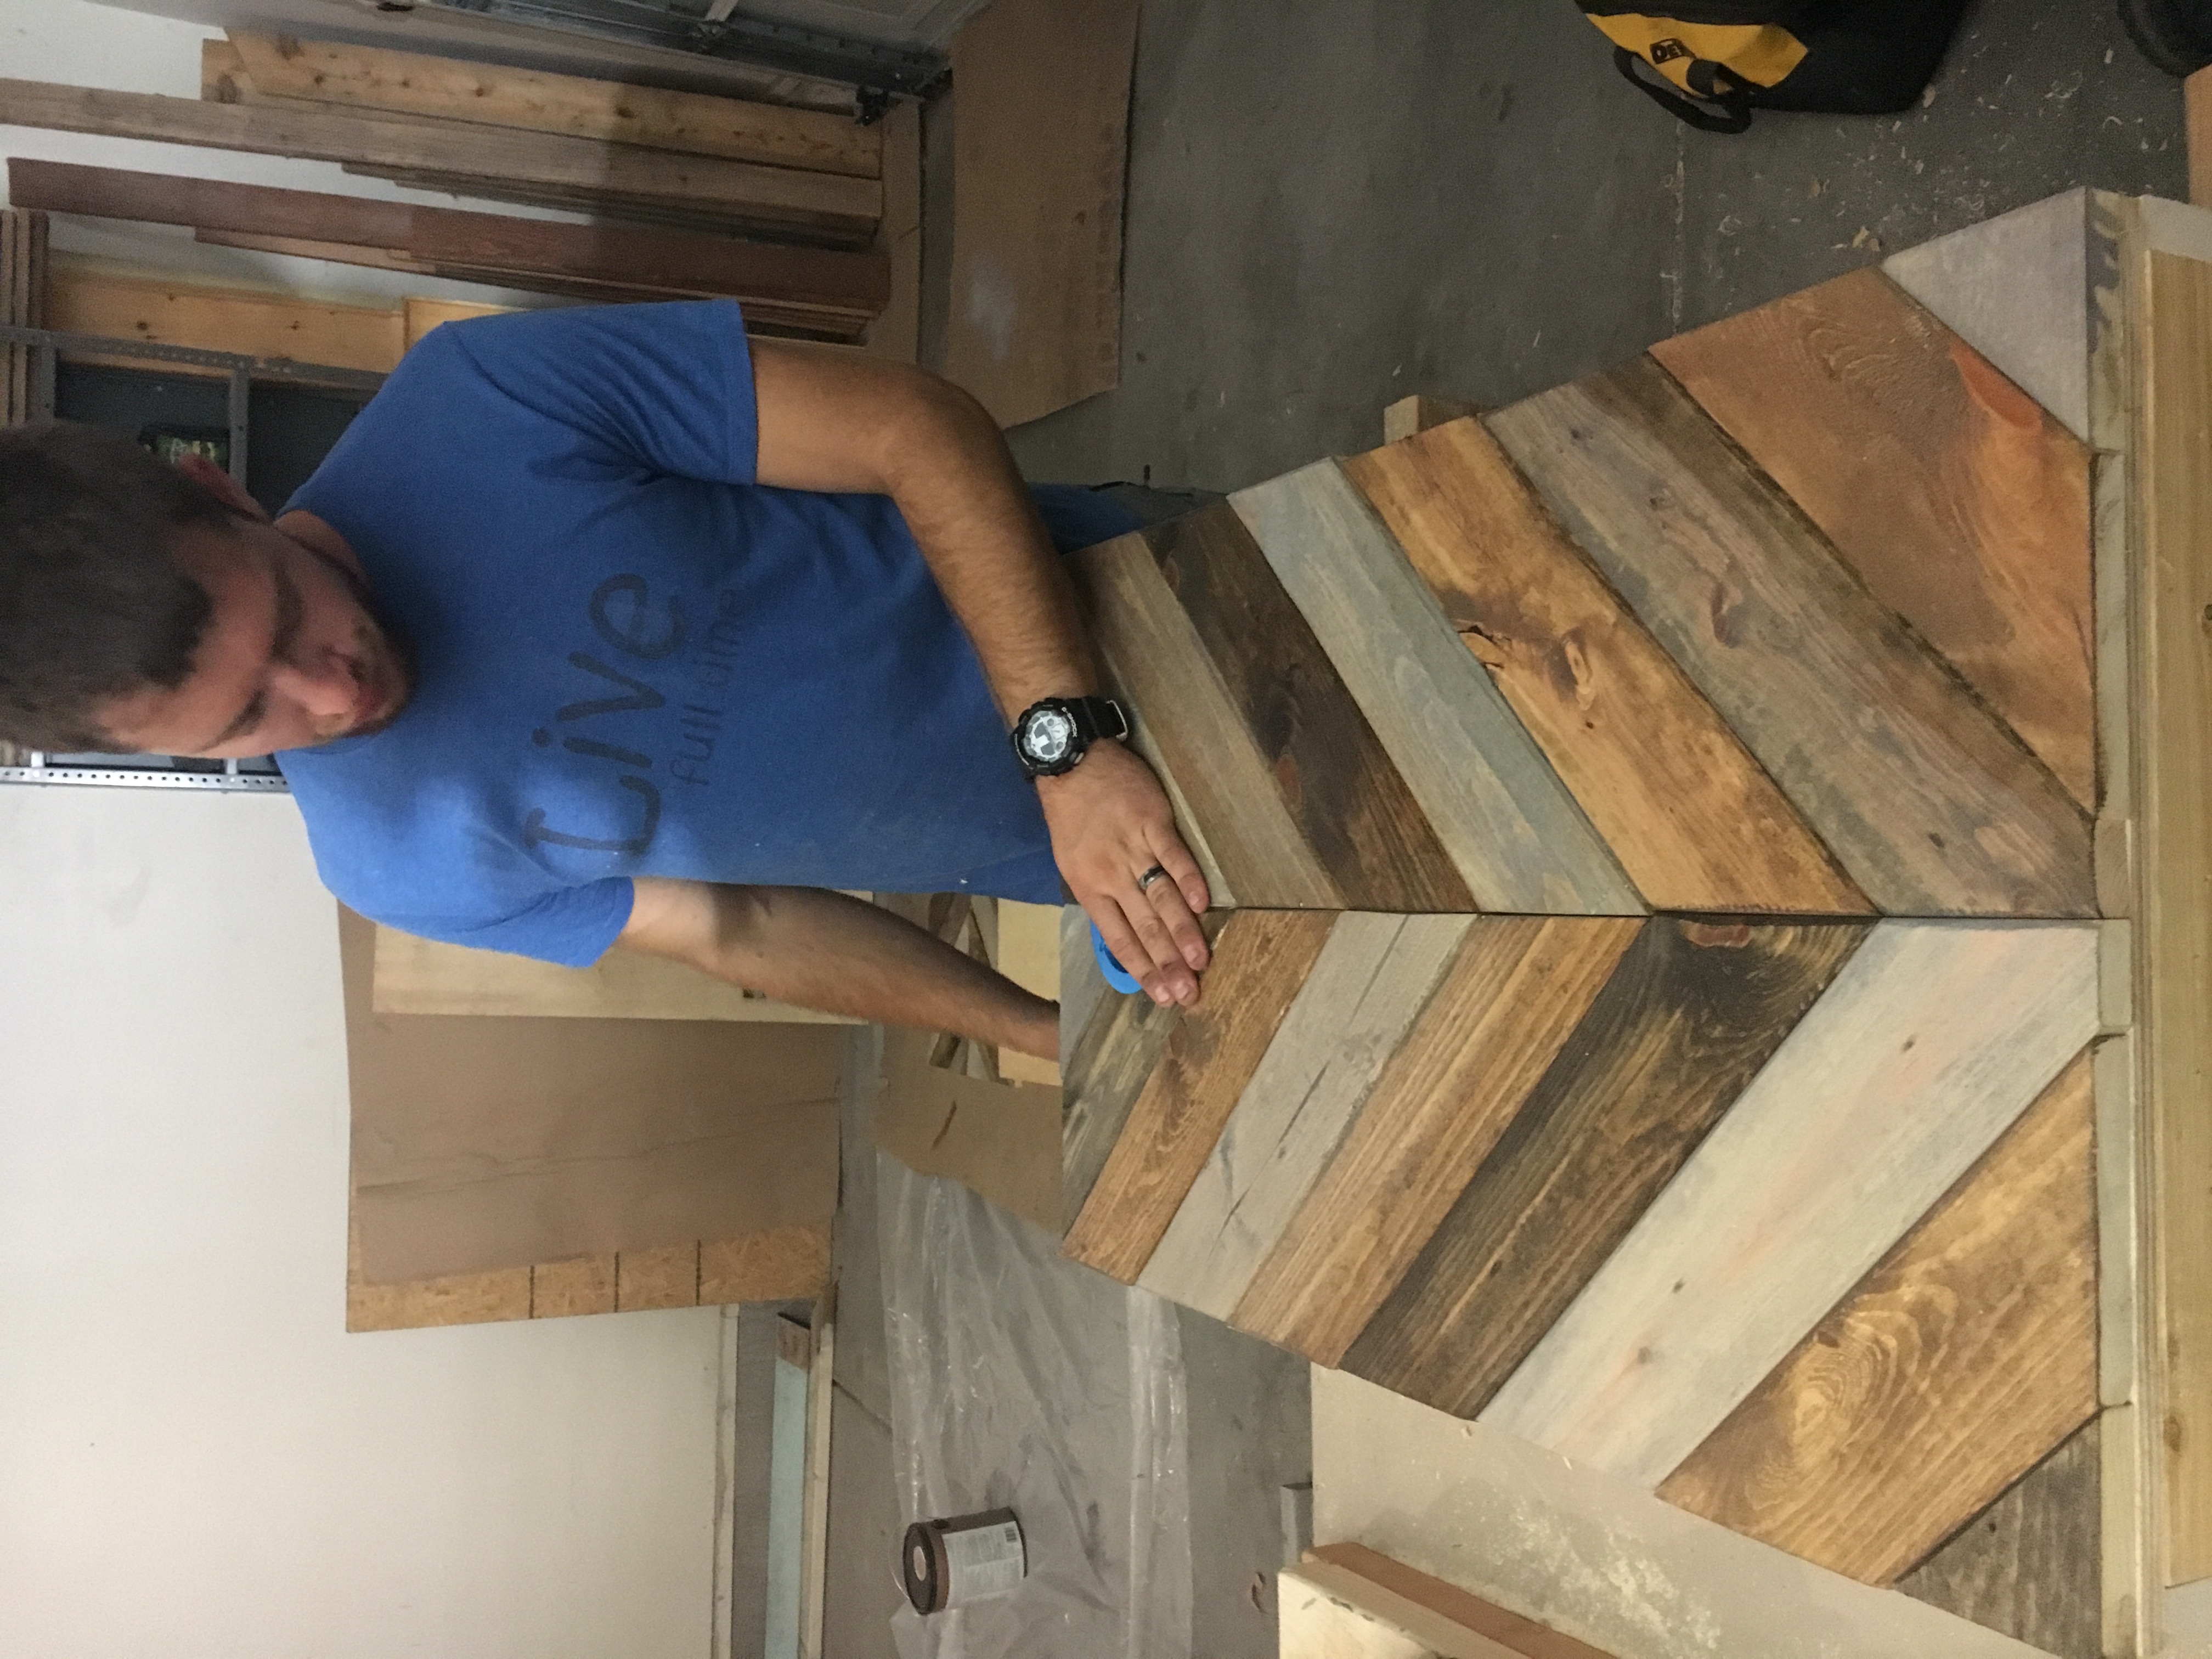
Stained panel, after pieces have been attached
Step 4: Before you attach the herringbone pieces, you need to cut a hole in the plywood for the light box. Find the center and measure a 6″ diameter hole as close to the top as you can. Cut out the hole using your jigsaw. (Yes, it looks like a corn-hole board at this point, but it won’t in the end ha)!
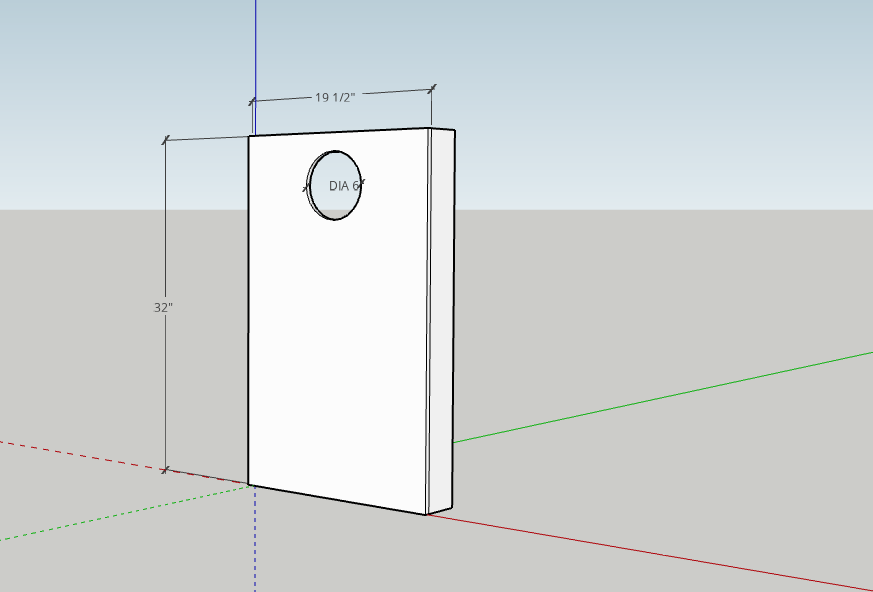
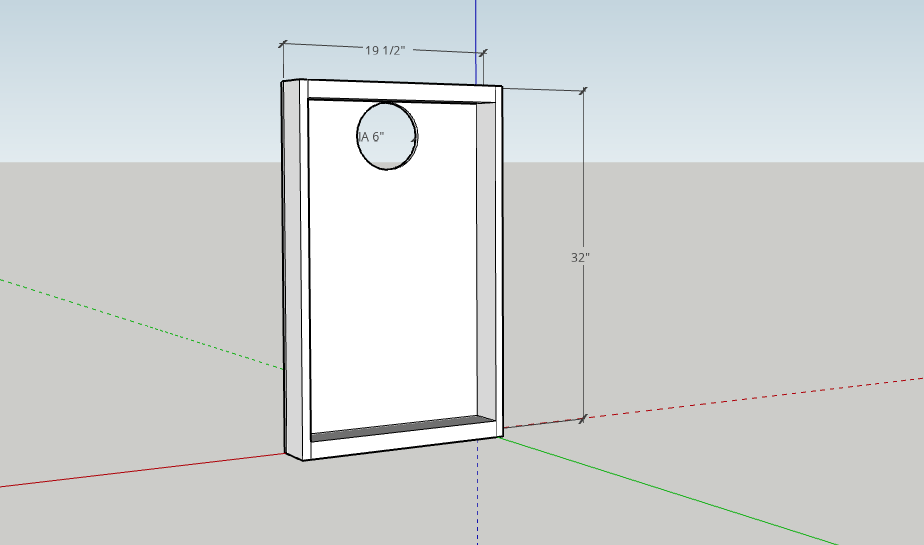
***(We figured out the hard way that the light boxes only fit in a 3/4″ thickness, so the hole on the plywood has to be wider than the hole on the front so the light box can be tightened down).
Step 5: On the side you want your switches/outlets, cut two rectangular holes for your electrical boxes using your jigsaw. (It doesn’t matter exactly where these are placed, just keep in mind there will be a piece of trim covering those raw edges and plate covers). Place the electrical boxes and tighten them down.
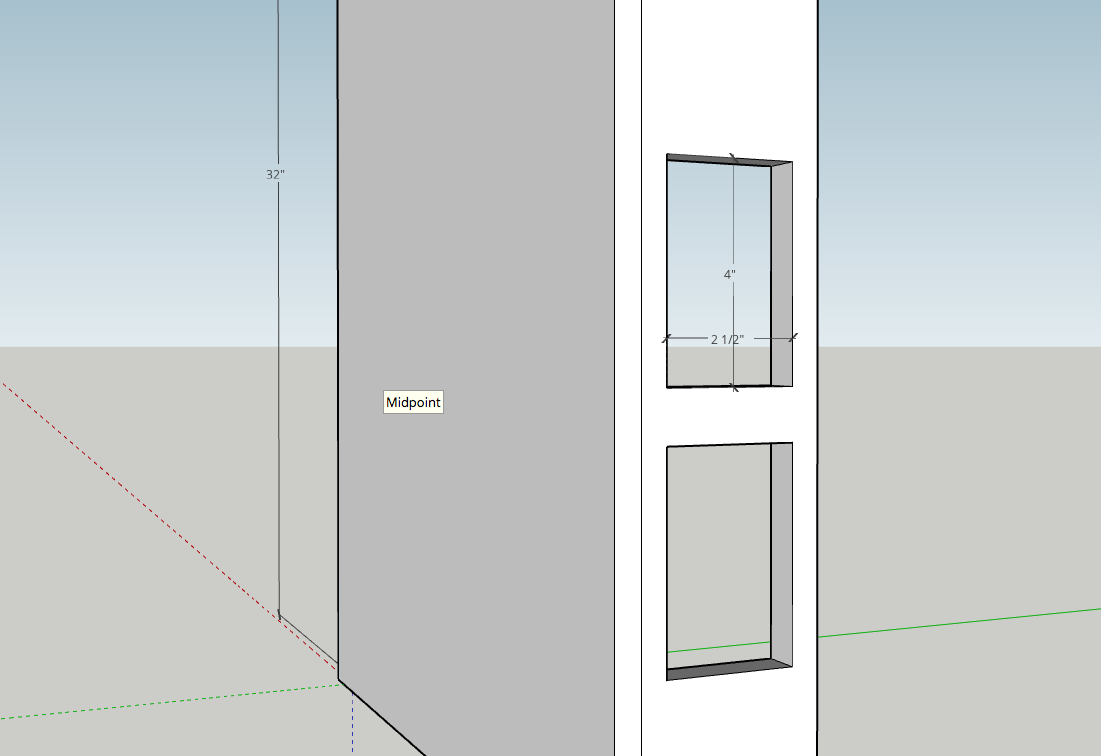
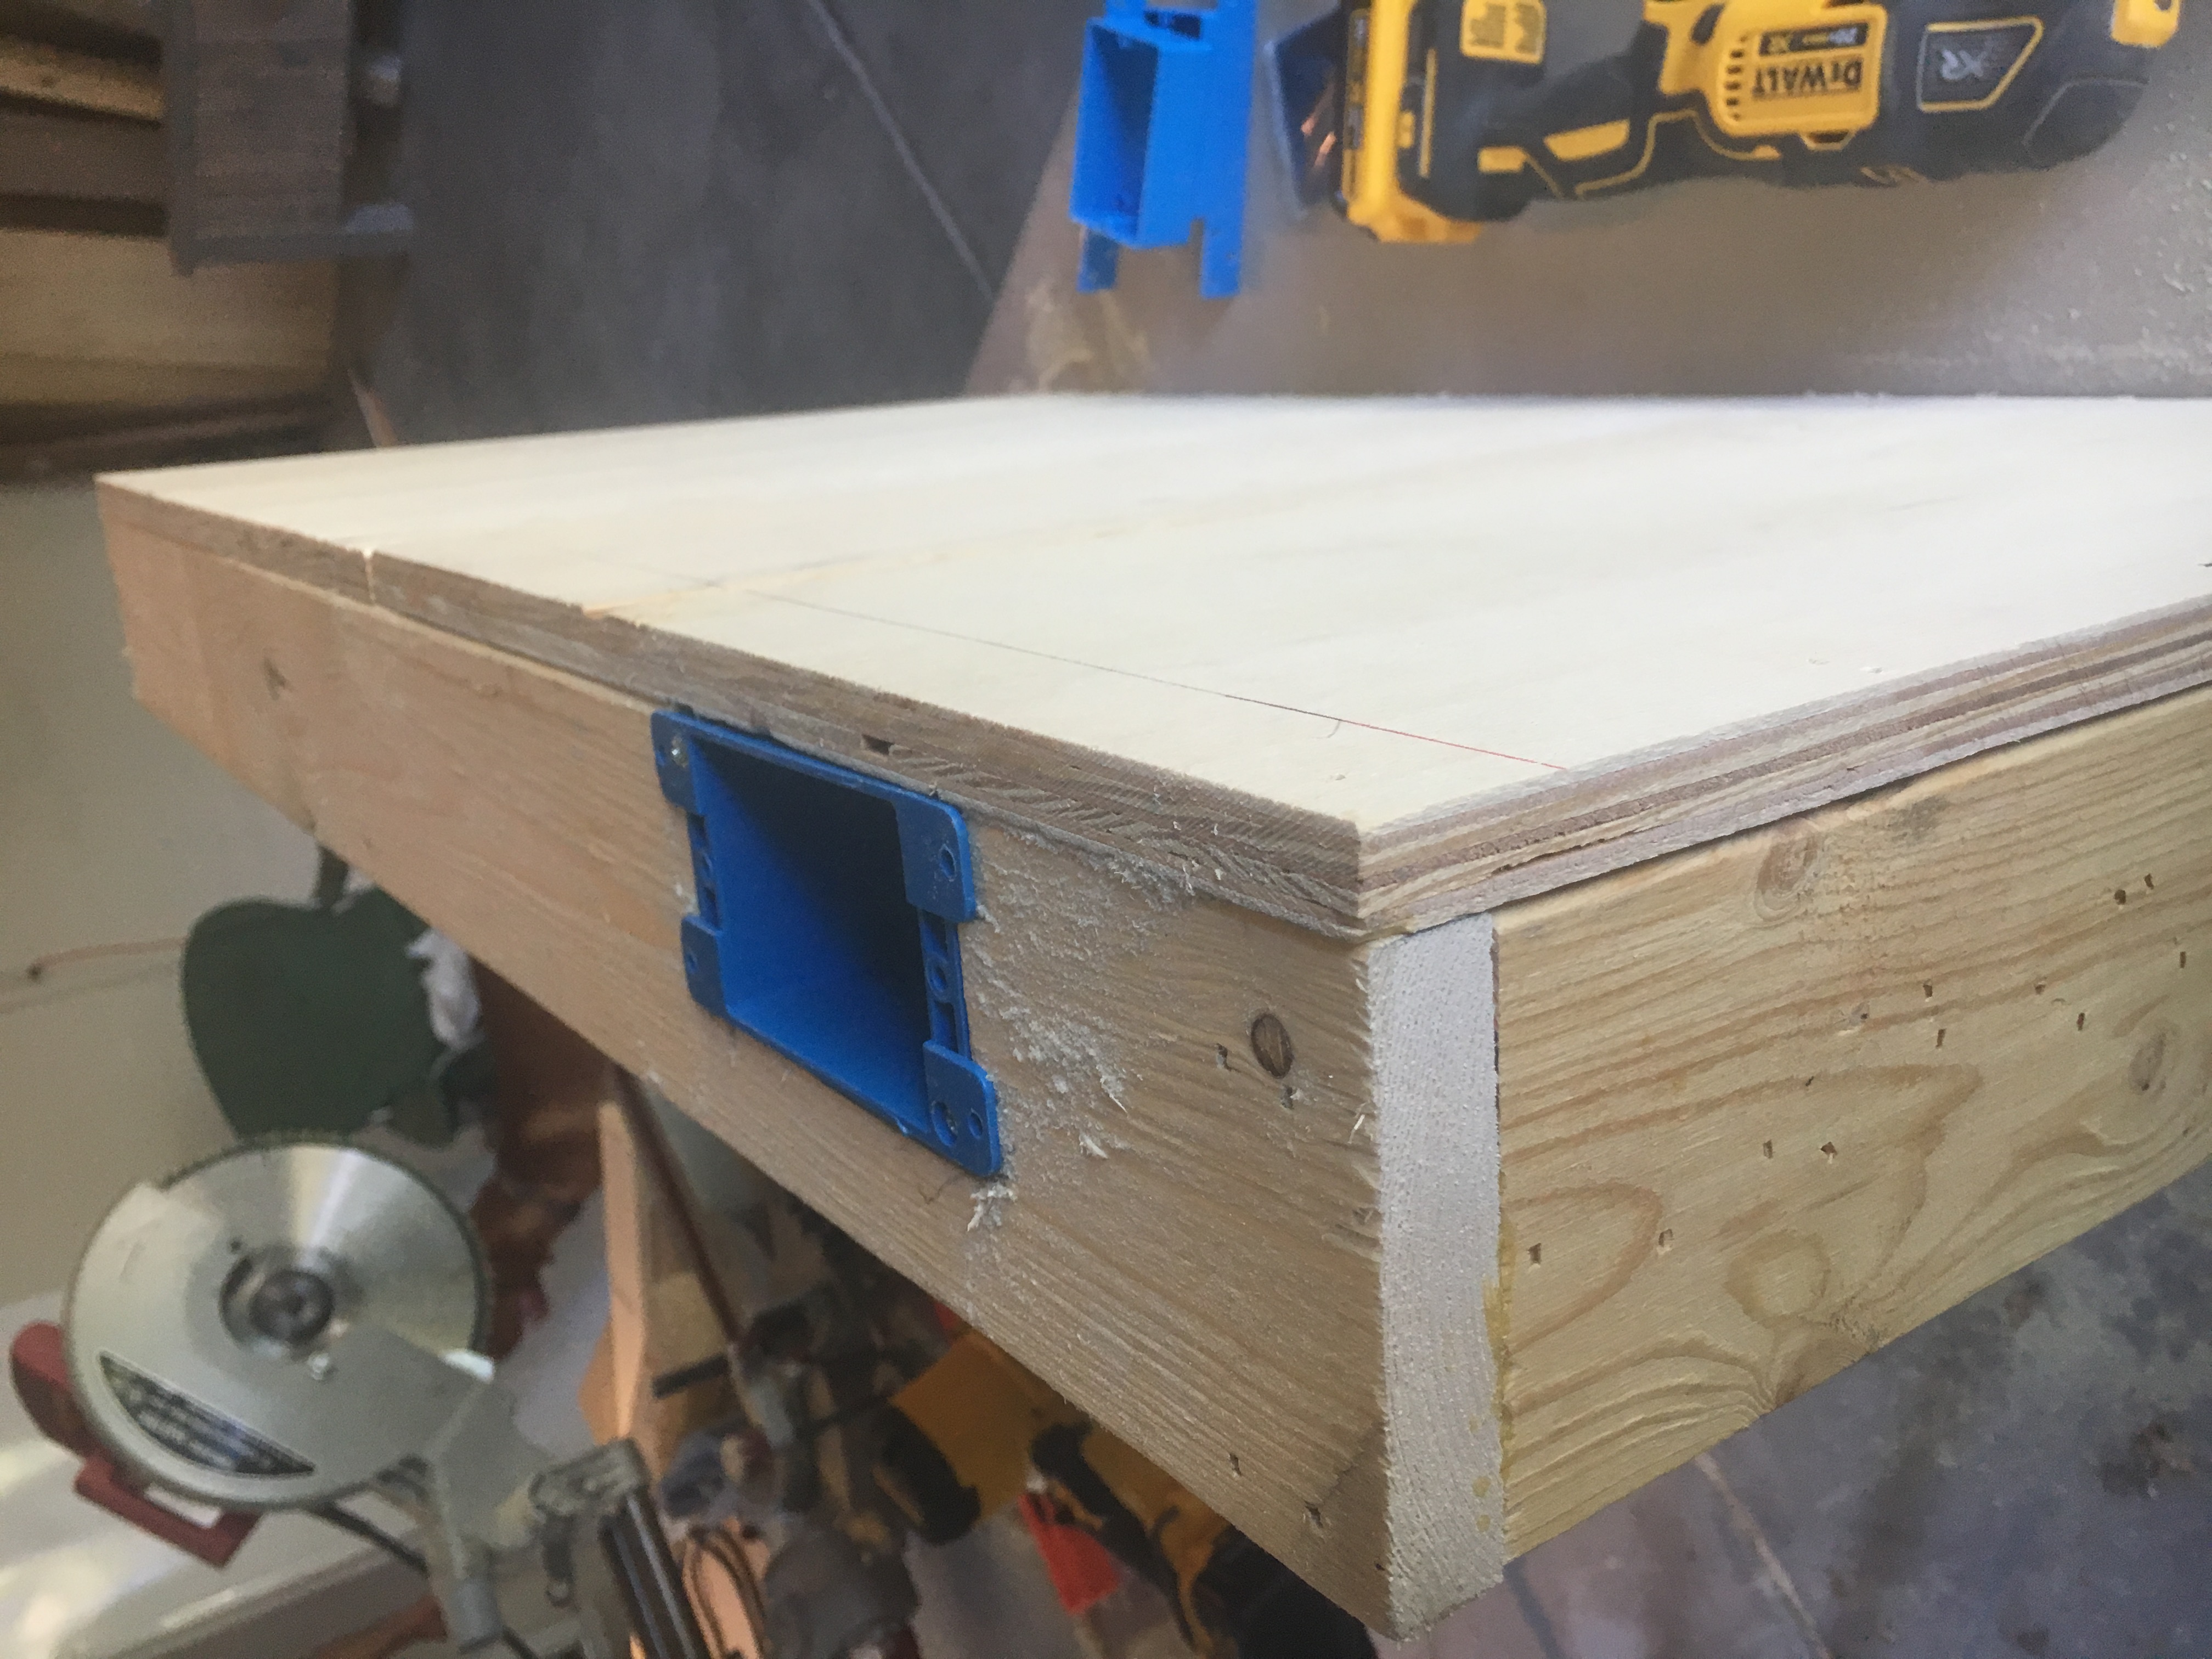
One outlet box fitted
Step 6: Attach the herringbone pieces using wood glue and finish nails. Since these were rough cuts, you may need to use your circular saw to get the pieces even on the edges. Then, take your router (with flush cut bit) and finish them off with a perfectly smooth edge.
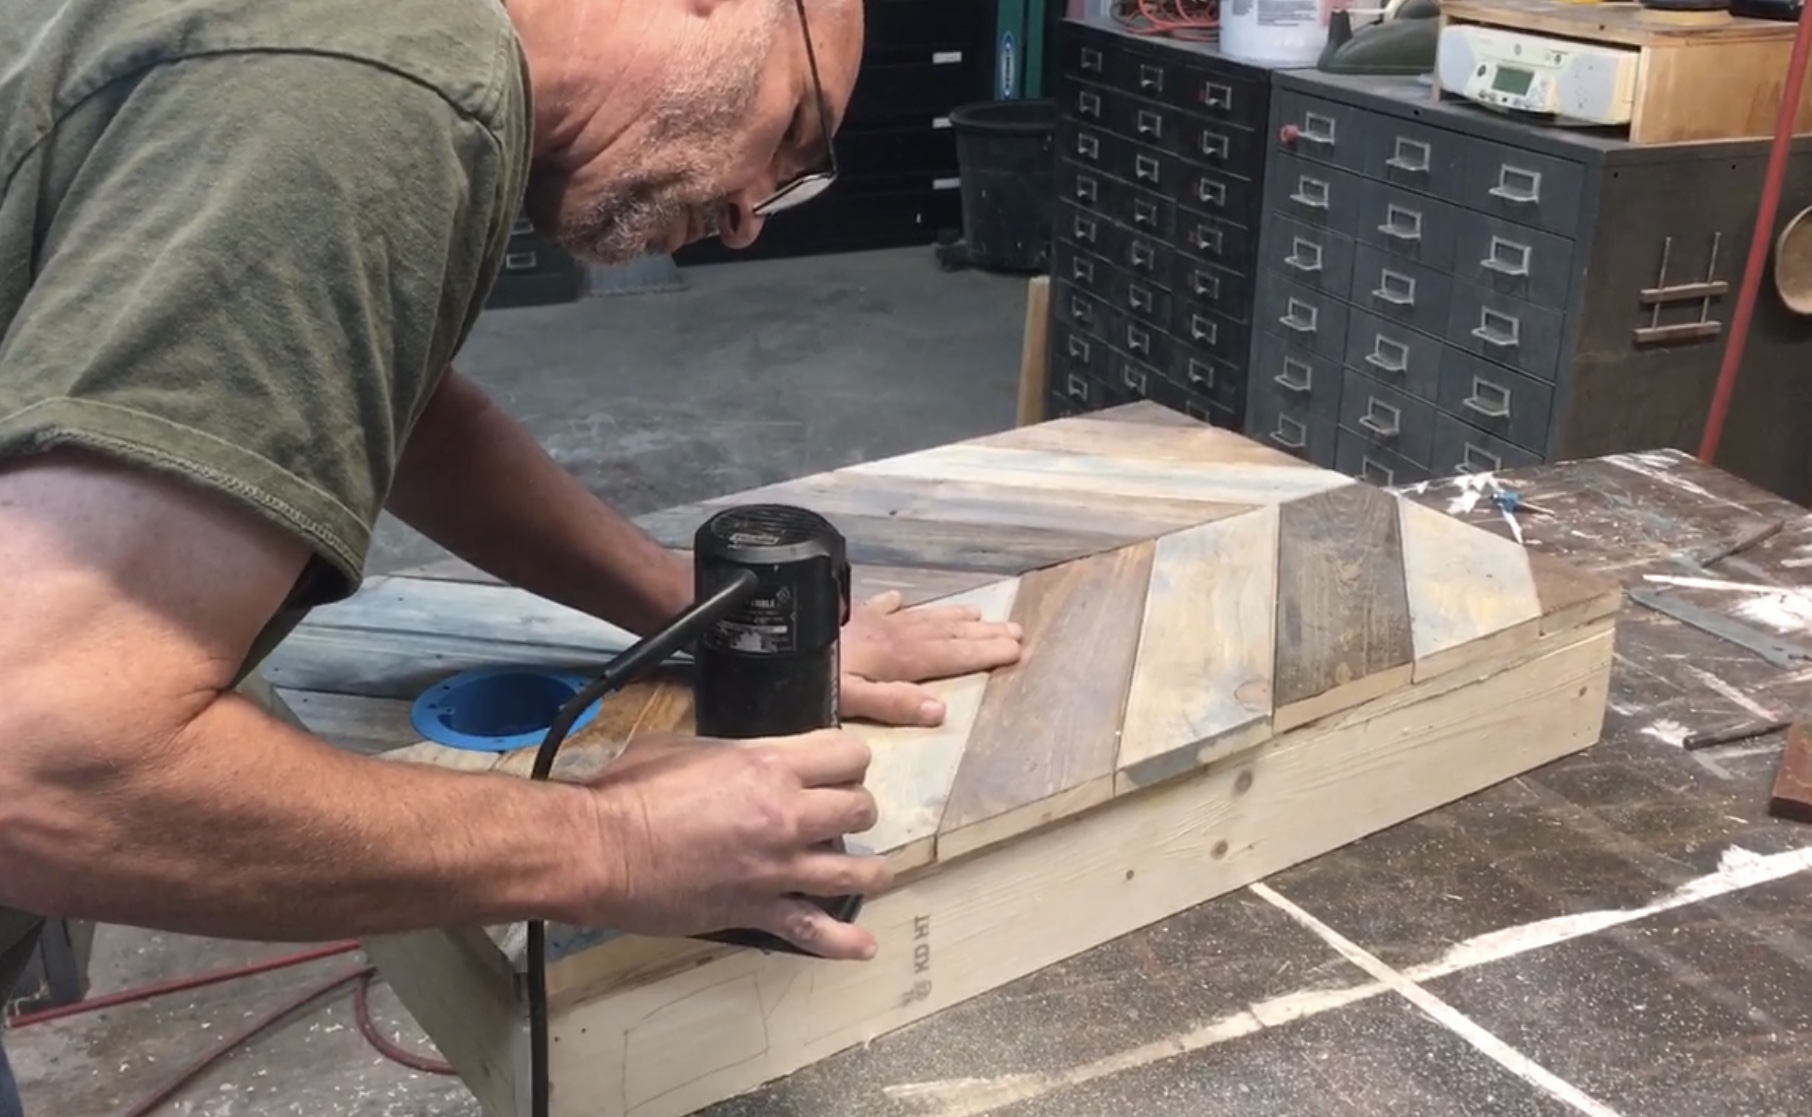
Step 7: Using your jigsaw (or hole saw if you have one) cut a 4″ diameter hole at the top center of the panels. It’s easiest to drill a hole from the back in the center of the 6″ hole to find the placement of the hole on the front. Place the light boxes and tighten them down.
 Step 8: Once you’ve ripped your trim pieces, cut rabbets on all of the pieces because they will need to overlap on the front and also cover the plywood edges on the side. After cutting the rabbets on the trim, stain them the same color as the frames.
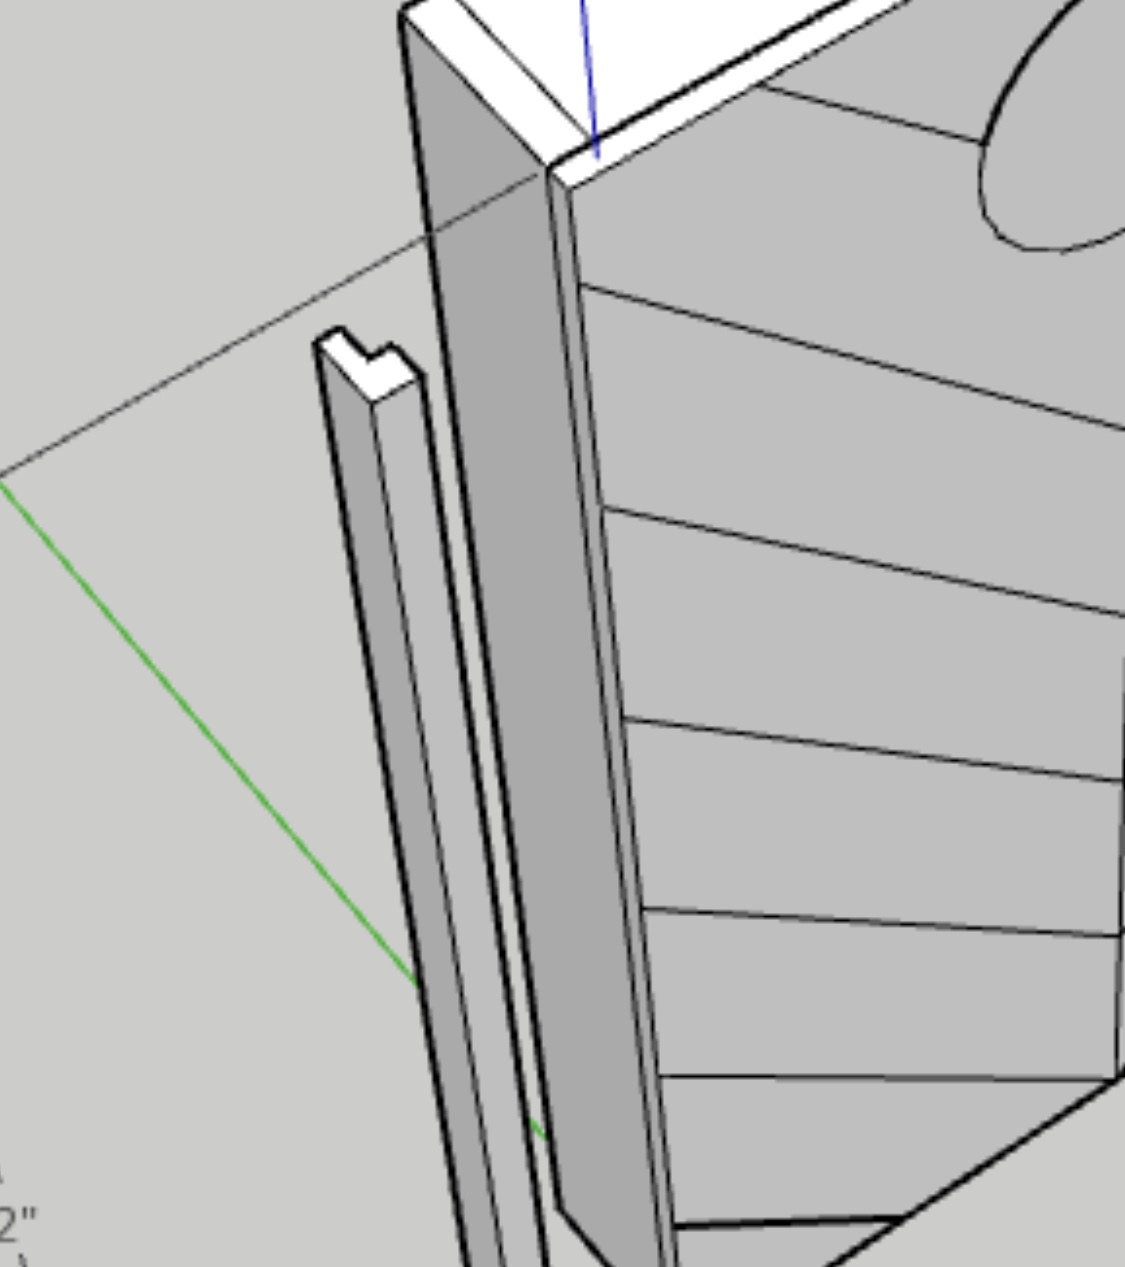
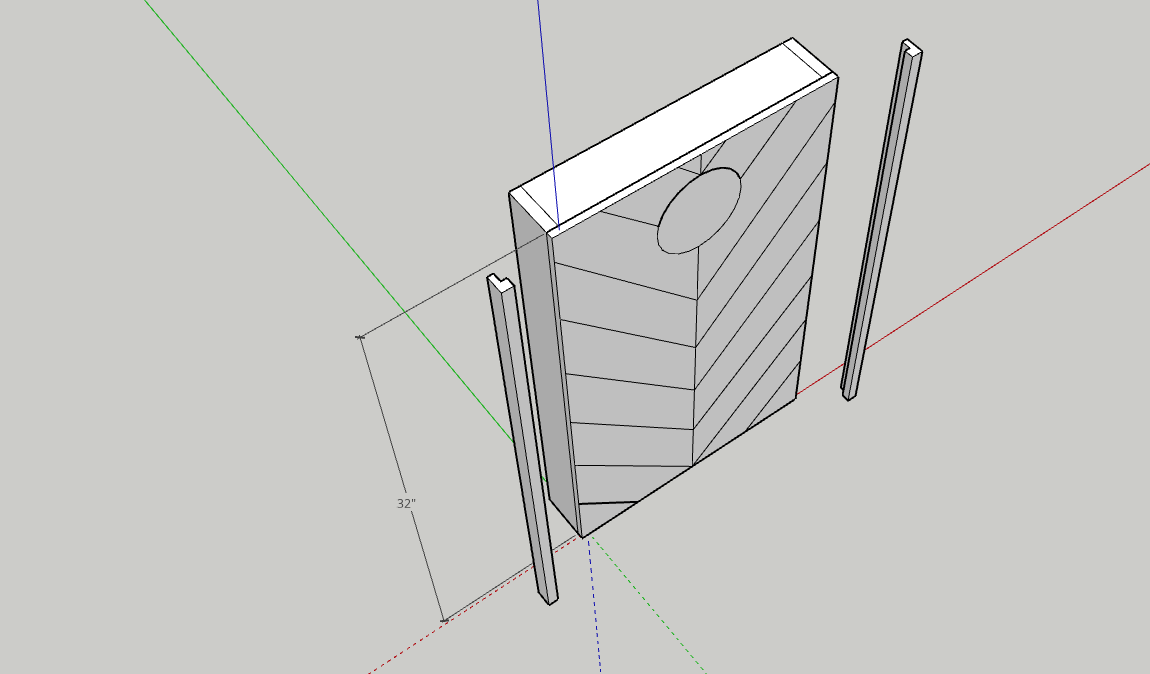
Step 9: Cut miters on one end. Attach one side and the top piece first using wood glue and finish nails. Then, measure and cut the miter for the other side piece. At the bottom, rip a 1″x1/4″ thick piece. Measure and cut it to length and attach it to the front (no miters on the bottom).
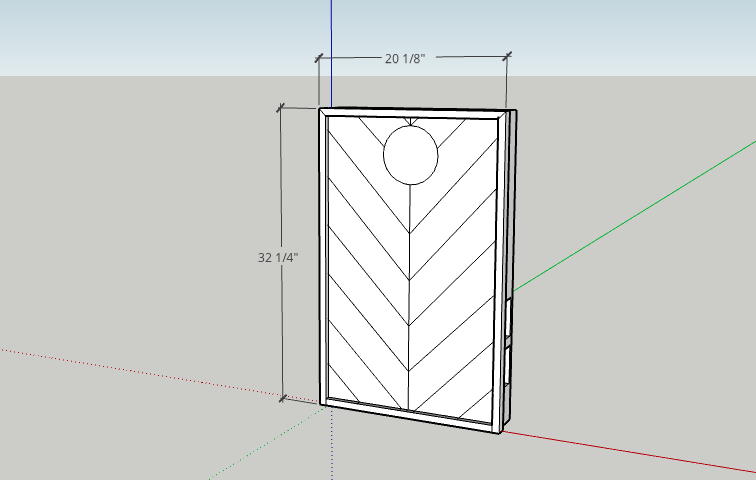
***Make sure the switch plates fit in place on the side before you attach the trim. If not, you may have to adjust your trim measurements.
Step 10: Clear coat the whole thing. (Apply two coats, sanding in between coats with a sponge sander).
Part 2: Table Tops/Drawer Boxes and Drawers
Cut List:
- 3/4″ Project Panel- Two @ 20 1/8″ (table tops)***
- 1×6- Four @ 16″ (sides of boxes) and Two @ 18 5/8″ (backs of boxes)***
- 1/2″ Plywood- Rip @ 5″ and cut Four @ 15″ and Four @ 16 5/8″ (drawer sides, fronts, and backs)***
- 1/4″ Plywood- Two @ 15″x17 5/8″ (drawer bottoms)***
- 1×8- Two @ 20 1/8″ and rip @ 6 1/4″ (finished drawer fronts)***
***Measure and cut as you go***
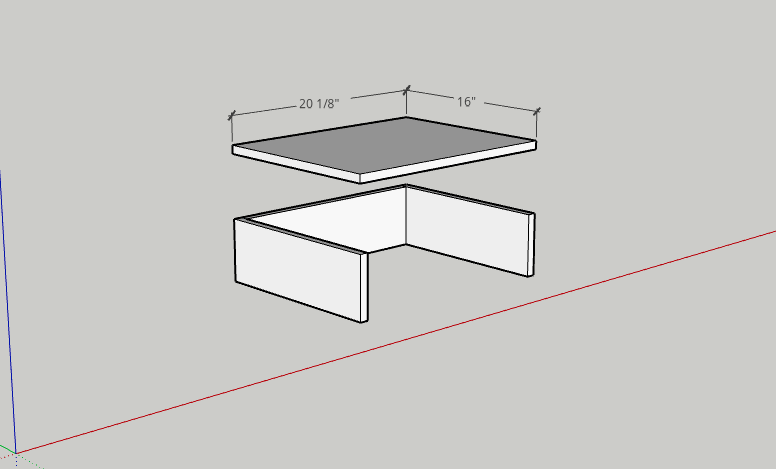
Step 1: Measure the exact width of your back panels with the trim on them, and cut out the table tops to that same width (should be close to 20 1/8″). The project panel is already the right depth.
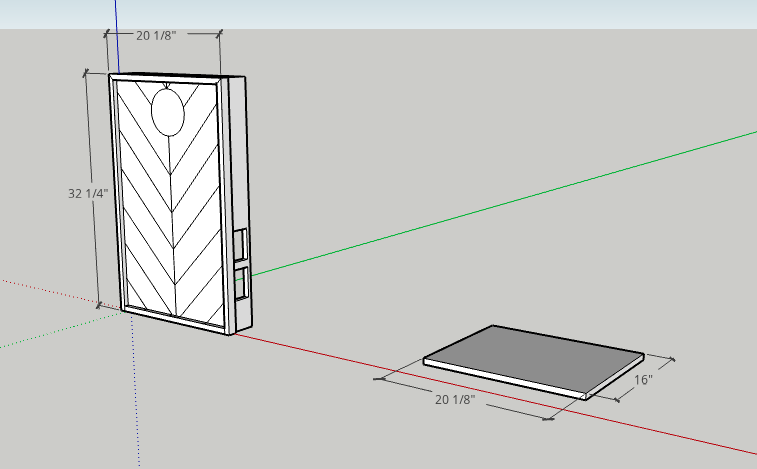
Step 2: Cut side pieces to the same depth as the top (16″) and measure and cut the back pieces to be the right width (about 18 5/8″). Attach using wood glue and finish nails.
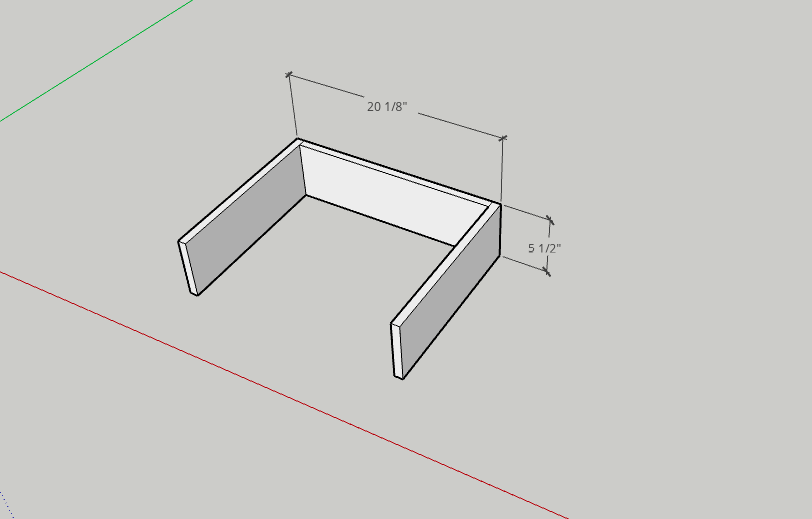
Step 3: Attach top piece using wood glue and finish nails. Then sand and stain to match the panels (don’t forget to stain the inside, as this will show).
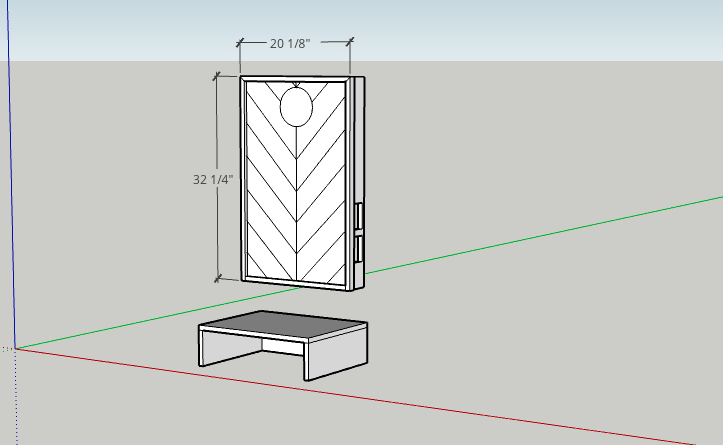
Step 4: Measure for the drawers.
***I’ve included our cut list, but in reality you should always measure your opening to get the most accurate measurements.***
- Measure the opening size: height, width, and depth.
- The height needs to be about 1/2″ less than the overall height of the opening.
- The width measurement will determine the size of the unfinished fronts and backs. From the overall width, subtract 1″ for the drawer guides, and about 1″ for the thickness of the plywood sides. This measurement needs to be extremely accurate for the drawer guides to work properly, so measure to the nearest 1/16″.
- The depth measurement will determine the size of the sides. From the overall depth, subtract about 1/2″ to give a little room in the back.
Step 5: Out of the remaining 1/2″ plywood, cut the parts for the drawers (two fronts, two backs, and four sides) according to your measurements.
Step 6: Cut the 1/4″ plywood for the drawer bottoms according to your measurements.
Step 7: Attach the sides to the front and back of each drawer using wood glue and finish nails. The sides should cover the raw edges of the front and back.
Attach the drawer bottoms using wood glue and finish nails.
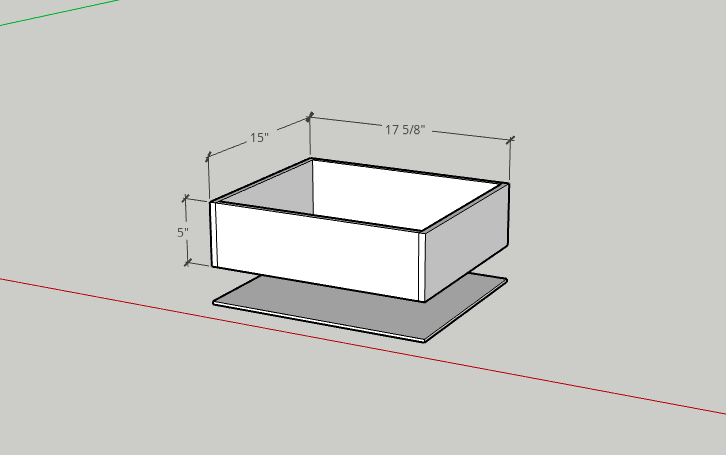
Step 8: (Optional) We wanted to take it a step further and round the edges of the plywood using a router (1/4″ round over bit) to really give the drawers a finished look.
- Round all the edges and corners (sides, back, bottom, and inside) except for the edge on the drawer front (these will be covered by a finished front that will need to be attached to a flat surface).
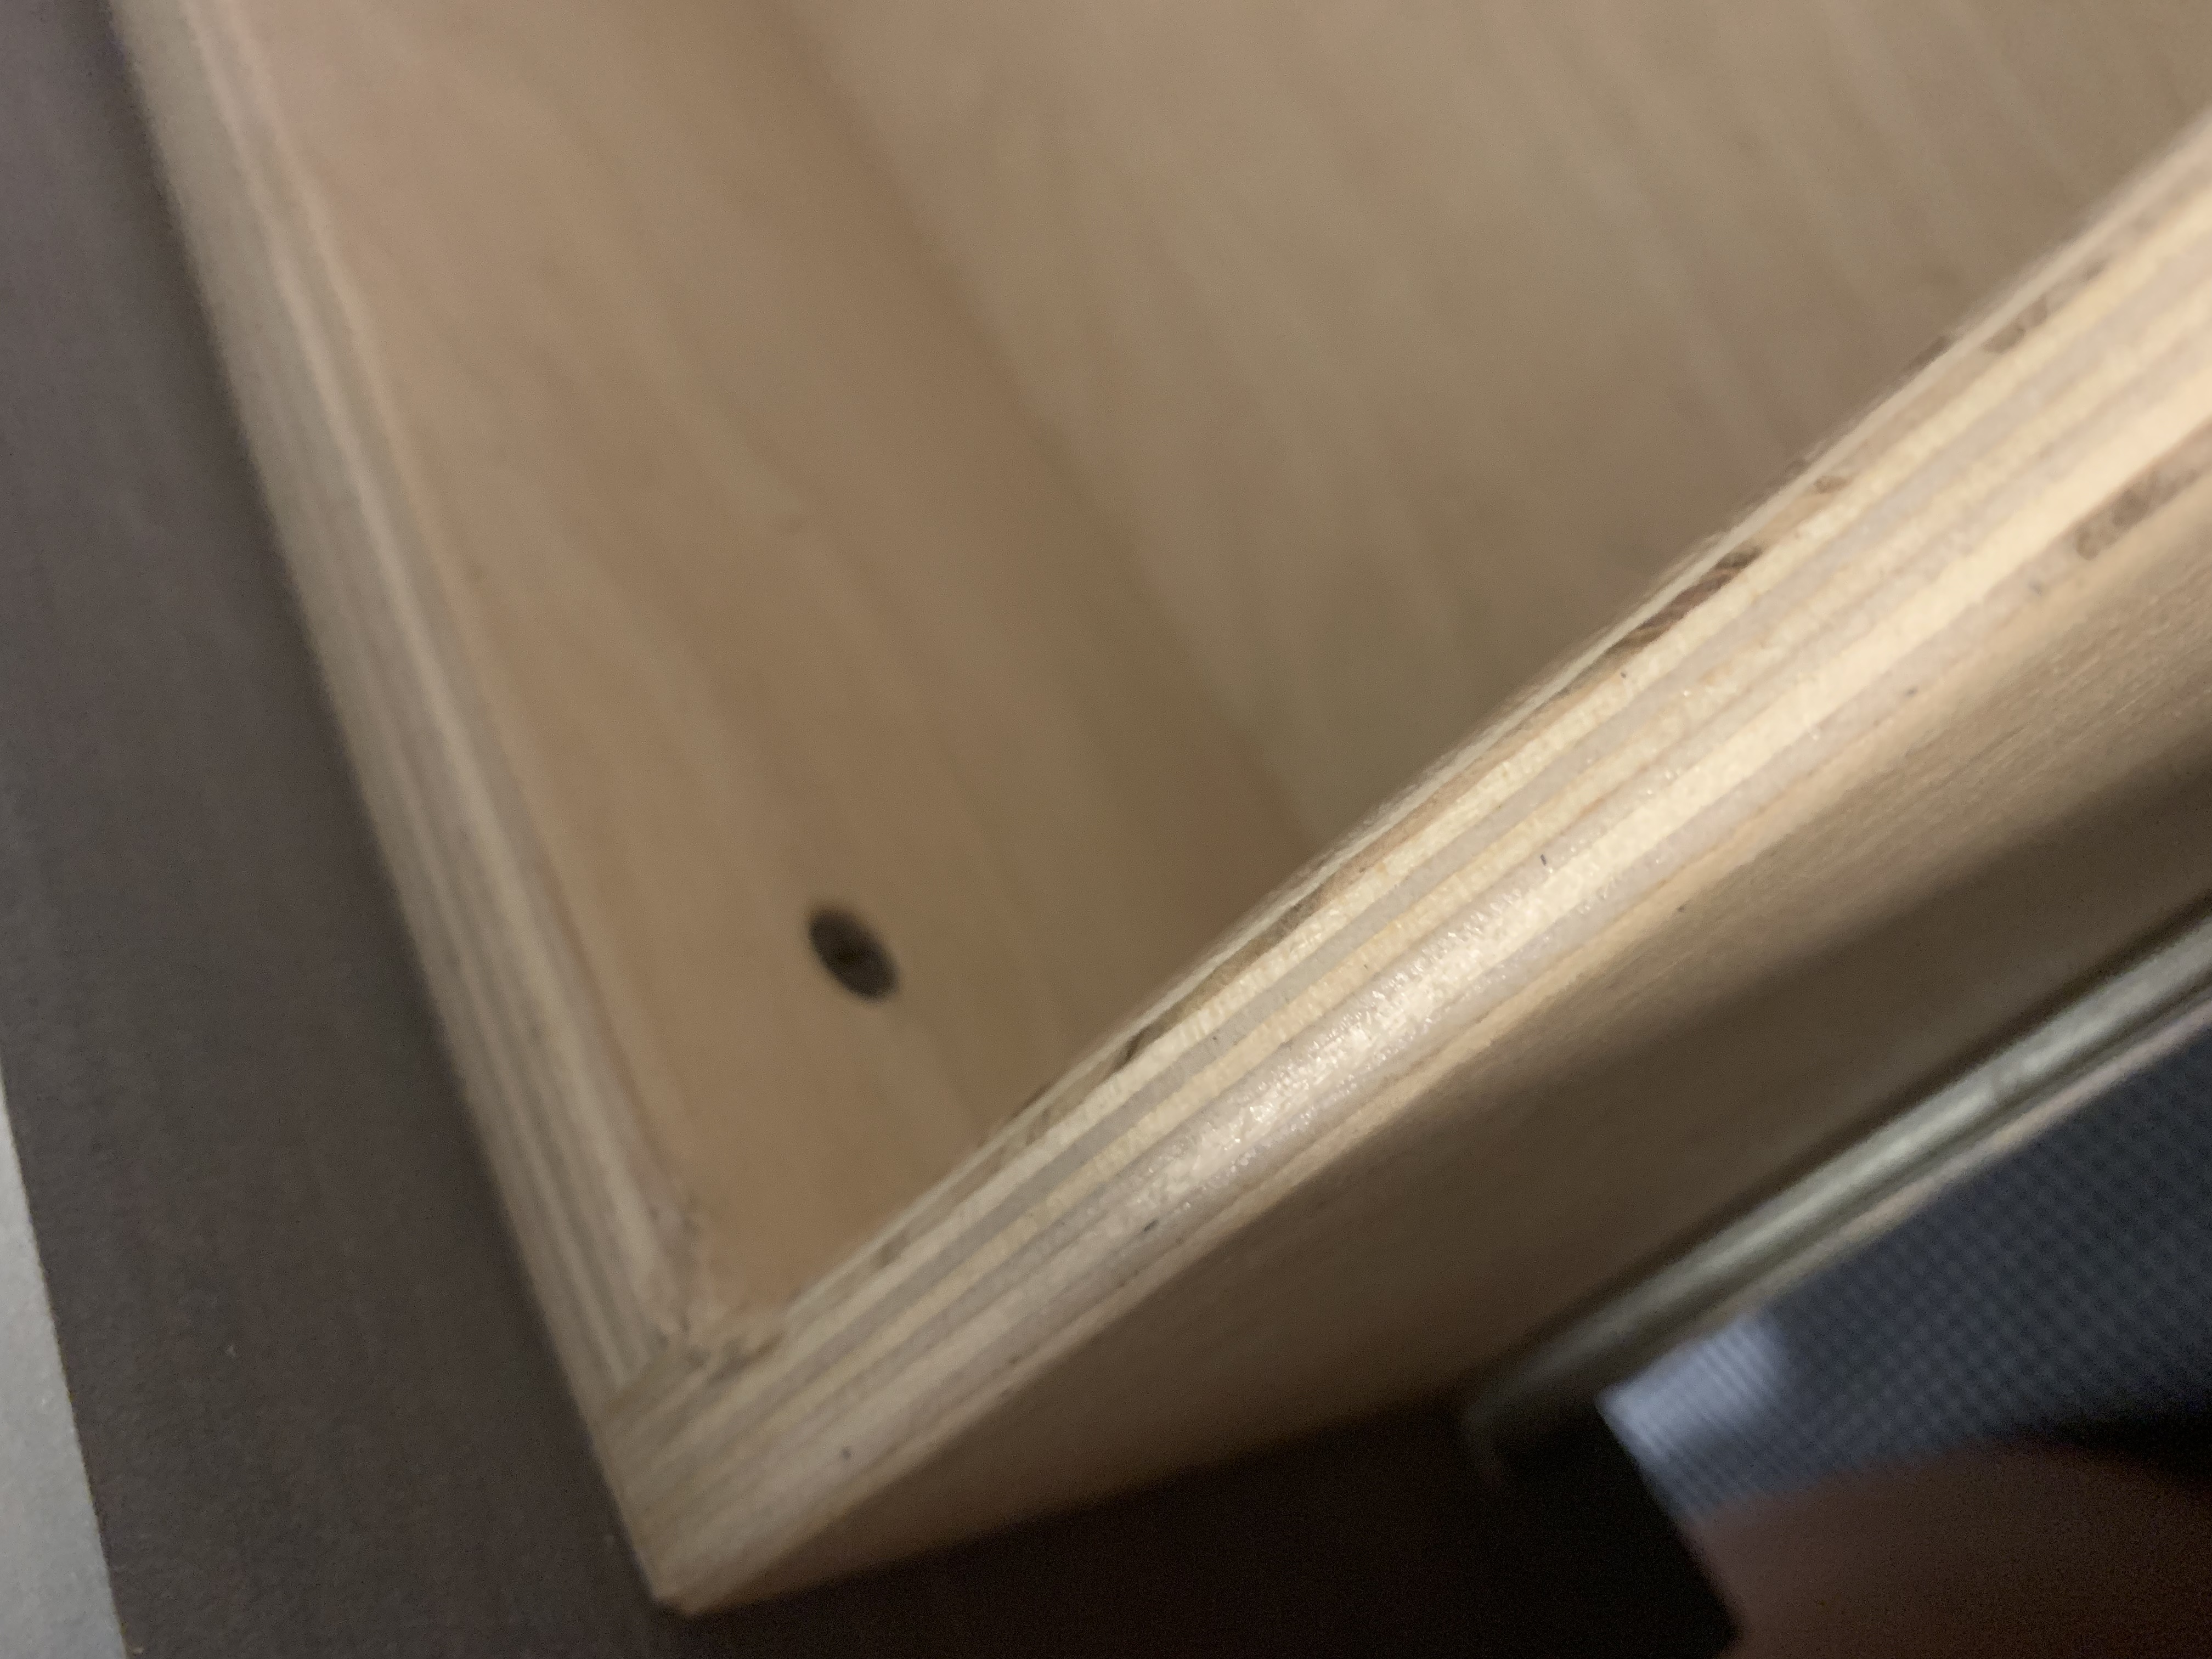
Rounded edges, flat front
Tip: When you round the edges on the inside of the drawers, go around one time backwards (right to left) to avoid splitting the veneer. Then, slowly go around the correct way, cleaning up any ragged edges.
Step 9: Measure and cut the finished drawer front. This should be the same as the outside height and width measurement of the boxes (about 6 1/4″x20 1/8″)
Stain the drawer fronts the same color as the boxes.
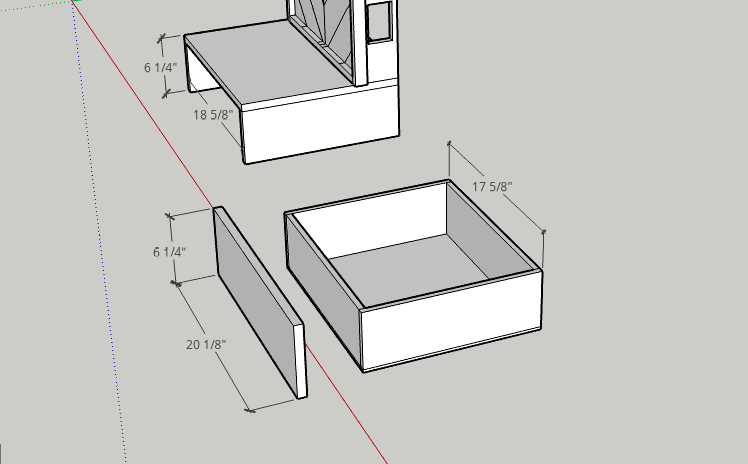 Step 10: Pre-drill holes to attach the finished drawer fronts.
Tip: Drill countersunk holes on the inside and outside of the unfinished drawer fronts in each corner. (We used a little homemade jig to get the holes spaced the same). This is to avoid “puckering” of the plywood when attaching the finished drawer fronts.
***Wait to attach drawer fronts until the drawers are installed.
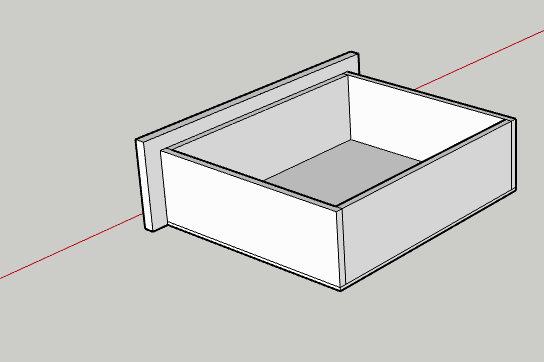
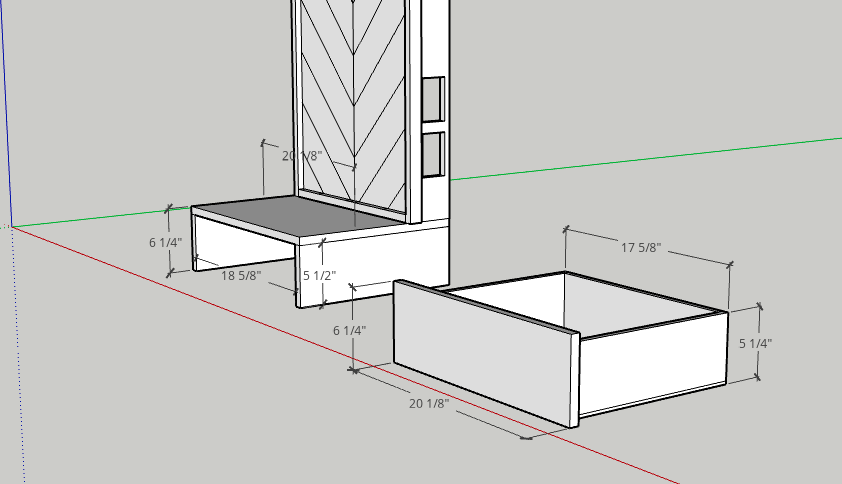 Step 11: Sand and clear coat the drawers, as well as the drawer boxes (apply two coats, sanding in between coats with a sponge sander).
Step 12: Attach drawer guides at the bottom of the drawer, using a 3/4″ spacer to draw a guide line.
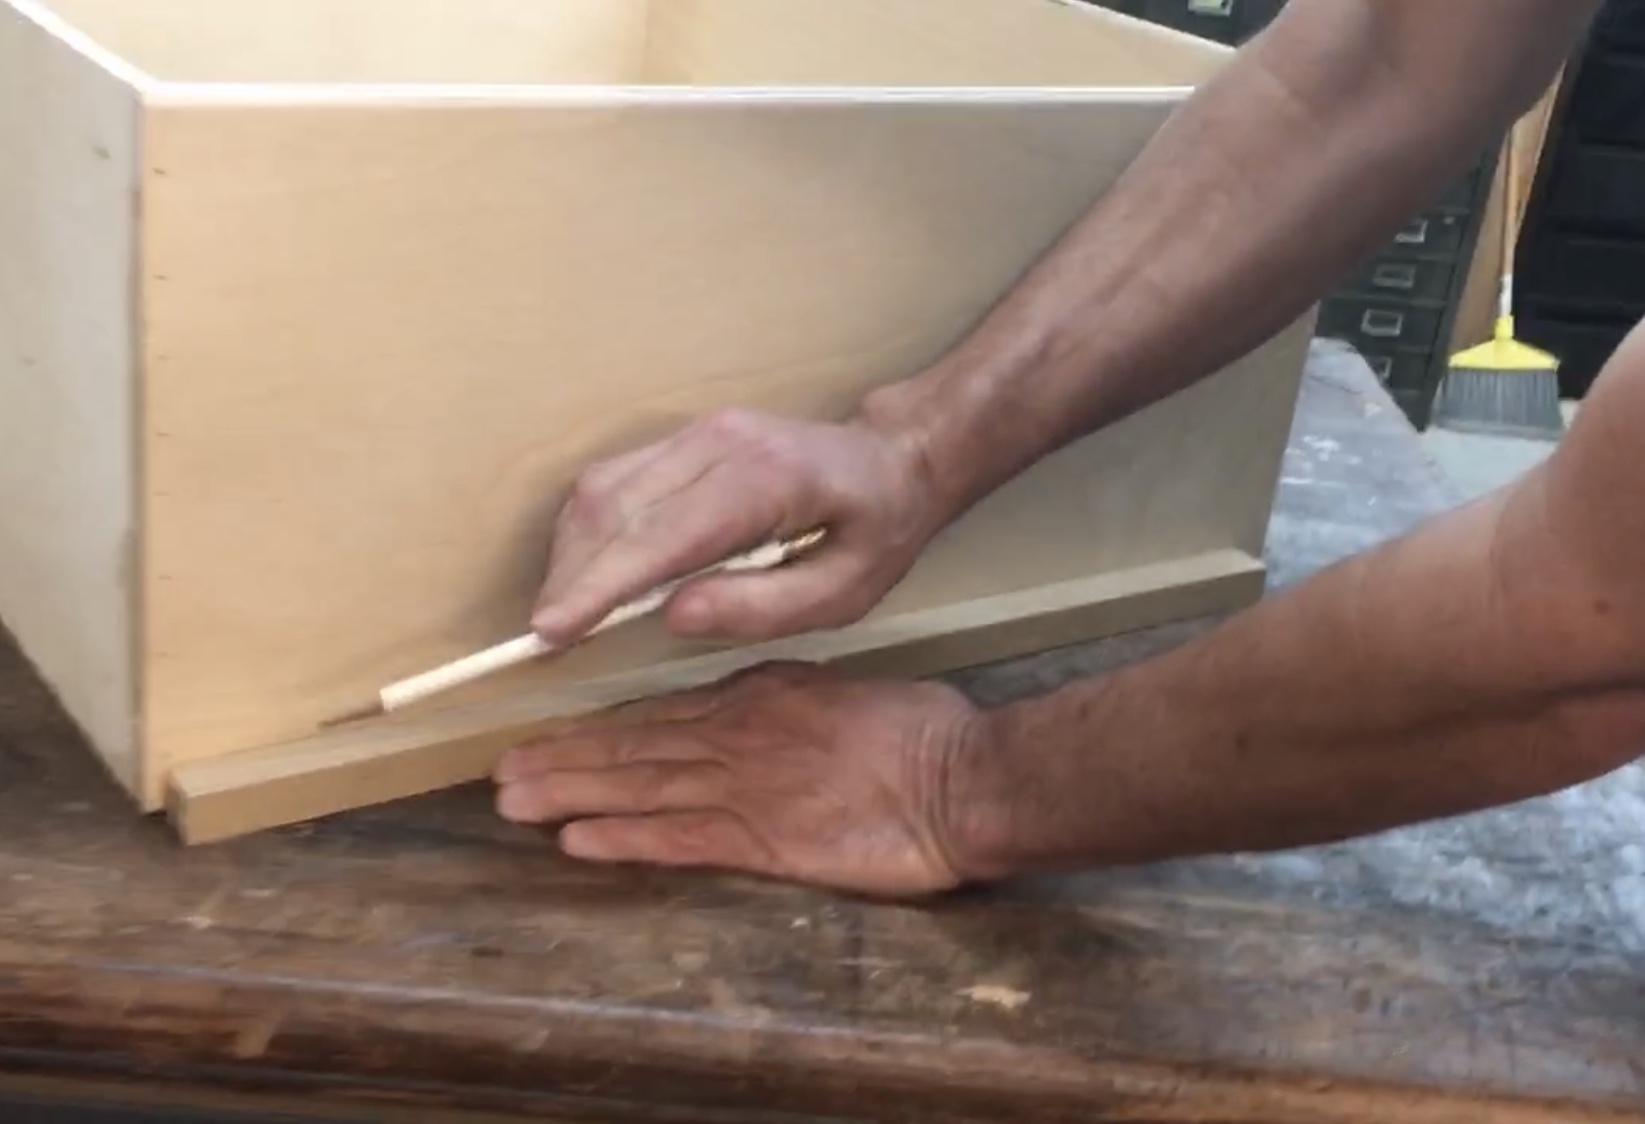
Visual example from another project
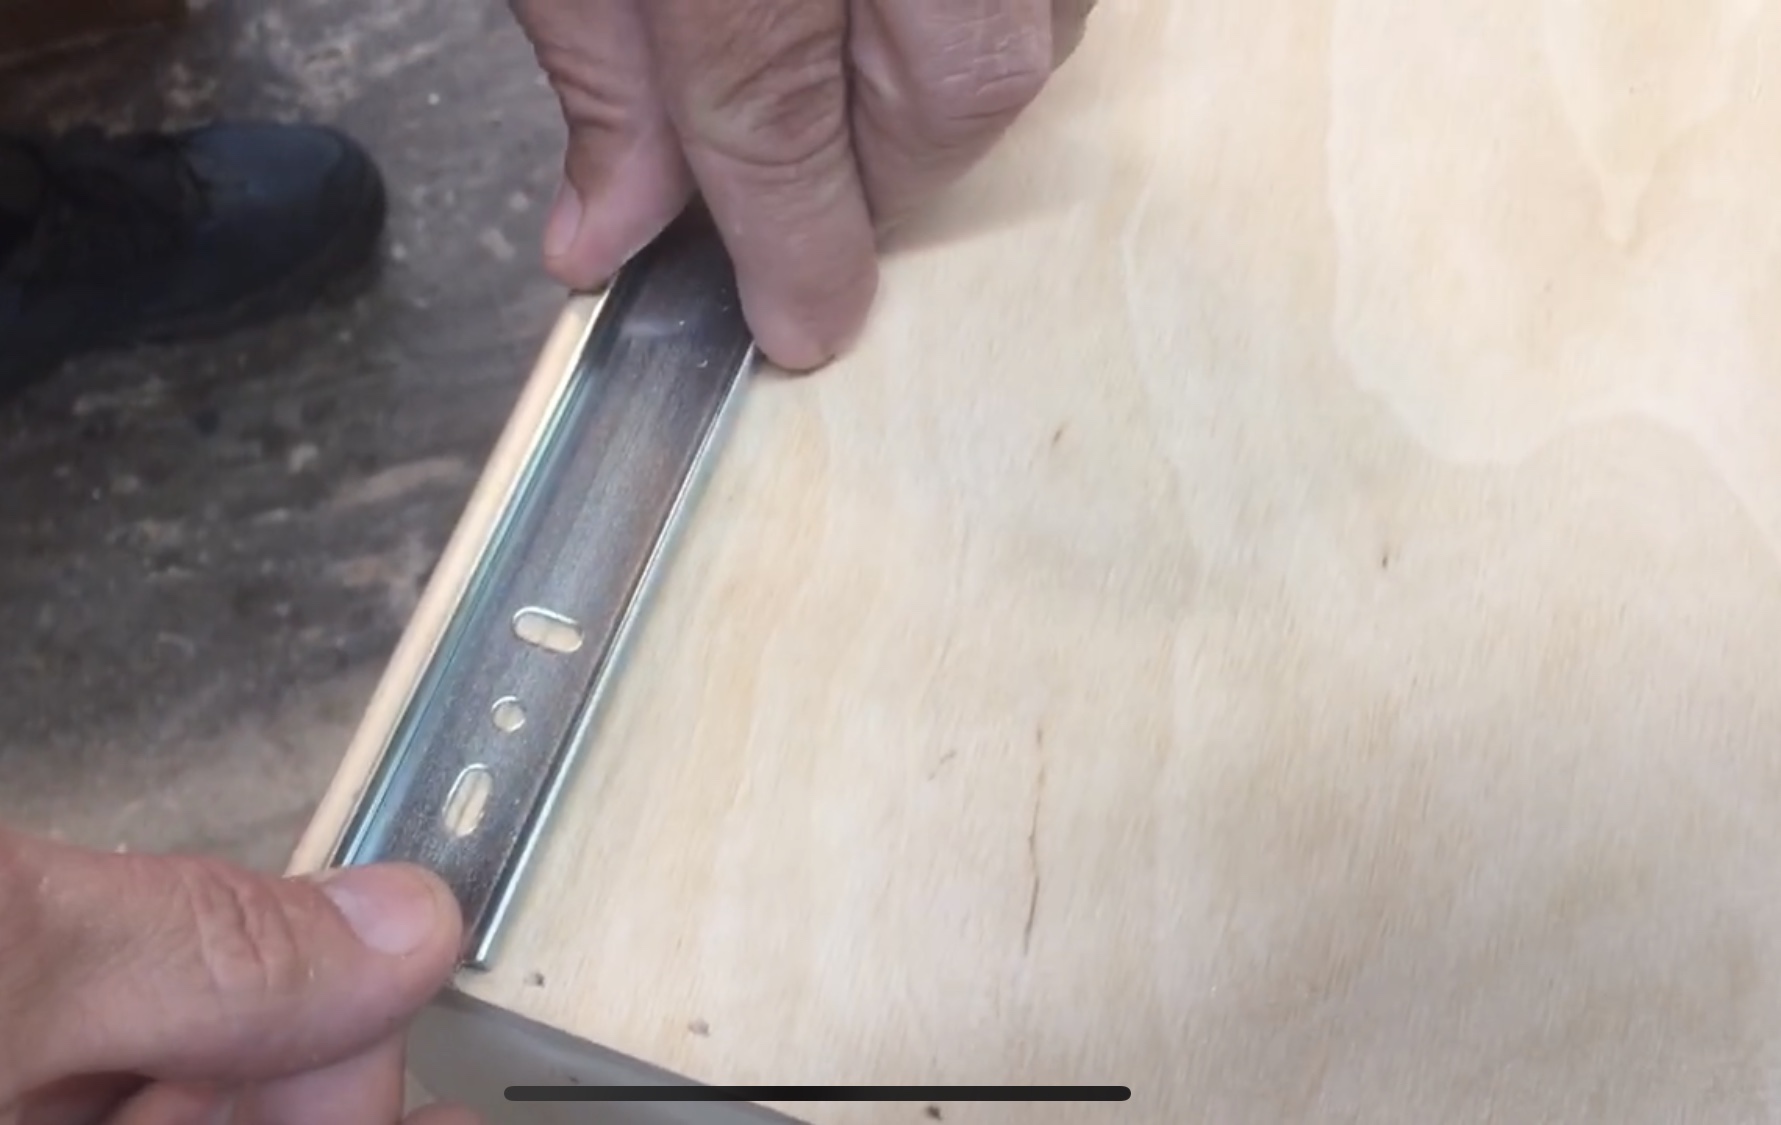
Line holes up on the line
Place the guide on the line with the flange side flush with the front, and screw through the vertical holes (this helps later on if you need to adjust the drawer guides up or down when you are fitting them in the opening).
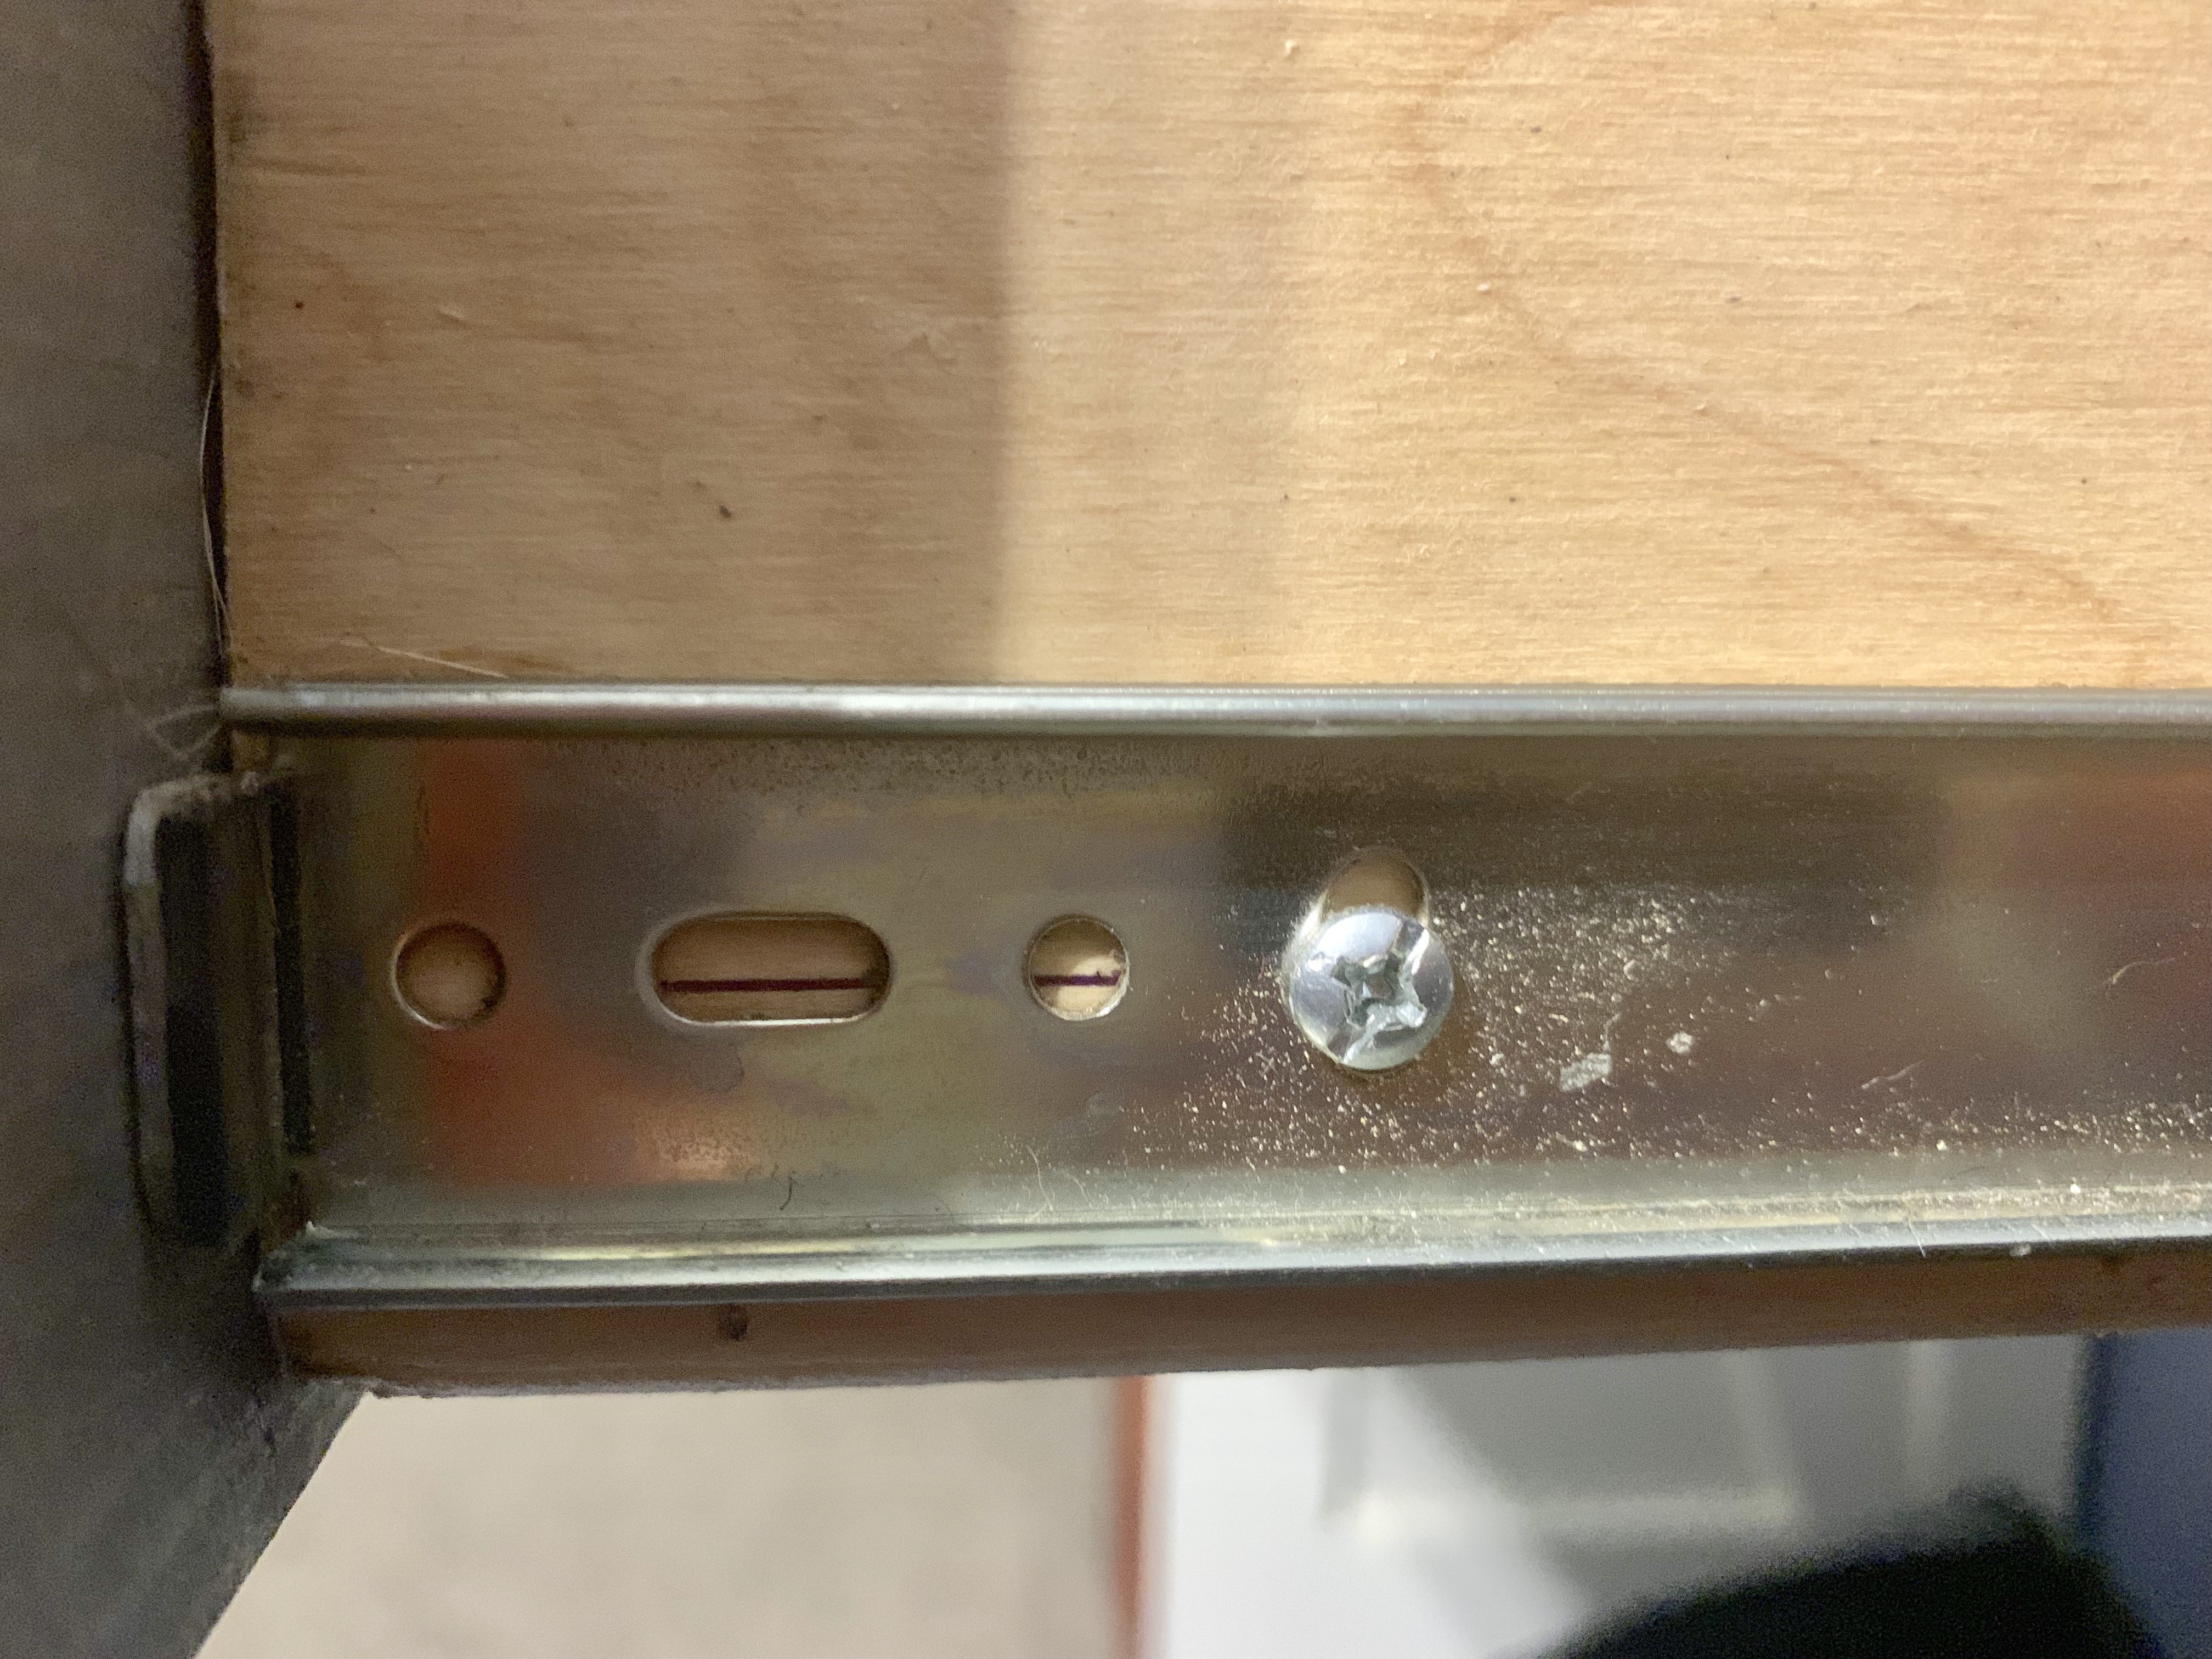
Screw through vertical holes first
Attach the guides to the drawer boxes flush with the front and at the bottom.
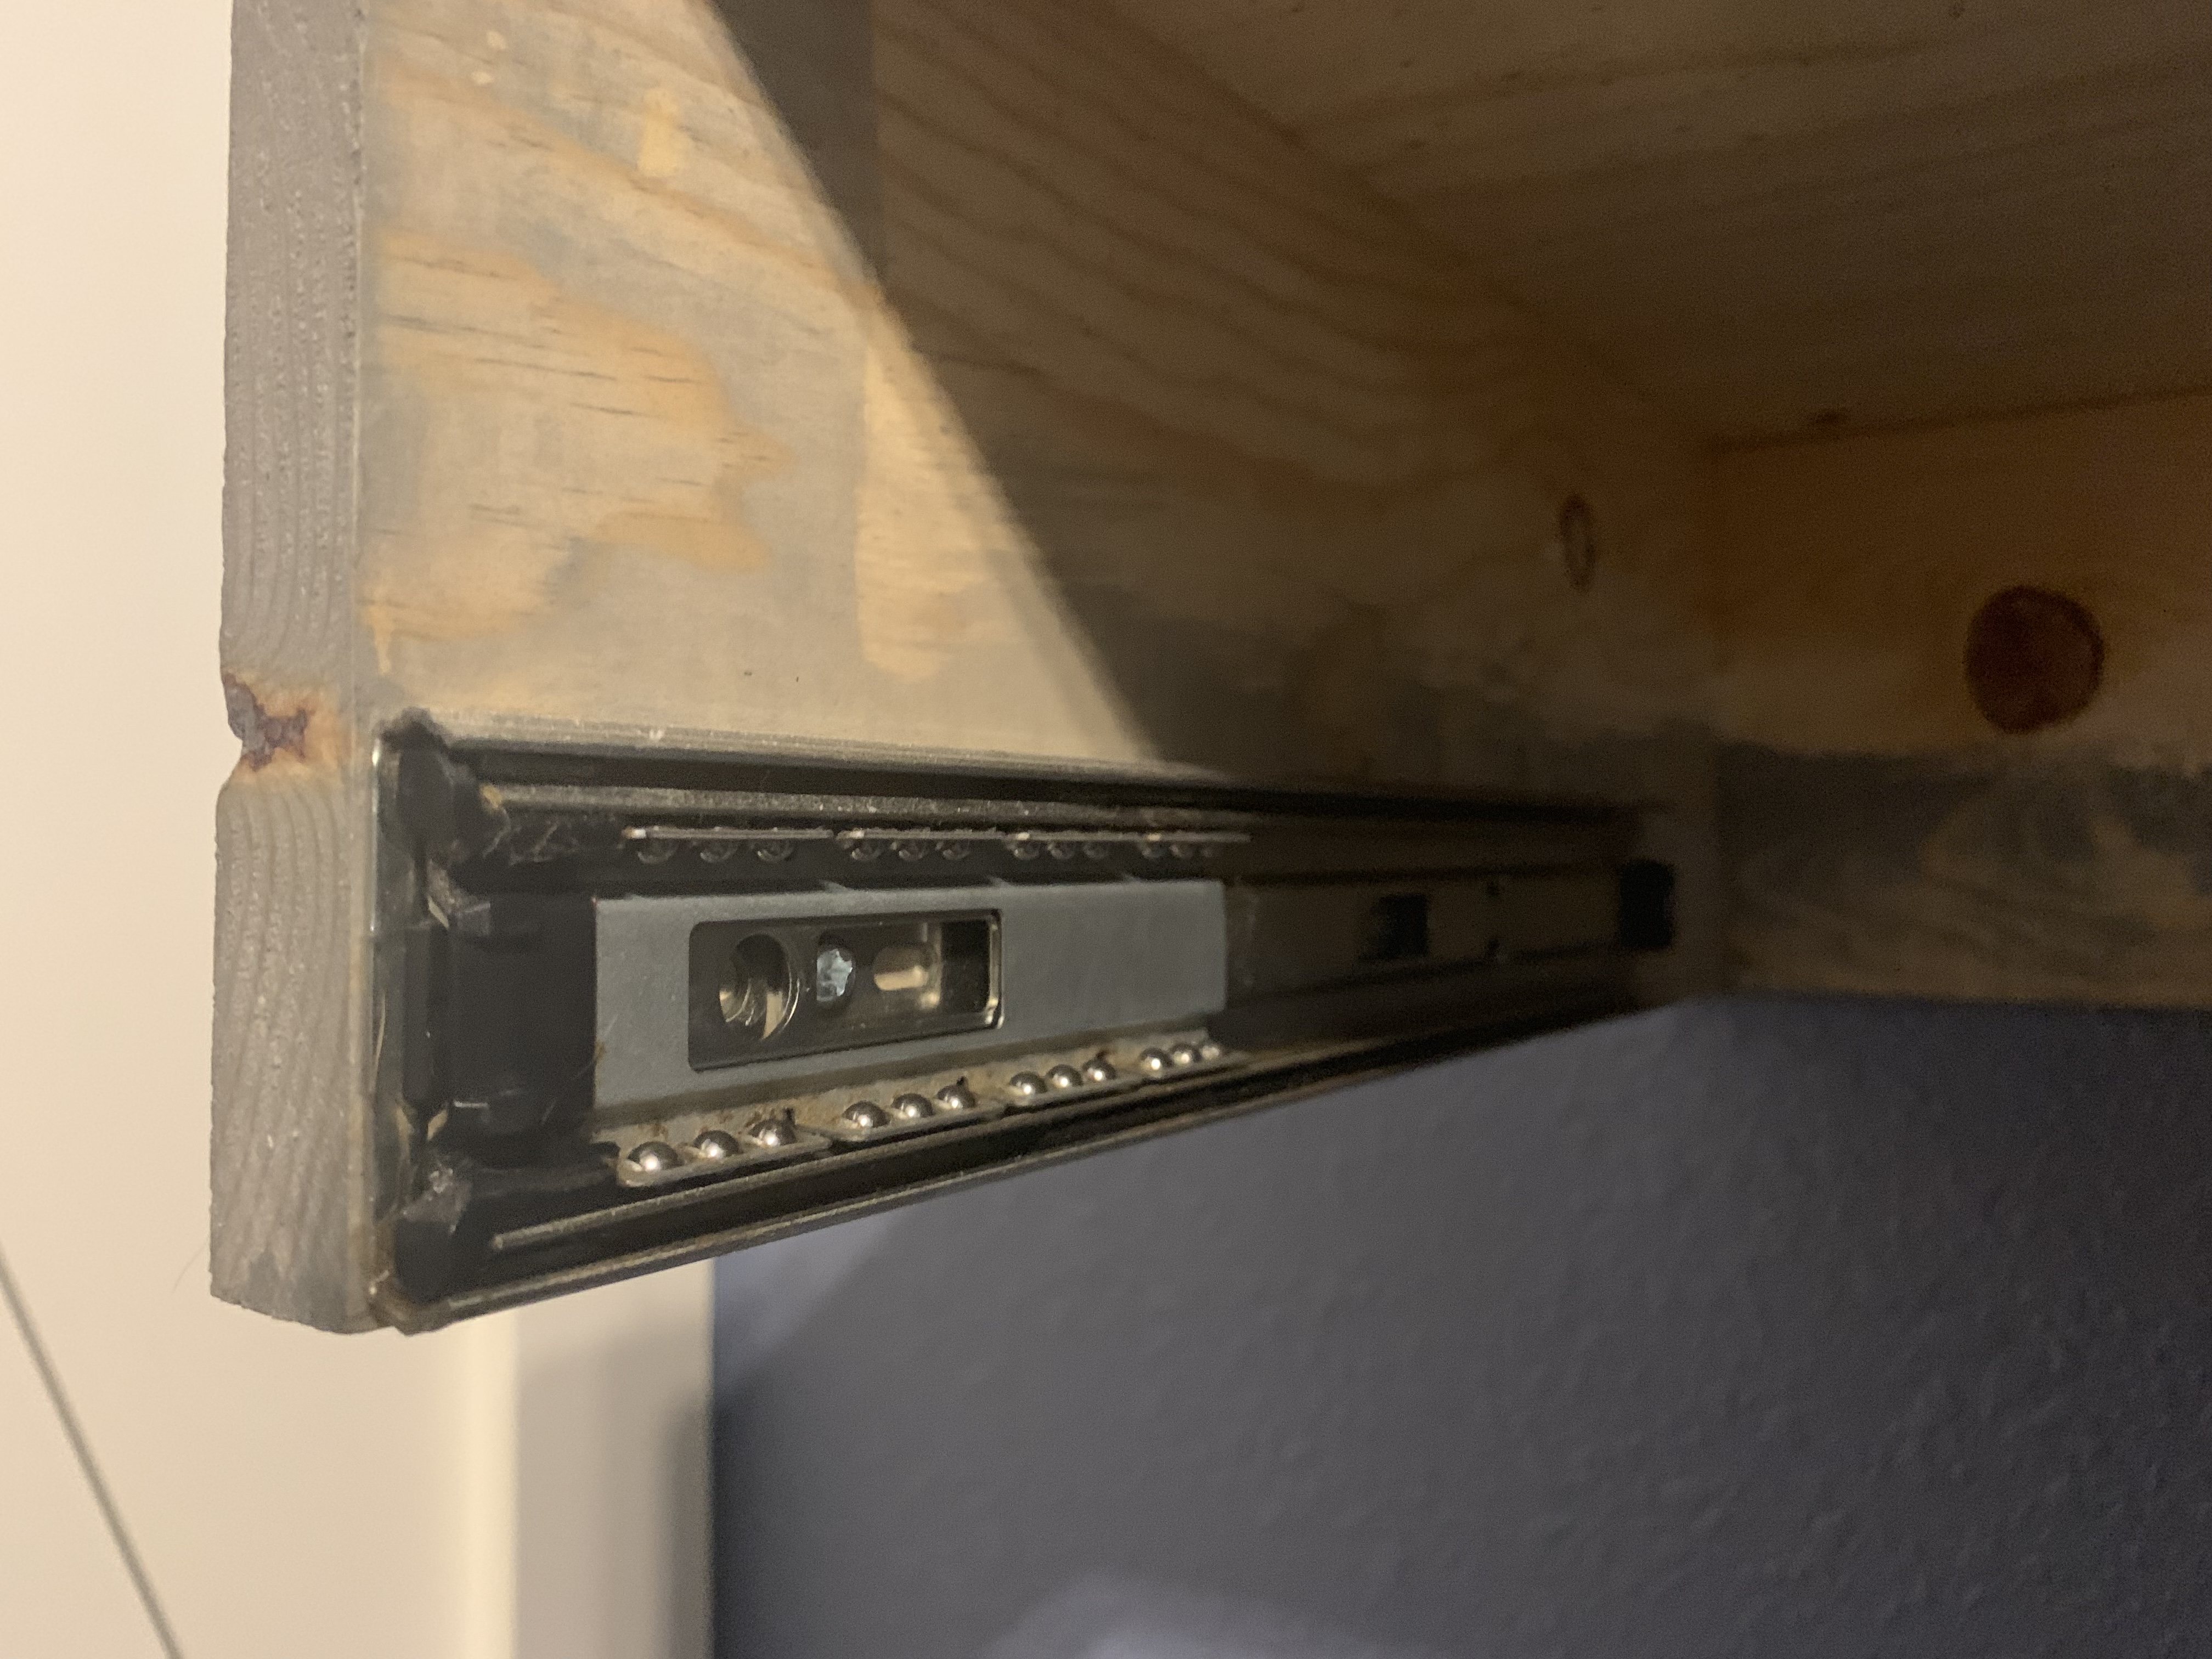 Test fit the drawers in the drawer boxes, making adjustments if needed. Then, put screws in the round holes to hold the guides permanently in place.
Step 13: Lastly, attach the finished drawer fronts using 1 1/4″ screws.
Tip: Start with putting in two screws diagonally from each other. This holds the drawer front in place while still allowing adjustments to be made (up or down, side to side). Using a mallet, adjust the drawer front to perfectly line up with the box. Once it’s lined up, attach the other two screws to permanently hold in place.
The drawers are meant to look seamless; like they are floating or almost hidden. We opted to go with no hardware, but this is optional!
Part 3: Wiring, Assembling, and Hanging
Step 1: If you have a general knowledge of how to wire switches and outlets, this is pretty straight forward, so I won’t go into much detail. Secure the two electrical boxes to the side, and the light box to the front. Finish the wiring to the boxes and make sure you leave enough chord to reach to a wall outlet.
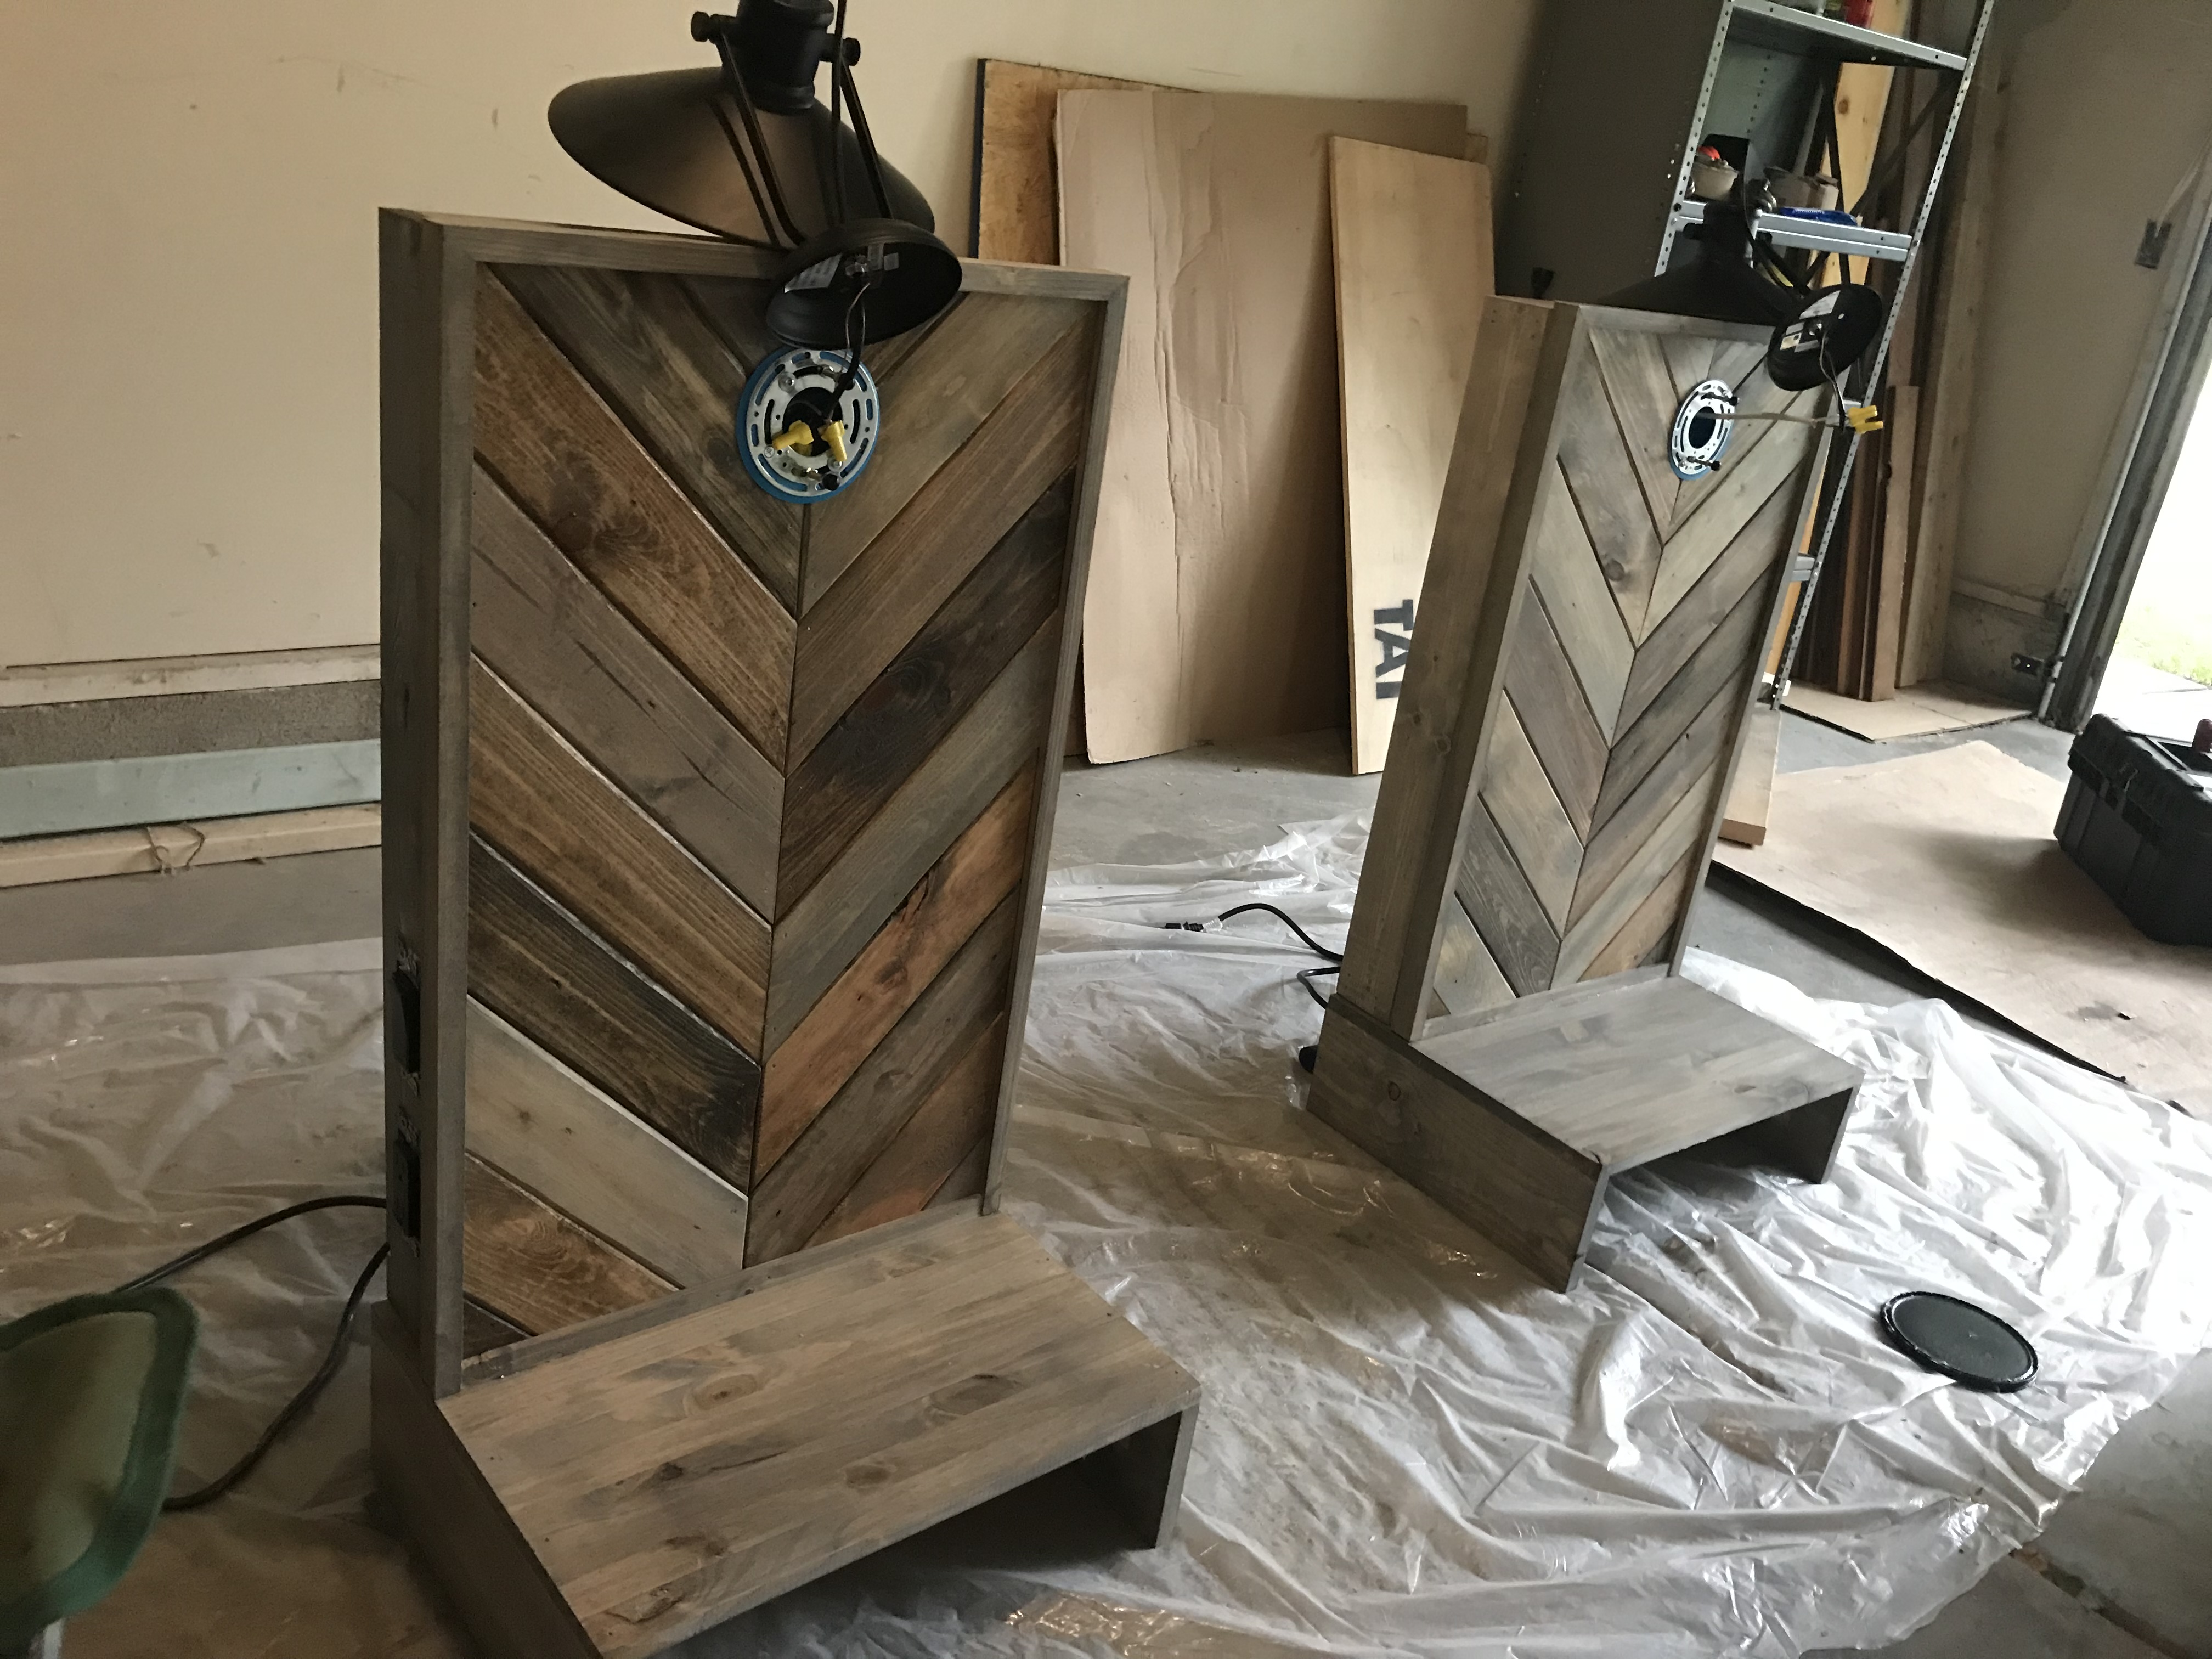
Wire and attach the sconce lights.
***You should always consult an expert first when dealing with electrical.
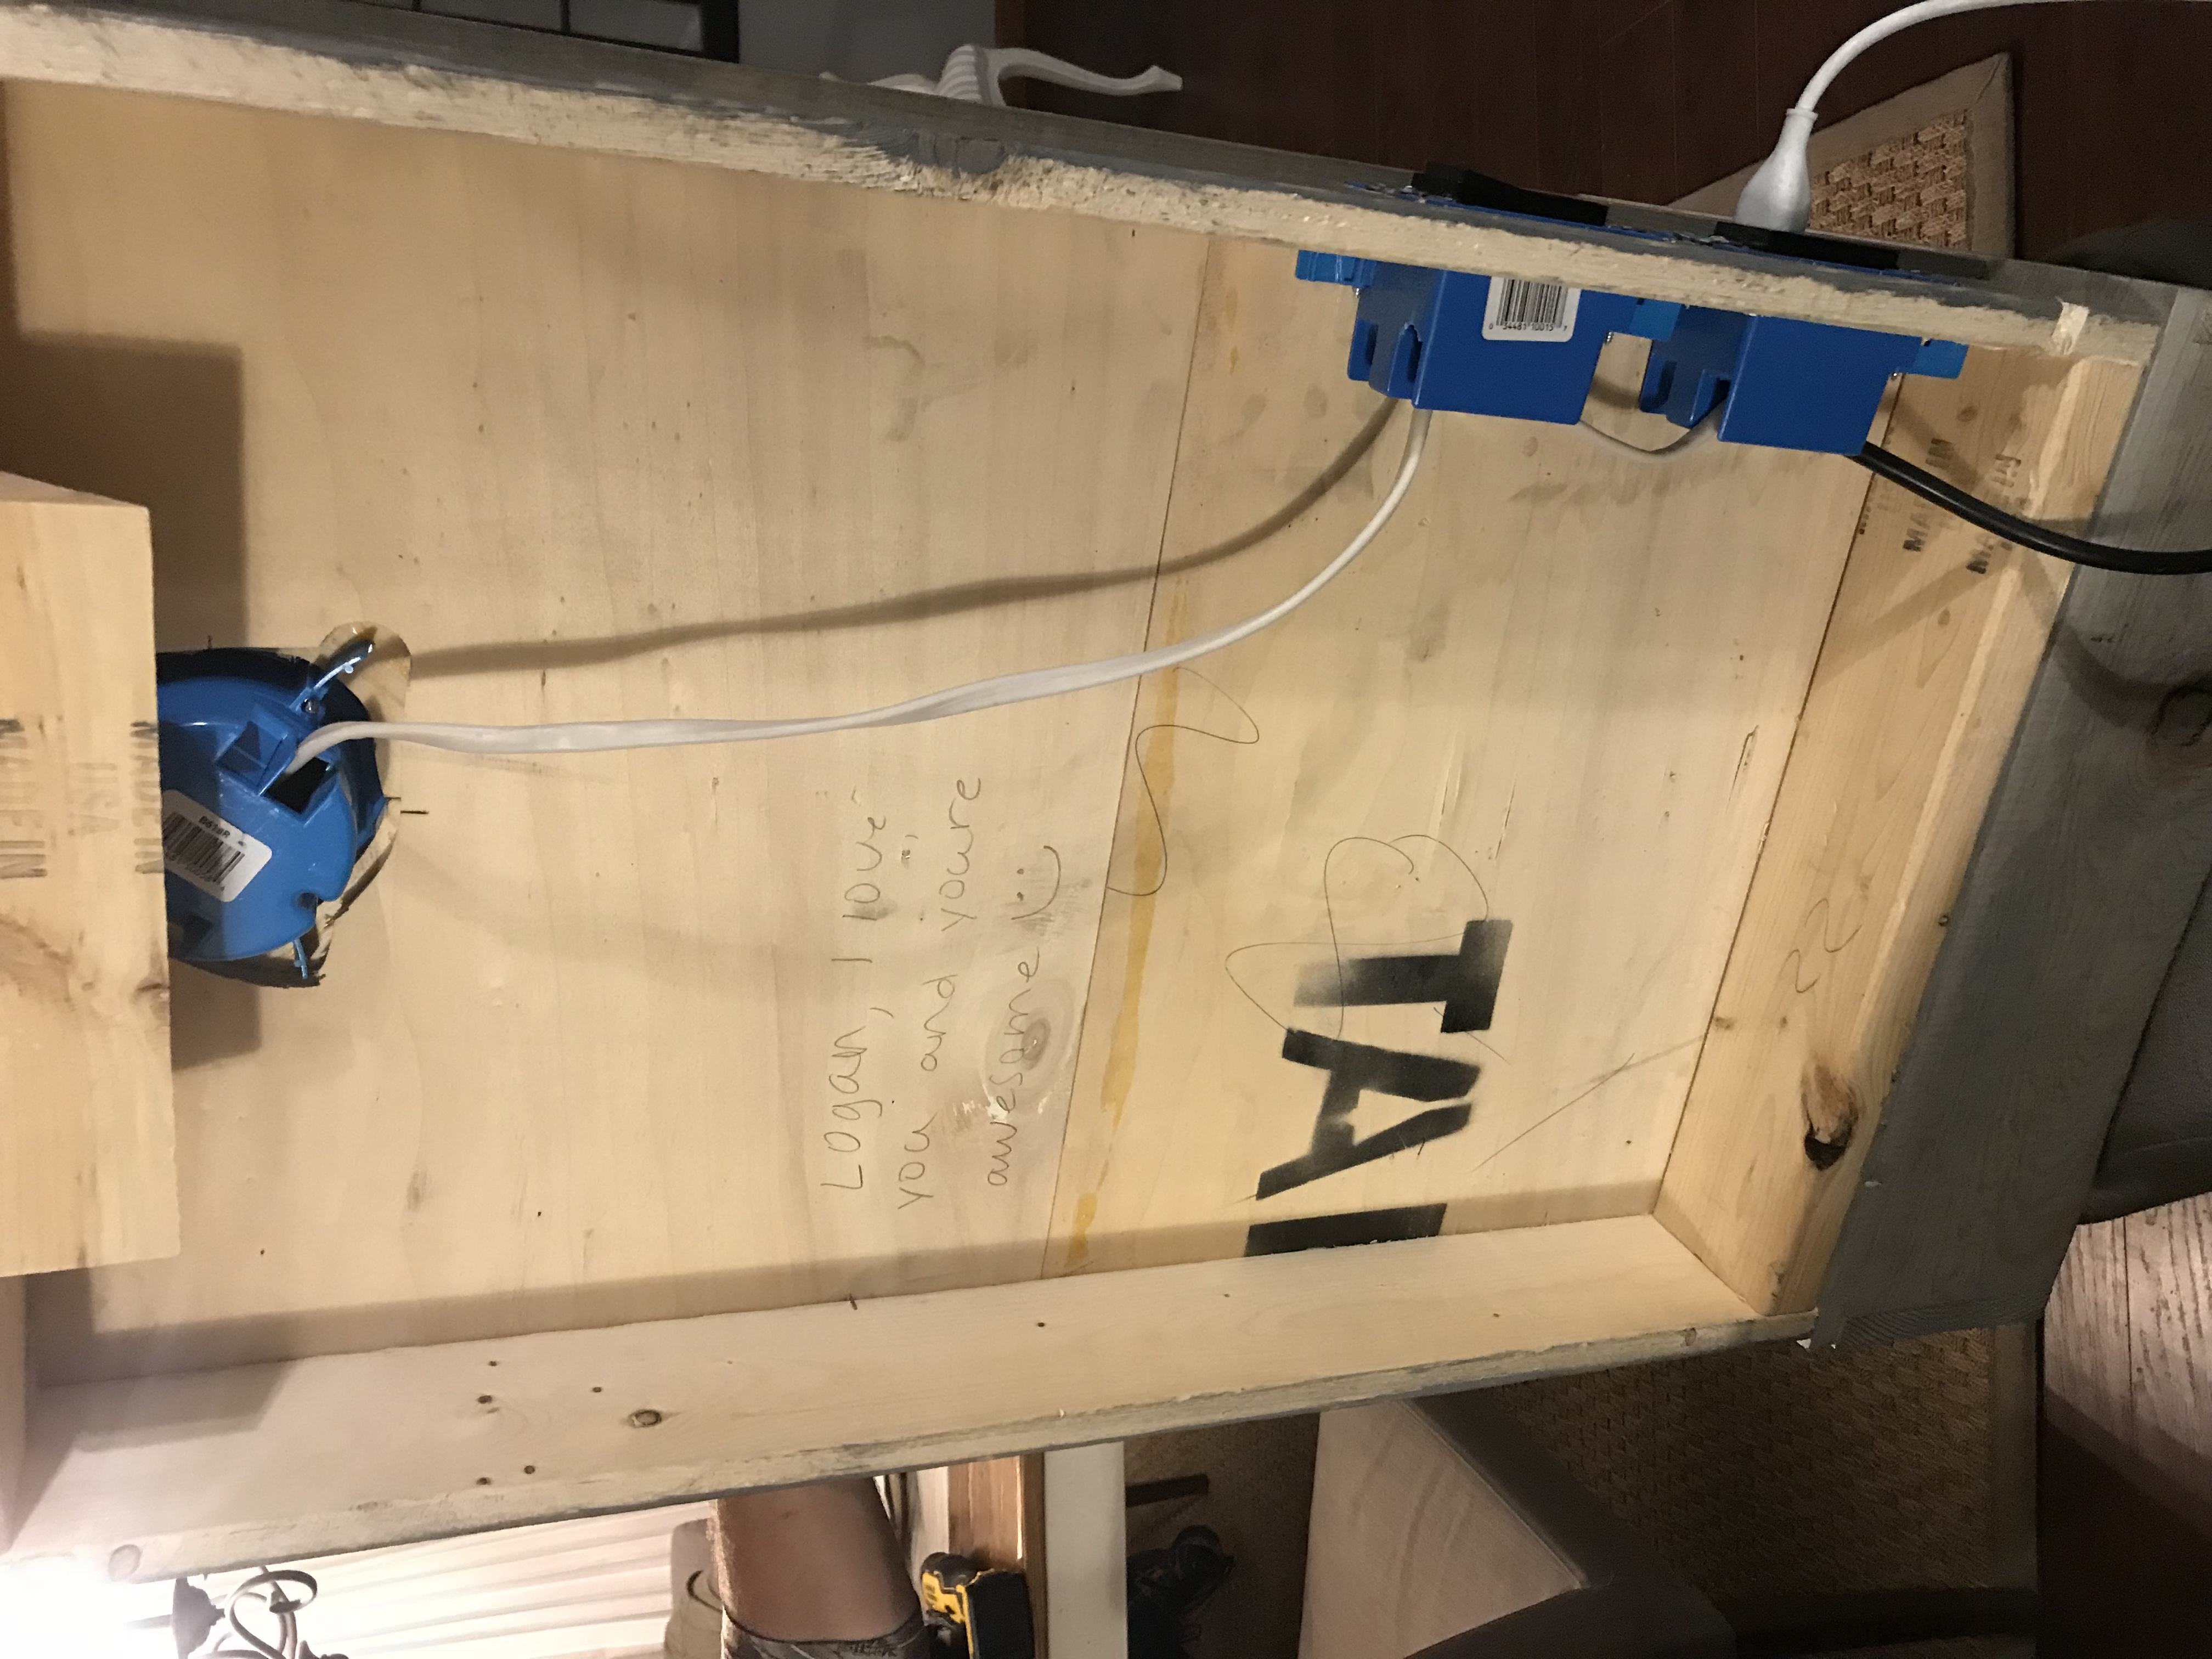
Apply love notes to the back (:
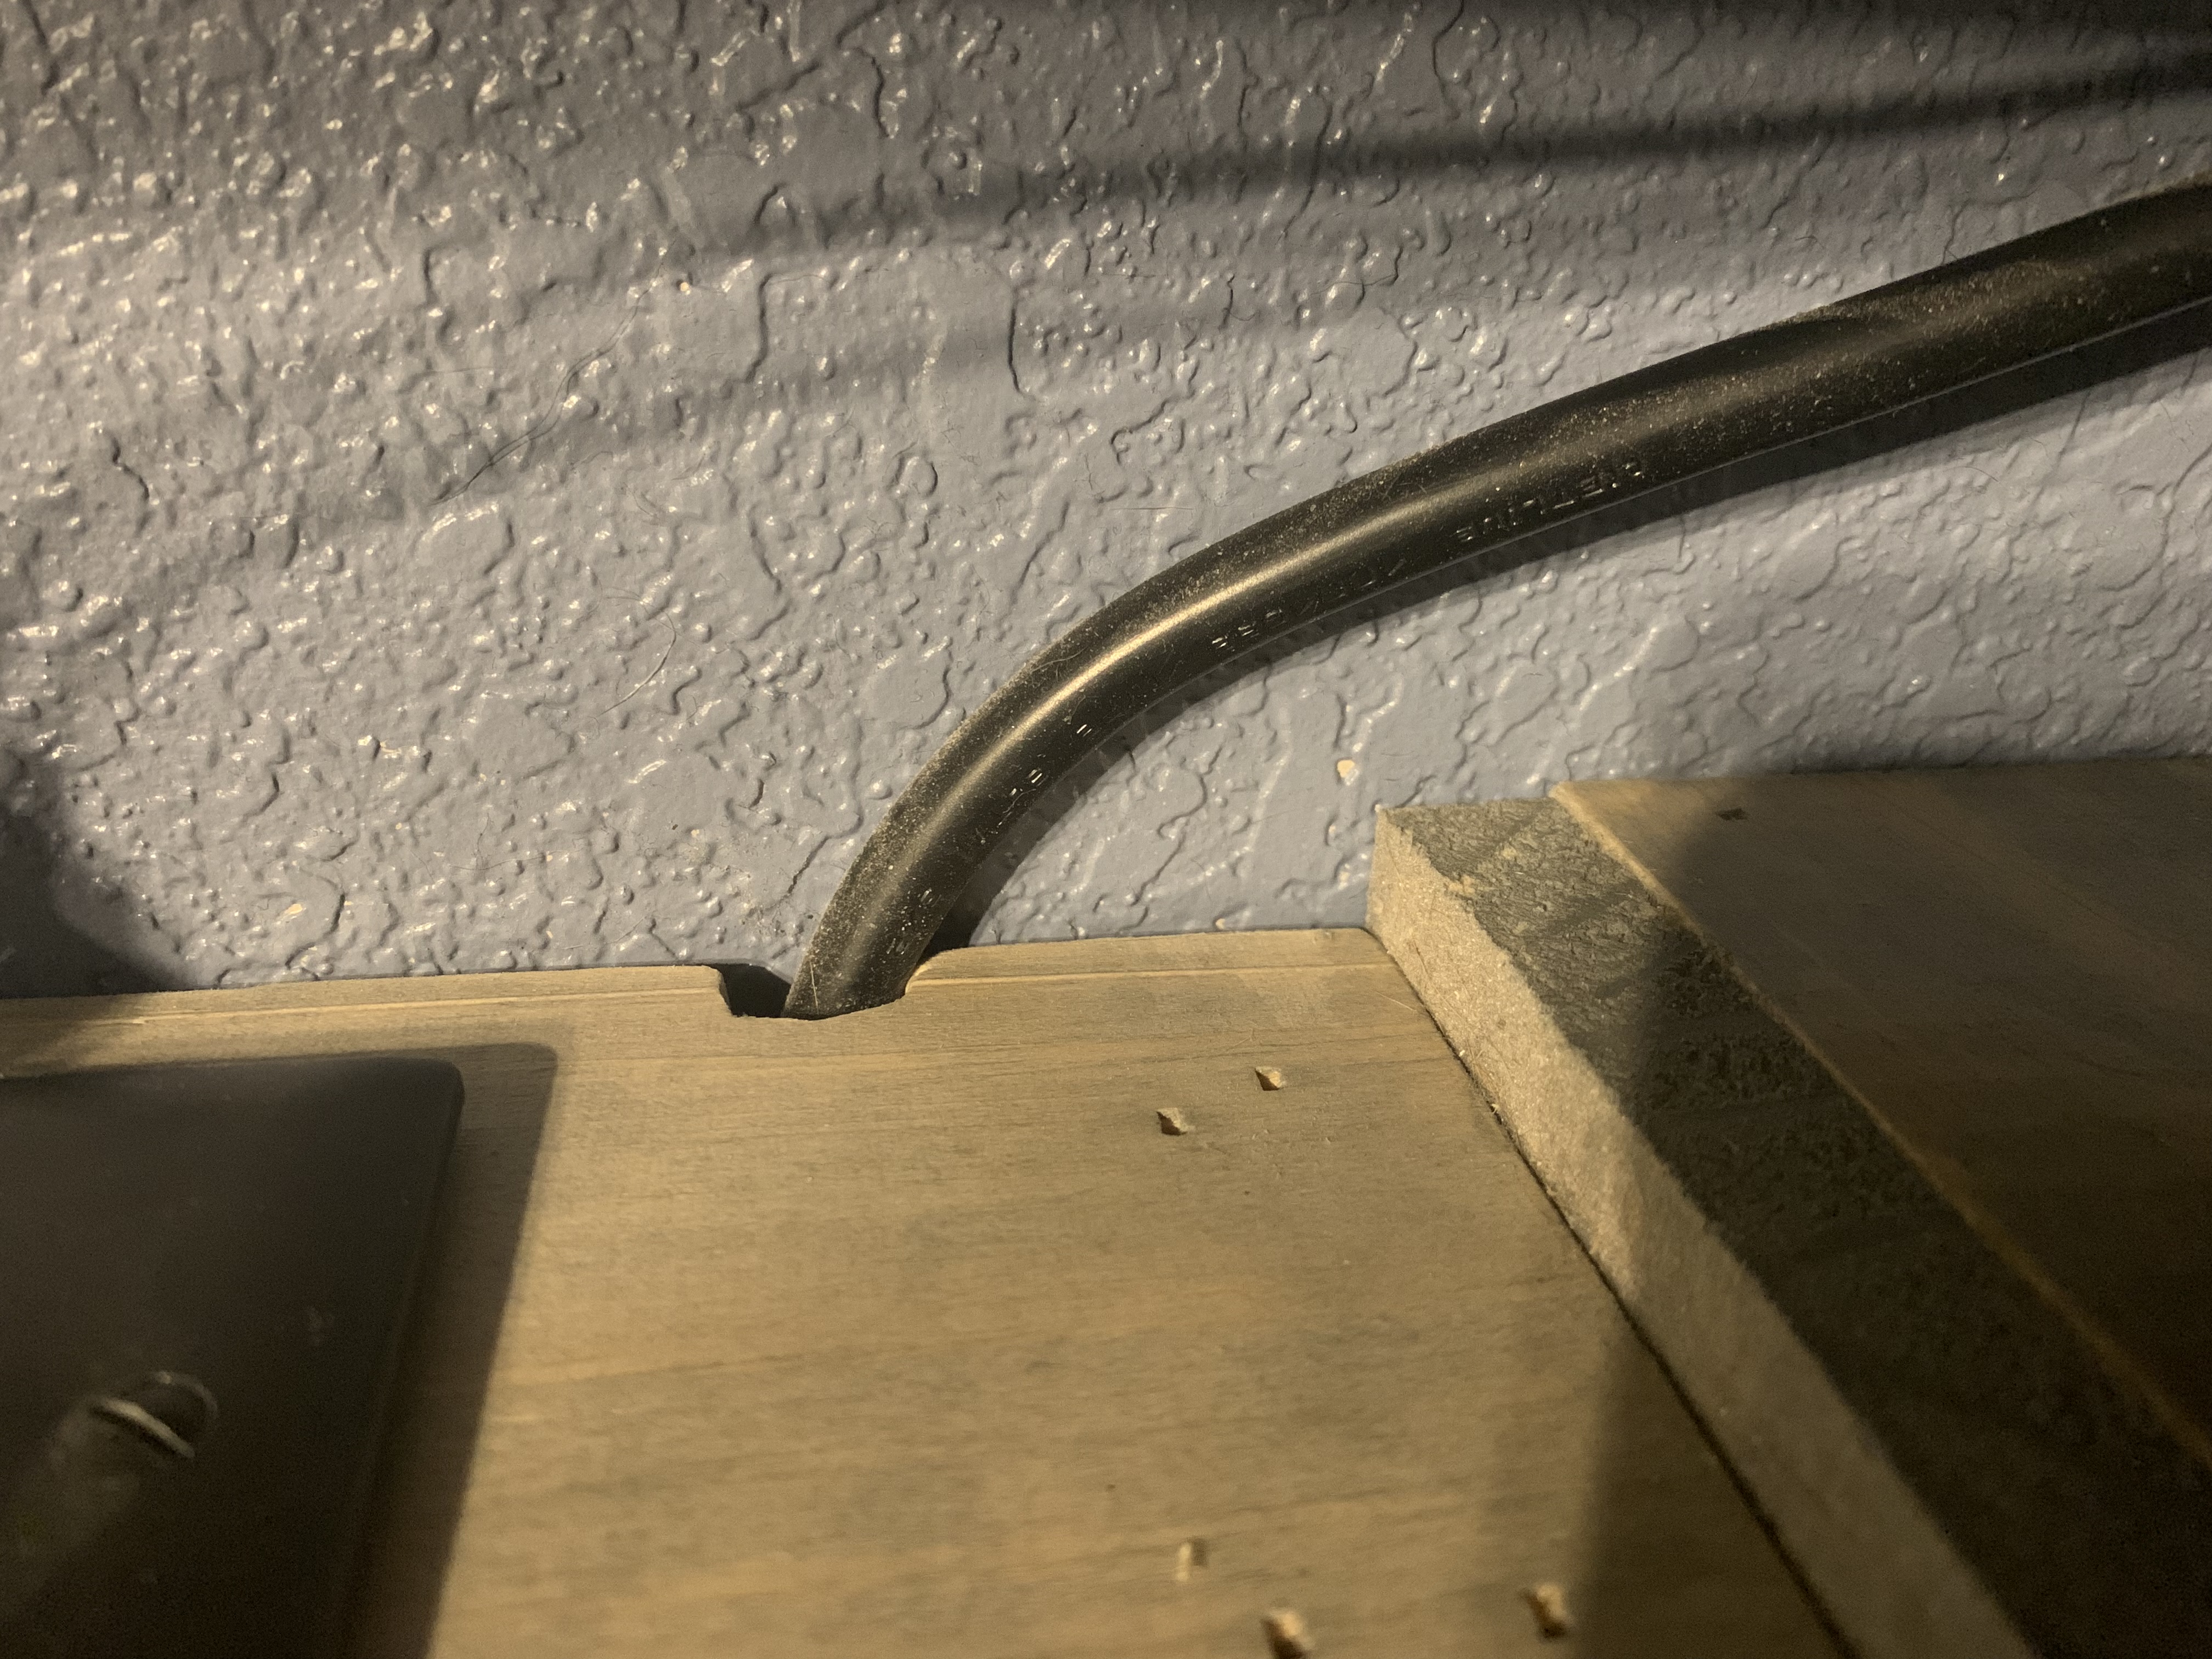
Step 2: Depending on where the closest wall outlet is, you’ll need to make a mark on one side of the panel (along the 1x4s), and create a groove for the chord to fit in once it is hanging on the wall. (We just drilled a hole on the edge, and this way it could sit flush against the wall).
Step 3: To assemble the two parts, lay the panel flat on its back, and line the drawer box up on the bottom. Attach it to the panel with 1 1/2″ screws through the inside of the drawer box. (Don’t use wood glue, but attach about 6 screws to really secure it).
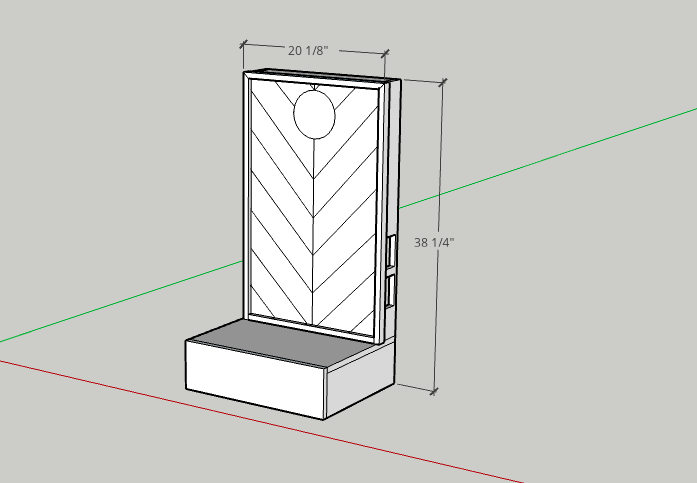
Step 4: To hang these, cut a 6″ scrap piece of 2×4 in half at an angle to create a cleat.
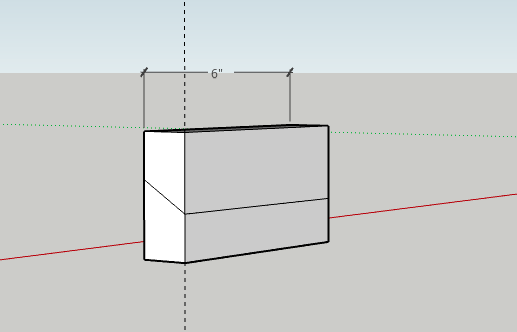
Attach one half of the cleat to the backside of the panel (inside the hollow portion) by screwing in through the top.
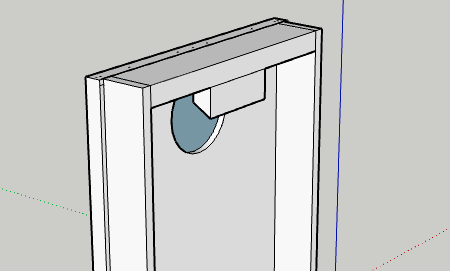
Figure out how high you want these hung, and secure the other half of the cleat to a stud in the wall. Hang the nightstand over the cleat on the wall and center it.
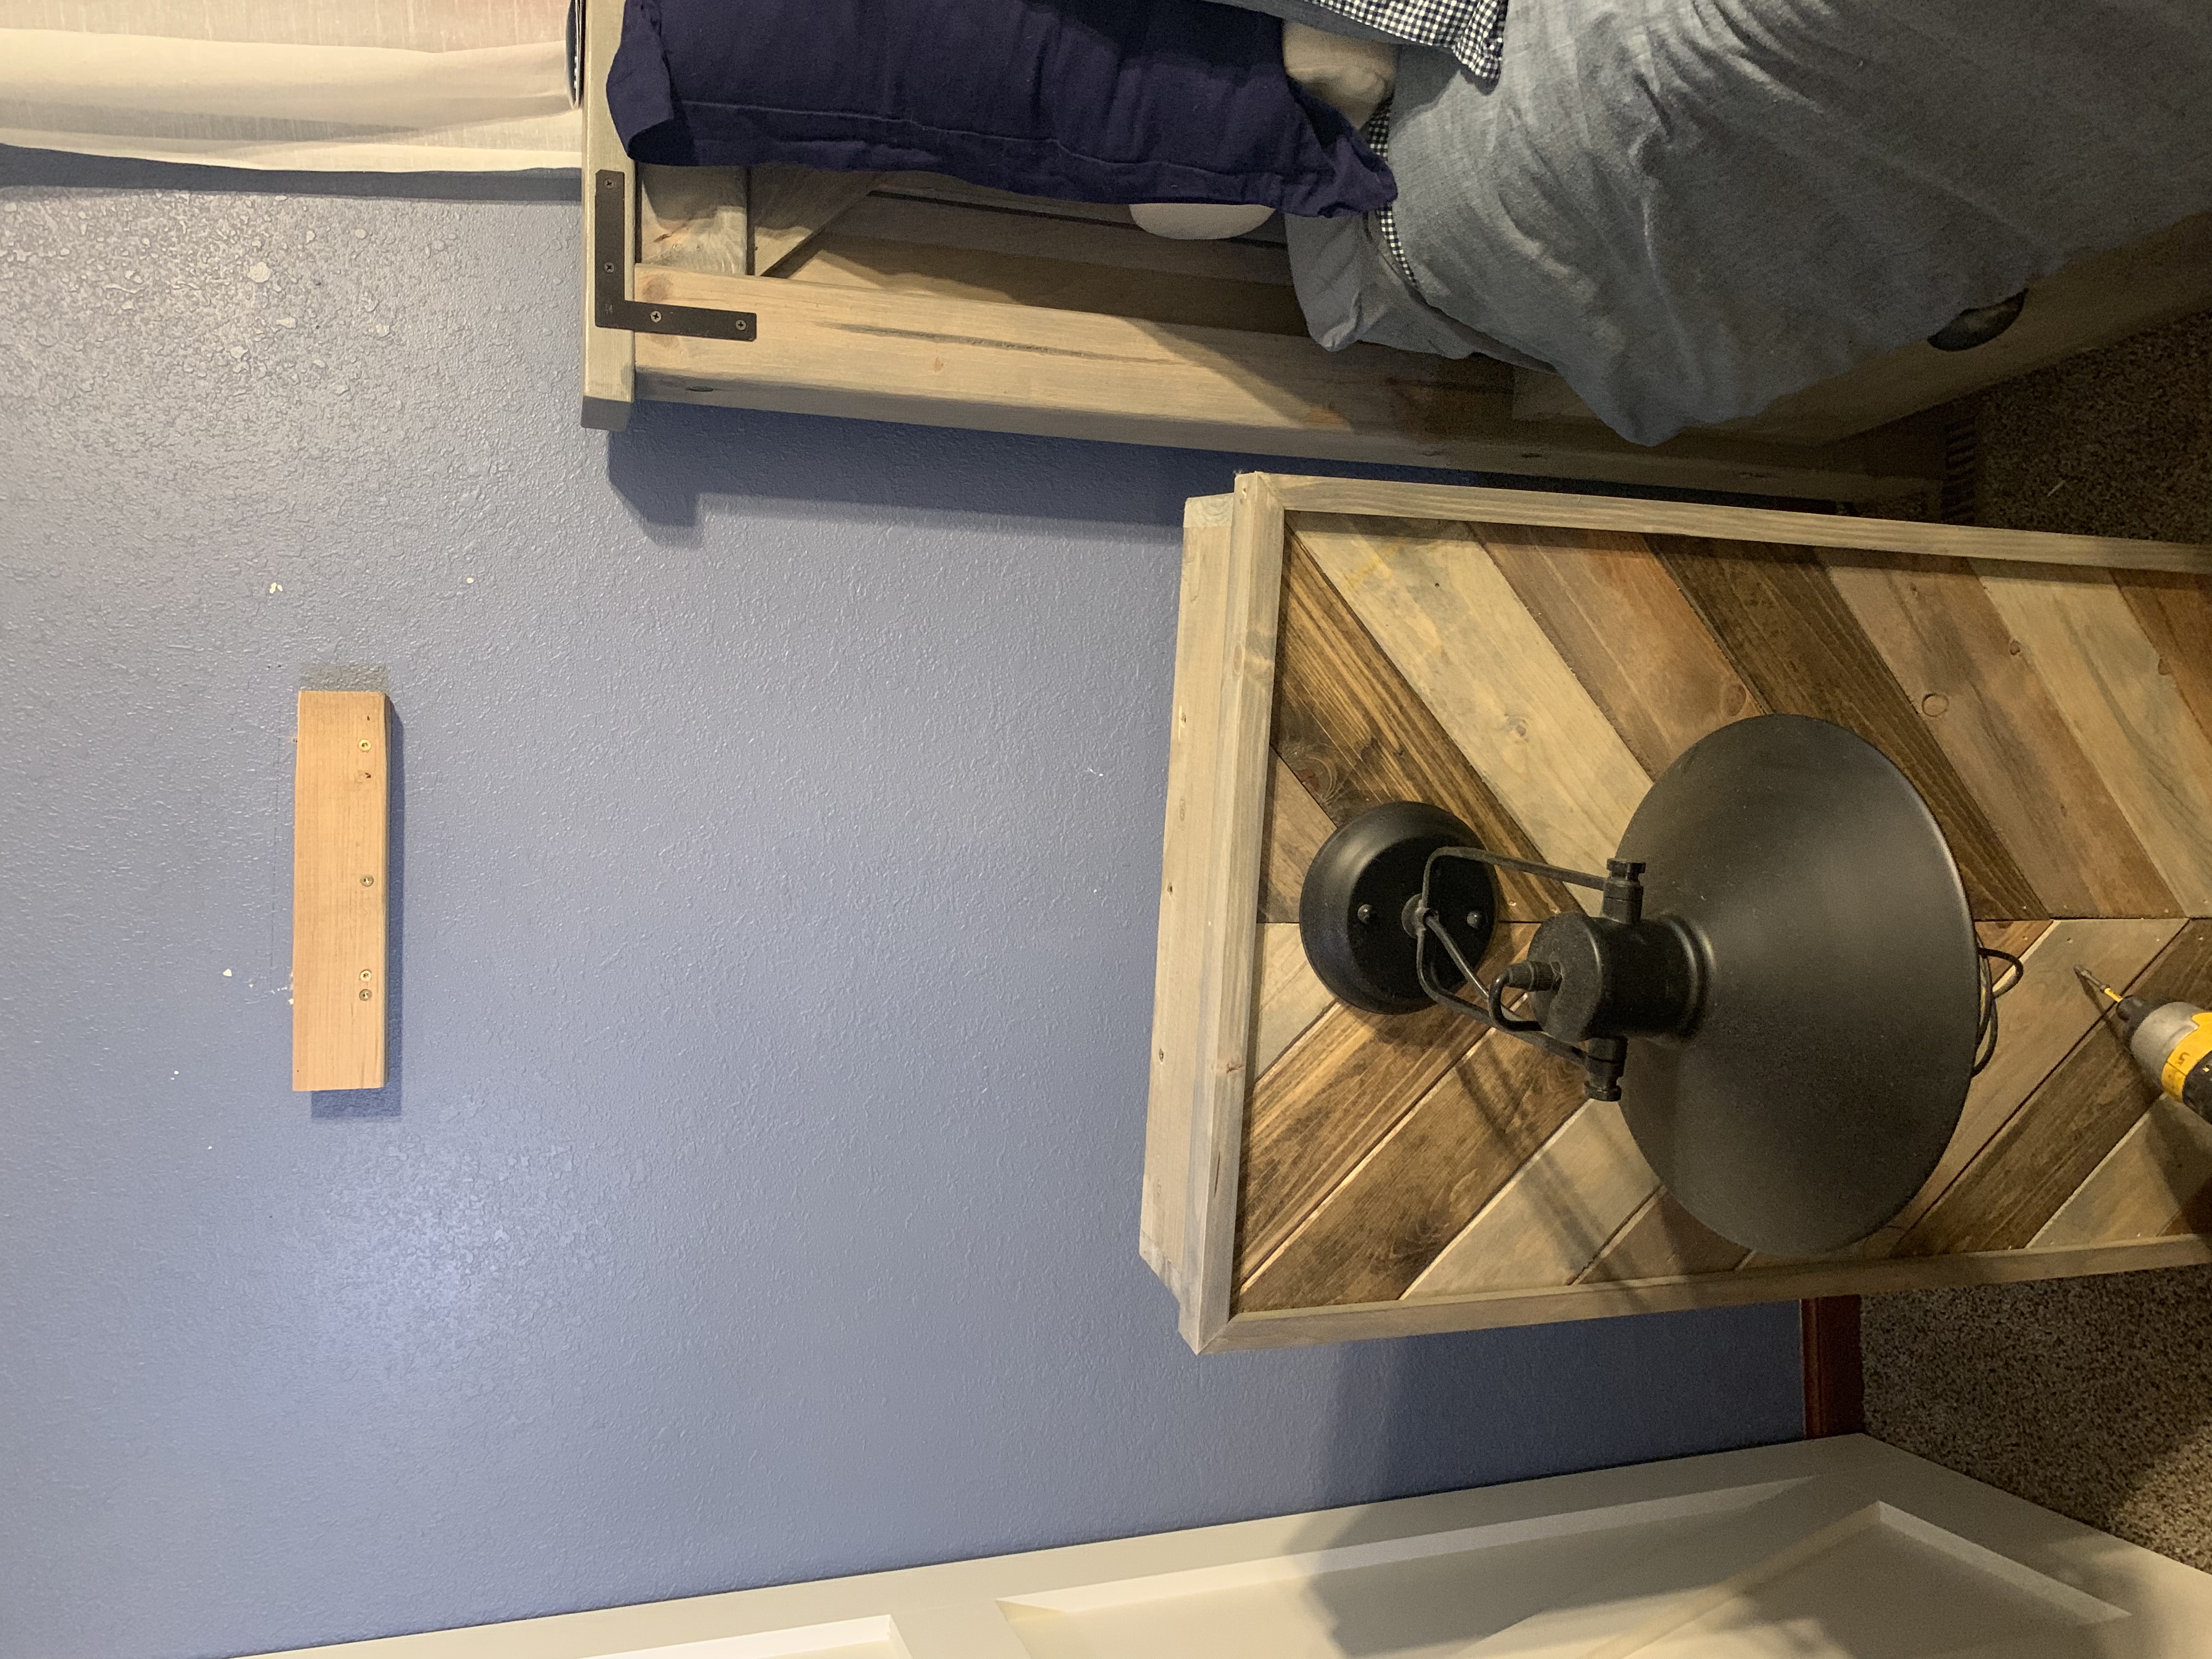
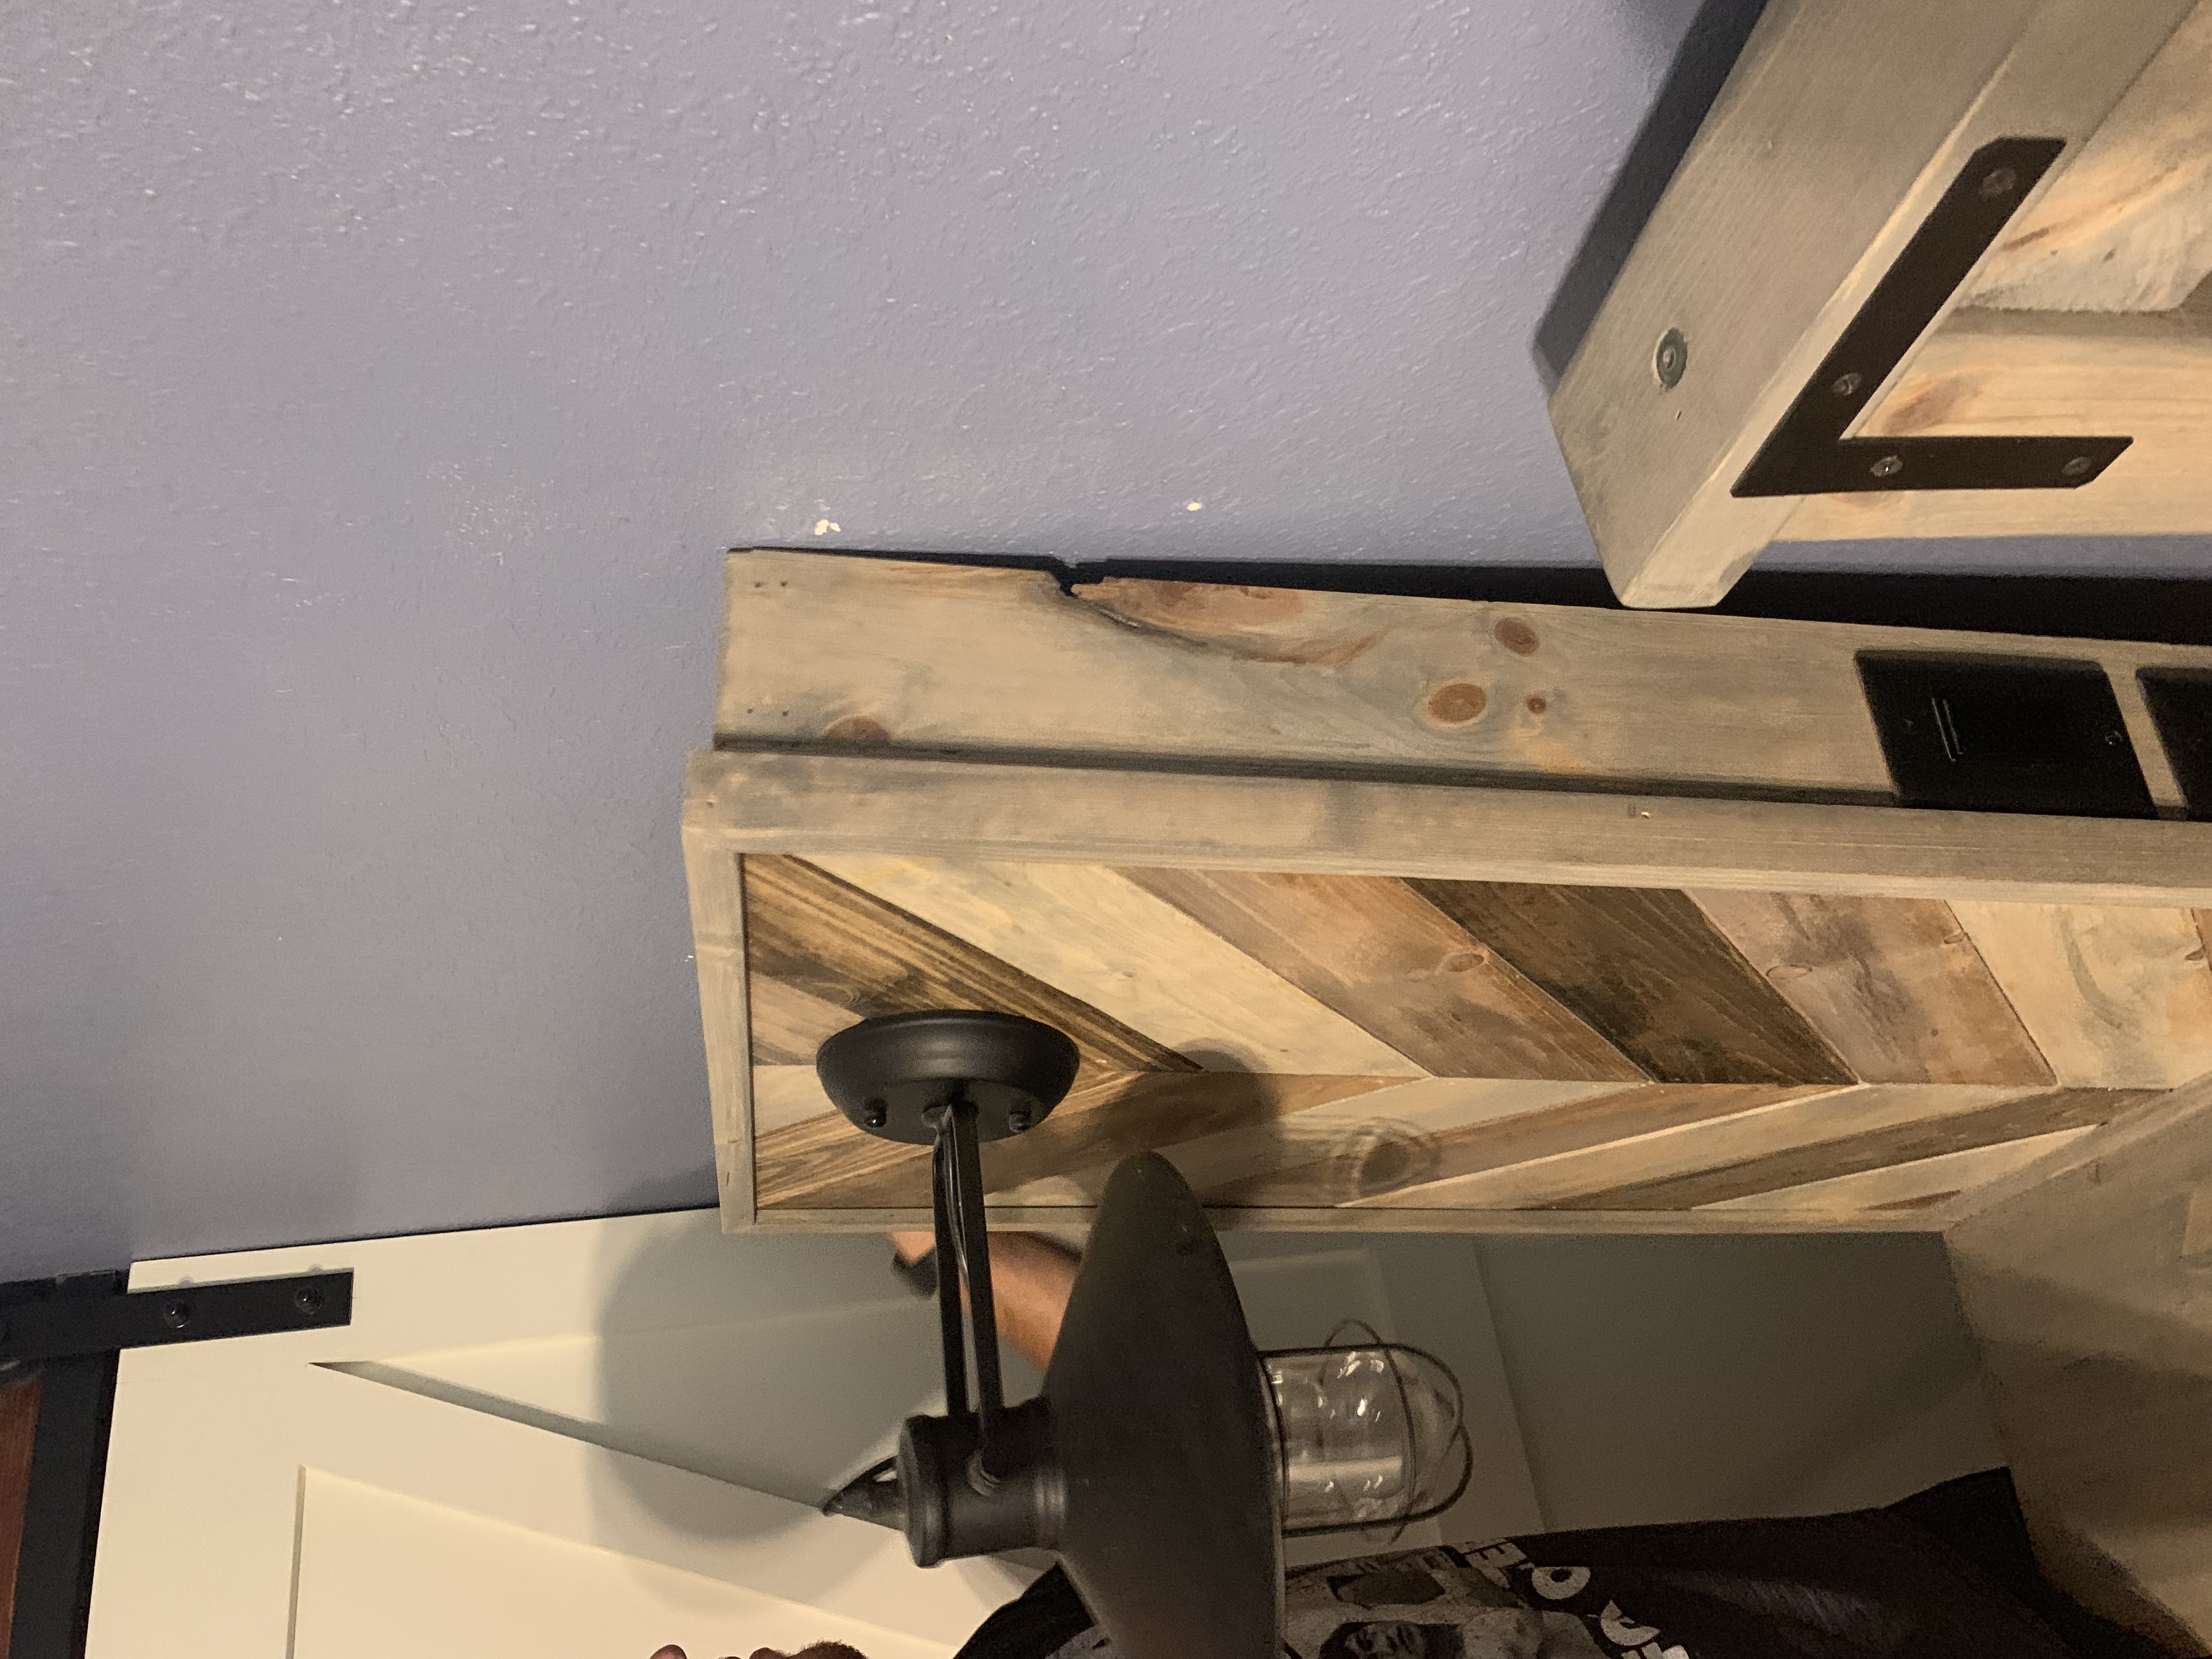
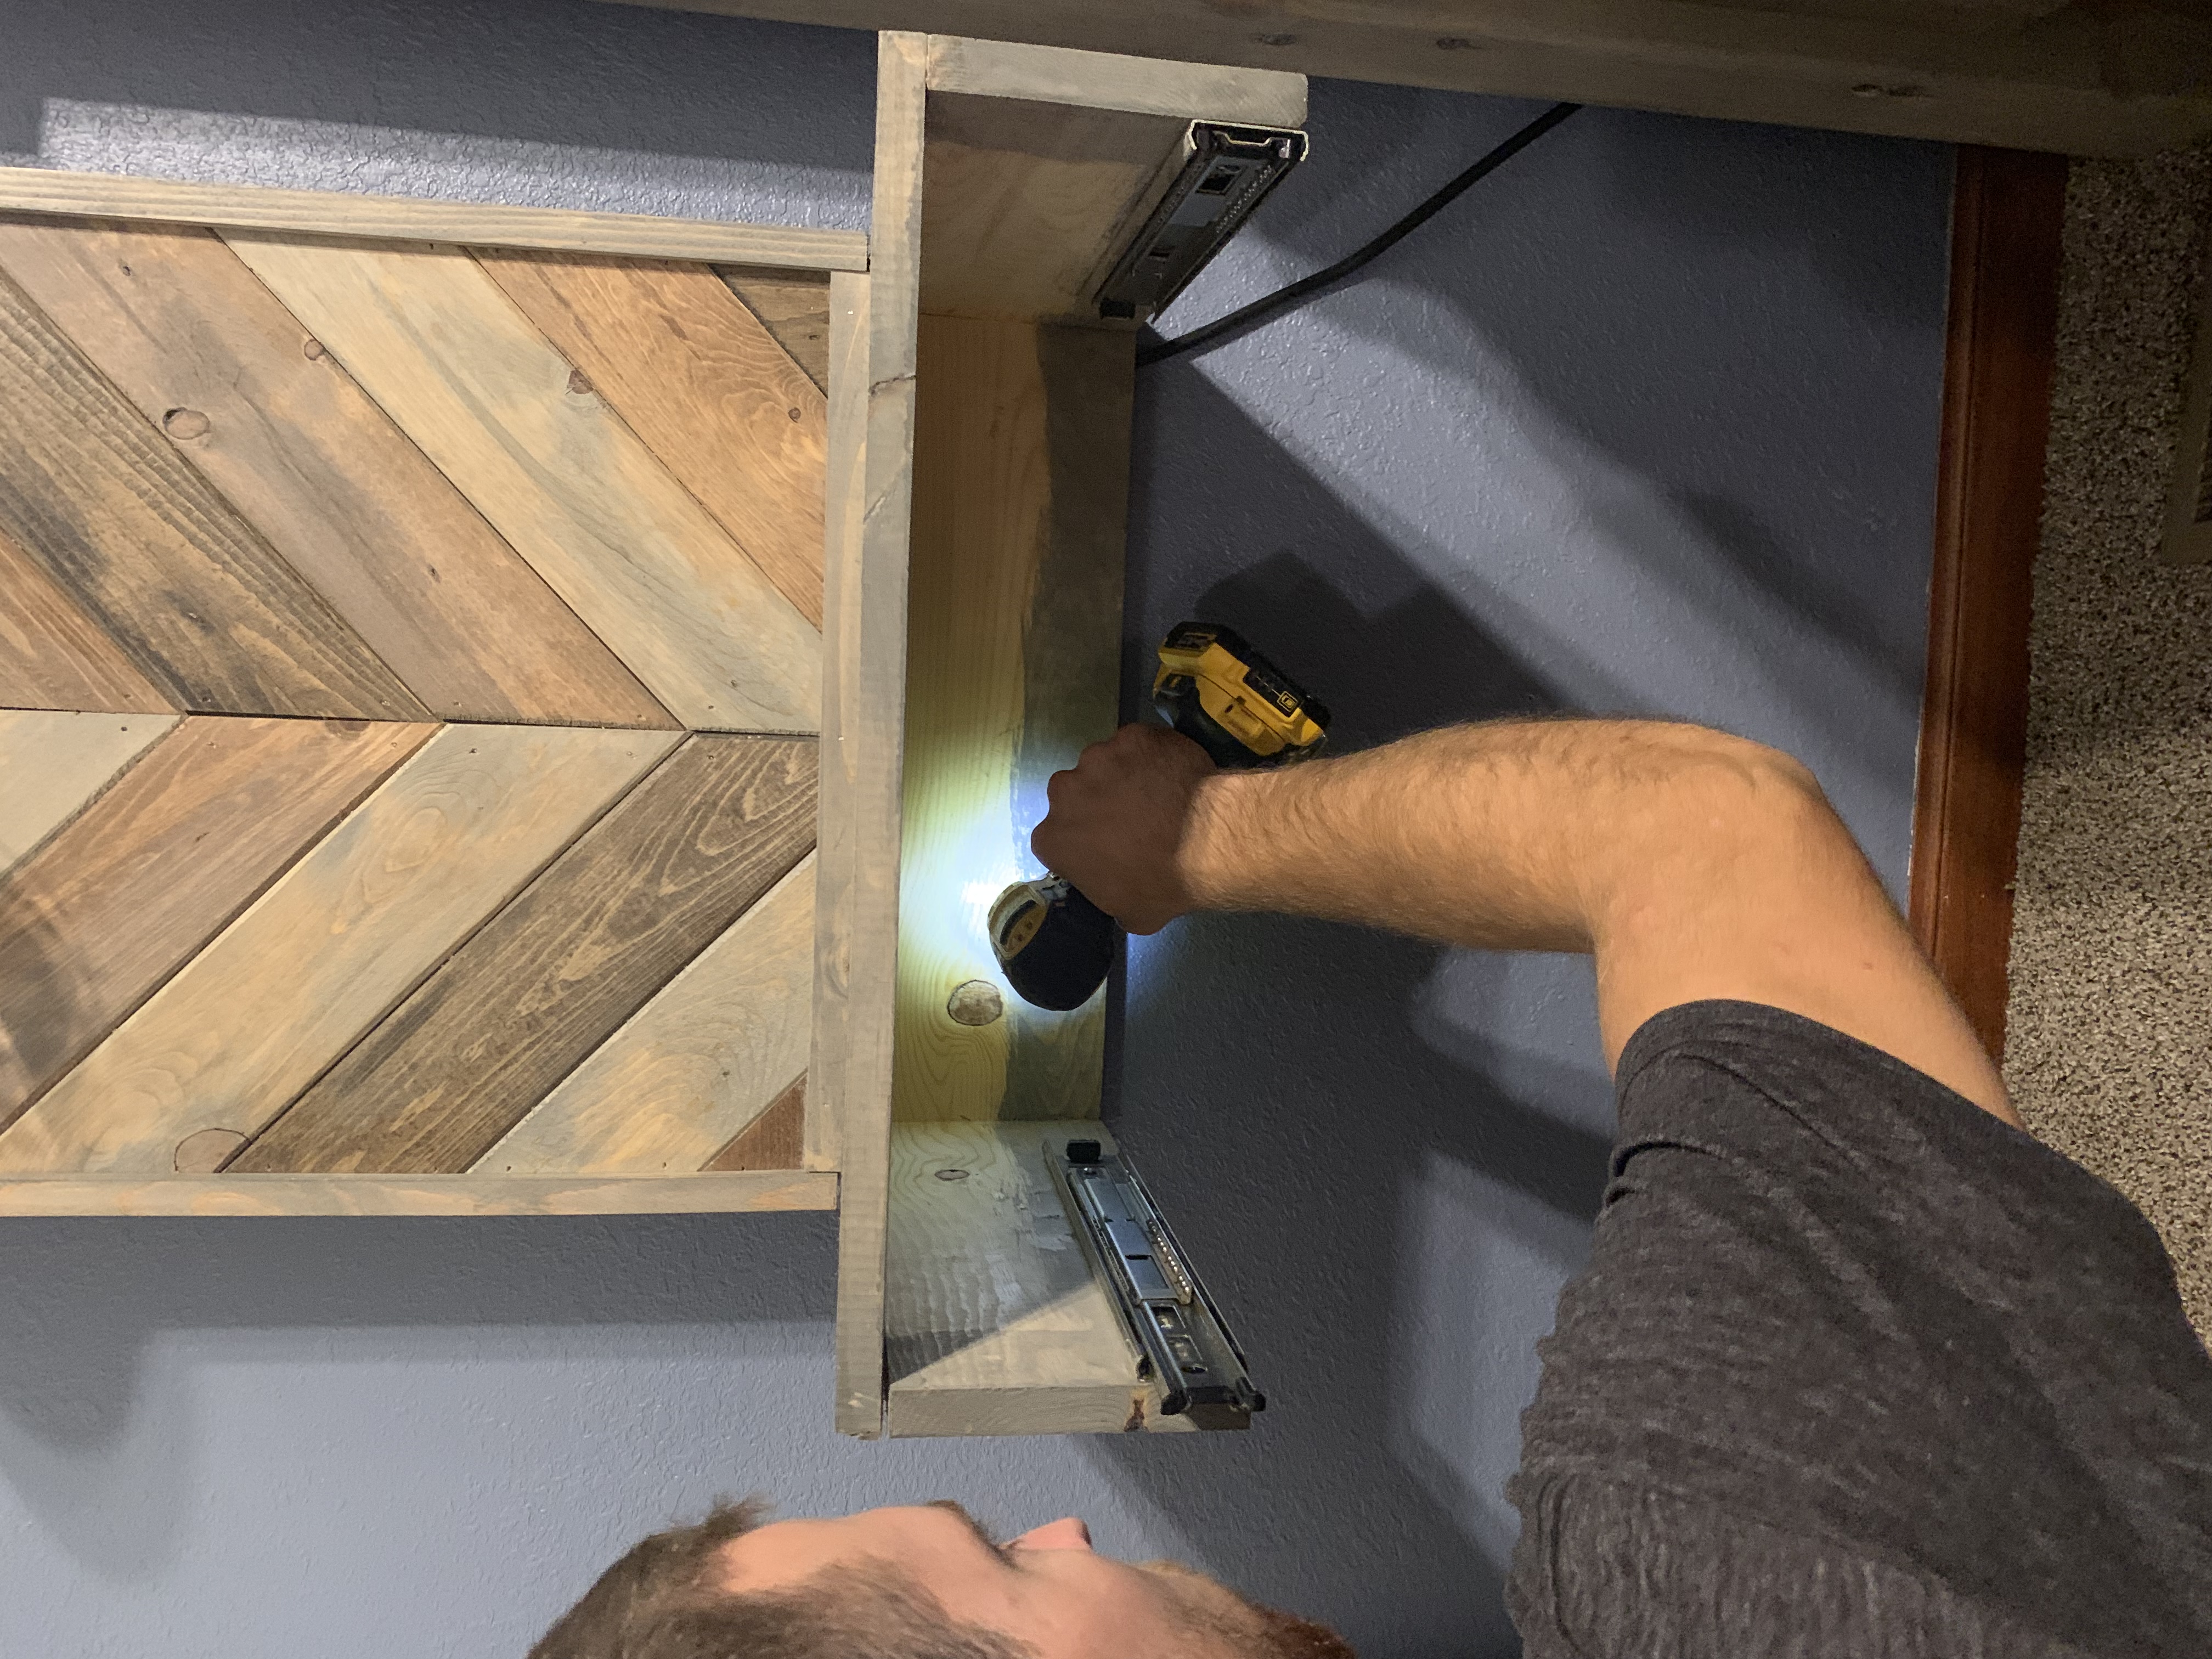
Once you have it placed exactly where you want it, secure one more screw in a stud inside the drawer box.
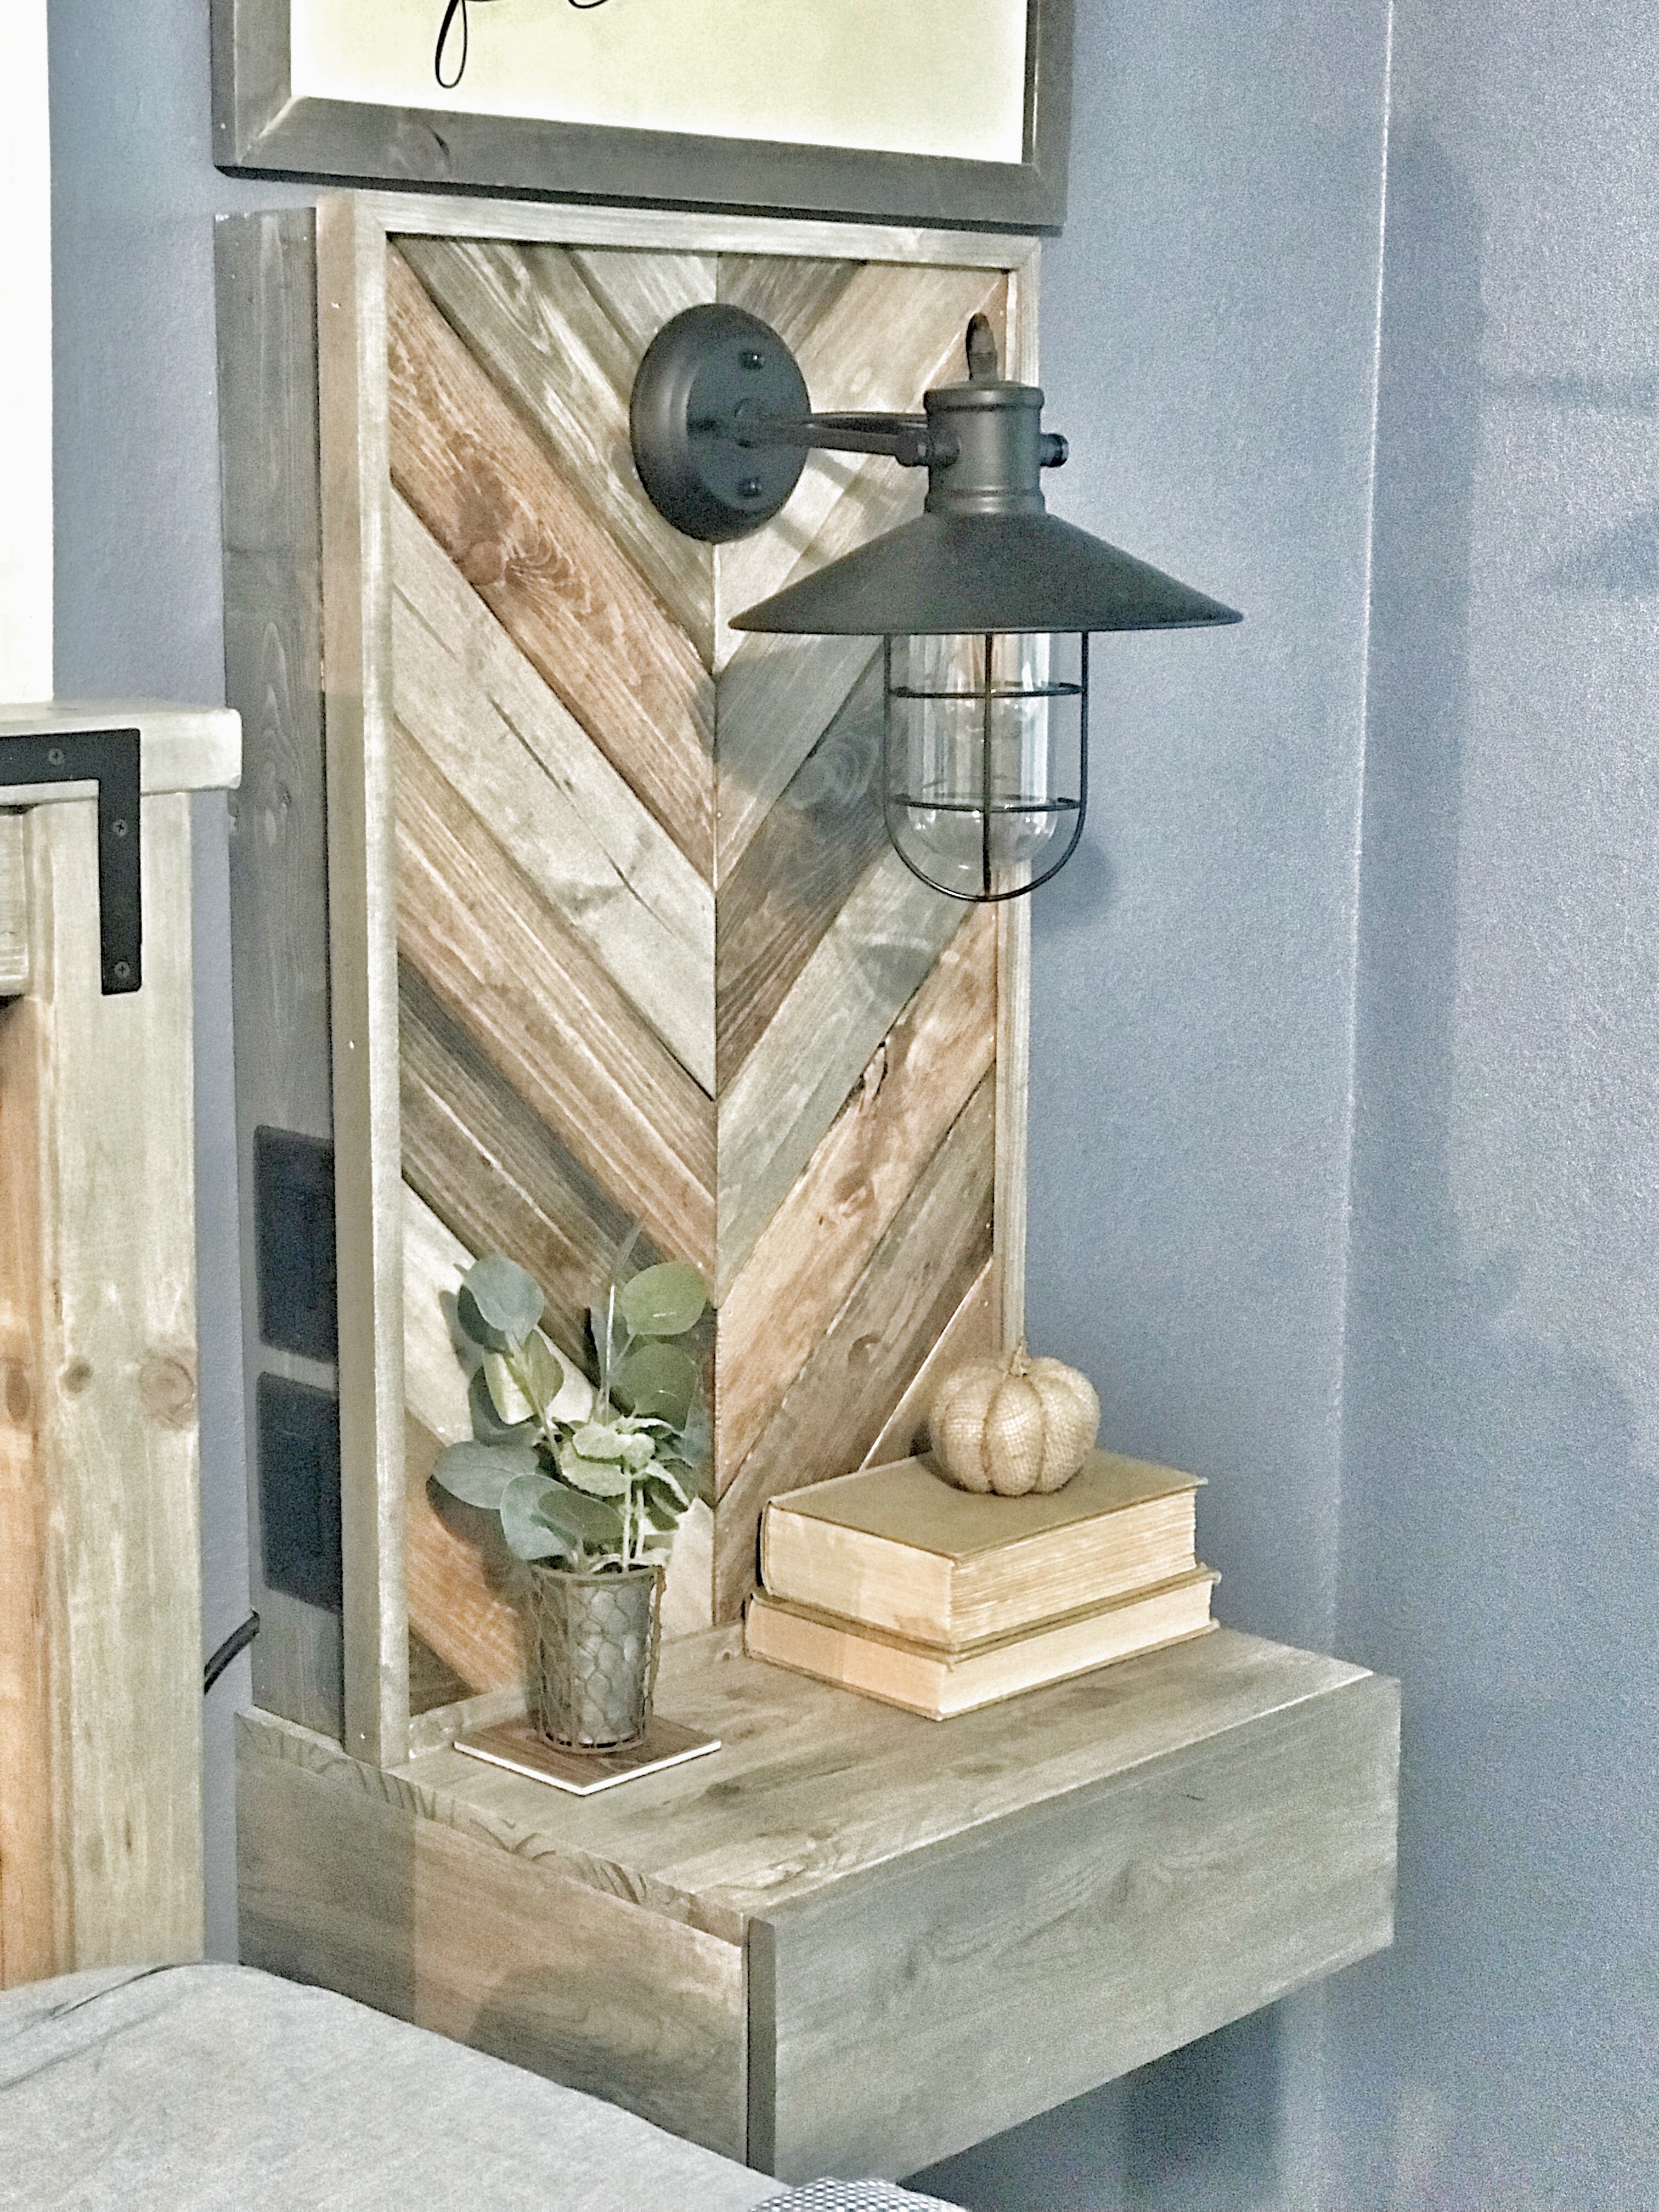
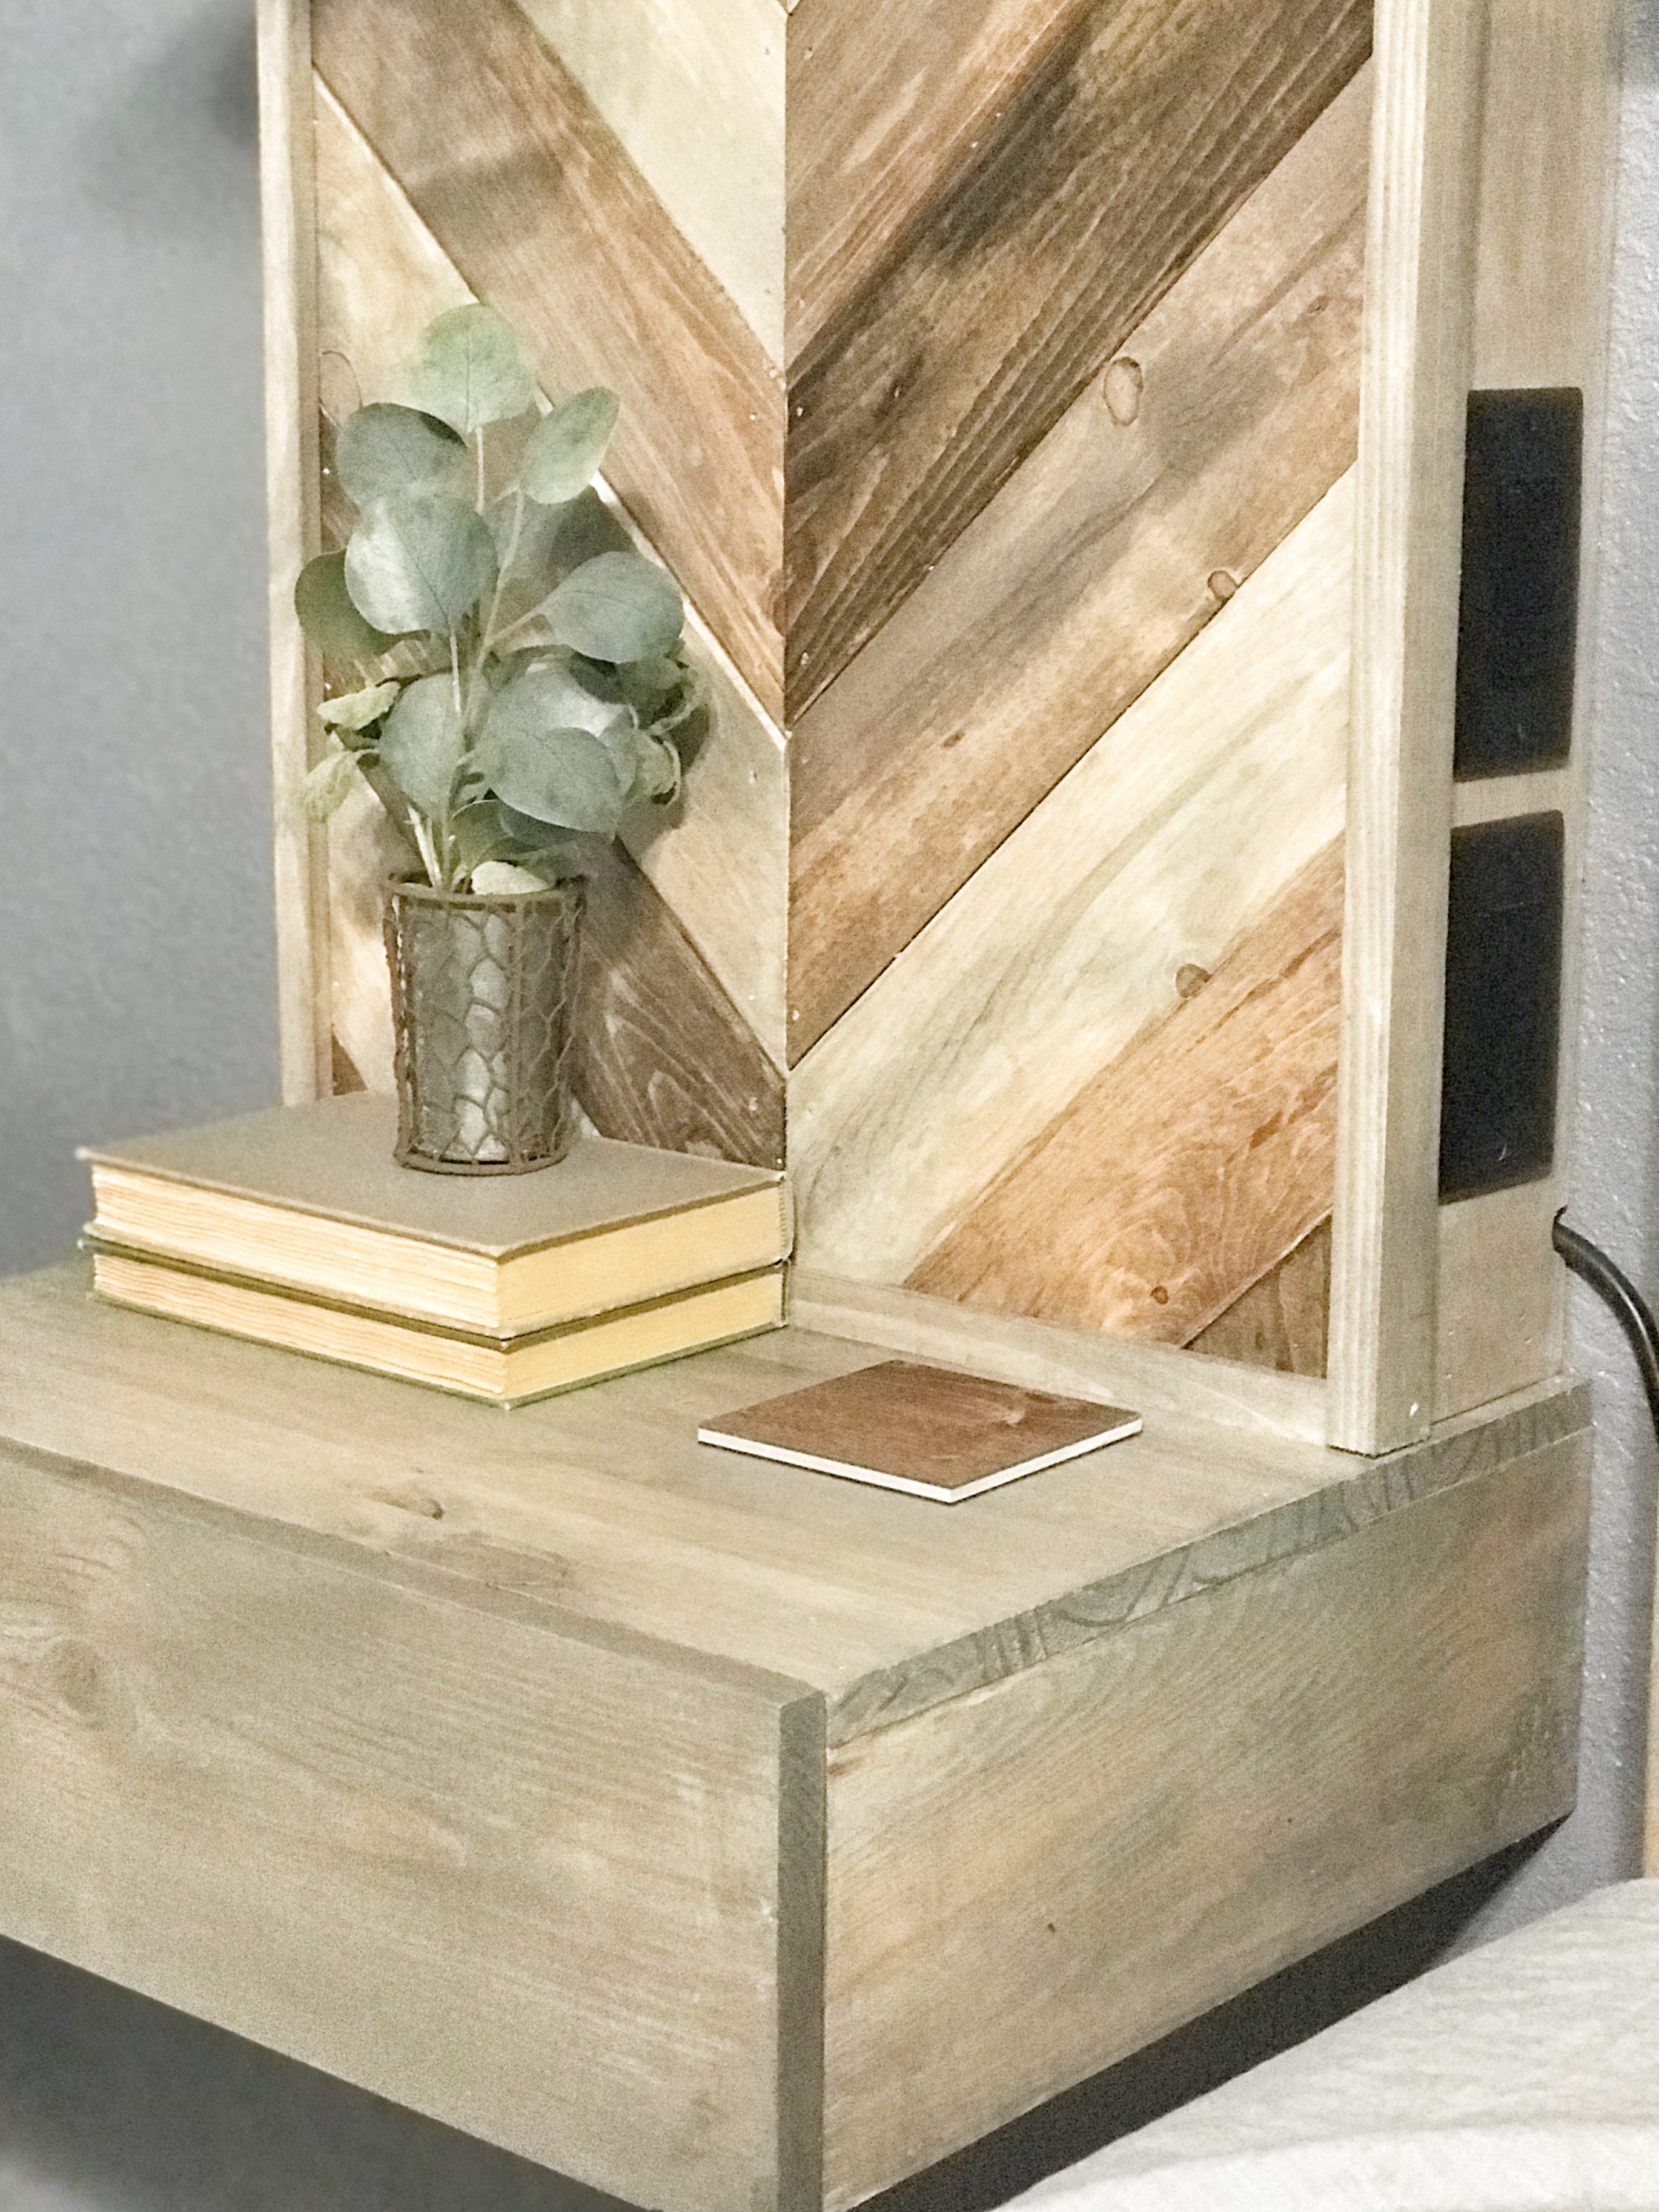
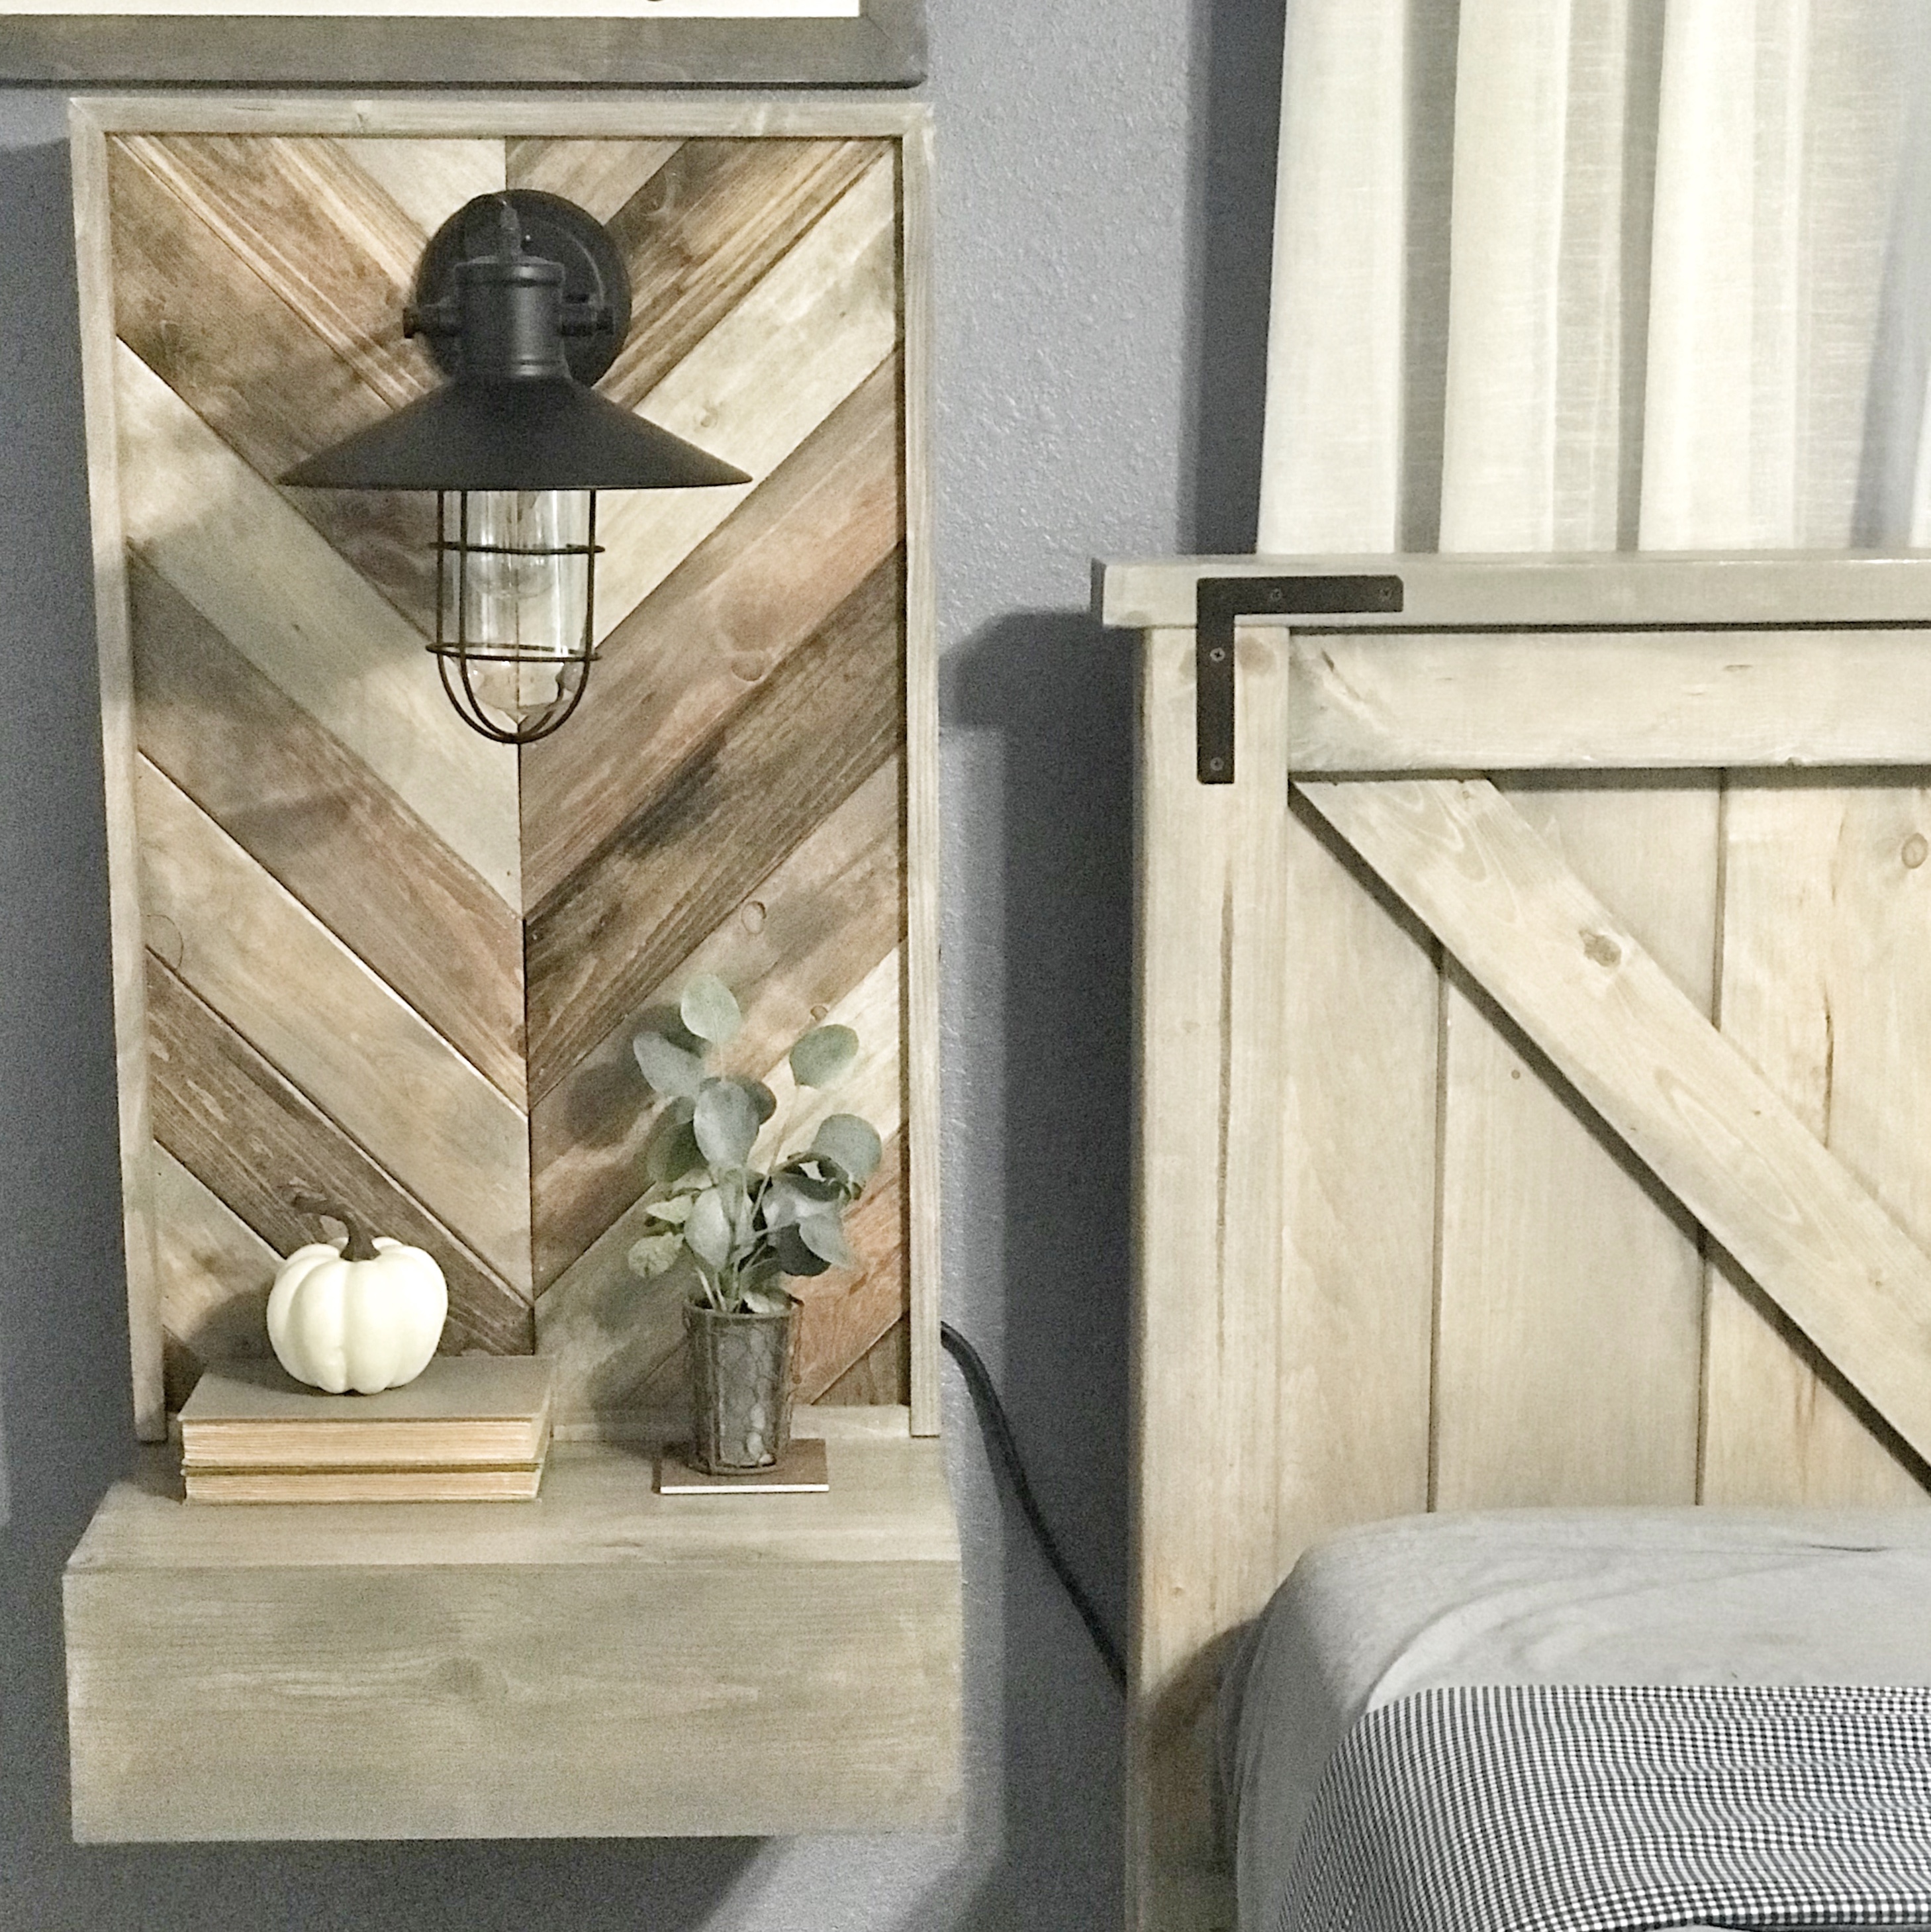
Thanks for reading! If you build these, please post pictures on social media and tag me! @ashleydianndesigns
God bless!
XOXO
ASHLEY DIANN
*Disclosure: We are not experts, but I believe the things I share could be helpful to other DIYers like us! Keep in mind that there are different ways to do just about anything, and this is just what worked for us.
The images used are a representation of steps in this build. Some are meant to show a concept and may not be completely accurate.
*Copyright Ashley Diann Designs. These design plans are meant only for personal use. Do not sell or distribute these plans, or reproduce anything for commercial use.

Hi there! Love this! I’m going to attempt it! I was just wondering if you could give a little more info on the electrical situation and how it’s set up? Thank you!